Our website already has more than one interesting master class dedicated to the fascinating technology of creating products from satin ribbons in the kanzashi style. Basically, these lessons talk about creating original lush flowers with your own hands. Today we will look at a slightly different topic of crafts. You will learn how to make a butterfly, dragonfly and ladybug. It’s easy to make such products, you just need to know the basics of creating the basic elements of kanzashi. In addition, to help beginners, the prepared MKs contain detailed photos and videos that demonstrate all stages of the work.
Simple kanzashi butterfly
The first lesson will cover a master class in which you will create a butterfly from several shades of satin ribbons.
So, in order to make a butterfly in the kanzashi style, you will need the following set of necessary materials and tools:
satin ribbons in two shades (red and gold). You can choose other colors for your butterfly, but it is better if they are in contrasting tones;- fishing line;
- beads;
- tweezers;
- pencil;
- ruler;
- glue;
- soldering iron;
- lighter;
- scissors.
At the first stage, any master class on kanzashi begins with cutting satin ribbons into pieces. To create a butterfly, prepare four pieces of each color of tape five by five centimeters. Next, from these elements you need to make wings based on one of the basic elements of kanzashi - a sharp-shaped petal. If you don’t know how to make such a petal, watch the video or photo from MK on this topic.
So, we need to fold the two wings and fold the ribbon twice. Next, we add the triangles to each other, as in the photo.
The next two wings are formed with your own hands from round petals. You can also learn how to make them from the video with training lessons.
Yellow petals are placed inside red ones. As a result, we get two wings of a narrow and square shape.
Having prepared all the necessary elements that will make up the kanzashi butterfly, we will proceed to its sequential assembly.
The body of the butterfly is made with your own hands from fishing line, beads and beads. We take the fishing line and fix the bead on it with glue. Now, we string beads onto both ends of the fishing line, which we also glue together. To make antennae for a butterfly at the ends of the fishing line, apply a drop of glue to them and attach microbeads.
To create the wings of a kanzashi butterfly, glue narrow and round petals together, as shown in the photo separately, and then together. Glue the prepared body on top of the formed wings.
This concludes the master class. And you can admire what a wonderful butterfly you can create in just a couple of hours.
Based on this lesson, you can make a variety of butterflies from satin ribbons, which you can later use as unique hair clips.
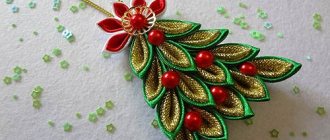
Gorgeous snowflake
Such a beautiful craft will decorate any holiday. Making a beautiful snowflake is not difficult, especially since you already know how to fold the satin ribbon fabric for each element. As you can see, you will have to assemble a large number of parts, and of different sizes.
The central part of the craft resembles a flower with six two-color petals and a spectacular pebble framed in the center. It is already around these large parts that the small elements of the snowflake will be attached. The craft is assembled using a glue gun. The rays of the snowflake begin in the holes between the large petals of the central flower and diverge in all directions.
Glue the petals in pairs. The connection point is covered with rhinestone. The beam ends with a single blue petal. You can complement the work with hanging shiny stars on thin silver threads.
Kanzashi dragonfly
The next master class invites you to make a dragonfly using the kanzashi technique.
A ribbon dragonfly is one of the easiest crafts that you can quickly create with your own hands. To make it, prepare:
- a satin ribbon, the width of which is two or three centimeters;
- narrow ribbon with glitter;
- beads of different sizes;
- wire;
- scissors;
- tweezers;
- a thread;
- igloo;
- glue.
We cut the satin ribbons into pieces about six centimeters. The ends of the resulting segments are trimmed at an angle. Next, the edges of the corners must be glued together on the wrong side. After the glue has dried, you need to turn out the corner in such a way as to get a kind of petal, as in the photo. After that, connect the corners at the bottom towards the outside. In this way, make three similar petals. In the photo we see what the resulting blanks should look like.
The dried elements are combined with glue (a pair on each side). As a result of such actions we get wings.
We continue the master class (MK), and at the next stage our dragonfly should acquire a body. To do this, you need to prepare two wire pieces, each ten centimeters long, and combine them with each other by twisting them. Form a knot at the tip. The remaining ends remain free.
We collect up to fourteen beads onto two wires. The closing bead will be a larger caliber bead. We fix the ends of the wires. As a result of such actions, our dragonfly received a body.
And at the final stage, we begin to assemble the dragonfly in the kanzashi style. Everything is very simple: the body is fixed among the prepared wings. In addition, if desired, this dragonfly can be decorated with various decorative elements, for example, a narrow shiny ribbon, beads, seed beads, etc.
What is required from a needlewoman
To create kanzashi ribbons with your own hands, you will need a piece of satin fabric, scissors or a soldering iron, a work surface, tweezers and Moment glue.
The following tools and materials will also be useful:
- ruler;
- lighter;
- needle;
- a simple pencil;
- monofilament;
- decorative elements (beads, sequins, rhinestones).
Speaking of fabric, you can use silk, brocade or organza instead of satin.
Making a ladybug
And the last master class will tell you how to make a ladybug.
Materials and tools required to create this product:
satin ribbons in the following shades: red (width - five centimeters, length - ten cm), black (width - 2.5 cm, length - five cm), green (width - five cm, length - fifteen cm);- dark colored beads;
- green felt material;
- glue (glue gun and “Moment”);
- metal ruler;
- soldering iron;
- glass board;
- large needle.
We begin the master class by cutting a red satin ribbon into pieces of five by five centimeters. These blanks are folded in half diagonally. The wrong side of the satin ribbon should be inside.
Fold the square in half diagonally with the wrong side inward. Next, the resulting triangle-shaped figure is folded in half several times. How to carry out these manipulations correctly, see step-by-step photos or videos.
Thus, we get a small triangular figure that has a right angle. In the lower part, it is necessary to cut off the base of this element using a soldering iron for this purpose. The resulting seam is located on the outside.
Next, using tweezers, unscrew this element. This is how we get the following blank, as in the photo.
Based on the described scheme of actions, you need to make another wing.
Glue the resulting wings together. Hot glue is best for this purpose.
Now, our ladybug will acquire a body and a head. To do this, take a black satin ribbon and use a soldering iron to cut out these parts, as in the photo. Using hot glue, fix these elements, respectively, the head is above the wings, and the body is under them.
What would a ladybug be without its characteristic round black markings? Beads are ideal for these purposes. To make it more convenient for you to glue such small material, use a thick needle. Remember how such circles are located on the wings of ladybugs or look at the photo.
For additional decoration, you can add green foliage. Prepare a piece of five by seven centimeters, fold it in half and cut off the corner using a soldering iron. After this, make a fold with your own hands, as in the photo. In total, prepare a couple of sheets in a similar way. We take a green felt circle as the base and fix it with hot glue, first the leaves, and then the insect itself.
This is the kind of bright ladybug you can get using the kanzashi technique.
With this, we finish our lessons and advise you to additionally review the technology for creating similar products presented in the training videos.
Additional decor
To make flower cores and decorate kanzashi bows, it is appropriate to use a variety of things:
- buttons;
- beads and half-beads;
- beads and rhinestones.
- You need to select them based on the purpose of the accessory, its color design and dimensions.
Cartoon cores depicting anime characters, mushrooms and insects look interesting. This is a great solution if you are creating a decoration for a child.
To decorate hair kanzashi with your own hands, you can also use bead huggers of various designs.
With the help of elegant centers, you can instantly refine your jewelry and hide minor mistakes.
Ideas for embroidering ribbons on a bag
Butterfly drawing.
An excellent option for both a summer clutch and a universal handbag. Making such a drawing is quite simple even for a novice needlewoman. For this we need three colors. First, you need to draw an outline along which we will do the embroidery. First of all, we begin to embroider the butterfly wings. Please note that the maximum allowable stitch length is 1 cm.
Important! Do not go beyond the contours of the drawing. You can decorate such an applique with beads, sequins or rhinestones.
Due to which, the picture will become even more elegant
You can decorate such an applique with beads, sequins or rhinestones. Due to which, the picture will become even more elegant.
Flower applique.
If you think that butterflies alone are not enough, then you can always add a few flowers. A pink peony will look amazing.
Accessories and materials
Ribbons are chosen depending on the color of the picture that will be depicted. To make an embroidered creation look perfect, as a rule, choose the satin version, as it is more wear-resistant. Silk ones are more expensive and look beautiful, but they are not suitable for decorating everyday items. Once caught in the rain, the handbag may become damaged and cannot be repaired. They often fade in the sun
It is important to thoroughly iron our main working material the day before, because after sewing them to the linen base, this will no longer be possible. Linen base can quickly melt if you choose the wrong iron temperature
It should also be chosen very carefully; if you use a dense type of canvas, then you should choose a thicker needle with a wide eye, otherwise it simply will not be able to pin the base. The same goes for needles that are too thick, which are not suitable for thin material; the needles leave behind large holes that will be visible to the naked eye.
Be sure to have a lighter ready, you will use it to burn the ends
Taking into account the fact that the product is constantly in active use, there is a high probability of disintegration of the created composition. That is why it should not only be securely fastened with knots on the reverse side, but also set on fire
Flower basket
First of all, you need to be able to draw a basket on a piece of paper. Let it be round or with rectangular edges. Take a brown ribbon and begin to make the entire outline of the basket using the seam that we are familiar with from the text. We secure the end of the tape on the wrong side. If you want the ribbon embroidery to be more impressive, you can combine several shades of brown for the basket. Next, we make transverse seams, intertwining them with horizontal stripes. Look at the photo, the same grid should form. This original weaving can later be used in embroidering roofs of houses and fences, as well as pieces of furniture. Using straight stitches we make the handle of the basket, in a curved form. The first basket is ready.
