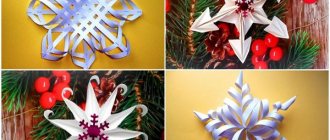
Beautiful snowflakes in kanzashi style can be used as a Christmas tree decoration. A master class with step-by-step photos and videos will help you make an openwork snowflake from satin ribbons with your own hands in an hour. And it, in turn, serves as the basis for creating a kanzashi snowflake crown or a voluminous brooch. The snowflake can be attached to a hair tie, headband or hairpin; it will also decorate a bracelet. Use your imagination! Even for beginners it will not be difficult to make a Christmas snowflake!
For a snowflake using the tsumami kanzashi technique you will need:
- white satin ribbon 5 cm wide 2 m
- white satin ribbon 4 cm wide 1.1 m
- white satin ribbon 2.5 cm wide 0.4 m
- silver brocade 4 cm wide 2 m
- blue half beads
- golden thread
- glue gun
- tweezers
- scissors
- needle with thread
Snowflake made of satin ribbons using the kanzashi technique
The Japanese kanzashi technique allows you to create unique jewelry from fabric.
A kanzashi snowflake is non-standard, beautiful and quite easy to implement. Products made from satin ribbons look gentle and noble. They are great for Christmas tree decorations.
Such snowflakes are so elegant that they are quite suitable as hair accessories. Delicate blue jewelry can become elegant elastic bands or hair clips, a detail for decorating a headband or headband.
You can attach a pin to the back of the snowflake, then it will become an excellent New Year's brooch, which can easily be attached to a fluffy dress.
If you set yourself the goal of making New Year's paraphernalia with your own hands, then the given master class will help you.
Snowflake using the kanzashi technique - the result of the work
Stylish New Year's decorations Kanzashi
New Year holidays are coming very soon.
On the eve of such an event, I want to do something with my own hands, so that later I can decorate an elegant Christmas tree or the interior of my apartment with these crafts and decorations. We suggest making New Year's decorations in kanzashi style. Which you can give to your friends as a small souvenir, and also decorate your desktop to lift your spirits. With our kanzashi master class, you can invent New Year's tree decorations, using the example of a Christmas tree and snowflakes.
Necessary materials
For convenience, here is a calculation of fittings for 1 product.
Prepare the following for one kanzashi snowflake:
- square-shaped satin blanks in soft blue and white colors. The side of all squares is 5 cm. The number of parts is 12 and 6 pieces of the first and second colors, respectively;
- square-shaped brocade blanks - silver with the inclusion of blue lurex thread. The side of the squares is 4 cm. The number of parts is 6 pieces;
- square-shaped satin blanks in soft blue and white. The side of the squares in this series is 2.5 cm. The number of parts is 7 and 37 pieces, respectively;
- round bead hugger with a diameter of 1.5 cm;
- blue half bead with a diameter of 0.8 cm;
- a felt circle of white or blue color, the diameter of which is 3.5 cm;
- needle and thread, glue - for collecting flowers and attaching parts.
To make a New Year's product, you need to model several parts:
- main flower of 6 four-layer sharp kanzashi petals;
- small flower of 7 double sharp petals;
- 6 branches, consisting of one central blue petal and four lateral white petals.
MK "Snowflake of Kanzashi"
1. Prepare blue and white squares with a side of 5 cm and a shiny square of 4 cm for one sharp petal.
2. Bend all three parts in the same way - diagonally.
3. Next, fold it again, align the white triangle with the blue one, and place the sparkling brocade piece on top.
4. Fold two corners and fasten. The right corner of the former triangular piece will become the sharp end of the triple petal of the kanzashi. The side and bottom of the part should be cut off.
5. To turn the resulting petal into a more elegant one, make it four-layered. For this you will need small white petals. They are made according to the same scenario, but from a white satin ribbon measuring 2.5 cm.
6. You also need to prepare 6 small elements. The same parts in the amount of 24 pieces will be used in the future for branches. Insert sharp petals into the center of large blanks.
7. Cut baby blue and white 2.5cm satin ribbon into 7 squares each. Make double pointed petals so that the white part is inside the blue one. Assemble the flower using thread and needle.
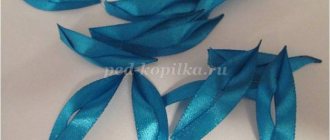
8. Prepare narrow, sharp petals for the branches. Blue squares with a side of 5 cm will be used to make them.
9. Such details will be one color. The squares are folded twice.
10. Also, after forming the petal, the cut should be soldered, pressing it on the sides with your fingers.
11. Prepare 6 identical petals.
12. Gather the main flower onto a thread. Also decorate the small flower with a bright blue half bead and a hugger.
13. Stick one layer on top of the other in the form of a pyramid. Cut out a 3.5cm felt circle.
14. Make designs from long blue petals and small white petals, combining them into snowflake rays.
15. Glue rays into the spaces between the petals of the main flower to turn it into a snowflake.
16. All that remains is to glue the product onto a felt base to use as an accessory or decoration.
As a result, we received dazzling hand-made kanzashi snowflakes.
How to make a double petal
To complete the beautiful ones below), you will need to make double petals.
The technology is like this:
- As for singles, cut the ribbons into squares. You can create a double element from both identical and different-sized pieces. In the first case, you will have to trim the bottom of the petal additionally. It is better to choose different colors and even textures. It will be more effective this way.
- Fold both squares individually into triangles.
- Repeat the previous step again.
- Place one triangle on top of another (smaller on larger).
- Perform the third addition of both blanks together.
- Connect like a single piece using a lighter, thread or hot glue.
Snowflakes made of satin ribbons
On the eve of the festive celebration, we carefully choose a beautiful outfit, trying to stand out from the crowd.
But to create a memorable image, one dress is not enough. A mandatory addition that can change your appearance beyond recognition will be stylish accessories. This is especially true for young beauties. The best thing for them will be an original hair decoration, created by the hands of a caring mother. This could be a metal clip, a plastic headband, an elastic band or a bandage. Or decorated with an unusual snowflake made using the kanzashi technique.
Even a beginner can cope with this work. It is enough to have a desire, show imagination and spend a little free time. Let's take a closer look at what this technique is and how to make a voluminous snowflake from satin ribbons with your own hands.
Festive green Christmas tree
This New Year tree will decorate your desktop for the New Year or give a cheerful mood to your relatives who will gather at the festive table on New Year's Eve.
The Christmas tree and its master class begin with the selection of materials that are easy to purchase in a specialized store. So, we will need:
- emerald color of satin ribbons;
- brocade ribbon;
- thin brown ribbon;
- cardboard;
- beads;
- a plastic cup;
- glue gun;
- tweezers with scissors;
- matches.
What is unique about the kanzashi technique?
This technique came to us from the east. It is the art of creating figures by folding material. But unlike the similar origami, kanzashi uses small squares of fabric . The most commonly used forms are:
- rounded;
- oblong;
- sharp petals.
Subsequently, beautiful flowers, snowflakes, twigs, and so on are collected from these elements. Images created using the kanzashi technique can be not only flat, but also three-dimensional.
Hair jewelry is mainly made using this method . But recently, this type of creativity has become widely used in the form of decoration. Unusual earrings and necklaces are made from satin ribbon . Handbags are decorated with created flowers and twigs . Such details are even used to decorate interior items. For example, a panel made in the form of a painting.
Balls and other Christmas decorations
Ribbons make very beautiful Christmas tree decorations, for example, balls, bells, cones, lanterns and more. We have found simple and complex MKs for you, with which you can create the Christmas tree of your dreams!
#1 Simple New Year's ball made of ribbons
To create such a Christmas ball you will need: ribbons, safety pins, foam blank. Roll the ribbons into a ring and secure them to the workpiece with a pin. Continue until the entire ball is decorated with ribbon rings.
#2 Christmas ball made of satin ribbons
To make such a ball you will need: a foam blank, tape cut into strips slightly larger than the diameter of the blank, two safety pins.
#3 New Year's ball made of ribbons using the artichoke technique
And here is a slightly more complex version of the craft. The whole difficulty actually lies in the fact that you will have to spend your time. You can arrange the colors to your taste, and you can learn the secrets of the “artichoke” technique from the step-by-step MK.
#4 Christmas ball made of ribbons
Here is another option for decorating a blank with a narrow ribbon. This MK uses glue instead of safety pins, and there is no need to cut the tape itself into pieces. The tape is wound obliquely through two points on the surface of the ball. Each time you pass the tape through one of these points, drop a drop of glue and secure a new layer. Step-by-step photo instructions are given below.
#5 Artichoke style cone
From ribbons you can make not only a ball, but a cone, for example. To do this, you will need a special blank, ribbons of a suitable color and safety pins in large quantities. Cut the ribbons into equal squares, wrap them into a triangle and secure them to the workpiece with a pin.
#6 Ribbon cone
And here is another version of a ribbon cone, only easier to make, but no less effective. To make it you will need a cardboard blank, a narrow ribbon of a suitable color and glue. The step-by-step process of making the craft is shown in the photo below.
#7 Icicle for Christmas tree made from ribbon
A very simple craft. To make such an icicle you will need a narrow ribbon, a pencil and thread. Wrap the tape around the pencil, secure it and leave it overnight. In the morning, remove the ribbon, sew on a thread and you can decorate the Christmas tree!
#8 Bell and lantern made of ribbons
#9 Kanzashi lanterns
#10 Kanzashi Christmas tree cones
#11 Christmas balls for the Christmas tree made of narrow ribbon
#12 Kanzashi Christmas balls without base
#13 New Year's ball kanzashi
See more ideas for New Year's balls:
Materials and tools for making snowflakes
Before starting the work process, you need to prepare materials and tools. For this you can
The following items will be required.
- Tapes of various widths . The material used is mainly satin, but brocade, silk stripes and bows can also be used. Blanks are cut from them in the form of squares of the required size.
- Open flame source: lighter or lit candle . A device for burning can also be used in this capacity .
- Tweezers . This tool makes it easier to hold small parts over the fire without damaging the skin.
- Scissors and safety pins . The latter will be required for temporary fixation of parts.
- The basis . It can be wire covered with tape, felt in color, or another thing on which it is convenient to assemble the product.
- PVA glue or Moment-gel.
Decorative elements may also be required . These can be beads of different sizes, rhinestones, sequins, lace and so on. Whatever your imagination is enough to bring your idea to life.
Attention! For an ideal final result, before starting work, carefully consider your product and prepare the base for mounting.
For example, for a hairpin it could be a metal clothespin blank.
Crochet Snowflake Crown - diagram
A charming crown is made from crocheted snowflakes. For work, prepare:
- white yarn;
- hook;
- headband;
- glue;
- sequins.
According to the pattern that can be found on our website, openwork snowflakes are crocheted. They are steamed and impregnated with PVA glue. When it dries, the snowflakes will hold their shape. The headband is wrapped with threads. The snowflakes are sewn together and carefully attached to the rim. Additionally, the crown can be decorated with sequins by gluing them to snowflakes.
Help us improve: if you notice an error, select a fragment and press Ctrl+Enter.
Step-by-step instructions for making a snowflake
A charming snowflake made in this manner can be used in many ways. Using it as a pendant, you will get an unusual necklace or earrings. Attach to a headband, hairpin or elastic band, and your little one will go crazy for such a gift. Decorate a knitted handbag with it and get an original accessory that will make you stand out from the crowd.
Now let's take a closer look at the process of creating a beautiful snowflake.
Materials and tools
To implement this you will need to prepare the following.
- White satin ribbon from 5 cm to 30 cm wide, from 2.5 cm to 117 cm wide.
- Pale blue satin ribbon from 4 cm to 24 cm wide.
- White felt.
- Pale blue heart shaped bead.
- Scissors, glue, lighter, tweezers.
Work process
- Cut the 5cm wide white ribbon into six pieces. The result should be 4 squares with sides of 5 cm.
- From a ribbon of the same color, 2.5 cm wide, make six pieces of 2.5 cm each and 18 pieces. 4 cm each.
- Next, cut six squares from the blue stripe.
- Cut a round base with a diameter of 3.5 cm from felt.
- Make sharp petals from the blue blank.
- From squares of white tape (2.5x2.5) we make a round petal.
- We place the round blank into the sharp petal. Then we place the resulting part in a sharp petal made of a 5x5 cm square.
- Trim the inner corner.
- We solder the corner over the fire.
- We cut off the bottom and burn it a little so that the workpiece does not unravel.
- In this way we make six petals.
- Then we make twelve round petals from a piece of 2.5x2.5 cm.
- Next, take a white blank with sides 2.5x4 cm, fold it in half and form a fan.
- We perform 12 parts in the same way.
- From the last elements we form the outer circle from those fans.
- Using glue, we assemble a flower of six blue and white petals.
- Between the two petals we glue a blank of three fans.
- Then we add round petals between the fans.
- At the back in the center we fix it on a felt base.
- Glue the middle element to the front.
Our charming snowflake is ready. Now you can decorate any item with it: a hairpin, an elastic band, a handbag and much more.
Reference! For the youngest representatives of the fairer sex, this exquisite decor can be attached to a headband.
What you need
Kanzashi snowflake must be performed carefully and consistently, so it is better to find everything you need in advance. While working, do not be distracted by searching for missing materials. So, prepare the following:
- Satin ribbons of different widths (from 5 mm for decorating the frame to 5 cm for making large elements).
- Fabric of suitable quality, color and texture (nylon, organza).
- Scissors.
- Lighter, candle, matches.
- Tweezers-clamp (for ease of use).
- Needle and thread.
- Thermal gun.
- Cardboard.
- Wire.
- Decor (beads, beads, sequins, for example in the form of snowflakes).
- Braid or for making a pendant (optional).
The list is presented to the maximum. In a minimal set you can get by with ribbons, scissors, a lighter and tweezers.
Making a snowflake from satin ribbon using the kanzashi technique
On the eve of the New Year's bustle, I am giving you a master class on making snowflakes using the kanzashi technique. This snowflake can be used both for a carnival costume and for decorating, say, a winter hat.
So, we need:
- white tape (50 mm) – 185 cm;
- silver ribbon (25 mm) – 45 cm;
- blue ribbon (50 mm) – 30 cm;
- white tape (12 mm) – 36 cm;
- rhinestone (button, half bead).
And from the tools:
We need to produce
- 12 sharp petals made of white ribbon,
- 6 round petals made of white ribbon,
- 6 sharp petals made of white and silver ribbons,
6 sharp petals made of white, silver and blue ribbons,6 complex petals.
Now you can start collecting snowflakes.
We collect 2 sharp white petals and a sharp silver-white petal in three. We fasten it with a drop of glue (as we did with the silver petals that are inside the complex one). The result was tridents.
Glue the complex petals together in pairs.
Glue together pairs of complex petals.
This method, in my experience, allows you to make a more even inflorescence. Some people prefer to collect by thread. Try it, if it’s more convenient, write in the comments.
Glue sharp petals from 3 ribbons onto a square of white tape so that they stand at the edges of the square and form an even circle.
Glue round white petals between them. This will be the skeleton of our snowflake. I covered the inside of the resulting circle with a layer of glue to make the base denser.
Lubricate the underside of the inflorescences of complex petals with glue and glue them to the base so that tricolor petals peek out between the complex petals.
We cut the thin white ribbon into 3 equal parts (about 12 cm each).
We glue the ribbons to the bottom of the base so that they form a continuation of the line of complex petals.
We glue our tridents onto the rays of ribbons as tightly as possible to the round petals.
We bend the excess tape and glue it. Why don't we cut it off? A double layer of glued tape will hold the rays of our snowflake tighter and they will not come loose.
Now the most mysterious part: we select the middle to suit our taste and glue the fittings.
Thank you for your attention! I wish you creative success.
If you have any questions, ask them without hesitation. I'll be glad to help you!
Snowflake Kanzashi Master class
Beautiful snowflakes in kanzashi style can be used as a Christmas tree decoration. A master class with step-by-step photos and videos will help you make an openwork snowflake from satin ribbons with your own hands in an hour. And it, in turn, serves as the basis for creating a kanzashi snowflake crown or a voluminous brooch. The snowflake can be attached to a hair tie, headband or hairpin; it will also decorate a bracelet. Use your imagination! Even for beginners it will not be difficult to make a Christmas snowflake!
For a snowflake using the tsumami kanzashi technique you will need:
white satin ribbon 4 cm wide 1.1 m
Quick and beautiful DIY Snowflake crown
It only takes half an hour to make this crown, but the result is impressive. For this you will need:
- headband;
- snowflakes;
- boa;
- glue gun
Everything is very simple. The base of the headband is wrapped around a boa, secured with a glue gun, and snowflakes are attached. The fluffy and shiny tiara, reminiscent of freshly fallen snow sparkling in the sun, is ready.
Headband “New Year's snowflake kanzashi (Cristmas snowflake)”
If you have learned how to create snowflakes using the kanzashi technique, then it will be easy for you to make a beautiful headband.
How to attach a snowflake to a headband:
- From a ribbon 5 cm wide, cut a circle with a diameter of 5 cm
- Melt the edge of the mug with a candle or lighter so that the edges do not crumble
- We gather the fabric along the edge with a thread and tighten it slightly.
- Cut out a circle of slightly smaller diameter from cardboard. Approximately 4.5 cm
- We put a cardboard circle in the middle of the fabric circle.
- Glue a cardboard circle covered with fabric to the underside of the snowflake.
- Glue the finished snowflake to the rim.
How to fold a single petal
How is a kanzashi snowflake made? The master class will teach you how to assemble simple blanks to create it.
Work like this:
- Cut the ribbon or other prepared fabric into squares.
- Treat the cuts over a candle flame or lighter.
- Fold the square in half, and then in half again. You can glue the layers together with a heat gun, sew them with thread, or heat the joint over a lighter and squeeze it properly with tweezers so that the parts are fused.
- Trim the bottom corner of the resulting workpiece so that it takes on the appearance of a petal, similar to a ring.
- Having completed many of these details, you will be able to make up elements of rays for snowflakes and centers from the required number of parts.
