Hi all! Today we have an unusual, but very interesting topic for discussion. We will talk about furniture with hiding places.
Each consumer has approximately the same requirements for purchased furniture items. It is important for a person that they fit into the interior of the room, have the necessary functionality and are as practical as possible.
But for some people, having secret places is also important. That is, such compartments and cavities in furniture that no one knows about and is unlikely to find out. It is antique furniture that is famous for the presence of various hiding places, which previously were an urgent need to hide valuables, jewelry, papers and just money.
Now many people are also interested and important to receive such pieces of furniture with secrets. There are actually two options. Buy a finished product, or make it yourself.
Narrow drawers
If the furniture was not made to order, then there will definitely be a narrow place that can also be used to advantage. And it doesn’t matter what kind of room it is: on a narrow pull-out rack or shelf (it all depends on the area) you can store from tubes of cream to jars of preserves.
Important: Such shelves can be made independently, and their creation does not require the qualifications of a carpenter; a minimum set of tools, the availability/purchase of any wood-based material, furniture wheels and fasteners will be sufficient.
Stage one: creating the frame
If you are using artwork that is already framed to create the hidden cabinet, you should skip this step.
You need to do the following:
- cut the boards to the required length;
- cut out grooves for glass, if its presence is required;
- file their edges at an angle of 45 degrees;
- glue;
- secure the mount using hardware located in the pocket holes;
- clean off any excess glue with sandpaper;
- decorate the finished frame.
If a system of pocket holes is not at hand, then it is quite possible to fasten the frame using furniture corner brackets. In this case, thin and short screws will be needed. It is convenient to use self-tapping screws.
Happy together for 17 years: new photos of Konstantinov’s wife from “Strong Armor”
Oscar Kucera's third wife looks great after her fourth birth (new photos)
The Internet is debating whether it is possible to distinguish an alpha male by his pose in a photograph.
The next step is to secure the glass. Paintings don't require glass, but watercolors or photography do. Instead of ordinary glass, you should use thin fiberglass, such as is used in the manufacture of photo frames. This material bends. It just needs to be inserted into the grooves. If you want to use simple glass, then it needs to be inserted into the grooves before assembling the frame.
The final step is to frame the artwork and secure the back panel. The backdrop needs to be cut out of plywood, sanded and decorated. The back panel is attached to the frame with hardware or glue.
An important point: when using wood glue, you will need clamps to fix the position of the parts.
Hide behind the mirror
As a rule, mirrors occupy a significant part of the vertical surfaces and practical people have also found a use for them. If you place a large mirror not just on the wall, but make an appropriate structure under it and attach piano hinges, you will get a secluded place to store hygiene products, small items or jewelry. Everything will depend on the location and width of the box.
Article on the topic: DIY furniture facade
Finally, finishing
1. To make the supporting part of the AD contrast with the outer frame E/F/G , tint it with a dark stain. We used a cherry oil stain, brushed it on, and then sealed it with a clear shellac polish. We applied three coats of the same shellac polish to the outer surfaces of the shelf, sanding in between with 320-grit sandpaper.
2. Secure the supporting part of the shelf A-D to the wall by screwing screws into the frame posts. Place your valuables inside and then put on the outer box E/F/G .
One cutter for different folds
To select neat, clean folds, it is convenient to use a universal set of folding cutter and replaceable bearings. Typically, such cutters have a diameter of 32 or 35 mm, and bearing diameters range from 9.5 to 28.5 mm. To change the width of the rebate, simply change the bearings. To find out the size, subtract the bearing diameter from the cutter diameter and divide the remainder in half.
Beauty and convenience
When creating storage systems, you should not forget about the aesthetic side, because housing should not only be comfortable, but also beautiful. Therefore, when covering one or another part of the free space, it is worth considering how this can be done more elegantly.
Sliding/folding doors can be especially convenient for storage systems in attic-type rooms. In a place where the space narrows, you can create a wonderful dressing room/closet and hide all your belongings behind decorative doors. If funds allow, then it is better to fully utilize the side space with capacious storage systems.
Screen in everyday life
It seems that the screen in the middle of the room has finally gone out of fashion. However, screens can be used in our daily lives. They allow you to partition or close something.
Our first recommendation concerns a screen that can be used to create a comfortable workplace. Two workstations in a narrow children's room, equipped with a side to the window, give two children the opportunity to study without distraction. The partition can be made from old material you have. If we are building a new partition, it is recommended to make a frame from slats (2 cm thick and 6–7 cm wide), interconnected at the ends with an overlap. If a large structure is planned, it is necessary to provide transverse rigid fastening, especially if we (as indicated in Fig. 21) also want to equip small shelves on the partitions.
Rice. 21. Screen
We carefully sheathe the frame on both sides with TDVP. We make small shelves from pieces of boards 12–15 cm wide, nailed together at right angles. The shelves should be positioned in such a way that they are supported by transverse connections, which are secured with screws screwed into the other side of the partition. Since the shelves are not opposite each other, you can hang a tear-off calendar or attach a writing board on the screw heads on the other side.
At certain intervals we screw in small hooks. We attach lamps to the top of our structure to provide the necessary lighting. In order for the partition to have a strong support, support bars are used as legs (as can be seen from the figure).
Another option for using a screen is shown in the figure below. The screen can be used by placing it in front of the crib to protect from light and noise. It is also useful in the garden to temporarily fence off, for example, a swimming pool. To do this, we build frames approximately 180 cm high, which are upholstered on one side with any padded material. The upholstery can be mats, straw matting, awnings, burlap (which, by the way, can be painted in a very original way) or even cardboard, which can be covered with wallpaper. The frames form a screen using plug hinges.
To use the screen outdoors, we attach two long pegs at the bottom of each frame that stick into the ground. By using tent pegs (as indicated in the right picture below), the screen is installed so firmly that no wind will blow it away.
Keep your bathroom walls clear
As a rule, all “soap and soap” products in the bathroom are placed either on hanging shelves or simply cluttered with them on the sides of the bathroom itself. To avoid such clutter and have all the necessary bottles and jars at hand, you can make secret or folding drawers. It is convenient to organize them behind a screen that covers all communications, and it will be much more convenient to get them out of there if you think through the opening system.
Hides in boxes
A box with a double bottom is a true classic that still works to this day.
Traditionally, hiding places are arranged in desk or chest of drawers, where you can make a “second bottom.” For its equipment, take the same material from which the furniture itself is made, of the same size, secure it:
- Velcro;
- magnetic strips in a plastic frame;
- other convenient ways.
The idea of a small hiding place is a box inside a box.
You can put flat objects there:
- documentation;
- cash;
- photos;
- securities.
Hidden “treasures” must also be secured on the “second day”.
Drawers with secrets for regular cabinets
Use over the full head of the bed
The head of the bed can be used more rationally, because it can hold not only a pillow during sleep or decorate the interior. There are models of beds that already have secret drawers for bedding built into the headboard, but craftsmen can do this themselves. And if you can’t fit pillows or blankets into them, then you can definitely create a hiding place with the most unexpected things.
Article on the topic: How to restore an old cabinet
Ready-made furniture with hidden niches
Naturally, not all ready-made furniture can be used to store valuables: most often it is simply intended for the convenient placement of ordinary household items. For example, in an ottoman in the hallway it is very convenient to neatly lay out shoes, and in ottomans or banquettes in the bedroom or living room - those things that are often used in these rooms.
The same applies to storage under the bed: you won’t get a full-fledged hiding place from this place, but it is very convenient to remove items that are not needed at the moment.
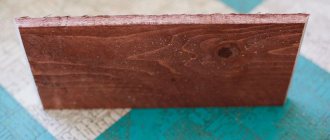
Among the ready-made furniture intended for secret storage of valuables, special shelves and tabletops should be noted. From their appearance it is impossible to guess that there is a hiding place inside.
Wall mirrors and specially designed paintings can also make great hiding places that are nearly impossible to discover. Real safes are sometimes disguised as paintings.
Another way to create a hiding place at home is to purchase a secret drawer or safe disguised as an outlet.
Small pieces of furniture can also be used for storage
No one is surprised by folding tables and chairs anymore, but they can be useful for other purposes. For example, in a seemingly ordinary chair or a tiny dressing table, you can also hide something or simply put small things out of sight so as not to create a mess in the apartment.
It's always better to see than to read or hear a bunch of useful tips on how to arrange a tiny kitchen. An example of arranging a real kitchen with an area of 6 sq.m. with a commentary from the owner herself, it really proves that even in such a tiny space you can place all the necessary things and equipment without compromising comfort and aesthetics.
Did you like the article? Then support us, click
:
Visible but hidden
Which of your house guests would think that there is a hiding place behind the mirror? We hope no one. Everyone will see themselves in the reflection, but will not even suspect that something may be hidden behind the mirror. If you make a small box and “sink” a mirror into it, the structure will seem solid, because the mirror will not stick out. In the resulting space you can store especially important documents and any valuables you have. In order not to complicate the finishing work, you can skip the step of creating a box for the mirror. It is enough to buy a thick mirror and a chic frame for it, and the frame should be thick enough so that the mirror seems to lie on it. In this case, there will be a gap between the wall and the mirror where you can put spare keys, jewelry that is not used daily, and other small items.
Advantages and disadvantages of furniture with secrets and hiding places
Furniture of this kind is structurally quite interesting, because it demonstrates the master’s capabilities in decorating seemingly ordinary interior items with various secrets.
Their presence always had its own meaning: here it was possible to hide something that was not necessary for others to see.
There are a huge number of options for their arrangement. Some of them are well known. Today you won’t surprise anyone with a built-in small safe, which is disguised as one of the sections of cabinet furniture. Large sums of money and particularly important documents and other papers not intended for public viewing are usually stored in it.
Article on the topic: How to repair upholstered furniture with your own hands
Starting from the 18th century, in any rich house one could find a secretary, or in the Russian version, a desk where the owner kept especially valuable documents: bills, money, jewelry.
Using secrets has many advantages, including:
- preventing unauthorized persons from accessing the contents of the cache;
- possibility of arrangement in various pieces of furniture and their elements;
- when made with your own hands - the originality of the design, excluding access to the hiding place of other people;
- self-production or individual order, ensuring structural exclusivity.
Various hiding places and secret drawers are often found inside antique furniture that has survived to this day.
There are disadvantages to this type of furniture, including:
- a mandatory sign is required by which you can find the cache if it is equipped in one of the identical pieces of furniture, in one of the chairs, for example;
- if a niche can only be opened with a special key or other device, it should have a separate storage place or, conversely, on a common bundle, but located only by the owner and easily recognizable by him;
- in case of force majeure, getting to the storage facility and taking away its contents will not be easy.
Their design has its advantages that ordinary tables and cabinets do not have, and features that are unique only to such products.
How and where can you order ready-made furniture?
Not everyone is gifted to be craftsmen, and not everyone wants to make furniture, so for those who want to acquire furniture with hiding places, you can use one of the methods: buy a finished product or order it according to an individual project. In the latter case, you can submit an application in various ways:
- by personally visiting the office of one of the companies;
- invite a representative by phone;
- make an online application via the Internet.
Purchasing special tables, cabinets and bedside tables with hiding places is quite expensive.
It is worth noting that in many cases the latter option may be preferable. On the website of a reputable company, as a rule, there is a virtual catalog where samples of manufactured furniture are posted, indicating the materials used.
Hiding places can be located in any part of it, and they can be equipped either by the owners themselves or by ordering their production by craftsmen.
It is possible to agree with manufacturers on the inclusion of individual requirements in the products offered - in this way, you can receive ready-made furniture with equipment for hiding places; only the customer will know about the functioning, location and features of use.
These can be equipped secret places under or inside countertops, in the doors of cabinets and bedside tables, as well as shelves and drawers on which locks can be installed.
At the same time, preference should be given to wooden furniture: it fits perfectly into the interior of any apartment and does not attract unnecessary attention from overly curious relatives or thieves.
Before hiding an item, you need to decide who may know about the existence of the cache and have access to it.
Do-it-yourself or custom-made caches
It is very popular to place caches made from books on bookshelves. This does not require any special skills or expensive materials: the main thing is to choose the spines of the books in such a way that they look harmonious among the other publications on the shelf and do not attract attention to themselves.
You can try creating your own simple secret storage spaces inside or under countertops.
More complex projects are made to order from a good craftsman. This applies to secret drawers or special secret niches for storing various furniture inside.
Article on the topic: DIY furniture made from garbage
For example, the photo below shows a very interesting idea for arranging a convenient hiding place in the headboard.
And in a country house, you can even make a secret door disguised as a bookcase, or arrange a convenient hidden storage system inside the steps of a wooden staircase.
Add to favorites1
- Tags
- multifunctional furniture
- storage storage system
- antiques
multifunctional furniture, storage storage system, antiques
Hiding places in ordinary furniture
Hiding places are often installed under furniture - in the empty space between the legs
Antique furniture is a storehouse of secrets and mysteries. Old cabinetmakers turned furniture elements into real works of art. Today's craftsmen make modern furniture in the old style, helping to create a special interior and complement it with hidden elements.
Hiding places in antique furniture
Purchasing special tables, cabinets and bedside tables with hiding places is quite expensive. But this does not mean that especially important documents and jewelry will remain on the shelf in the closet.
Manufacturing options
Well, I propose to consider the most popular places that can be used in furniture as storage and secret areas.
In general, no one limits you, since you can come up with an original hiding place yourself. But there are popular solutions, which I will tell you about.
- The back surface of the tabletop. That is, under it. You can implement a hiding place in different ways, from cutting out a groove for a retractable hiding place hidden behind a decorative overlay, to simply attaching important documents to tape;
- The space under the seats of chairs and banquettes. An interesting and quite effective solution that allows you to hide fairly large objects. To do this, a removable or liftable seat is made on a chair or stool, secured with a lock, for example. It is unlikely that it would occur to anyone to disassemble a stool and remove the pad;
- Hollow legs. These can be small legs, or quite long and voluminous structures. You can drill grooves in wooden legs yourself, or order ready-made structures made of metal, plastic and other materials. When drilling holes for the hiding place, do not forget to maintain the strength of the structure. Therefore, usually only one leg is converted into a hiding place;
- Bottom of the box. Quite a popular double bottom. The secret is to place another panel of the same material at the bottom of the box. The advantage is the ability to implement it already on a finished table;
- Hollow backs. Here, as in the case of the legs, only there is much more space. It all depends on the design of the headboard;
- Armrests. Relevant for armchairs and sofas. The hiding places can be made retractable or simply provided with cavities covered with decorative overlays. Such structures are made at the design stage. It is not always possible to easily remake a finished chair or sofa.
Article on the topic: DIY furniture for Tilda dolls patterns
The question of implementing this or that idea with a hiding place is extremely individual. Therefore, I cannot tell you about every method of making hidden storage.
As for me, it is better to provide hiding places in advance, that is, include them in the drawings and design of future furniture in your house, apartment, office and in any other room.
Doing it yourself or ordering from specialists depends on your capabilities and skills. Some secrets or hiding places can actually be made with your own hands. For more complex ideas, it is better to enlist the support of experts.
What examples of hiding places in furniture do you know?
Thanks everyone for your attention! Don't forget to subscribe, leave comments and ask relevant questions!
Hides in closets
Secret drawers, securely hidden in the most ordinary-looking bookshelves.
Cabinets provide a wide field of activity for equipping secret places from thieves. Their large internal and external space allows you to hide a large number of items of various configurations.
Hiding places built into a regular closet
Place of hiding place What can be hidden How to secure it Under the bottom of the closet, in the far corner Jewelry, small valuable items · put in a box of a suitable size and place on the floor;
·pack in a bag and attach with Velcro to the bottom of the cabinet Behind the back wall Documents, valuable papers.
Jewelry, artistic canvases Secure in bags and attach with tape or glue Behind the inner surface of the mirror Only flat objects Use tape At the bottom of the cabinet - forming a second bottom Any objects corresponding to the height of the second bottom Place in a niche, cover with a second bottom In the far corner inside the cabinet, disguised as a shoe box Items that match the size of the box Drawer with a lid, lockable, put in a shoe box secured with screws to the floor of the closet, put a pair of shoes on top that no one uses, cover with a shoe box lid
Pull-out panel in the closet, hidden from prying eyes
Attention! Before hiding a thing, you need to decide who may know about the existence of the cache and have access to it, so that if it is discovered by household members, you will not end up in a stupid position.
Materials for assembling a simple bedside table
To assemble furniture according to the project I developed, I needed the following:
- Set for creating hidden connections.
- Wooden dowels with a diameter of 1 cm, connected in 5 pieces.
- Wood glue.
- Clamps.
- Electric drill.
- Pull-out guides for a 25 cm long drawer.
- Metal hinges for the top cover.
- Clamp.
Below I list the main steps for building a nightstand.
Website about repair and construction » How to make a hiding place in a wooden floor with your own hands
Category: Repair › Floor › Foundations, starting work, preparation, general tips
In fact, you can make a hiding place with your own hands in every place of your own home: the design of windows, the ceiling, various pipes, etc. Let’s look at the step-by-step creation of a hiding place in a wooden floor with your own hands.
Choose the place wisely To make an invisible hiding place under the floor you need to try hard. Now there are different points of view about how, of course, it is best to make a hiding place in a wooden floor.
Still, most experts advise choosing not the middle of the room, but one of its edges for the production site for the hidden cavity.
There is a logical justification for this position: if you do not have time to hide the lid from prying eyes, the cache located in the center of the room will quickly give itself away.
Also, in the place allocated for it, the floor may sag, and when walking on the floor covering, the specific sound of footsteps will indicate that there is emptiness under the floor.
As a result, it becomes absolutely clear that the most pleasant place to make a hiding place is considered to be the edges of the room, because people move along them least often.
And this especially applies to corners. You can also increase the inconspicuousness of the cache. To do this, install some piece of furniture on it. So, for example, a chest of drawers or a safe, which are often placed along one of the walls, can not only close the lid of the hiding place, but also firmly press the carpet to the floor, so the secret cavity will be kept secret from prying eyes.
As a result, even if, for example, criminals carry out a search and they do not have enough time, it is unlikely that they will find your jewelry. It is worth stating right away that real specialists will be able to simply identify such tricks, but, again, with the required amount of time.
What you can focus on The nature of the floor can, in some categories, help you in choosing the location of the hiding place. It is clear that if a carpet, for example, can be used for conspiracy, it is only superficial
But a floor made of parquet or vinyl tiles with a pattern of joints will be a particularly convenient option: With its help, you can professionally achieve the desired outline of a hiding place hatch.
A hiding place placed in a living space can simply put money, papers, disks, but for very large items it is better to find another place. Making a hiding place in a wooden floor with your own hands Let's look at how to make a hiding place in a wooden floor with your own hands.
First, keep in mind that producing a competent cache is considered a fairly thoughtful endeavor because its features do not need to be visible to uninformed people. In order to make a hiding place in the floor, you need this material: wood glue, plywood two centimeters thick, painting, circular saw, self-tapping screws, nails, compressor, jigsaw, hammer.
In addition, you will need the following tools: tape measure, screwdriver, roller, sander, level, brush, square and plug drill. Only when everything you need is at hand can you begin to work. First, choose a suitable hiding place in the wood floor.
Set the required depth of the flooring on the circular saw, which is often equal to two centimeters. Later, you need to cut out a small hole in order to understand what is being installed under the floor of your home. Try to preserve the integrity of the logs.
The insulating material that is placed under the decking can be removed or moved to the side.
Mark the future cache and cut a hole for it. Of course, it is best for it to be located between the joists. The hole should be in the shape of a rectangle.
And after this you need to measure the resulting cache
- this will help determine the size of the future box for storing your treasures. To make the walls of the cache, you can use plywood, which is connected with glue and nails. Try to create a box so that its dimensions are slightly smaller than the hole you made. And after that you can paint it.
You can create this using a plug drill.
If you have completed all the steps listed above, you will be able to make a hiding place in a wood floor with your own hands. Now worry about his strong secrecy and take advantage of his well-being.
What is good about this furniture:
- no one knows about the cache
- it is possible to hide money and valuables in the house without resorting to bulky safes;
- you can make a hiding place yourself, using different places;
- suitable for houses where there are servants and strangers;
- places inaccessible to children.
Of course, hiding places must be equipped with high quality so that even an experienced person cannot suspect their presence. Also, furniture with hiding places is useful in a house where a person goes on business trips or comes home late. To avoid breaking into your home and stealing personal belongings, you can plan for this in advance by making a hiding place in a chair or closet or other places.
Hollow furniture legs and uprights
A simple hiding place in furniture - in the hollow legs of a chair
A hiding place arranged in these pieces of furniture is considered a classic. Making it is quite simple: you need to drill a hole of the selected size inside the furniture element. It is assumed that only one person will know about such a “secret” - the one who made it.
It is clear that the place for storing valuables equipped here does not imply a large number of them, which must be remembered to be disguised in a convenient way.
Advice. You need to make holes very carefully and not overdo it with their diameter, so as not to weaken the structure and lead to its breakage.
Stash inside the chair seat
Bedroom. Shelves inside the headboard
If you don’t want to fill the space under the bed, you can use a headboard: both ready-made designs with built-in drawers and free-standing narrow cabinets are sold. It is very convenient to store things in special compartments - they do not gather dust and are always at hand.
Article on the topic: DIY vanity cabinet
In addition to books, you can store night cream, small decorative pillows, a change of bed linen or a blanket inside.
A few tips and rules
First of all, you should understand where you should not store valuables, documents and money.
Important! The main rule is not to store all funds, papers and expensive items in one place.
Avoid using classic hiding places: mattresses, mirrors, paintings - they will be the first to be examined in the event of a robbery. Also, traditional hiding places in which most thieves find valuables are: drawers of chests of drawers, bedside tables and cabinets, including those with double bottoms, mezzanines, kitchen jars, books, musical instruments, such as pianos. Do not make hiding places in household appliances, especially video and audio devices, as there is a high probability that they will also be taken away during a robbery.
In the photo below you can see some fascinating statistics about where people usually prefer to hide things:
Popular hiding places in the house.
The hiding place should not be obvious and most often it is placed in a visible place. But the main thing is that this object does not catch the eye and its appearance does not stand out from the overall picture. Then no one will think of checking your homemade safe!
Table stand
The stand is assembled from six side walls. They are made of 15 mm thick MDF and are veneered on the outside with radially sawn maple veneer. The vertical edges of the walls are sawn at an angle of 60 degrees. Having temporarily assembled all six walls, the master determined the dimensions of the upper and lower supports so that they would fit accurately into the rack. The supports are made of MDF. They have holes drilled and countersunk for screws.
Then the master cleaned the inner surfaces of the walls, sealed the joints, coated them with wax and polished them. The stand - walls and supports - are assembled with glue using window clamps and clamps for picture frames. There is no need to glue one of the walls, which should become a door.
When the glue hardened, the master removed the door - and there were five walls attached to hexagonal bases. Using a hand plane, he chamfered it to create a 4mm wide edge. I glued strips of tulip edging to them with PVA glue and pressed them with adhesive tape until the glue dried.
Make a load-bearing part
1. From 19 mm poplar boards, cut out the front, back and side walls with partition A, B (photo A). Mark the centers of the screw holes on the front and rear walls so that there is a free space of at least 10 mm wide at the bottom for trimming the edges of the bottom C . Drill mounting holes in the indicated places and countersink them (Fig. 1, photo B).
To ensure that the box parts have the same length, use a clamp to secure an end stop (stop) made from a piece of board to the cross-cut (angular) stop plate.
When making mounting holes to attach the shelf to the wall, use a combination drill bit with a depth stop.
2. Glue the walls of the box and additionally fasten them with screws (photo C), aligning partition B exactly in the middle.
Quick tip! Do you use regular screws without a drill tip? Make pilot holes by inserting a drill bit into the front and back wall mounting holes to prevent cracks in the side walls and bulkhead.
Drive screws through the holes in the front and back walls A and into the two side walls B before securing the partition in place.
Use a bearing cutter to trim the protruding edges of bottom C to ensure a neat assembly.
3. From 6 mm maple plywood, cut out the bottom C with allowances for width and width. Glue the bottom to the bottom of the A/B , aligning the overhangs on all sides, and press with clamps. When the glue has dried, align the edges of the bottom flush with the sides of the box (photo D ).
4. From a 19 mm poplar board, cut two D of the specified sizes. (They create a gap that makes it easier to remove the shelf.) Glue the bosses to the front of the A/B/C box (Figure 1).
How to make a secret room behind a bookcase with your own hands
Who doesn't want to have their own secret bookcase with a secret door? Probably, if there is such an opportunity, everyone would like to do something similar at home. Author Scott McIndoe from Canada spoke about his project:
“We have a corner in the living room that I've been dreaming of closing with a door like this for a long time, but I put it off because I wanted to do something like this really well. I wanted the joinery to be of high quality and the opening mechanism to be strong and reliable and I finally found the time, materials and tools to meet the standard I was aiming for.
This is a long instructable because it shows not only the construction of the bookcase, but also other nuances - I used a unique closing mechanism based on a sliding book, many secret compartments inside the bookcase (besides the largest one behind it!), and an electronic device that produces strange , but interesting sounds and lighting effects.
Step 1: Finding a Suitable Location
You know better where you have the right place in your home for such a cabinet door. For us it was a strange little corner under the attic ceiling and window. It was covered by the parapet of the stairs and was completely useless, and the first thing we decided to do was replace the balustrade with a wall to create a niche for a desk where the children could study. This niche was clearly visible from the living room, which is generally normal, but not ideal, since keeping such a place always in order is a difficult task. What made this location particularly suitable for a secret room was that it was located above the hallway, so if a stranger entered the house, he would be unlikely to realize that there was anything there. Already, many guests are surprised, and I am immensely happy about this.
Step 2: Outline
To further hide the existence of a secret room, I was going to make the cabinet similar to the rest of our furniture. My plan was simple: I would match the design and finish of the other wood bookcase as closely as possible, and use door hinges from Murphy Door that support door weights of up to 300 pounds.
For the cabinet it was necessary to use plywood with bent edges, but I decided to make it from wooden furniture boards glued together from slats: this material for shelves is not expensive, does not swell or dry out, and is sold in the required sizes. The hardest part was coming up with a design that would create the illusion that the cabinet walls were the same depth as our existing cabinet, since the hinges had to be attached to the outside edges of the frame to create a double door. Luckily, I found an elegant solution to this that, among other things, reinforces the bookcase (the loaded side of the bookcase is now directly above the hinge axis).
File with cabinet drawings for the Sketchup program.
Step 3. Materials and tools
You will need 2 sheets of sanded plywood 6 mm thick, and 6 laminated pine panels 18x38x245 mm, and several long boards 50x100 mm (planed). You will also need metal door elements, as in the photo above. I really liked them - they really looked reliable and well thought out. You will also need tools, depending on the method you will use for assembly. I assembled the cabinet using screws and wooden dowels; I like both techniques, which allow you to assemble furniture using glue (which holds surprisingly well), but without various special tools and vices (which I simply don’t have). The total cost of all materials was less than $500 CAD.
If I didn't have a lot of specialty tools, I at least had a lot of electric ones in the garage, including a table saw, hacksaw, hand plane, router, drill, and the like. In general, you don't need anything other than this to build a regular bookcase, so a circular saw with a guide plus a screwdriver is all you need.
The outer part of the cabinet is made of five wooden planks, which are assembled first. I used Miller dowels (pictured above) to attach the long strips of trim. The dowels are sawed off flush with the surface after the glue has dried, and then sanded with sandpaper. It seems like a lot of fiddling around than it actually is - in any case, you'll have to grind it.
If you're an expert at working with tenons, mortises, etc., work with them; if you paint the cabinet, you can use screws and then fill the holes.
Before attaching the short pieces, you need to make slots to accommodate the metal pieces (which are designed to be placed externally on the box, so if you want a nice box surface, then you need to make these slots. I glued and screwed screws into these small pieces so that there would be no screw heads are visible.
One of the inner pieces has a long piece of platband attached, the other does not. Take the side that will be better visible as the platband. I attached it with a Miller dowel, including a dummy dowel on the other side to make both sides look secured.
The IKEA bookshelves I tried to reference had several edges treated with ruther: rounded front edges on the shelves and curly trims on the cabinet walls. I added the first ones before I started sawing the shelves to length, but since I didn't have the right router bit, I started improvising. I made the overlay using a bevel bit, starting and ending 50mm from the edge or so. These small additions are almost useless in terms of strength, but they are needed to make the product look nice and finished.
Step 4: Cutting
18 mm shelves
#1 and #2: Taper the boards to 191mm wide for each shelf. Saw off to a length of 2120 mm. Make a quarter to accommodate 6mm plywood on the back - make the quarter about 10mm deep to make it easier to attach the back of the cabinet. Label the shelves: “inner left” and “inner right.”
Cut one 185mm wide board from each remaining panel. Shorten to a length of 2120 mm, and mark “outer right” and “outer left”.
#3, 4 and 5: Taper all elements to a width of 185mm. From these 6 long boards, make 18 pieces 718mm long. 12 of these 18 shelves will be removable and may need to be shortened slightly to fit more easily into the cabinet. I also went over them lightly with a router to create a decorative edge on these 12 shelves, if you do this it would be best to do this before cutting to length.
#6: Saw off a plate 200x1511 mm, mark it as “valance”. Another plate 90x1511 mm will be marked as “back valance”. Saw off another strip 70x1549 mm and label it “front valance”. From the 70 mm wide trim, saw off two pieces 219 mm long and label them “left valance” and “right valance.”
construction boards 50x100mm
I made the platbands from ordinary 50x100mm boards, sawing them into bars and processing the faces with a hand-held electric planer. This job would be easier to do with a jointer or planer, but what can I do if I don't have one? Here's what you need:
Two bars 718 × 38 × 19 mm. "Right Middle" and "Left Middle".
Four bars 718 × 60 × 19 mm. "Top Right", "Top Left", "Bottom Right" and "Bottom Left".
Two bars 2120 × 30 × 19 mm. "Rear left" and "Rear right".
Four 150 × 60 × 19 mm (83 7/16" × 5 15/16" × 3/4"). Label "top right side", "top left side", "bottom right side" and "bottom left side"
Two bars 2120 × 30 × 38 mm. Cut a piece of 11 × 19 mm from them so that the two ends of the block form an L-shaped corner 19 mm thick and label them “front right” and “front left”.
plywood 6 mm
Prepare two pieces 2120 × 746 mm. This is where the most waste is because you need a single sheet for the back of the cabinet. But you may need 6mm plywood for other projects, so just put the scraps aside for another time.
If you were making a cabinet out of plywood, you would have to buy two 18mm thick sheets, which would cost you $100, compared to $130 for the furniture panel + boards for the trim. I bet that the latter option is better because you won't have to bend the plywood and that the bookcase will look more expensive and finished, despite the higher cost of materials.
The outer part of the cabinet is made of five pieces of wood, which are assembled first. I used Miller dowels (pictured above) to attach the long strips of trim. The dowels are sawed off flush with the surface after the glue has dried, and then sanded with sandpaper. It seems like a lot of fiddling around than it actually is - in any case, you'll have to grind it.
If you're an expert at working with tenons, mortises, etc., work with them; if you paint the cabinet, you can use screws and then fill the holes.
Before attaching the short pieces, you need to make slots to accommodate the metal pieces (which are designed to be placed externally on the box, so if you want a nice surface on the box, then you need to make these slots). I glued and screwed screws into these small pieces so that the screw heads would not be visible.
One of the inner pieces has a long piece of platband attached, the other does not. Take the side that will be better visible as the platband. I attached it with a Miller dowel, including a dummy dowel on the other side to make both sides look secured.
Step 5: Sides
The outer part of the cabinet is made of five pieces of wood, which are assembled first. I used Miller dowels (pictured above) to attach the long strips of trim. The dowels are sawed off flush with the surface after the glue has dried, and then sanded with sandpaper. It seems like a lot of fiddling around than it actually is - in any case, you'll have to grind it.
If you're an expert at working with tenons, mortises, etc., work with them; if you paint the cabinet, you can use screws and then fill the holes.
Before attaching the short pieces, you need to make slots to accommodate the metal pieces (which are designed to be placed externally on the box, so if you want a nice surface on the box, then you need to make these slots). I glued and screwed screws into these small pieces so that the screw heads would not be visible.
One of the inner pieces has a long piece of platband attached, the other does not. Take the side that will be better visible as the platband. I attached it with a Miller dowel, including a dummy dowel on the other side to make both sides look secured.
Step 6: Drill Holes to Support Shelves
Only one shelf in this design is fixed, the rest are removable. Right now you may only need one space between the shelves, but in the future you might want to hang a picture or some speakers and you'll appreciate the flexibility. For the same reason, make more shelves than you currently think are necessary. To drill the holes I used a small Kreg hole jig. You can easily make such a conductor yourself, but I was too lazy. Changing shelves will also make the cabinet easier to build since you can paint or treat the shelves separately from the cabinet.
Step 7: Preparing the Horizontal Parts
I need to make three fixed shelves with a side for each door leaf. I attached them using countersunk self-tapping screws; to work with them you need a special jig and a specially shaped drill (see photo). Countersunk screws hold two pieces of wood together tightly, without the need for dowels to join the pieces together. You can see in the photo that my holes are very rough because my drill is old. You should have 6 shelves with sides—2 shelves 38mm deep and 4 shelves 60mm deep. The first will go to the middle, and the last to the edges.
Step 8: Assembling the Case
I've tried to document the process so you can clearly understand how to put it together, but it's not particularly difficult. I used countersunk screws and wood glue to join the sides and 3 horizontal pieces. Just make sure the corners of the cabinet remain square - you may have noticed that I used a sheet of plywood to measure the square corners and nailed the slats in a crisscross pattern to keep the cabinet from warping while the glue dried.
Step 9: Attaching the Back Wall
This is the easiest and fastest step - cut two pieces of 6mm plywood to the following size: 2120 x 746mm, glue them to the back and then nail them in place. I used a nail gun (nailer). Fill the cracks and then sand.
Step 10. Upper casing
The top trims can be made very quickly, only with the help of hidden self-tapping screws. Note that the finished cabinet is made with a cornice (crown) over the top trim, but I didn't install it until I installed the cabinet (see below). The 3rd and 4th photos show metal plates installed on the casing, brackets and runner.
Please note that the casing inside is empty. You can use this circumstance to organize a secret compartment above the door with a secret. Really great!
Step 11: Finishing the Cabinet
Fill all the uneven areas with wood putty, sand the entire cabinet with fine sandpaper, vacuum off any dust, then treat the surface as you like: paint, stain or polyurethane varnish. To get a color close to wooden furniture from IKEA, you can use a stain that is sold there.
Step 12: Installing the Bottom Runner
You will need a long hardwood board to which the bottom runner will be attached. I bought a 1550 mm long oak board with dimensions 18x98 mm. Using a circular saw, I made a cut 5 mm deep, drilled a hole for the swivel joint, and processed the edges using a round cutter to prevent injuries while walking. I also cut a cutout in the bottom plate to allow for carpeting to be slipped under. Since this board must support the full weight of the bookcase, it must be attached directly to the floor. For me, this meant cutting the rug and piping the edges. When I did this, the oak board sank deep into the carpet, I had to put a strip of 6mm plywood down to lift it up slightly. It turned out that I did the right thing, otherwise the cabinet would have caught on the carpet.
I determined the exact location of the strip by hanging a “plumb line” from the upper horizon, which I temporarily screwed into place.
Step 13. Hanging the door
First, ask someone to help you. These doors are hard to hold. First attach the pivot mechanism by connecting the two parts of the door using piano hinges, lift the door vertically, place the top horizon at the top using a template with 6mm holes, mark the location of the locking bolts, remove the curtain rod, drill the holes, then install the curtain rod in place by screwing it down . Your cabinet should be working properly by now!
Step 14: Secret compartment in the cabinet ledge
Above the top horizon I added cornices to match the rest of the furniture and covered them with a piece of 6mm plywood. I glued wooden slats along the edges of the plywood so that the sheet would sit flush with the top of the cornice. The upper horizon is needed to prevent the cabinet from falling, it is not designed for heavy things, so only put light objects there, it will not be an additional shelf.
Now you see that you have created a spacious place ideal for hiding something. Who would have thought that there was a hiding place upstairs (KGB?) Well, okay, except for those who read this instruction...
There are also two more secret compartments that can hold heavier items—at the top of each door. Again, you can easily make a cover for these out of plywood. But I decided not to bother, partly because I wanted to use this space to house electronic equipment for sound effects.
Step 15. Making a secret door lock
All real secret cabinet doors need to have secret locks, so I made one from a hardback book, a bolt and a round plate from an old tin can. The bolt is fixed in a hole on one of the sides of the housing. Another hole, large enough to accommodate the bolt head, was drilled through the other box. A metal plate was cut and glued inside the book to hold the head of the bolt, preventing the door body from opening on its own. By pushing the book, the bolt head is released. The hole in the book where the lock mechanism is located is covered with a thin plate from a tin can so that when you open the door you can hear a click when you push the book.
I drilled a small hole in the back of the cabinet, just behind the book, so that I could tie a thin nylon cord to a metal plate, allowing someone in the room to open the door from the inside. This cord also allows you to close the room. As for the book, I chose one that is unlikely to interest anyone.
LIGHT AND SOUND
It's very easy to forget to turn off the lights in the office, so I decided to install a motion sensor that turns off the lights. I bought a touch switch, then made a wooden box from scrap boards since we don't have a good place on the wall to mount the switch. To make the switch more flexible, I used wires from the scanner that I had. The light turns on when the door is opened and turns off after a few minutes if the sensor detects movement.
Step 16. Lighting Effects
4. A place is formed at the back for placing wires 5. At the back of the switch there is a wire connection diagram. Wires are held in the cover using a ribbed holder
Step 17: Sound Effects
To make it more interesting, I added some electronic gadgets. First, when you push the closing book, the Legend of Zelda "secret revealing" sound is played (bells ring when the puzzle is solved). Then, when you close the door, a fanfare sound is played and a bright light turns on inside the room. The sound echoes when a treasure chest is opened. It's funny, although most people don't know where this music comes from, everyone finds it suitable for the secret door.
How does it work? The first melody is played when the book is moved, and the second when the door opens. Both devices use a $7 recording module with a microphone and speaker, powered by 3 AA batteries.
The sound module was placed on the plate, and a large wooden lever was moved by the bookcase. To enhance the sound, I covered it on top with a plastic plate cut from a bottle.
I designed the switch for the other module in SketchUp and made it on a 3D printer (which I have access to at work). This is basically a small house with an accordion roof and walls that cover the sound module. When the door opens, it presses on the roof, which is connected to the “pipe” down, and it presses on the module button.
The holes are needed to mount the sound module, and the walls are like an accordion so that they spring back when compressed. You can set the switch so that it is activated when the door is opened to a certain angle.
The creative process of designing something for a 3D printer is very unusual for someone who makes things the traditional way, because you can almost completely ignore the question of “How am I going to do this?” and just create any weird shape. I don't pretend that this strange house is the most elegant solution, but it was interesting to make.
Step 18: Arrange Your Books
We had quite a few shelves to place books on, and this project added almost 8 meters to our space. Most of the books are paperback (>200) plus a few hardcovers and various souvenirs. The door opens very smoothly, relying on the strength of the hinges, we don’t have to worry about distortions. I think it will last a long time. I am very glad!".