Each owner of his summer cottage has many different tools and household supplies that are difficult to keep in order. The article contains interesting ideas for organizing and storing garden tools in a shed, allowing you to create the most convenient access to the necessary things at minimal cost.
Storage of garden tools Source dizbook.com
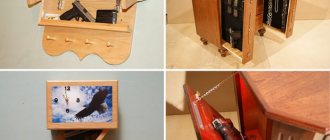
Garden cabinet - for tools and more
This idea has been haunting me for a long time.
I really want to have a small cabinet for those tools that are constantly in use, so that I don’t have to go to the barn every time to get my favorite shovel, or to the house to get my pruning shears. Moreover, the design of such a structure is extremely simple, it is easy to build, and it does not take up much space. You can even rearrange a miniature storage unit if necessary - it’s no more difficult than moving a closet in your house. A garden cabinet can be quite small
Although, if desired, the cabinet can be made wider, more spacious and more massive, and on the door you can attach practical containers for all sorts of small things or a folding table, on which it is convenient, for example, to leave a box of seeds or your garden diary, so that you can keep the necessary notes immediately as you work .
A garden cabinet does not have to be a free-standing structure - you can attach it to the wall of a house or utility room. And good materials and thoughtful design will make this utility facility not only convenient, but also stylish.
A garden cabinet can be not only convenient, but also stylish
The internal space of the storage can also be organized to your taste: make shelves, hang hooks, equip stands if there are a lot of tools in it (for a couple of shovels, I think you can use stands and not bother). Such a structure will not replace a full-fledged shed, of course - it has a different role: it is a place where things that are constantly in use and should always be at hand are conveniently stored.
Planting cone for bulbs 270 RUB Russian Vegetable Garden Secateurs Classic 269 RUB Russian Vegetable Garden Narrow planting scoop with wooden handle 59 RUB Russian Vegetable Garden Garden rake with telescopic handle 170 cm. 500 RUB Russian Vegetable Garden
Rocking bed
PHOTO: eurosamodelki.ru Rocking bed
To make a bed, you need to develop a drawing, prepare the material and prepare the tools and workplace.
The material used is moisture-resistant plywood with a sheet size of 1900×1650 mm and a thickness of 20 mm or more. You will need two sheets. Six cross bars are made of round timber with a diameter of 30 mm and a length of 900 mm (this is the width between the side panels of the bed). You also need 12 plywood strips 940 mm long and 100 mm wide to form the upper surface of the bed. For the awning and for the lounger, you need to choose a water-repellent fabric to your taste.
The most convenient way to cut out the side parts of the bed is with a jigsaw or other specialized power tool. The ends of all parts after sawing should be covered with primer, acrylic paint or drying oil. This will prevent the plywood from breaking.
When assembling the bed, you should mark places for installing transverse bars at the rate of two along the lower contour of the bed, two on the upper contour and two along the middle part. They need to be secured with powerful self-tapping screws with a diameter of 6 mm or more. The ends of the bars can be coated with PVA glue. After assembling the frame, you need to lay and secure plywood strips on the middle contour. You can already put a mattress on them. The awning is stretched and secured along the upper contour. The rocking bed is ready for use.
PHOTO: eurosamodelki.ru Drawing of a rocking bed
Sealed containers for storing substances
Not only tools and equipment are stored at the dacha, but also construction mixtures, varnishes, paints, materials and reagents. Add fertilizers, sprayers, insecticides and other compounds to them. Breathing in the “aroma” of many of these substances is undesirable and sometimes harmful to humans. Therefore, they need to be stored in airtight containers, preferably tightly sealed containers. The “golden rule” applies here: “The more toxic the drug, the higher on the shelf it should be.” And of course, do not forget to always carefully study the storage conditions indicated on the labels of building mixtures, garden preparations and other substances. Some of them cannot tolerate negative temperatures, others cannot tolerate excess air humidity. All kinds of mixtures should be kept in original packaging or reliable and airtight containers. However, it is also better to store tools and parts in special suitcases or organizers.
As you can see, there are quite a few options for storing garden tools. It’s worth showing a little imagination, and instead of a chaotic warehouse of old things, you will have a beautiful and well-kept space in which everything is laid out in its place.
With the onset of warm weather, gardeners and gardeners take out tools and various household equipment from sheds and storerooms. In the midst of spring work, everything that a summer resident needs should be at his fingertips. There is a constant need for shovels, rakes, scoops, forks and pruning shears. On the one hand, they need to be as close as possible to the work site. On the other hand, I really don’t want the neat appearance of the area to be disturbed by objects scattered around! There is only one way out: you need to identify and equip a place for summer storage of tools. And in winter, they also have to be stored somewhere in order to meet the new summer season fully armed.
How to make a dryer for fruits and vegetables?
Look at what materials you need to take for this:
- sheet metal;
- square pipes;
- locking mechanism;
- polycarbonate sheet;
- self-tapping screws;
- 2 door hinges.
Here are the tools you need to equip yourself with:
- grinder;
- welding machine;
- drill;
- stationery knife;
- tape measure and marker;
- metal scissors;
- with a hacksaw.
First you need to make the base for the drying cabinet. Make a frame from square pipes. Horizontal and vertical posts are sawed off so that the edges are smooth. And the ends on the connecting elements should be beveled.
The door here will be metal. To make it, cut 4 fragments from an iron pipe and weld them into a rectangle. Then you need to sheathe this base with metal using screws with nuts and self-tapping screws. If possible, weld a steel sheet. To make a mount for baking sheets, attach wooden blocks to the back of the frame. Take self-tapping screws for this. In this case, on each side there are 4 wooden blocks for 4 baking sheets.
An absorber is installed in the dryer. Take some sheet metal and paint it black. Use heat-resistant paint. When it is dry, place this blank on the bottom of the dryer. For the absorber, take a thick aluminum or copper sheet, or, in extreme cases, steel. These materials conduct heat well.
Now you need to sheathe the outside of the dryer, make the roof transparent, made of polycarbonate. Then the sun's rays will penetrate well here. Glass can also be used. Cover the ventilation windows with a mosquito net to prevent insects from flying in.
Attach hinges and a locking mechanism to the door. Secure the door in place. Look what a wonderful, beautiful and spacious dryer it turned out to be.
All that remains is to make the baking sheets. They must allow air to pass through. First, knock together the frames from the bars, and then attach the metal mesh to them.
Now you can cut fruit and watch how your device will work. Place a thermometer in the dryer to monitor the temperature. It should be between 50–55°C. At lower temperatures, cover the bottom holes by placing a rag here.
In such a homemade dryer you can dry not only fruits, but also vegetables, herbs, fish, meat, and roots.
If this design diagram for such a device seems complicated to you, then you can make a dryer from a metal barrel. A hole for the door is cut out in it, and metal mesh racks are inserted inside.
To prevent water from flowing in here and for better ventilation, a roof like this is installed on top.
You can upgrade this fixture by installing a fan and an electric heater inside.
If you want to make your own lawn mower, then this is also possible.
Turn an old washing machine into it, for example, like this one.
And if you still have an old bedside table, then you can turn it into a platform for a future almost self-propelled device. But you only need the door from the bedside table.
Drill holes in the center of the motor shaft. Make a cutting knife from an old two-handed saw. It is necessary to saw off it to the size of the desired shape, cut out a recess inside.
To make it convenient to transport the lawn mower, take wheels from the same old washing machine. These will become the rear wheels of the mower.
And you can take the front ones from a baby stroller.
To avoid bumping into fences and other obstacles with your knife when mowing, place the front wheels so that they protrude slightly beyond the knife.
Cover the electric motor with a casing cut from a plastic container.
Attach two wooden pickets that will become the handles of the mower. Don't forget to secure the motor and extension cord to it. Now you can test such an interesting unit.
If you are interested in other homemade products for the garden, then you will find it useful to watch the following video.
Many interesting ideas await you in the first video. And you can get acquainted with cool homemade products made from plastic pipes if you watch the second story.
Metal boards for storing tools (pegboard)
A real find for lovers of a strict style in the category of “to have everything at hand” are sheets of metal with fine perforations. This results in double savings - both the tool is in sight and the workbench or desktop is always free. And this “wall perfectionism” also has advantages for forgetful or very generous owners. When all the tools are in place, you can immediately see what is missing, and you can either bring a forgotten tool from the garden or remind your neighbor to return the borrowed drill. Metal shields are equipped with numerous holes into which fasteners for various tools can be inserted. This system is suitable for both small and large rooms.
Baskets for small items
Very convenient and functional storage for tools, parts, gloves, twine or, for example, nails can be built from metal or wooden boxes and baskets. Boxes made from a single piece of metal are especially convenient. Nothing spills out of them, and in order not to get confused about what is where, explanatory inscriptions are put on the boxes. Mesh baskets are a little less reliable in this regard (the main thing is not to put anything small in there), but they have additional “ventilation”. A convenient bag or box is suitable for storing small items. Remember that any container must be washed, cleaned and disinfected, as well as the instrument stored there.
Construction of a utility block - optimal area
On the one hand, such a structure does not take up much space on the site, on the other hand, does 0.2% exert any load on the remaining 99.8%, even if the site area is small - 6 acres? The answer is obvious - no.
Possibilities - the design serves only for its intended purpose or for other purposes (work in the workshop, taking a shower-toilet).
Availability of transport (the larger the vehicle, the more spare parts and consumables it has).
As a result, there is no specific area of the utility block that will suit everyone. After all, some people want to dine not far from the machine, while others love the space inside any room.
Obviously, the area of the utility room should not exceed the area of the living room and bathroom combined.
Optimal storage conditions
When storing a beekeeping product, it is necessary to create the necessary conditions to minimize losses associated with spoilage and loss of beneficial qualities.
It is important to protect pollen from contamination by bacteria and fungi
To preserve the healing properties, the raw materials are placed in glass containers with a tight lid. The container is first sterilized and dried. Keep the filled container away from sunlight, high temperatures and high humidity. You can store pollen at room temperature or in the refrigerator. The bulk substance cannot be frozen, since at sub-zero temperatures it loses its beneficial properties.
Prepared pollen after drying and sifting is stored for up to two years. The period depends on storage conditions. Even if all conditions are met, a natural product loses 40% of its usefulness within a year. Therefore, within two years, at the end of the shelf life, only the protein compound is valuable. There are practically no vitamins and minerals in the composition.
DIY shelf!
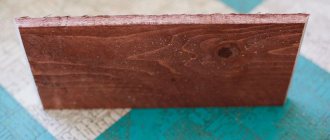
Take a board that is at least a meter long and at least 4 cm thick; You will also need some remnants of boards and various planks, plywood trims in the shape of a triangle, of the same size.
Make grooves in each triangle the same size as the largest board. Connect the triangles to the planks using self-tapping screws. The edges need to be filed down. And as a result, you will get each of the triangles as a console.
Next, all consoles should be individually attached to a large board using self-tapping screws. During this process, make sure that the equipment can be hung upward with the working part. Insert boards between the consoles
This is important for imparting rigidity.
As a result of the work done, you will get a fairly heavy shelf that cannot be attached to the surface of the wall of the room without an assistant.
In fact, there are a lot of options for how to store tools in the country. And no one forbids you to fantasize and create your own ideas. A very interesting option for storing equipment is organizing a garden organizer.
KONICA MINOLTA DIGITAL CAMERA
And so that you don’t have to run for new garden tools at the beginning of each season, be vigilant and observe the correct storage conditions for your tools. Carefully consider your storage system so that they are reliably protected not only during the season, but also during frosts.
Grinder cutting machine
Homemade machines for the workshop are always in demand, but the angle grinder (angle grinder), popularly known as the “grinder”, is one of the favorites in the arsenal of any home craftsman. But the instrument requires a very careful attitude, because Any disregard for safety rules when working with an angle grinder can lead to serious injuries. Therefore, when cutting large volumes of metal (when making a fence or cutting reinforcement), many people prefer to work with a metal cutting machine.
You can buy a frame for an angle grinder on the Internet, but to save money, you can make a cutting machine yourself, from an “unnecessary” or “superfluous” grinder, which almost every owner of a country house has. As we'll see, it's good for more than just sharpening garden equipment!
Looking ahead, let's say that the machine (more precisely, its second modification) was a success: it cuts smoothly and without distortions.
Ivici
I made it like this - I took a piece of channel No. 6.5 (65 mm wide and 36 mm high). This is the basis of the machine.
A steel strip of 50x5 mm was also required. With its help the angle grinder is secured. A 4x2 cm profile and a three-millimeter piece of steel were also required. A figure eight bolt serves as a turning axis.
In the first version of the machine, a powerful door hinge was used as a rotary axis. But, due to welding, under the influence of high temperature, all the lubricant in the loop burned out, and a backlash appeared in the assembly.
According to the user, the most difficult thing was to accurately mark and drill three holes with a diameter of 14 mm for attaching angle grinders with bolts to the threaded holes intended for installing the side handle.
I also had to work with a round file. A small bore of the holes, due to the backlash, allows you to move the angle grinder a little during the assembly process and accurately install it. After all the parts are ready, the user welded the piece of hardware holding the angle grinder together, assembled the entire structure in rough form, checked all the corners and, making sure that everything was mounted as it should, finally welded the entire structure.
Another homemade machine from an angle grinder was suggested by a portal user with the nickname Bistok
.
As usual, first we understand that we need a homemade tool and some kind of devices, and then the search for the most optimal solution begins. Well, don't buy it!
Everything that is usually lying around in the home workshop (and it would be a pity to throw it away) of a zealous owner went into action, waiting for its finest hour. As a stand for a Bistok
I used an overlock table.
The swivel unit is made from the hub from the “nine”, because it has a bearing.
As in the option described above, the most difficult thing was to “catch” the right angle between the cutting disc and the stop angle. After all, the accuracy of sawing metal depends on this unit.
The end result is clearly demonstrated by the photo below.
To turn on the Bistok
I made additional wiring - I installed a regular switch and a socket, and an extension cord comes from this switch. You can buy a homemade machine from a craftsman you know, but it’s much better to upgrade to a creator of devices of this level!
Original wall mounts
Here is perhaps the quickest and simplest idea: take an old garden hose and attach it to the wall so that the cuttings of garden tools can be inserted into the resulting “loops”. All! I would perhaps improve the idea a little by laying the hose not in one, but in two rows, one under the other - this way our equipment will be more stable.
An old hose will still serve: a mount for equipment that can be made in a few minutes. It will take a little more time to make mounts from pipe scraps. Well, the idea with construction buckets seemed worthy of attention to me. Although in this case the durability of the structure is questionable: with constant use, the upper buckets will most likely quickly become unusable.
It's all about: fastenings for tools from pipe scraps and construction buckets
But the main thing here is the idea, and then you can creatively develop it: for example, take not plastic buckets, but old galvanized ones - they are much stronger...
Garden organizer made easy
For a simple garden organizer, we won’t need extra effort or significant financial costs. It's quite simple!
We will need four edged boards 25 mm thick. They need to be prepared for work - planed. The picture shows where the holes will be placed on the two boards. Let's outline them. Using a feather drill, we will make holes according to preliminary markings and then, using a jigsaw or a simple hacksaw, we will cut out the side cuts.
There is nothing complicated about assembling such an organizer. This simple process is reflected in sufficient detail in these pictures.
Let's connect the boards in pairs with self-tapping screws to make two L-shaped structures. Now we have two vertical posts. We choose the wall on which our organizer will be placed. Let it be, for example, the outer wall of any outbuilding. The racks need to be screwed to it parallel to each other at a shorter distance than the length of the shovel handle.
Why not show off such a worthy result of your work? It's always nice when your tools are kept in order. Work will be more fun with clean equipment
The work is finished. All that remains is to place all your equipment in the organizer and be glad that it will always be in order.
How to make a marker for sowing seeds
A homemade two-row marker allows me to significantly speed up the process of sowing seeds. Hilling potatoes with a hand hiller gave me this idea; people also call it an “eared” hiller. In essence, the marker is a smaller copy of it. During the tests, I finalized the design and I would like to tell you about the final result.
The rows made with a marker turn out smooth, and the work is pleasantly easy. The row depth can be adjusted by pressing on the marker handle, and the width between the rows can be adjusted by rearranging the marker plows on the base.
The marker is made of stainless steel. A half-inch pipe was taken as a base and a cone for the handle was welded perpendicular to it. Small gussets are welded between the pipe and the cone for structural rigidity. Holes are drilled along the edges of the pipe to change the width between the rows. Plows are inserted into these holes. They are made according to a template from two identical halves. The two halves are bent so that they touch in the middle and welded together.
To attach the plows to the frame, I took a metal rod with a diameter of 10 mm. I welded one side vertically to the plow, and on the other side I cut a thread and screwed it to the pipe with nuts. The handle is an ordinary wooden one, 150-170 cm long.
That's basically it. If you are not able to make this product yourself, then there will definitely be a craftsman nearby who can do all this, guided by the drawings I provided.
V. VITER
Link on topic: Sharpening and finishing of tools with sandpaper (sandpaper)
Making a shelf with your own hands
There are many ways to make a simple DIY tool rack. We bring to your attention one of them. For the base of the shelf we need one board over 1 meter long and 40 mm thick. In addition, we will prepare the remains of boards, planks, as well as identical trimmings of triangular plywood.
We take plywood triangles and cut out a groove on each of them with a jigsaw, corresponding to the board that we prepared for the base of the shelf. We screw the trim strips to the triangles with self-tapping screws and file off their edges. Now each triangle is a console.
This shelf is not difficult to make: to create it there is no point in buying new materials, you can use those left over from previous construction work
Using self-tapping screws, we fix each console to the base board so that shovels, rakes and other tools can be hung with the working part up. Cutting boards or chipboards should be inserted between the consoles. This will give the overall structure the necessary rigidity.
It must be said that the finished structure is quite heavy. To secure such a shelf to the wall, you need an assistant to support it. If the master works alone, then it is easier for him to initially secure the support board, and only then screw the consoles and elements that provide rigidity to it.
The only difficulty is the weight of the shelf itself, which will be a problem if you have to attach it to the wall alone, but in this case there is a way out
Another option involves securing the finished structure with one large nail, and then the final installation with self-tapping screws. In their locations, you can make through holes in advance. The resulting simple shelf collects all the main equipment.
Rammer
If you want to get a good harvest (and this is the dream of all summer residents), you need to start with the correct sowing of seeds. The basis for good growth is a strong root system. Its health depends precisely on how you carried out the sowing. To ensure a strong root system, seeds must be sown on compacted soil. For this purpose, a tamper is useful, which you can easily make with your own hands.
In design, it resembles a regular wooden mop for washing floors. The only difference is in the lower part: for a mop this part is flat, but for a rammer it should be semicircular, resembling a rolling pin or handle cut lengthwise.
To work, you will need a wooden handle, a semicircular board for the bottom, 2 small parts for stops and several screws to connect the main elements.
Mark a row and compact the soil along its entire length with a hand-made tool, and then begin sowing.
Storage of garden tools and other things at the dacha
As a rule, a country house, the area around it and all outbuildings resemble a warehouse for the temporary storage of various tools, gardening and sports equipment, and seasonal items. In this case, the main task that faces the owners is to organize the space on the site in such a way that the environment on it becomes functional, and the work brings only pleasure, without unnecessary expenditure of effort and time.
You should not clutter up your country house and outbuildings with broken things, because, most often, there is not enough time to fix them. Therefore, it would be more expedient if the necessary tools take the place of broken things. First of all, you should get rid of rusty equipment, broken boxes, old cans of paint and expired fertilizers and various chemicals, old, worn-out gloves and broken equipment. This will help free up additional space for convenient storage of things and garden tools in the country.
Round hammock chair
You can work well at the dacha, and then you want to have a good rest. A handmade hammock chair is very suitable for this.
PHOTO: eurosamodelki.ru Hammock chair
The product is based on two hoops intertwined with colored cord. The hoops are made from metal-plastic water pipes. If you are given the dimensions of the chair - a large circle with a diameter of 120 cm, and a small circle with a diameter of 100 cm, then you need to cut two pieces of pipe 380 cm and 314 cm long.
It is better to buy the pipe already rolled into a roll, it will be easier to work with. The brought ends of the pipe are connected by a wooden or metal pin inserted into it.
It is recommended to use polyamide cord for braiding. It is much more technologically advanced than polypropylene, softer in structure and better for tying knots. In total you will need about 1000 m of cord. Samples of mesh weaving are shown in the pictures.
PHOTO: eurosamodelki.ruMesh weaving option
PHOTO: eurosamodelki.ru Another option for mesh weaving
Garden Tool Storage: Ideas
Throughout the year, you need to take care of your summer cottage: loosen and level the soil, replant flowers, harvest, and remove fallen leaves. Therefore, gardening tools must always be kept in good condition.
Special attention should be paid to storing garden tools. Each piece of gardening equipment must occupy a specially designated place for it.
For example, to store equipment, you can build a wall-mounted container from boards, in which you can make several compartments of suitable width and depth so that the sharp parts of the tools occupy a safe position.
Rakes, shovels and forks can be stored on the wall of a garage or shed if you attach special hook holders to it. For gardening tools that are stored outside, it is necessary to make a container with a canopy. This will prevent moisture from getting on the tools and rust from forming on the metal parts of the equipment.
Interior decoration of the barn
- Additional reinforcements and mortgages for placing furniture accessories, trusses and hangers on the walls of the structure should be provided in advance in the frame. To do this, a beam is placed in the frame with fastening to the base of the frame, as well as supporting elements;
- The next step is to lay the insulation. Rolled mineral wool is enough. You can choose material from the manufacturer Knauf, which has proven itself and is quite affordable;
- After laying the mineral wool into the frame, a layer of vapor barrier film is installed, the seams of which are taped;
- The interior walls of the barn are lined with plywood or other moisture-resistant panels!
Construction necessarily takes place with a step-by-step check of levels, dimensions, planes, and angles. During the process, the materials are antiseptic, painted and varnished!
When the summer season is over
When cold weather sets in and work at the dacha is curtailed, it’s time to preserve the tools that have served us faithfully and send them for storage. If we follow all the rules, in the spring we will not have to spend money on buying a new one. Spring expenses are already high.
All shovels, hoes, rakes and other gardening tools should be preserved. We will conduct an initial inspection and repair anything that has broken down during the working season. Dirt and rust must be removed. Cleaning is best done with a wire brush or spatula. Lubricate the cutting edge and metal surfaces with oil.
Tools should not be left dirty and ungreased during the winter. All the same, we will have to do the same work ourselves in the spring. And in the spring, as you yourself know, there is a lot to do without it
It is necessary to sharpen the blades of the loppers and pruning shears. To remove nicks from the blade of a lopper or garden saw, use a file. A sharpening stone is better suited for pruning shears for the same purpose. You also need to take care of the wooden handles. They are also thoroughly cleaned, after which they are generously lubricated with ordinary sunflower or linseed oil. Handles impregnated in this way will not dry out and will last a long time.
Particular attention should be paid to the fertilizer sprayer. It is cleaned, thoroughly washed and dried
All levers and fastenings of the device are thoroughly coated with machine oil. Free the hoses from any remaining water, roll them into a ring and hang them on the wall. They should only be stored indoors.
A well-equipped summer cottage cannot do without electromechanical equipment. When preparing it for winter, the following steps are necessary:
- draining all excess fuel;
- changing engine oil;
- checking the availability of fasteners (brackets, plugs, screws) and making up for actual shortages.
Power cords also require mandatory inspection. If the integrity is broken, it is better to replace them with new ones. The trimmer head is cleaned, washed and dried. The mower blades are sharpened and lubricated. Both the electric shears and the herb chopper need cleaning. All knives, metal parts and movable joints of various units must be cleaned and lubricated.
Any electromechanical devices require careful care. But the life of a gardener and gardener is greatly simplified if he has them and is in good condition
Under no circumstances should the tool be left where it could get wet by rain or covered with snow. Even moisture from fog negatively affects its performance properties. The ideal storage location would be a special utility room. If there is no such room, a workshop or even a storage room in the house will do. Carefully preserved gardening equipment will successfully survive the period of lack of demand and will not let its owners down in the spring.
Storing garden tools vertically
The device for vertical placement of garden tools looks somewhat simpler. You can also use a wall.
There are many mounting options. From simple hanging to using tubes. The pros and cons here are the same as on the Swedish wall above. Everything is in sight, good access, but it takes up a lot of wall space.
The option of storing garden tools in a special device that resembles a box, divided from the inside into sections, looks more economical in terms of space occupied. The design can be different, it can be clearly seen in the photographs below.
One of the disadvantages of this design is difficult access to the tools located in the center. You will have to pull it out from many neighboring ones, which may not always be convenient and can be fraught with injury.
Storage of small garden tools
So far we have been talking about organizing the storage of large garden tools, such as shovels, forks, rakes, etc.
But there are also small spades, pruning shears and other “trifles”. You can make small shelves and holders for them (photo below).
For longer storage, it is recommended to use a container filled with sand with a small addition of vegetable oil. It is better not to use machine oil, since there is a risk of introducing it into the soil, and we do not want this. It is better to use linseed oil.
Just stick the tool into the sand and that's it. Of course, the storage must be dry, otherwise your tools are in danger of rusting.
As for storing watering hoses, it is not recommended to store them hanging on thin holders.
Under their own weight, they can sag and become broken at the point where they hang. An interesting option in the photo below.
Screw an old bucket or pan with its bottom to the wall. Original and convenient. And the internal volume of the bucket can be used as a shelf for every little thing.
However, the hoses can be stored rolled up and lying down.
You can read how to prepare your garden tools for winter storage.
Usually, country equipment is simply stored in a barn or basement. It is difficult to achieve order with this storage method, and it is not easy to quickly find the right thing. Isn't it time to clean up your property? We'll give you some valuable ideas.
Often a country barn or basement is a real secret room, the contents of which are almost unknown even to its owner. What is there: garden tools, equipment, old furniture, a set of summer or winter tires, spare parts for a car, building materials, power tools, etc. To find something, you need to carry out real excavations. Therefore, to help summer residents, special techniques were invented and systems for storing equipment were developed.
Some ideas for the DIYer
Let's look at a few simple options; this is not a complete list; rather, these are individual examples of how you can use unnecessary things.
Products made from plastic bottles
This material gives a huge space for imagination, while the price of raw materials is zero, since the bottles are thrown away anyway, let’s focus on several interesting solutions:
Palm trees and various decorative crafts. The instructions for creating them are simple: you only need scissors, bottles and imagination, everything is done very simply, the main thing is that there is enough material to implement the ideas.
Such trees will become a real decoration of the site
You can make excellent window curtains from the bottoms; they look very interesting and original.
A simple way to make a window very interesting
You can build a frame from wood or metal, and decorate the gazebo at the dacha with plastic bottles. An excellent option that allows you to build a structure with minimal investment.
If you wish, you can build such a gazebo out of bottles
Remember! This is not a complete list of possible options; some summer residents manage to make greenhouses, flower pots and even furniture from bottles.
Use of boards, logs and other wooden objects
Do-it-yourself wooden crafts for home and garden are one of the most popular options due to their simplicity and excellent results:
From stumps and poles you can make very original furniture for your summer cottage, which will become a real decoration of the entire setting. This or that option is selected based on the available materials. Your imagination is not limited by anything.
This kind of furniture is perfect for a summer house.
You can build a swing from the boards, which will be an excellent resting place for both children and adults. The design again depends on the availability of certain materials, for example, when country houses are built from block containers, boards from the packaging frame remain. A cord, cable or chain is used for hanging.
Making a swing is much easier than it seems
Another great option is using pallets. It is very easy to make an armchair, sofa or even a comfortable mobile table from them. Everything is very simple and quite doable.
Advice! Buy wheels for furniture, attach them to the bottom of a table made of pallets - and it will become as mobile as possible.
This set of furniture will fit perfectly into a countryside environment.
Metal products
Making metal crafts for your dacha and garden with your own hands is much easier than it seems:
A washing machine tank makes an excellent barbecue. Making a smokehouse from a bucket or barrel is even easier: just attach a metal mesh.
To make such a grill, you need a grinder and several pins for the legs.
https://youtube.com/watch?v=ECpXl6GPYCs
When remembering homemade projects at the dacha with your own hands, one most often comes to mind are greenhouses. Making a metal frame is very simple; for this you can use either a welding machine or self-tapping screws or bolts. If the electrical networks are too weak for the welding machine, the simplest solution is to rent a diesel generator for the dacha.
A high-quality drawing will help you make a good greenhouse.
Methods for extending shelf life
Preservation will help preserve the usefulness and extend the shelf life of the bee product. The pollen is mixed with honey in a 1:1 ratio. The apiproduct is stored in a cool, dark place, away from sunlight and humidity. The pollen is first crushed with a coffee grinder or blender, then mixed with honey. The shelf life in this case reaches up to 5 years.
Flower pollen mixed with honey makes the product more palatable. In combination, two useful components only enhance their healing properties. The mixture becomes richer in the amount of vitamins and nutrients.
Pollen is a storehouse of medicinal properties for human health. In the absence of allergies, it is recommended not only for the treatment of a number of diseases, but also for the prevention of illnesses.
Share link:
Garden toilet...for tools
If there is not much space on your site, and a large barn will take a considerable part of the fertile land out of use, you can build or purchase a small, “individual” room for equipment. An ordinary country toilet is quite suitable for this role. Considering that most of the garden tools are long rakes, shovels, hoes, hoes, etc., it is best to store them not in a long room, but in a high room. Such a booth can be slightly modified and, depending on the number of tools available, nail several hooks to the door, hang shelves or install a vertical stand. A small storage room can also be adapted for the same purposes.
Garage for a lawn mower (walk-behind tractor)
“Heavy country artillery” like walk-behind tractors, lawn mowers or mini-tractors require a lot of storage space. The entrance to a barn, cellar, or even more so a house, crowded with such a unit is an annoying inconvenience, which, at first glance, is difficult to get rid of. However, you can get by with a very simple and obvious solution - build a separate small garage for your home appliances. It is better to do it in a place that is not used for other needs: near the toilet, in the shade, on the back side of the house, etc. You will be surprised, but if the dimensions match, even a doghouse can act as a mini-garage. All that remains is to re-equip the “entrance” a little.
Where to store equipment and equipment
Option 1. In the barn
- Large items (most often garden equipment) are placed on the floor, preferably at the entrance - in case something is urgently needed in winter (for example,).
- Small equipment, as noted above, is stored hanging on hooks or in containers (possibly in) attached to the wall. The order of arrangement depends on the frequency of use. A hoe is unlikely to be needed in winter, but a shovel is absolutely necessary. Even if you have a special shovel for cleaning, an extra one can always come in handy.
Option 2. In the garage
Equipment stored in the garage should not harm the car. Therefore, you should not place it closely
to the parking lot of the iron horse (minimum distance – 1 meter). You shouldn't hang it too high or too close either. Imagine for a second your favorite car and a pitchfork or rake flying at it... An unpleasant picture! Anything can happen, sometimes even the most reliable fasteners and hooks fall off, so it’s better to be safe.
Option 3. Give for special storage
Interesting:
Such warehouses are not very common in Russia. In Europe, on the contrary, the self-storage service is very popular, because Europeans value every free square meter and will not tolerate, even temporarily, extra boxes, containers and other things in a house or apartment.
In case you decide to try temporary storage, please note:
- on the company's reputation,
- on how long she has been storing things,
- as well as what types of storage it provides.
A selection of useful ideas
Proper storage of garden tools and other tools and things in the shed will not only give them easy access, but will also extend their service life.
Racks and shelves
It is shed racks that play a very important role in organizing inventory. With proper placement of shelves, you can store many important things on them. For example, on the upper tiers you can place items that are rarely used, and on the middle and lower ones - essential items.
To make shelves, you can use scrap materials that were left over after construction, or order structures of the required sizes separately. These can be racks welded from metal or wooden shelves.
Homemade shelves for storing necessary things Source uk.aviarydecor.com
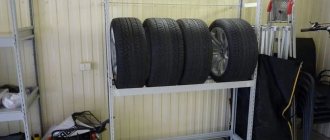
Space for shovels and rakes
To care for a vegetable garden, you need equipment that needs to be stored in a dry room. Therefore, a device for rakes and shovels in the shed is simply necessary.
If you have plastic pipes at home, then the issue of a high inventory organizer is resolved in a matter of minutes. A wooden plank is attached to the wall of the shed with a screwdriver. The length depends on the number of garden utensils. Next, we cut the pipe into cylinders 30 cm high and attach them to the bar. A shovel or rake holder is inserted into the cylinder and the equipment is in place.
Place for rakes and shovels in the shed Source in.pinterest.com
Country wardrobe, storage in a barn
Every summer resident knows how dirty and dusty things become after work. And to preserve your everyday wardrobe, the surest way is to store things in a barn at the dacha.
To do this, you can attach hooks to the door or wall or select a space and place a separate cabinet there.
An ordinary wooden pallet will also help in creating order in the barn. It can be fixed on the wall and various hooks and shelves for things can be attached.
Rake hanger
Decluttering your shed can reveal many old and forgotten gardening tools. There is no need to rush to say goodbye to them. For example, an old rake can be useful for storing small gardening supplies. This will be a great organizer for storing pliers, garden shears and gloves.
Option for storing work items and gloves in a shed Source spatiulconstruit.ro
Small Item Storage
There are always many small items in the shed that are rarely used, but take up invaluable space. In this case, you can use plastic containers and hang them on ceiling rails. But this method is possible if the barn has high ceilings.
Organizer for nails, screws and nuts
always necessary in every household. However, their small size always causes storage difficulties. Therefore, you can purchase small plastic containers with a screw-on lid at a hardware store. Screw the lids to the rack, and then screw the filled jars. This is a great way to keep everything at hand while taking up minimal space.
Or you can use plastic bottles, cut them and attach them to the countertop.
Plastic storage containers Source co.pinterest.com
Working surface
Any utility room needs a surface where you can transplant flowers or arrange something. To do this, you can build a table according to your individual size and using available materials.
Stack the pallets one on top of the other, covering them with a sheet of chipboard on top. Afterwards it can be decorated with various colors. In addition, the space between the trays will also serve as an excellent way to store small items and tools.
Work surface option for a shed Source makemone.ru
Organizer for small tools
An old shoe organizer is perfect for this. You just need to attach it to the wall and store all the necessary things. These could be gloves, garden shears, pruning shears, or your favorite vegetable seeds.
Storing things in an organizer Source pinterest.com