DIY baseboard frames
Plinth is a decorative and protective element of room decoration for hiding the gap between the floor or ceiling and the wall.
In addition to being used in the construction and finishing industry, skirting boards are a great thing for realizing creative fantasies. For example, the production of various kinds of frames.
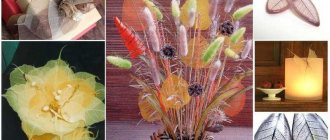
Frames for photos, paintings, mirrors, etc. They turn out very original and beautiful.
It is also worth noting the ease of processing, since the plinth is made mainly from materials such as foam, wood or plastic.
This article shows how to make frames from baseboards, which you can make at home with your own hands.
Types of skirting boards
The main materials for skirting boards today are: foam, wood and plastic.
Plaster, metal and ceramics are also used in certain interiors.
These materials require certain skills and tools for processing, so they are very rarely used for making various kinds of crafts with their own hands.
So, the main material for the plinth is foam :
This is a very cheap and very easy to process material, it cuts and glues perfectly, you can buy it at almost any hardware store.
But there are also disadvantages: polystyrene foam is a very fragile material, any careless movements or falling even from a short distance can ruin the appearance of the product.
Plastic:
The main advantage is that plastic is a strong enough material for use in modern creativity, and plastic is also not susceptible to moisture.
The disadvantages are that plastic is quite more difficult to process than foam and it is made from artificial materials.
Tree:
The main advantage of wood is its naturalness; you must agree that no matter what material looks like wood, natural wood is immediately visible.
The beauty and environmental friendliness of the material still does not allow a large number of people to be indifferent, despite the rather high cost compared to other materials and the complexity of processing.
Step-by-step instruction
Prepare the following:
- foam baseboard;
- ruler, square, protractor;
- miter box (a carpentry device that allows you to cut boards or any other profile lumber at right angles and at an angle of 45°);
- glue such as “Liquid Nails” (you can also use “Dragon”, “Moment” and in general any glue that can be used to glue foam products);
- a knife and a hacksaw for metal (unlike a hacksaw for wood, it provides smoother cut edges);
- marker or pencil;
- awl, drill, small diameter drills;
- acrylic paints, acrylic putty;
- metallic enamel;
- thick cardboard (you can use a thin sheet of fiberboard or plywood);
- brushes and foam sponge;
- thick fishing line or long cord.
- Measure the length of the painting (or photograph) you are making the frame for.
- Make appropriate marks on the side of the plinth where it will be in contact with the painting.
- Using a miter box, cut two pieces of baseboard at exactly 45° angles so that they look like a very long trapezoid with the shorter side equal to the previously measured length.
- Now measure the height (width) of the painting. And doing the same as in steps 3 and 4, cut two more shorter pieces of baseboard.
- Glue the resulting four pieces of baseboard together to form a rectangular frame.
- Check with a square whether the corners of the resulting structure are rectangular.
- Putty (after the glue has hardened) places where there are gaps, cracks or uneven areas.
- Wait until the surface of the frame is dry and prime it with dark paint, applying it two or three times in succession.
- When the paint has dried, cover the convex areas of the frame surface using a foam sponge with metallic enamel (imitation bronze, silver or gold). Don’t forget that you also need to paint the ends of the frame.
- According to the size of the resulting frame, cut a piece of cardboard (or fiberboard, or plywood) in order to attach the picture and frame to it in the future.
- Drill holes in this piece for fishing line (string/string), with which you will hang your framed picture on the wall.
- Pull the fishing line through the holes and tie the ends in a knot, or it is best to make several knots so that they do not come undone.
- Apply glue to a piece of cardboard with fishing line and glue the picture and the frame framing it.
After enough time for the glue to dry completely, you can hang your painting on the wall.
A frame for a mirror from a ceiling plinth can be made using the same method as given above. In this case, not only the ceiling plinth can be used, but also the door frame, which can be painted with paint that matches the main color of the interior. The appearance of a painted frame will also improve if it is varnished and decorated with some decorative elements. Although you can limit yourself to just a varnish coating if you want to emphasize the naturalness and beauty of natural wood.
People have been using frames for a very long time to highlight the contents of works of art such as paintings, to achieve a more impressive appearance by separating them from other interior items. And today, the scope of application of frames in the form of frames has become even wider: now this method of design is used not only for paintings and mirrors, as in past centuries, but also for photographs, and even for wall-mounted panel TVs. At the same time, thanks to the availability of modern materials on sale, cheap and easy to process, it is not at all necessary to buy frames. You can make them yourself if you know how to make a frame from a ceiling plinth!
Tools and materials
Before you start working, think about the design of your crafts. Skirting boards or moldings can be purchased at any hardware store. Trimmings and pieces are also suitable for work, but novice craftsmen are better off buying new ones.
Suitable materials
You can choose a molding decorated with a textured pattern or smooth. Any materials from which skirting boards are made are suitable. But their different properties must be taken into account.
- Styrofoam is cheap and suitable for beginners, but it crumbles and breaks easily.
- Expanded polystyrene is one of the types of foam plastic. Its reliability is better and its price is higher.
- Polyurethane is durable, wear-resistant and cuts well. Flexible skirting board options allow you to create products of any shape. But it has a high cost.
- Wood is also an expensive material. Working with it requires professional training.
The choice of material for creating baguettes depends on their purpose and your imagination
The choice of material for a baguette depends on what kind of picture you are going to place. Fragile foam plastic is suitable for small and light photographs, and polystyrene foam, polyurethane and wood are suitable even for oil paintings.
How to peel the top layer of cardboard down to the corrugations
Of course, before starting work on any project, you need to prepare all the materials so as not to be distracted by this while working.
For corrugated cardboard projects, it's very common to use old boxes you have on hand. But for work you need to prepare such cardboard, or rather, separate the top layer of paper to a corrugated layer
.The problem is that this can be difficult to do for several reasons:
- When making cardboard sheets, different manufacturers use different amounts of glue between the layers of cardboard;
- the strength of the glued layers depends on the thickness of the existing grooves; different manufacturers use paper of different qualities in the production of cardboard;
- the presence of layers is also an important factor.
There are two ways to remove the top layer of paper from cardboard:
- tear the paper in different directions immediately from the cardboard;
- first moisten the surface of the paper and let it soak a little so that the glue “softens”, and then remove the top layer.
How to decide on the size
It is determined by the interior of the room in which you will hang the picture, and the actual size of the picture itself. If the canvas is small, it does not need a large frame with a wide mat.
History of the picture frame
Nowadays, most images have frames and can be found everywhere: in apartments, offices, restaurants and churches. Today it is a common element of decor, however, few people think about when it was first used. This happened back in Antiquity. The first picture frames were found in excavated tombs in Egypt, which date back to more than 2 thousand years BC. Archaeologists found a portrait that was in a wooden frame. Back then, these painting decorations were called “borders.”
The next find dates back to the Middle Ages, when decorative borders in books became the prototype; they were used to separate the text from the rest of the content. With the beginning of the 11th century, the time of Gothic began - a golden period when all rich people tried to decorate their interiors with shiny metal to the maximum. Back then, all works of art were framed with intricately carved wood and plated with precious metals. Gold baguettes for paintings were especially popular. A large number of copies have survived to this day in the French Louvre and the Spanish Prado.
LiveInternetLiveInternet
–Categories
- EMBROIDERY (618)
- 3D embroidery (27)
- smooth surface (25)
- beads (24)
- richelieu (10)
- on knitted fabric (8)
- programs (4)
- magazines, websites (31)
- cross stitch (302)
- ribbons (67)
- miscellaneous (80)
- tips (7)
- lessons (14)
- FOR CARS (21)
- tips (9)
- shops (3)
- MISCELLANEOUS TIPS (1)
- KNITTING (5525)
- flowers (120)
- tops, swimsuits (111)
- dresses, tunics (50)
- miscellaneous (48)
- programs (35)
- beads (15)
- coat (10)
- for the holiday (7)
- trousers, shorts (5)
- hats, scarves, shawls (215)
- children (661)
- for comfort (495)
- animals (18)
- magazines, websites (243)
- lace (432)
- mittens, mittens, socks, slippers (139)
- suits, skirts (475)
- pullovers, sweaters, boleros (637)
- tips (64)
- bags (121)
- fabric + hook (39)
- patterns, motifs (733)
- decorations (65)
- lessons, master class (625)
- fillet knitting (87)
- FOR LOVELY LADIES (117)
- tips (25)
- fashion (14)
- massage (8)
- HOUSEHOLDING (977)
- advice for all occasions (138)
- house plants (103)
- repair (34)
- miscellaneous (16)
- serving (7)
- vegetable garden on the balcony (5)
- equipment (1)
- interior (101)
- tips (132)
- washing (114)
- cleaning, housekeeping (171)
- HEALTH (2166)
- folk recipes (300)
- green pharmacy (95)
- eyes (33)
- animals (1)
- women's (8)
- treat colds (134)
- massage (33)
- calluses (9)
- nerves (7)
- body cleansing (158)
- liver, stomach, intestines (88)
- increase immunity (30)
- weight loss (29)
- kidneys (27)
- miscellaneous (320)
- heart, blood vessels, pressure (165)
- tips (50)
- joints (177)
- exercises (184)
- COSMETICS (1373)
- for hair (165)
- makeup (92)
- for eyes (29)
- for skin (127)
- for face (177)
- for feet (28)
- for hands, nails (61)
- for body (2)
- perfume (1)
- masks (231)
- miscellaneous (37)
- tips (20)
- COOKING (3970)
- meat, poultry (417)
- jam, compotes (54)
- dough (44)
- baked goods (29)
- for Easter (17)
- casseroles (5)
- technology (4)
- dumplings, pancakes (398)
- hot dishes (251)
- magazines, websites (7)
- preservation, preparations for the winter (483)
- drinks (114)
- first courses (44)
- pies, pies (357)
- various recipes (130)
- fish (148)
- salads, snacks (343)
- sweet tooth (113)
- tips (142)
- sauces, dressings (101)
- cakes, pastries, cookies, desserts (523)
- decoration of dishes, cakes (42)
- cold dishes (59)
- MY Cottage (1133)
- trees, shrubs (115)
- root vegetables (41)
- magazines, websites (16)
- grapes (15)
- interior (10)
- parasites, diseases (8)
- ideas (25)
- medicinal plants (3)
- lunar calendar (8)
- cucumbers (51)
- buildings (82)
- miscellaneous (112)
- seedlings (48)
- tips (210)
- tomatoes (81)
- fertilizers, fertilizing, pest control (70)
- flowers (149)
- berry (42)
- WISE (108)
- MISCELLANEOUS INTERESTING (1055)
- interesting (50)
- horoscope, numerology (48)
- for a diary (182)
- zodiac signs (23)
- cinema, video, television (69)
- books (13)
- computer, phone, camera (319)
- music (193)
- tips (5)
- NEEDLEWORK (1823)
- decoupage (20)
- salt dough (11)
- quilling (10)
- miscellaneous by topic (10)
- felting (3)
- macrame (2)
- patchwork (1)
- for comfort (42)
- magazines, websites (43)
- hairpins (3)
- toys (506)
- beads, beads (161)
- made of paper, cardboard (296)
- leather (8)
- made of ribbons, fabric, felt (371)
- made of plastic polymer clay (18)
- from yarn, threads (35)
- soap making (3)
- miscellaneous (111)
- tips (14)
- stencils, ornaments (15)
- decorations (54)
- cold porcelain (26)
- templates (16)
- DIY (6)
- SEWING (1046)
- children (83)
- alterations (25)
- pattern (20)
- animals (12)
- technology (8)
- for women (208)
- for comfort (120)
- magazines, websites (35)
- pillows (46)
- miscellaneous (31)
- tips (35)
- bags (110)
- lessons, master classes (224)
- hats, hats (18)
Making without a miter box
To make a frame without a miter box you will need:
- mirror;
- fibreboard (fibreboard) according to the size of the mirror;
- ceiling plinth;
- glue for mirrors;
- putty;
- molar tape;
- acrylic lacquer.
Work process:
- We outline the mirror on the fiberboard, leaving space for the fillet at the edges.
- We measure and cut the ceiling plinth to the size of the mirror.
- We glue the mirror and fillet to the fiberboard using special glue.
- After everything is glued, we paste masking tape between the mirror and the baseboard to pre-protect the mirror.
- Now we fill the gaps that form between two perpendicular fillets.
- Apply acrylic varnish to the frame on top. The color of the varnish is up to you. After the varnish has dried, remove the tape. And the frame is ready!