Many people, imitating the Great Artist, arrange their homes and plots in a unique way. Recently, fresh landscaping ideas have been used for this purpose. Creative summer residents create green decor to cover unattractive walls of utility buildings or fences. Moreover, they decorate living spaces with compositions of green plants. Unique living paintings are made from indoor plants, which are placed in special frames. They fit effectively into any interior of a house or apartment.
With the help of phyto-paintings, you can exotically decorate your apartment, give it a special coziness and enliven it with greenery.
How are living paintings created?
The essence of the new direction is to turn living plants into an art object, replacing canvas and paints with soil and flowers. A “living” landscape will always outperform a painted one, because it lives its own life, plays with colors and is constantly changing.
The canvas of the great artist Van Gogh shone with new colors when it was recreated on a huge wall using living plants
The basis for phyto-pictures are frames, metal mesh and plywood, which are fastened into one holding frame. It is filled with soil and planted in the cells of the plant so as to create a certain pattern.
A drip irrigation system is installed under the frame (if there is no time to water).
An ugly wooden fence, which is located “facing” north, can become a real art gallery if it is decorated with phytolandscapes of different sizes
Instead of a mesh, you can use special hanging containers that are fixed to a support. Plants planted in containers create compositions due to their texture, different sizes and colors, and at the same time they can be swapped if the design is not successful.
Material on methods for constructing vertical beds will also be useful:
The height and texture of the picture frame can be completely different. The main thing is that the frame has sufficient thickness to fill it with soil.
Some designers do not make frames in phyto-pictures at all. They create landscapes over the entire area of the house wall, fence, etc.
But in the case of using buildings as the basis for paintings, the walls will certainly be waterproofed so that “wet neighbors” do not destroy the structure of the material from which the wall is made.
A piece of nature in the house: what is a green wall
The phytowall is a huge structure, similar to a puzzle, which consists of cells with plants - phytomodules. A fashionable green carpet has many advantages for lovers of indoor flowers:
- saves space;
- increases humidity, saturates the room with oxygen;
- does not require special care, as it is usually equipped with an automatic watering system;
- an excellent screen for zoning the space of a room;
- Gives you the feeling of summer all year round.
Still lifes from succulents
Most often, succulent plants act as components of a living design. They grow well on any type of soil, are not afraid of changes in humidity and can easily withstand periods of drought (if the owner forgets to water the composition on time).
To create a painting you will need:
- A ready-made or hand-made thick frame (the bottom bar is 4 cm thick).
- A sheet of plywood equal in size to the frame.
- Waterproofing material for plywood (film).
- Fine mesh metal mesh of the same size.
- Soil (forest clay soil mixed half with sand or fine expanded clay).
- Sphagnum moss (optional).
- Nails, hammer, construction stapler.
- Paint or varnish on wood.
- Succulent plants.
Create a picture like this:
- Cover the plywood with film so that the soil that comes into contact with it does not destroy the material. The film can even be food grade, wrapped in several layers around plywood.
- A mesh is installed between the frame slats and secured with nails or staples.
- On the back side of the frame, plywood is nailed with the insulated side inward.
- Nail fasteners to the plywood on which the picture will be held (at least 2).
- The frame is painted or varnished.
- While the frame is drying, prepare the plants: cut cuttings with a long tail to make it easier to insert into the mesh cells.
- The plants are laid out in the desired pattern right on the table to determine the composition of the picture.
- The frame is laid horizontally on the table and filled with soil through the mesh cells. Don't forget to compact it using a pencil.
- When the soil fills the frame flush with the mesh, spray the soil with water from a spray bottle.
- Lightly sprinkle the wet soil with dry soil or cover it with a layer of moss, which will prevent soil from spilling through the mesh, and begin planting.
- Large cuttings are planted first.
- Try to fill the frame as tightly as the mesh size allows, because succulents grow slowly.
- Leave the finished composition to take root for a month in a warm place where there is no direct sunlight.
- Check the soil moisture with a toothpick. Water only when there is no trace of soil left on the toothpick.
As soon as the plants begin to grow (and this can be seen from the young growths), feel free to hang your creation in a permanent place. The main thing is to avoid sunny places, otherwise the succulents will burn. For the winter, the paintings are put away in a heated room.
Cuttings of succulents must be prepared 1-2 days before planting in the picture, so that the cut site has time to dry out and does not rot.
Wooden frames do not like being close to wet soil, so their internal parts should be coated with varnish or antiseptic impregnation in advance
Sand or expanded clay added to the soil acts as a moisture accumulator, so even with infrequent watering, succulents continue to grow normally
Peculiarities of observing interior ethics in a neighborhood with a living green corner
In an effort to create a beautiful picture and create comfortable conditions for the inhabitants of the house, it is important not to forget about the rules of ethics in the neighborhood with living herbs and flowers. Before planting a plant at home, it is important to know its characteristics and care for each species accordingly.
Follow a few rules:
- You should not grow plants with a strong smell at home, otherwise you will get headaches.
- Say no to flowers and herbs that contain poisons that cause allergies.
- Give preference to unpretentious green friends, so as not to accidentally ruin valuable specimens.
Creating a green area in a city apartment is easy and simple. Use the services of phytodesigners or make a small island of green harmony yourself. The main thing is to choose unpretentious plants and care for them regularly.
Landscapes on walls and fences
If you want to create a living picture on the entire wall or completely hide an old fence under it, use a container decoration option (phytomodules). They are incredibly popular in Europe.
Phytowalls differ from vertical gardens in that designers carefully work out the pattern of plant placement in order to create some kind of visual image
The basis of phytowalls are also metal frames. They are attached to the base on which floral masterpieces will be created. In the southern climate, such walls are made from perennials that will not freeze over the winter, since severe frosts do not occur.
In the middle zone or northern regions, it is most convenient to create phytowalls from annuals. They provide no less bright colors and colors, but you don’t have to worry about wintering.
The metal frame is the main component of the phytowalls, since it is on it that the entire weight of the green painting is supported, gaining weight day by day
Landscaping rules
Let's look at the main points:
- The base is completely waterproofed.
- There should be 2-3 cm of space between the frame and the base for ventilation.
- The frame is attached to the wall using thick wooden blocks, laying them between the metal and the building.
- A pipe for drip irrigation is laid on the top of the frame. Water will have to be pumped into it.
- The container for plants can be jute fabric or a material like felt, which is not afraid of rotting and accumulates moisture well.
- Pockets made of the same material are sewn onto the jute canvas, in which the plants will live.
- You can not sew pockets, but quilt two large felt sheets with squares, and when planting, make cuts in the center of the squares and plant the plants there.
- Before planting on the wall, each plant is wrapped in felt or jute to keep the soil firm.
Professional gardeners for phytowalls use a drip irrigation system, laying a tube to each plant. But such complexity is needed for home phytowalls.
And outside, it is enough to organize drip irrigation from above, since the water will spread over the entire surface of the fabric and nourish each flower. Even if there is excess water, it will drain from below and will not damage the landscape.
An example of a drip irrigation system design can be found in the material:
Jute material has high strength and hygroscopicity, so all the moisture flowing from above will evenly disperse through the pores of the fabric and seep into the roots
Quilted two-layer felt also retains moisture well, so even adult plants with a small clod of soil or grown on hydrogel can be planted in it
In addition to pocket structures made of fabric, container-type plastic phytomodules can be purchased in specialized stores. For more information about these systems, watch the video.
Phytoideas by Patrick Blanc
The most famous phyto-artist was the Frenchman Patrick Blanc. He abandoned the container method of decorating the walls and came up with a hydroponic growing system. All the plants with which he decorates the walls live in felt slabs.
Recent Entries
Lilac perennials that are beautiful, compact and do not crowd out other plants Why when buying seedlings you should not take the sellers’ word for it and how to determine the age of the plant using 3 signs Tomato seedlings have turned purple or whitish: why the color has changed and how to save the plants
Using a drip irrigation system, they are fed with mineral solutions. Plants do not need soil to function normally. They take oxygen from the air, and food from water.
Patrick Blanc's phyto-paintings attract the eye already at the initial stage of seed germination, because everyone is interested in how the landscape gradually develops before our eyes
Patrick uses metal frames for the base. They are the connecting link between the walls and phyto-pictures. Plastic waterproof frames are screwed to the frames. They serve as a barrier to moisture getting on the walls and thereby protect the building from destruction.
On the outside of the frame, plates made of polyamide are fixed - a porous material that retains moisture well. It is in it that the flowers will grow.
The peculiarity of Blank's idea is that the plants are planted on the wall not as adults, but in the form of seeds. Approximately 30 seeds per square meter. Therefore, the phytolandscape also needs to be grown. But such plants are immediately adapted to vertical living conditions. They don't have to go through an adaptation period.
The finished painting can live on the wall for up to 10 years. Dying plants are replaced with new ones.
What plants are used to make a living wall in an apartment?
For a vertical garden, it is better to choose plants with a developed root system that can support the weight of the leaves. The stem should be short or curly. Lush bushes with small leaves will also come in handy. Here is a list of greens that fit these criteria:
- Ampelous plants. Their distinctive feature is their rapid growth both in height and in breadth, and they curl well.
- Varieties of decorative grapes. A wonderful decoration for the kitchen. Some of them bear fruit, although they are not worth eating, but they are quite suitable for decoration.
- Saptiphyllum, chlorophytum, other plants like these.
- Small succulents and low sanseviers are simply irreplaceable in apartments whose windows face the sunny side and the room is constantly hot.
Use just one type of plant or combine several. For your first living wall project, it is better to choose unpretentious plants that do not require a lot of light or abundant watering.
Moss
This plant is suitable for beginners in phytodesign. It is unpretentious, shade-loving, and does not need fertilizer. If the apartment has thin walls, make a wall of moss and forget about noisy neighbors. This plant has excellent soundproofing properties. Usually moss is used, but you can make a composition from ordinary forest moss.
Resin moss is subjected to special treatment. It is preserved, that is, special solutions and dyes are applied to the surface so that its texture is bright, elastic, durable, and also does not rot and is reliably protected from mold and bacteria. Resin moss does not need soil. It is glued to the MDF panel.
Greenery structures should be kept away from children and pets. Parts of the green wall can cause poisoning to the body.
Flower plants
A green wall can sometimes bloom with lush, bright flowers. To diversify the rich green color, you need to provide space for saptiphyllum and anthurium in the phytomodules. These two flowers are called female and male happiness. The combination of white and red will advantageously emphasize the greenery of the florarium.
Beautiful compositions featuring begonias. This plant has many species and a variety of colors. Christmas cactus (Decembrist), Kalanchoe, and violet are well suited for the role of bright accents.
Artificial plants
Many allergy sufferers, pet owners, and people who are often forced to leave home for a long time prefer artificial greenery to natural greenery. It does not create a special microclimate, but it has a number of other advantages:
- durable and does not require maintenance;
- safe, does not emit odors;
- thanks to modern materials, plants look like alive;
Grass
Herbs that thrive outdoors can decorate walls inside your home. Most often, housewives grow chives, peppermint, basil, cumin, rosemary, cilantro, lemon balm, sage, etc. in the kitchen. Some set up a vertical garden, harvesting onions, garlic, parsley, celery, and radishes from the phytowall.
Regular lawn grass, wheat sprouts, and seeds of other cereals are used to make the phytowall look like a football field. Seedlings grown from grains are planted in module pockets mounted on the wall.
Moss graffiti - phytodrawing
Moss graffiti looks modern and stylish. They can be used to paint any vertical that is in the shadow. For example, on the front wall of a house, create its number or street name. Green letters will attract the attention of every passerby.
Moss patterns are very unpretentious. They do not require fertilizing, pruning, or drip watering. In damp places, mosses grow without any care
General instructions for application
To create such a design, you must first draw the desired design with a construction pencil and cover the outline with mounting tape so as not to go beyond the boundaries of the design.
For graffiti, it is better to take mosses that grow in your area, since they have a higher rate of survival than store-bought ones.
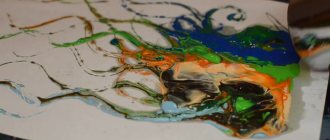
Next you need to create paint from moss:
- We go into the forest and cut off a cushion of beautiful moss (If there is no forest nearby, buy moss at the store).
- Mix unusual ingredients in a blender: brought moss + 2 cups of kefir + glass of beer + 2 teaspoons of sugar + 3 teaspoons of corn syrup (it can be replaced with any fruit syrup).
- The finished paint should be thick. If the solution flows from the brush rather than dripping, add more moss and whisk.
- Carefully apply the resulting magical mixture to the wall. If the wall is not too porous, first sand it with coarse sandpaper. Mosses take root well on porous surfaces.
- Cover the top with non-woven material, securing it outside the frame of the design with tape.
To ensure that the moss takes root well, spray the wall periodically.
What types of mosses are suitable for graffiti?
Each type of moss lives on a specific surface. For graffiti, you should select those types that cover the ground or corners of some abandoned concrete house. Mosses from trees do not take root on walls.
According to experts, moss species with a cushion-shaped shape - Racomitrium or Leucobryum - are suitable for phytodrawing. They grow even in northern regions and develop normally on rocky surfaces.
1. Small-fruited Racomitrium (Racomitrium microcarpum). 2. Racomitrium lanuginosum. 3. Leucobryum glaucum. 4. Dicranum scoparium Hedw
Mossy furniture
If you want to create not a painting, but an installation of an ancient garden, decorate old furniture with mosses.
Moss creates the impression of abandonment and antiquity in the garden, so it can be used to cover any surface - from sculptures to old shoes
To do this you need:
- Wash an old wooden chair.
- Cover it with wet strips of newspaper (like papier-mâché). Newspapers are wetted only with water.
- Spray from a spray bottle over the entire surface with PVA glue diluted with water.
- Wrap a chair with soft wire so that the mosses have something to hold on to.
- Collect pads of living moss in the forest (or better yet, sculpt a chair in the forest, where building material will be at hand).
- Clean the roots from the soil, sprinkle them with glue and press them to the surface of the chair.
- Place the moss tightly so that there are no lumbagoes.
- To secure the fixation, use toothpicks that can be stuck into each moss pad and hooked onto the wire. But stick it at an angle so that someone doesn't accidentally sit on the tip of the toothpick. After the moss has taken root, the clamps must be removed.
The finished moss masterpiece is sprinkled with water and placed in a shady place. You should moisten your stool every day for a month.
A type of moss that is well suited for furniture installation is sphagnum, which grows everywhere, has a high survival rate and a beautiful lush texture.
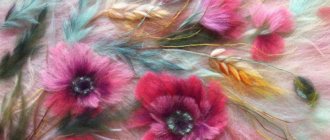
Featured Succulents
These plants can have different colors, shapes and sizes. As mentioned above, it is important to choose smaller plants so that they do not stick out too much. Choose plants in a variety of colors to give your garden a more versatile look. Also note the different sizes. Recommended succulents:
- Blue Pearl or Graptoveria
- Blue Giant or Graptosum hybrid
- Silver moon or Pachyphyte
- Golden glow or Sedum hybrid
- Chocolate Soldier or Kalanchoe Tomentosa
Once you select your succulents, get to work.
DIY leaf paintings on the theme “Autumn” for children - step-by-step master class with photos
The next version of a painting made from leaves with your own hands on the theme “Autumn” is suitable for children of different ages. The idea of creating such a picture can be used both in kindergarten and in primary school. Learn more about how to make a picture of leaves with your own hands on the theme “Autumn” with children in the step-by-step master class below.
Step-by-step instructions for a DIY leaf painting on an autumn theme for children
- In this master class we will make an autumn birch tree, but using the same principle you can create compositions with images of other trees. First of all, draw a diagram of the future tree on white cardboard, as shown in the following photo.
- We divide the black plasticine into small pieces and use them to shape the birch trunk.
- Then we take some of the driest leaves and crush them with our hands. This will be an imitation of fallen leaves at the base of a birch tree.
- Lubricate the bottom of the picture with glue and sprinkle chopped leaves on top. Let it dry a little.
- All that remains is to glue the main leaves to the crown of our birch tree. Ready!
Creating a beautiful design
To make your living picture look attractive, use a beautiful frame. When making planting holes, get creative with interesting designs and configurations. You can arrange different species in alternating rows or arrange plants in a circle.
To improve your academic performance, you need to start studying an hour later than usual.
Andy Neil takes wonderful photographs of Colchester using light painting
A photo of dogs shows two extreme points of people's attitude towards the New Year
Use miniature succulents to create symmetrical designs. Interesting ideas on planting style and arrangement can be explored in specialized groups on the Internet.
Choosing a base for the panel
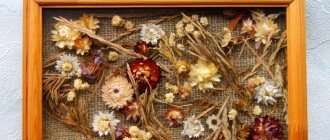
Compositions made from dried flowers are very light and small in size. They will be located on the wall in a vertical position, so they must be securely attached to the base. For small applications, choose thick cardboard. It has excellent adhesion to all adhesives and is easy to process with paints of any composition.
If the panel will be covered with glass, use plastic or wooden frames. Dense bases will easily withstand elements that weigh down the composition. Influenced by the eco-trend, many craftsmen use burlap to create wall decorations from dried flowers. The texture of the material allows you to use not only glue, but also thread and wire to attach flowers.
Various materials are used as backgrounds. It could be a sect, fabric, paper, leather, a piece of wallpaper. They can be left in natural color or painted with paints. Dried leaves can also be used as a base. They are laid out on the surface, overlapping each other.
Dry composition in the interior
Paintings can be made to decorate the interior; the surfaces of furniture or walls covered with leaves look beautiful. Autumn material can be used in bouquets and placed in vases. Wreaths formed from leaves on the door look beautiful. Interesting compositions are those combined from dried leaves, dried flowers, cones, to which you can add pumpkins and other long-storable products. These include apples and pears.
Autumn bouquet
The easiest way to preserve the colorful magic of autumn for a long time is to collect a bouquet of leaves and place them in a vase of the appropriate size. To keep the leaves longer, you can spray them with hairspray.
Bright autumn bouquet
Bouquet of roses
Anyone who has formed paper roses at least once and knows the order of their assembly can easily apply this knowledge to leaves. To do this, roll the leaf crosswise. The result is a very elastic material that holds its shape well. Roll it into a tube, holding it by the stem. This will be the inside of the rose. Wrap all other parts around the middle, lifting each one slightly. The petals should overlap each other.
Making roses from dry leaves
Secure the resulting roses; you can use thread. After you have made several roses, at least three, combine them into one composition. Place several large sheets on the bottom. The decorative element is ready. Can be used for interior decoration. Retains its shape well when dried.
Ready-made bouquet of dry leaves
Autumn wreaths
Christmas wreaths have come into use and beautifully decorate the holiday. A wreath of leaves that can be used to decorate a door leaf will look no less delightful.
Autumn wreath made of dry leaves
To make the composition you will need a vine. You can use willow branches. If they are out of reach, make a regular circle of wire.
Wire wreath base
Collect beautiful leaves. Dry. You can use fresh ones. The easiest way is to glue the leaves with a gun. If you don't have it, use regular strong glue. After the glue has completely dried, decorate the door with a wreath. This technique will emphasize how much the owners love their home, value it, and are ready to maintain coziness and create comfort.
Glue the leaves with hot glue
To add more color and to emphasize the ethnic orientation of the composition, place pine cones, brownies, beautiful branches of a bush or tree, and dried autumn flowers among the details. The herbarium is beautifully decorated with bows.
Autumn wreath is an excellent decoration option made from dry leaves
Vase
After simple compositions, creating a vase will not be difficult.
Vase of autumn leaves
Carry out the work in the following sequence:
- Turn a vase in your house over so the inside surface is facing down.
- Cover it with a layer of cling film.
- Place a layer of leaves on its outer surface.
- Connect the leaves together with glue.
- Cover the structure with acrylic varnish.
- Turn it over.
Step-by-step production of a vase from leaves
The vase is ready. Use it to store small items.
Topiary
These trees of happiness are unusually popular.
Leaf topiary for home decor
In order to make them, you will need the following parts:
- small pot,
- a thick branch on which the entire composition will be fixed,
- leaves, you can add the following material: reeds, cones, bunches of rowan.
Using glue, secure it all into one composition.
Features of composition and planting technology
The design of a living picture of plants must be individually drawn up in accordance with the concept of your home. As a rule, for such purposes, light greens are alternated with dark representatives and planted in the soil in the form of a pattern. It is better to place the most beautiful flowers with a variety of colors in the center of the picture. Plants with dark and fleshy greenery can be planted around them, thus creating a certain contrast in the landscape.
If the composition involves the use of decorative elements, then you need to carefully consider how to attach them. For example, small and medium-sized pebbles or shells can be glued to the frame with glue.
Note! After completing the composition and planting all its representatives, you need to give the living picture time to strengthen the flowers in the soil. To do this, lay it out on a flat surface in a well-lit room and let it sit for two weeks.
Flower arrangement
What materials to use for crafts
Often the phrase “I need a craft for the garden” causes a nervous tic in parents. However, if you approach the task with passion, it will become a great opportunity to have fun. So, collecting materials will become a real quest for a child on a walk, and making them will become a creative game.
What you will need
For children's crafts, pine cones, acorns, pine twigs, pumpkin seeds, cereals, twigs and sticks, dried flowers and leaves, and ferns are most often used.
Plasticine, white glue, needles and paper clips, colored paper, felt, and matches are used as auxiliary materials.
What will happen
Ideas for crafts, as a rule, are set by the teacher, but they are always very extensive, and parents have to rack their brains a little about what to glue together from leaves on the “Golden Autumn” theme. Below are some ideas for children's crafts.
- hedgehog, Christmas tree, bear or rooster made of cones;
- a house made of cardboard covered with pebbles, with a roof made of dry leaves;
- pumpkin house;
- a pot with an artificial flower made of “foot” material;
- deer, little men, caterpillars and various animals made from acorns and matches;
- various kinds of applications;
- tree made of cones;
- a spider on a web of twigs and acorns;
- a basket of plasticine and twigs with fruit made of painted pebbles;
- owl made of pine cones and cotton wool;
- caterpillar made of plasticine and chestnuts;
- dinosaur made of pine cones and plasticine;
- a panel of a tree using painted pumpkin seeds as foliage;
- stained glass windows made of dry leaves, PVA and twigs;
- an aquarium made from a painted cardboard box with fish made from leaves on strings;
- various little animals with frames made of newspapers, covered with moss.
When choosing, you should not limit yourself only to natural materials for the development of children's imagination. So, if you ask your child to think about what to make sand from in a cardboard aquarium, you can together find a non-standard solution, for example, glue semolina, salt or oatmeal.
Grid installation
To begin, you will adjust the mesh to the appropriate size. It should be equal to the size of the shelf plus the tabs that bend inward.
It is convenient to bend the mesh using a thin wooden board.
Bend the tabs at an angle of 90°, after cutting out the corners with wire cutters.
Be careful that the grille must fit exactly into the frame.
Attach the grille from the inside to the shelf using nails and a hammer.
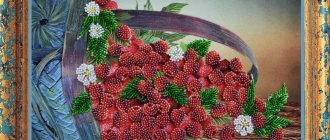
Volumetric cross stitch
The cross, beloved by many needlewomen, has also found its application in voluminous embroidery. Using it in this embroidery technique, you can create beautiful and practical objects in three dimensions - vases, boxes, boxes for small items, toy houses. The result is a truly living picture that you can take your hands with or play with. The volume is achieved through the use of plastic canvas. Plastic canvas can be purchased at any craft store. First, the design is embroidered on a regular canvas, on which small allowances are made along the edges, then the finished embroidery is sewn to parts made of plastic canvas that correspond to the contours of the embroidery. Separate durable parts are obtained, which are then fastened together “at the joint”, forming houses, vases, boxes and other products. You can assemble entire cities and villages from houses, and put homemade flowers in vases.
Volumetric cross stitch is mainly a European type of needlework; Europeans congratulate each other on various holidays with such toy crafts. Photos of such cute houses or even entire villages can be seen on our website.
We do it together with children
Natural materials are great for children's creativity. The ability to see a flower or bird in scattered twigs, cones and seeds is a manifestation of creative abilities that it is advisable to identify and develop from a very early age. The older a child gets, the more complex the ideas he is able to come up with and implement. The little ones, of course, will need the help of adults - both in preparing materials and in implementing ideas.
Bouquet made of natural materials and plasticine
Children learn such crafts from kindergarten age. This activity is very useful for the development of a child, and from the compositions created by his hands you can make an entire exhibition at home or in the country. An interesting and intelligible video lesson will help you if you have already forgotten your own childhood.
Postcard with dried flowers
An older child can make a panel or postcard with elements of natural materials. The applique technique is used here, which kids also master quite early. The larger the details of the future product, the easier it is for a novice florist to handle them. Well, those children who already have skills in such creativity can use small flowers, thin twigs and leaves for decoration.
A child can make a panel or postcard with elements of natural materials
It is worth immediately warning the child that this material is very fragile, and working with it requires patience, perseverance, and accuracy. But how nice it is to make a beautiful gift for your mother, grandmother or beloved teacher with your own hands!
Assortment of plants for vertical gardens
Plants for vertical walls are selected individually depending on the biological characteristics of the plant itself, growing conditions and compositional solution. Climbing plants, mosses, ground covers, and succulents are mainly used for vertical gardening.
In the conditions of central Russia, a wide range of plants can be successfully used to create vertical compositions.
Lianas: actinidia kolomikta, Amur grapes, cultivated grapes (varieties for temperate climates), maiden grapes, honeysuckle (honeysuckle, climbing), clematis, Chinese lemongrass, roses (climbing varieties), hops.
Attention!
Wisteria, campsis, ivy and petiolate hydrangea cannot winter successfully in the middle zone.
Groundcovers: mountain weed, tenacious, bryozoan, thyme, woodweed, jasmine.
Succulents: young, sedum, sedum.
Annuals: sweet pea, thunbergia, morning glory, kobea, bean, nasturtium, petunia, pelargonium, lobularia, begonia, lobelia.
The assortment of plants for an indoor phytowall depends only on the degree of illumination of the room. But this problem can also be solved with the help of artificial lighting and the use of phytolamps. For indoor gardening, ivy, philodendron, episcia, arrowroot, hoya, fuchsia, duchesnea and dichondra, grown from seeds and a number of others, are used.
About stabilized moss
Moss can be found in every corner of the Earth. In total there are about 10,000 species of this plant. However, not every variety is suitable for stabilization. During production, only certain breeds are used, which in their characteristics best correspond to the tasks assigned to them.
Stabilization is a kind of conservation of natural moss. In simple terms, a living plant is soaked in a certain solution in order to stop its development and adapt it for decoration.
To produce a stabilized product, various types of moss are used:
- moss is the most accessible in our latitudes;
- sphagnum;
- oak – resembles algae;
- with stems and leaves;
- dicranum – in the form of panicles;
- forest;
- fern.
To compose compositions, reindeer moss, which has an attractive bright green color, is often used. In addition, it is easier to obtain in our geographical latitudes. It has proven itself remarkably well as a finishing material for framed outdoor and interior sculptures and panels.
The material is available for sale as follows:
- layers;
- hummock;
- balls.
People learned to stabilize moss already in the 40s of the twentieth century. One of the first patents for its production was issued in the USA in 1949. Early technologies were based on the use of salt solutions and coloring with various color pigments. Stabilized material was used as a complement to flower buds, which were the main characters of most compositions. Nowadays, designers are increasingly giving preference to panels and paintings made of moss.
Some moss stabilization technologies are being replaced by others. One of the latest trends is glycerinization. According to it, the plant is placed in a special solution of glycerin and water with the addition of dye. During the soaking process, glycerin penetrates into its structure. This is the most effective way to preserve it. Thanks to it, the durability of moss and its ability to withstand various mechanical influences is significantly increased compared to solanization.