A picture of poppies made using the felting technique
Felting is one of the oldest technologies for creating textiles. During excavations, archaeologists found that the approximate age of this method is 8000 years.
Felting came to Russia in the 13th century during the Mongol-Tatar invasion. Cloth and felt were made and used in household affairs. Felted clothing was also common. They made hats, skirts and pouches in which to store tobacco for smoking. The peculiarity of wool was used to insulate houses.
Currently, this technique is acquiring an artistic form and has a specific name - felting. It is used to create toys, paintings, crafts and clothing.
What tools and materials will you need to create a wonderful picture from wool?
What is considered wool painting? This is a layer-by-layer application of fibrous material, resulting in an image of multi-colored strands. Work in the technique of drawing with wool is carried out in stages, starting from the background and ending with the nuances of the foreground.
Produces full-color three-dimensional images
The fibers are not fastened together in any way, as in the felting technique.
We see a multi-layered pattern that is located between the glass and the backdrop
For the backdrop, fiberboard (hardboard) with a fabric base is suitable. We sell ready-made clip frames, usually used for photos and including glass, hardboard and clamps.
Wool artists need a number of materials and tools:
- selection of a subject: depending on the theme of the future drawing, choose the colors of unspun wool;
- convenient small scissors;
- ordinary tweezers;
- glass, backdrop or ready-made clip frame;
- non-woven or fleecy fabric on a backing.
For a painting to be impressive, it must be framed
Wool is very docile and does not require special skill, as it might seem when looking at beautiful works. Skills in handling fibers are developed very quickly. Wool is purchased in the form of ribbons or carding.
A ribbon, or top, is nothing more than already combed wool, with all the fibers located in one direction. Carding can be described as wool wool: the fibers bend in any direction, resembling a fleece in appearance.
In addition to the desire to create and the above-mentioned tools, you need to allocate a little time for your creativity
Who is this type of creativity suitable for?
The peculiarity of wool watercolor is its absolute versatility: anyone can do it, regardless of gender and age. The technique of this type of creativity cannot be called complex: even children of senior preschool age can easily master it. Teenagers, expectant mothers on maternity leave, and pensioners are willing to do this. This is a great hobby even for working people who want to spend free time alone with their creative self.
Wool watercolor, even if you don’t take into account the beautiful result of the work, which is quite suitable for decorating the interior of a home, is a useful hobby. It:
- develops artistic taste (you need to find or independently create a sketch of your future work, choose colors harmoniously);
- maintains fine motor skills of the hands in good shape, therefore, trains our memory, activates the imagination, develops cognitive abilities (yes, in adults too!);
- promotes relaxation, allows you to escape from the flow of everyday problems, calms you down.
The result of the work usually has a motivating effect: even if a person does not know how to draw, he is able to create a completely artistic work! And a person who knows how to create beauty has every reason for self-respect!
The only “contraindication” for practicing wool watercolors is an allergy to the material. Be especially careful when offering this activity to children! But not everything is so hopeless: there are craftsmen who sneeze while working - the problem can be solved with the help of a cheap medical mask, sold in any pharmacy. True, you need to get used to it, but soon you will stop paying attention to it.
How can you work with wool?
There are three main methods for drawing with strands: pulling, plucking and cutting.
Pull
It is most convenient to work with combed ribbon: strands can be easily pulled out of it. Moreover, the thickness of the strands will be what the author needs: thin, not covering the previous layers, dense, capable of covering the background.
The ribbon is clamped in the left hand, and the strand of the desired thickness is easily pulled out with the right hand.
Important! You cannot strain your hands, everything should happen as if by itself - the process does not become torture, it is real pleasure!
Pinching
By pinching, small lumps are created that resemble a cobweb. The fibers bend in different directions. Small lumps help create smooth transitions between colors and shades.
If you use this method against a background, you get watercolor tones.
With your left hand (for right-handed people) take the tape, forming a fold. The fingers of the right hand pinch the fibers at the bend. Movements should be small and frequent. The result is fluffy clumps of different densities, which means they will each overlap the layers in their own way.
Important! The lumps should be uniform, don’t worry if the loops come out the first time - just get used to it a little, and it will work!
Advice! If you have a carded card of the desired color, then the pinching method will not be useful.
Trimming
Scissors are needed for the cutting method: the strands are cut into a cloth with a pattern above the place where the fluff of a certain size and shape is required. The cut can be positioned with your hands and tweezers.
Additional nuances of work
Beauty in artistic designs comes from mixing colors: wool also mixes beautifully. To do this, take 2-3 different colors and form them into a strand. Already with this strand they work with any of the listed methods or their combination.
Any painting is a combination of basic techniques of working with wool fibers. As a result, we see a number of layers, base, fiberboard and glass
The practicality of wet felting
There is also a method of wet felting.
These methods are similar in the principle of creating a drawing and materials. The difference is that in wet felting, wool is made into felt by soaking the layers in hot soapy water and rolling them out onto bubble polyethylene with a rolling pin. After a long period of rolling out, turning over, rolling out again, the painting is rinsed and dried.
More wool is spent on this technique and the pictures are more saturated.
Such a picture can not only hang in a frame on the wall, but also be used as a rug, a decorative element for clothing or accessories, or a decorative pillow can be sewn from it. This method is more convenient for practical use. However, both methods have their own unique characteristics and are good in their own way.
At first, it is better to choose simple images and complicate them over time. This is how the skills of this wonderful skill are acquired. Creating wool paintings will be a lot of fun.
How to make a picture out of wool: what we can recommend for beginners
The first time, and several subsequent times, you need to be patient: it would be better to master the process gradually, and not try to complete everything in one sitting. In any case, attention will be strained and fatigue will take its toll, which will lead to negligence and low performance. We remember: pleasure from work should come first!
Glass is often used on a painting
Since the result will be observed precisely under glass, the result can only be adequately assessed in glass. It will reveal flaws and shortcomings that will need to be corrected immediately.
If you do not apply glass, you may find that those parts of the painting that seemed thin suddenly turned out to be excessively large.
We remember that the ratio of dark and light is responsible for the visual volume, so we try to make the drawing full-color
We don’t skimp on creating highlights on the flower vase using white and don’t forget to add dark tones where the shadow should lie.
What to do if something goes wrong? We remove the layers in reverse order and redo the mistake - this will be an irreplaceable experience, there’s no point in getting upset.
Preparing the basis
You need to lay a proportionate piece of non-woven or flannel on the fiberboard. Since the process consists of layer-by-layer overlay from the background to the foreground, we do not neglect the very first layer. Sliver fibers (undyed, unbleached wool) are laid in a fairly dense layer.
Selecting the wool of the desired type and color
The first works should not be complicated - let it be a simple and accessible plot. Colors are selected in accordance with the chosen plot:
- the warm group is ideal for autumn landscapes, skin color, flowers;
- cold group is suitable for winter landscapes, marine themes, night views;
- mixed shades of each group are used at your own discretion;
- white color creates highlights, emphasizes individual elements, and is used as a basis for snowy landscapes;
- black color is responsible not only for dark elements, but also for creating depth and shadows.
Making the background
To draw a background, you need to sequentially lay several layers of strands by pulling the fibers.
Someone is an ardent opponent of the sliver and immediately starts working with a colored background - this is the personal choice of each master. The background is rarely one color; it is usually a combination of several layers that differ from each other in thickness and color. At this stage, there is also no need to rush anywhere; you need to carefully select shades.
Laying out the drawing and framing the painting in a frame under glass
The drawing is laid out on the finished background. Start with larger elements or background objects. At this stage, all methods or their combinations are actively used.
At the end of the work, it is covered with glass, the excess wool is trimmed off along the edge, and all that remains is to insert everything into the baguette.
Necessary materials
For this type of needlework you will need the following materials:
- natural wool;
- felting needles with several notches at the bottom (for the dry method);
- tweezers (for laying out small parts when making paintings);
- flannel or non-woven fabric (for the base when making paintings);
- liquid soap or warm soap solution (for the wet method);
- eyes, noses and stuffing material (used in making toys).
If you do not yet have experience in purchasing suitable material for felting, it is advisable to purchase ready-made kits for creating paintings in craft stores.
Such kits may include different volumes of material, needles of different sizes and a special solution for wet felting. Each set comes with detailed instructions, which will be especially convenient for beginners. The undeniable advantage of such sets is that after creating one product, needles and solution will remain, which can be used repeatedly later.
Master classes on making paintings from wool
General recommendations have been received, it’s time to see how masters create their works and learn new things from them.
Painting "Flowers in the meadow"
The author demonstrates the process of creating a colorful and delicate painting. If you want to start somewhere, why not with beautiful flowers?
| Illustration | Description of action |
| You will need enough wool colors: dark brown, blue, white, yellow, light green, brown, red, burgundy, pink. It will be good if there are similar shades of warm colors. In addition to strands of combed tape, standard tools are used in the work. | |
| Don’t forget about selecting a frame according to the fiberboard or hardboard format. | |
| We lay out the first layer either in white or in sliver. We slowly pull out the strands and arrange them as we please, without being afraid to run over the edge of the canvas. | |
| The blue base will create depth to the picture. We also don’t need to lay out everything at once in a dense layer, otherwise the effect will not be the same. | |
| On top of the blue we pull out strands of dark brown in the center, concentrating on the future meadow. | |
| We are not afraid to highlight the depth and shadows on the lawn with color. | |
| The next fairly dense layer is a dark red or even burgundy shade. | |
| Now we work with the edges of the picture: dark accents are placed, take light orange and light brown colors and apply them radially or vertically along the edges. | |
| We take yellow, orange and peach colors: we need to mix them like paints using the pulling method. Each time we pull out a few strands and add them to the bun again. This way we will thoroughly mix the shades - you can continue painting. | |
| We pull a very thin strand from the new bun, twisting it at the same time. We lay rows over the picture and cut them with scissors. You can use tweezers - this is how we create individual twigs and straws in the meadow. | |
| Pink strands will serve as flower petals. It would be great if you also mixed a few warm shades. We cut the strands, forming the length of the petals. Let's make several flowers this way. We form the middle from yellow using the pinching method. | |
| The finished picture is trimmed around the edges, removing excess wool, and hidden under glass. |
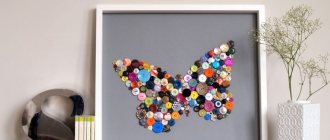
Painting for beginners on paper, not fabric
An interesting option for creating a cat’s face will appeal to many. The creative author used watercolor paper instead of a fabric base, which itself is moderately rough.
| Illustration | Description of action |
| We stock combed ribbons of white, cream, blue (or any other for the background), several shades of green, peach, brown and dark brown, black. We purchase a frame of the required size, and it will need the same proportionate sheet of paper. | |
| Draw a portrait of a cat on paper. We place the paper on the base, having first removed the frame from it. | |
| First of all, we lay out the background, using the stretching method. | |
| Take a dark color and pull out a small strand. We cut the fiber so that its length matches the length of the eyelet side. | |
| Lay out the edges of the ears one by one. | |
| Using lighter shades of brown, we gradually fill the space inside the ears. | |
| We try on the appropriate length of the cat's chin, and take suitable light hair for it. | |
| Having cut the strands, lay them out radially from the muzzle. | |
| To add volume to the design, layers of lighter sand and brown shades should be placed on the chin. | |
| Since the ears were laid out first, now you can beautifully and naturally place the hairs on top of them. | |
| In the center, we begin by stretching to create the cat’s face. | |
| We lay out the cheeks radially from the nose, using different shades of wool. | |
| Eyes are created by pinching. The eyes are laid out with fibers of different shades of green; on top you need to put the black color of the pupil, not forgetting about the white highlight. |
When the work is completed, you can hide it under the frame. We admire our creativity and come up with different interesting subjects for wool painting!
Inspiration from nature
Flowers in wool paintings look beautiful and unusual. Lilies are beautiful and delicate; the lack of clear lines makes them mysterious.
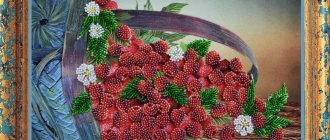
Wildflowers made from wool look especially artistic. Bright poppies on the wall look like a watercolor painting in a gallery.
The woolen sunflowers depicted in the paintings will bring a sunny mood, warmth and joy to your home.
Roses look great in these pictures. You can admire them endlessly.
Spring flowers are charming, and in wool paintings they look so realistic that you can even smell the scent of lilac. The tulips depicted in the picture create the impression that it is spring outside and they were presented as a gift for a wonderful holiday. By the way, it is the spring flowers in the paintings that will become a pleasant gift to the fair sex with the arrival of warmth and the awakening of nature.
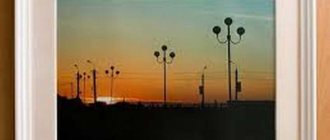
Images with nature motifs are perfect for wool paintings. Space looks fascinating. Its infinity is wonderfully conveyed by this technique of creating images.
Autumn is depicted brightly and colorfully in woolen paintings, and blurred silhouettes create the feeling of drizzling rain.
The sea in the paintings is incredibly beautiful. It is simply impossible to look at them indifferently. Wool conveys the depth of the sea and the glare of the sun on the water well.
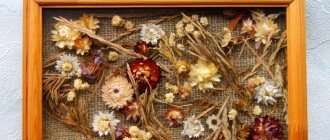
Related article: DIY autumn head wreaths made from natural material
Painting with wool is a lot of fun. Having mastered the technique, you can create masterpieces of unreal beauty. Below, in the selection of photos, you can get inspiration and feel free to start making the painting.
How to fix it?
The advantages of wool painting include the ability to easily make adjustments. This allows you to go back several steps when completing a project, since the layout is done in many layers. All that is required for this is to remove the required part of the layer or individual elements that turn out to be superfluous.
Paintings with wool. Tips for beginners
Such changes, as a rule, do not take much time, but it allows you to practice and gain valuable skills. Don't be afraid, because there is always the opportunity to redo it if necessary! Of course, it is important to know the limits here so that the picture looks easy and remains fresh.
Subjects
The technique allows you to create and choose arbitrary subjects for paintings. At first, it is recommended to choose simpler topics. Over time, the difficulty level can be increased. Paintings with wool
Try to find an experienced master who can share all the intricacies of the technique. There are a huge number of master classes and video lessons available on the Internet, some of which you can find at the end of this article.
See also:
- How to make a felt toy, or felting for beginners
Possibilities of wool watercolor
The development of painting in our time is characterized by the emergence of new techniques that make it possible to create unusual paintings. Today you can easily purchase felt in a variety of colors, which is great for creating real masterpieces using the wool watercolor technique. Using wool fibers of various colors, you can create:
- abstract drawings;
- portraits;
- still lifes;
- landscapes.
Video
How to “paint” with wool
How to transfer a pattern to non-woven fabric
How to mix wool "dyes"
MK for beginners: Lilac herbs
Master class “Spring”: Wool painting for beginners
Master class “Sunset”
Master class: Cat
How to draw a poppy with wool?
See also:
- How to make a felt toy, or felting for beginners
Highlights and shadows
For a painting to be realistic and beautiful, there must be highlights and shadows. This will give each item its own volume.
When laying out, individual parts of the elements should be shaded using a suitable shade of wool.
Vases will look more impressive thanks to the glare. A skillful combination of shadow and light can effectively transform and enliven a picture. To achieve the best result, it is recommended to read the relevant literature, which contains a lot of valuable advice. Paintings with wool