To view a high-quality image from a projector, you need a special design - a regular white wall will not always satisfy your needs. It is quite possible to make a projector screen with your own hands, and your homemade screen will be no different from the analogue from the store. Let's consider what materials are needed to make this structure.
Selecting material and format
The canvas must comply with the main tasks:
- reproduce all information reliably and with high quality;
- distribute the light towards the audience at the right angle so that there is no distortion.
As a rule, thick, opaque white fabric is used for the screen. This could be a piece of awning or stretch ceiling material, sheet vinyl, or raincoat fabric will also work. In addition, even ordinary sheets made of durable fabric, without scuffs, are suitable for making your own projection screen or so-called homemade projector displays.
Image format is also one of the main factors that determines the choice of design. The following options exist:
- standard -1:1;
- video format - 4:3;
- wide - 16:10;
- HD for TV - 16:9;
- for the film industry - 2.35:1.
It is quite difficult to make a screen for a motorized projector yourself due to purely technical problems. The window regulator alone will cost you 1.5 thousand rubles, not to mention other related parts. The material for making the box is not cheap, but you also need bearings and banner fabric.
Backlight repair
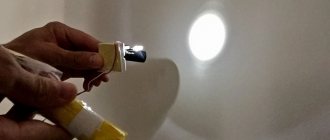
A SAMSUNG GH19LS monitor being repaired with the problem “turns off after a couple of seconds of operation.” The first thoughts arise about the power supply.
Apparently, the monitor has already been repaired since the electrolytes have been replaced. In addition, one of them clearly did not have enough height of the terminal and it was “extended” with a wire. The capacitors are at the wrong voltage rating. It is better to re-solder to those that are needed.
Lengthy repair process
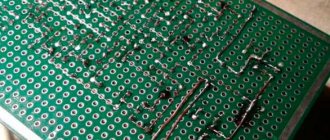
The problem remains. The monitor does not turn on. Next you need to diagnose the converter part. Since the monitor goes out after a couple of seconds, and the power button itself is lit, this means that the backlight goes out. The problem is either in the lamps or in the transformers. When measuring the resistance of the windings of one of them, it turned out that for one transformer it differs by about 10 Ohms. This is a lot, and the difference in lamp consumption increases, which is why the power supply protection is triggered. The way out of the situation is to change the transformer. But it is not so easy to get.
Why two at once? Since the transformers are from a donor and are designed for different parameters, the backlight will light differently. That is, if you leave one “native” transformer, and replace the second failed one with a “donor” one, then there will be an uneven glow. And the inverter will fail sooner or later. In addition, the type of fastening of the terminals of the transformer from the “donor” is different.
There is another way out. The transformers are from a donor, but I had to put a whole board together with them. To do this, it was necessary to supply power and signal wires separately to them. By the way, when replacing a transformer from a “donor”, one more condition is still necessary - the size of the diagonal of the screen. The repaired monitor and the “donor” one must be the same size (or close) since the lamps are different, the current is different, and the voltage is different.
Donor transformers do not wear out as much as electrolytic capacitors.
Soldering is done in place of the power electrolyte of the new board, and the signal is in place of the cable, where according to the circuit there is a signal to turn on the backlight.
Works. The problem was the increased resistance of the winding of the backlight transformer. This may also be due to the end of its service life.
Correct size calculation
To properly build a projector screen with your own hands, you need to take into account the location of the projector and the viewing angle of the audience. The screen is located in front of the audience, and not in front of the projector - this is the basic rule that guarantees the success of the planned event.
The height of the canvas should be approximately 1/6 of the distance from it to the last row of spectators; only if this condition is met, the information will be perfectly readable. The first row should be no closer than two screen heights: for example, height = 1.5 m, which means that the first viewers should sit at a distance of 3 m. Experts assure that it is from this distance that the perception of the plot or information will be comfortable. The lower edge of the canvas should be at least 1.2 m from the floor level - viewers sitting at the very end of the hall will see all the information without shading.
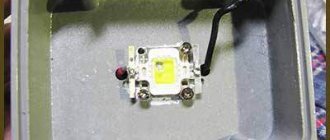
Aluminum based LED panel
Using aluminum sheet as a base for an LED panel has several advantages. Firstly, this design is more mechanically stable. Secondly, a material with high thermal conductivity is better than glass at removing the generated thermal energy from operating diodes.
In this article we will give an example of a small panel 28*26 centimeters, for which you will need:
- aluminum sheet with a width of 28 cm and a length of 26 cm;
- 5 meters of LED strip 5630 SMD;
- power unit;
- power supply wire;
- copper wire with a cross-sectional diameter of 1 mm for connecting pieces of tape into a circuit;
- soldering tools.
How to assemble a DIY LED panel on an aluminum base:
- The tape is cut at the marked places and glued to the base in several rows. In this example, the segments are laid in 20 rows of 25 cm in length.
- In this case, it is convenient to connect the positive and negative contacts of the segments through one wire. That is, on one side a rod of copper wire is laid, to which the positive contacts are soldered, and on the other, a rod connected to the negative ones. The power wire is connected to the first one.
- It is also convenient to use a connector to connect the power supply.
- To insulate and give a more aesthetic appearance, you can stick electrical tape over the connecting wires, and then shrink it, heating it with hot air from a hairdryer.
The power consumption of 5 meters of tape in this device is 160 W. After adding 30% of the margin, the result is 208 W. To ensure stable operation in this case, a 250 W power supply is suitable.
Tools and materials
To make a projector screen with your own hands, you will need:
- fabric chosen for the screen of the required size, for example, our dimensions are 2.6x1.6 m;
- wooden beam, 4 pcs. with dimensions 2500x40x15 mm;
- aluminum box - 5 pcs., 2500x65 mm;
- borders for frame - 4 pcs.;
- construction stapler;
- thin felt;
- scissors for cutting metal, construction knife;
- white paint and paint roller;
- wood screws;
- emery cloth;
- screwdriver to make work easier;
- fiberboard sheet.
Screen makers claim that such homemade products have specific advantages: low production cost, the surface can be made in exact accordance with the design parameters for a given room.
Make a frame
The frame will be the base on which the projector screen will be fixed. Creating a smooth frame will help optimize the screen as much as possible. Consider the following points:
A Brazilian travels 36 km by bike every day to take his loved one home.
Smooth and fresh skin: dermaplaning, or why a woman needs to shave her face
The money tree pleases with lush flowering: my secret is in caring for the leaves
- If the boards are too long, cut them to the desired length.
- Place corner braces on the four sides where the boards meet.
- Install screws into the wood strips through the corner brackets.
- Check how stable your frame is. If necessary, add additional parentheses.
Manufacturing algorithm
Detailed instructions will help you make a projector screen yourself.
- Two boxes will be used as guides along the width of the future screen, the other two will be cut to 1.5 m - this will be the height. Each box is sheathed on one side with timber.
- From each edge of the box we make an indent along its width, and make cuts using metal scissors. Then we bend the edges, leveling them with a wooden mallet. We do similar actions with the second one, drill holes in the aluminum box and fasten it with self-tapping screws. We get a strong frame.
- In a similar way, to give greater rigidity to the structure, we fix the remaining fifth box in the center, in which we also make cuts with scissors. We fasten it to a wooden beam with self-tapping screws, making small holes along the edges.
- We cover the entire frame with fiberboard, cut off the excess and chamfer it with emery cloth to remove sharp edges that could damage the screen material. It is better to make fastenings with a stapler, using large staples 10-12 mm.
- A thin felt lining is placed on top of the structure - it serves to level out possible unevenness due to seams and protruding staples.
- The prepared canvas for the screen should be uniform, without seams—this is done to improve image quality. The tension of the canvas is done gradually from opposite sides: we fasten side No. 1 with a stapler, stretch the material without fanaticism and folds on the opposite side No. 2, and do a similar fastening at the ends No. 3 and No. 4. Trim off excess fabric using a knife.
- We cover the entire canvas in two layers of white paint, it is best to use a paint roller.
- To ensure high-quality fastening of the manufactured screen to the vertical wall, we screw a block to it, onto which it will be convenient to fix the entire structure. We install a decorative frame around the perimeter, which enhances the entire design.
How to assemble an LED display
At the first stage of manufacturing a homemade video screen, it is necessary to make a reliable supporting metal structure to accommodate a large number of electronic components (modules, controllers, power supplies - drivers that convert the 220 V AC mains voltage into 12 V DC). The design is a frame made of a square profile pipe. A typical frame option is shown in the photo below.
LED screen frame with P10 modules
At the second stage, P10 modules are assembled, attached to the frame close to each other and connected using cables with high-quality male-female connectors. Modules are often fastened using reliable magnets, which greatly simplifies the assembly stage and especially disassembly during repair work.
Next, on the back side of the frame, power supplies and controllers are located, which are responsible for processing video information and distributing it to specific modules and small pixels. The back wall of the video screen is made of metal sheet or aluminum composite panel. How to install an LED screen is shown below.
LED screen diagram
Original screen
Many models of modern projectors have excessive brightness, which can create black distortions during display. To eliminate these nuances, they make a black screen - unusual and very original. Such a coating will reliably absorb excess of any color, with its help you will successfully reduce the effects of external lighting, excessive projector brightness, and get the deepest black colors that a white screen cannot reproduce.
When making your own screen, you can choose the most suitable option for you; do not use the usual standards - give freedom to your imagination within reasonable limits.
Video projection equipment
Recently, projectors have become increasingly popular. Fans of cinema appreciate the benefits of video projection equipment, which allows them to enjoy watching films on a huge screen at home.
Large images that give realism to what is happening on the screen, and special effects leave a lasting impression. A real cinema at home! For this category of viewers: which is better - a projector or a large TV, the question has been resolved long ago and unambiguously. You can understand fans of film projectors and rush to quickly exchange their plasma TV for the device they like.
But don’t rush, let’s first compare the advantages and disadvantages of both types of devices.
Home Projector Review
There is also a lot of this stuff (projectors) there, but firstly, the prices are affordable, and secondly, it was there that I found what I needed: the XGIMI MoGo portable projector, which can work even without a network connection - for this it has built-in 10,400 mAh battery. It costs as much as an average TV, but you can take it with you to any room, and it has a larger “screen.” It’s also a more or less well-known brand; I didn’t want to take a Chinese name at all.
But, damn it, 43 thousand rubles! This was my biggest purchase with Ali. It was scary, yes. It’s one thing when you order a charger for 2 thousand rubles or headphones for 10, but here the price is much higher, plus it’s a projector - what if something happens to it during transportation? I was lucky, the move went smoothly, the projector arrived intact.
Looks absolutely gorgeous
After two years of use, dirt has accumulated on the bottom
It looks very cool, just like an Apple-style device. In front there is a projector window and a speaker, in the back there are various interfaces for connection. For example, you can connect it to a computer using an HDMI cable or output sound to external speakers. By the way, the sound here is from harman/kardon, this is not just for you.
720p camera
There are ports to connect to a computer or external speakers
On the top you can control playback, there is a pause/play button and volume buttons. Plus, XGIMI MoGo has Bluetooth support, you can even connect a joystick to it if you decide to use the projector as a screen for games.
You can control playback directly from the projector
Or you can do it from the remote control
But in general, all he needs is Wi-Fi and that’s it. I charged the projector, placed it on the table at a distance of several meters from the wall (preferably white), connected it to Wi-Fi and you can watch a movie. The device runs on MoGo OS, but in fact it is a regular Android TV, just with its own shell. Therefore, you can install YouTube and any other services there without any problems. I've been using the cinema pub for a long time, I downloaded it on this projector in literally 10 minutes.
The main advantage in comparison with a TV is that you just have a huge bomb screen. TVs with this diagonal are much more expensive. And there is no need to make any embeds for the wires, ditch the walls or throw cables along the floor. On one charge, the projector works for 2-3 hours, which is enough for any film except the director's cut of Titanic.
A TV with such a diagonal would cost me 150-200 thousand
The built-in sound is generally good, but I made it even better by connecting a JBL Extreme speaker via Bluetooth (yes, that's possible too). There are no wires at all and the sound is top-notch, the main thing is to put it closer to the wall. Of course, if you want, you can go crazy and connect external speakers around for surround sound, but I really like it without it.
This makes it easier to see what size the screen is
There is also an opinion that watching an image from a projector is more useful than just watching TV, but I’m not an expert on this. If yes, that's really cool. Maybe you know something about this, share it in the comments and in our chat in the cart.
And the projector also looks cool with the Mi Speaker Art, as if they were made at the same factory (in fact, they are not).
Isn't this Xiaomi's daughter? (joke)
Once again on the models. I have XGIMI MoGo, I’m happy as an elephant, now it costs around 38 thousand rubles. The resolution of this projector is 720p, but it’s not like a TV - due to the fact that the image is scattered, you don’t feel it. This manufacturer has even cooler projectors, for 61-65 thousand rubles, they already have 1080p resolution and 3D support, so you don’t have to go to the movies at all. I prefer to watch without 3D.
There are also more professional solutions on Ali with support for 4K and other goodies, but this is just for those who want to get really confused. According to the mind, here you already need to make mortgages, hang the projector on a special bracket, distribute sound around the room. The asking price there is already about 100 thousand rubles - I wouldn’t risk ordering something like this from Ali, although if my projector arrived without problems, why not?