Clay is a natural material that has been valued and used since ancient times. Plastic and soft at first, after firing, it turns into durable household items, toys and decorations.
With the development of civilization, the popularity of clay is growing, and in our time it is becoming a means of relaxation and the realization of creative potential.
Children, working with clay, develop coordination and fine motor skills, imagination and imaginative thinking. Adults relax, letting go of the stress of the day.
An original clay jug made by a novice craftsman will delight any housewife. Also, DIY polymer clay crafts will decorate any interior and make a wonderful gift.
What is polymer clay
Polymer clay is a plastic substance made on the basis of polyvinyl chloride intended for modeling. During heat treatment, the polymer hardens and becomes similar to ceramics or plastic. Heat treatment involves baking the material at a temperature of 110-1300C. Both large sculptures and miniature crafts are created from plastic for modeling.
Thermoplastic consists of the following components:
- PVC (base), represents gelatin-like elements;
- liquid substances (plasticizers) that help plastic harden at high temperatures and retain its shape.
Polymer clay varies in texture and color. It can be hard and soft, and has different shades.
There are also such characteristics of plastic material:
- liquid;
- translucent;
- with the addition of impurities, the result is a metallic shade;
- pearl;
- fluorescent or luminescent;
- with glow effect.
Properly selected material affects the quality of the finished craft.
The most common brands of plastic are:
| Name | Manufacturer country | Advantages | Flaws |
| Tsvetika | Russia | Reasonable price | Great hardness, has a poor color palette. The finished product becomes fragile. |
| Fimo | Germany | A wide range of shades that retain their saturation after heat treatment; there are options with the addition of mother-of-pearl and marble. | Expensive cost (from 230 rubles per 57 g plate). |
| Kato | USA | High hardness | It needs to be baked at high temperature. |
| Cernit | Belgium | Durability, adds the effect of transparency and marble to the products. | May change color after heat treatment |
| Premo, Sculpey | USA | Extensive color palette | |
| Artifact, Sonnet | Russia | cheap (100 rubles for 56 g), wide range of shades. |
Where to get or how to prepare clay
Polymer clay is a material whose structure and characteristics resemble plasticine, known to everyone since childhood, but is capable of hardening, making crafts durable. There are several types of clay: those that harden only after baking or firing, and others that do not use high temperatures.
Clay can be bought at any stationery store or made at home with your own hands. Such a material cannot be called polymer, since when creating it at home, the composition will include completely different components. However, the properties of such a material will be similar to purchased polymer clay.
To obtain such a mixture you need:
- 250 ml of PVA glue and the same amount of corn starch;
- 2 tbsp. spoons of lemon juice;
- 1 tbsp. a spoonful of Vaseline and the same amount of any cream;
- Polyethylene film;
- Surface for kneading;
- Bowl and spoon for preparing the mixture.
These ingredients are enough to prepare 350 grams of finished material. All ingredients, except the cream, must be mixed in a prepared container and placed in the microwave for half a minute at maximum speed. The cream is needed to lubricate the surface on which the clay will be kneaded.
After microwave, you need to mix everything again and place it on a surface greased with cream and knead intensively, like regular dough, for 5 minutes. Subsequently, an elastic plastic material should form. Next you need to give it a shape and wrap it in a cloth to remove any remaining water. When the clay has cooled, it is ready for use.
Tools needed for sculpting
Crafts from polymer clay are made using the following tools and devices:
- Smooth work surface. Paper, polyethylene, smooth tiles or glass are suitable here.
- A rolling pin will be needed to roll out thin layers of clay. It is replaced with a bottle or other round object, with the exception of wooden specimens.
- The pasta machine is a noodle cutter with smooth shafts. Helps to roll out the plastic and create a smooth color transition. To make crafts from polymer clay easier, you need a paste machine.
- Blade or utility knife. Suitable for cutting and cutting.
- Needles and toothpicks are handy tools for creating holes. They are used in heat treatment of beads.
- A device for sanding and leveling crafts. After baking, the plastic material swells slightly, the surface is polished with sandpaper or various nail files.
- Gloves are used to avoid leaving fingerprints on the smooth surface. It is better to purchase thick rubber gloves that have roughness on one side.
- An oven is necessary for baking products. A mini-oven with a temperature control device is suitable.
- The thermometer helps to accurately determine the temperature regime.
- Wire cutters, round nose pliers and pliers are needed for assembling finished crafts and processing wire.
- Varnish for baked clay adds shine and richness to the finished souvenir, and also protects it from the influence of the external environment.
- A varnish brush made from natural or synthetic materials.
- A device for drilling beads with thin drills (1-2 mm).
- Napkins are used to wipe hands and tools from thermoplastic.
- Various cutting molds.
- Stacks make it easier to work with small elements.
- Molds are used to create identical elements.
- The foil helps form the base of the product.
- Wire is needed to create a frame.
- Cling film is suitable for storing plastic clay.
- The extruder functions like a syringe and makes it possible to create unique color transitions.
Cold porcelain recipe
Cold porcelain is used for sculpting flower arrangements. Finished products dry on their own if the temperature is maintained within 1 day. To prepare the composition you will need:
- 2 tbsp. Vaseline;
- 2.5 tbsp. corn starch;
- 15 grams of baking soda;
- PVA glue 100 gr.
In a plastic container, mix all the ingredients together. Particular attention should be paid to starch and petroleum jelly. Upon contact with each other, a large number of small lumps are formed, which must be mixed well until a dense mixture is formed.
Gradually add baking soda. When the polymer paste begins to thicken a little, we begin to add the adhesive composition. When the mass becomes soft, place it on the table. To prevent the composition from sticking to your hands, I use corn starch.
Some experts recommend lubricating the skin of your hands with a small amount of Vaseline. A moistened surface will allow you to quickly mix the composition with an elastic structure.
How to work with polymer clay and bake?
Crafts made from polymer clay are made in several ways:
- Bake in the oven . First you need to heat the device to 110-1300C. After this, place the formed craft in the oven, placing it in a ceramic or earthenware dish. Use a baking tray previously lined with baking paper. The thicker the product, the longer it takes to bake. The continuation time of heat treatment ranges from 5-40 minutes. Complex works are put into the oven several times. Finally, let the craft cool without removing it from the oven.
- Cooking in boiling water . Here you will need utensils that are not intended for cooking. First you need to immerse the clay object in boiling water for 3-4 minutes. If the souvenir is thick, then the time is increased, 1 minute is added for every 1 mm of thickness. Remove the finished craft from the water and rinse under running cold water. The advantage of this method is that the item will not burn or lose shape. One of the disadvantages is that some types of clay at the end of cooking acquire a light white coating and lose their brightness.
- There is self-hardening clay . Depending on the manufacturer, the hardening time ranges from 2 hours to 2 days. This material is stored in an airtight container or in plastic wrap.
What do you need to make clay crafts?
Regardless of whether the master will work with polymer or fried red clay, he must make sure that everything he needs is at hand.
To work on clay crafts, you need to stock up on a large, flat board, sharp cutting objects, including a stationery knife and several types of scissors, as well as all kinds of rolling pins. They are needed to roll out layers. At the same time, rolling pins can have a textured surface, which will allow you to quickly create interesting designs. Various skewers, toothpicks, needles and pins will also come in handy. Beginning craftsmen should definitely stock up on several types of molds, but they can also be useful for experienced needlewomen.
For more comfortable work, latex gloves should be used. They are needed not because clay is toxic or dangerous to the human body, but solely because the material gets dirty quickly. If you work with gloves, the surface of the products will be cleaner and smoother, without unwanted papillary patterns. You should also prepare wet wipes to quickly get rid of dirt.
Do not use large amounts of water during operation. Only gentle wiping of the product is allowed. But after the clay has completely hardened during firing or heat treatment, it can be washed even under the tap, and this will not harm the product. After all the main elements are ready, you can proceed to work on the clay product.
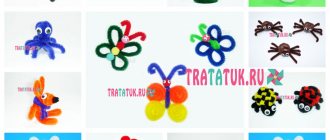
Toys
Simple toys are made from thermoplastic for children.
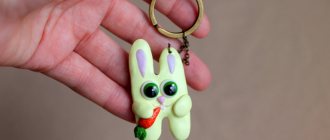
For example, to design a bunny you should follow these steps:
- Roll a large ball out of plastic material; this will be the body.
- In the round blank, squeeze out indentations under the eye sockets, into which to insert black pieces of plastic. Attach the pink nose a little lower.
- Then, using a color of the same shade as the body, form the ears and paws.
- Bake the figurine in the oven for 20-30 minutes.
- A chick is made in the same way, only instead of legs, a tail and wings of a different color are fixed.
Step-by-step instructions for making a minion:
- Roll the baked clay into a large ball.
- Stretch the workpiece slightly and flatten it on one side.
- Attach large eyes, hands, a smiling mouth and a blue overall to the convex surface.
Master class on creating a cheerful little man:
- Make a ball out of green plastic.
- Flatten the workpiece in the form of beans.
- Using tweezers, press out holes for the eyes and insert beads there.
- Use a thin knife to draw a mouth.
- Use short thin black plastic rods to make the hair stick up and insert it into the head.
- Form handles from white plastic material and attach to the body of the man.
- Place the character on a round stand, the diameter of which is larger than the product.
Some features of this material
The properties of the described material include the following characteristics:
- has a fluid state of aggregation;
- half translucent;
- has some additives that give a silver color;
- contains iridescent shades;
- it sometimes contains spectacular, iridescent enamel;
- reflects light rays.
Crafts for dolls
Crafts for dolls are made from polymer clay.
Step-by-step instructions for creating a handbag:
- Select baked clay of a bright color and sculpt a miniature rectangle out of it.
- Roll out a thin sausage from the same plastic and attach it to the product in the form of a handle on both edges.
- Bake the dough in the oven for 10-15 minutes, then cool it.
- On one side of the bag, lay out multi-colored patterns or flowers with thermoplastic.
- Bake the item again, then cool.
Master class on creating doll watches:
- From beige plastic, form a watch case in a round or square configuration.
- Use a toothpick to squeeze out the dial on the workpiece.
- Insert small pieces of wire into the body on both sides to attach the strap.
- Bake the part in the oven for 30 minutes. at a temperature of 110-1300C.
- Take a strip of leather and align its edges. The width of the leather belt should match the inserted wire pieces.
- Using acrylic paint, paint the clock. It is recommended to use a silver or gold shade.
- Thread the strap through the wire.
- At the ends of the bracelet they put fittings or tie the belt with a bow.
The best master classes
For proper and quick learning, video lessons on making clay crafts have been created in various sources. They describe in detail the processes of making certain products, taking into account the selection of clay, tools for work, subsequent processing of finished products and many additional tips.
Using a clear example, you can easily learn how to work with complex techniques and master the correct use of various techniques.
Note!
- Animals made of plasticine - a master class on creating crafts with your own hands. Unusual modeling ideas + photo examples of finished works
- Plasticine crafts for grade 4 - reviews of creative ideas. New products, step-by-step master classes for schoolchildren + 150 photo examples
Salt dough recipe: TOP 100 photos with simple modeling dough recipes. Ideas for DIY salt dough crafts with examples of finished work
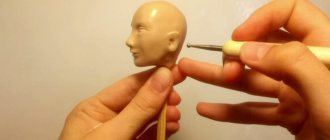
Figurines
To create a figurine from polymer clay, you should make a plan, which is as follows:
- Maintaining proportions. For example, the figures of a gnome and an elf have the same height, but the volume of their torso is different.
- The ratio of the proportions of the arms, legs, upper and lower extremities. These parameters depend on the type and age of the magical character. Thus, among trolls or gnomes, the proportions emphasize the unusualness of fairy-tale inhabitants.
- The frame is made to hold all the details of the figurine. Large figures require the use of foil and wire. The skeleton of characters that have extensive flat surfaces may consist of elastic wire mesh. For tall creatures, metal rods are used.
- Using templates to help maintain proportions.
Master class on creating a complex figure:
- Heat the plastic material of the desired color.
- Form a frame from the wire.
- Increase the volume of the figurine to the desired size using foil.
- Wrap the workpiece in thermoplastic; during the wrapping process, it is recommended to smooth out unevenness with a moistened napkin or rag.
- Bake the craft in the oven, or leave to harden.
- Finish the remaining touches with a toothpick and attach the fittings.
- Finally, apply a layer of varnish to the head of the figurine.
- Place the figurine on a stand made of glass, with a thickness of 2 cm and an area 2 times larger than the base of the product.
Recommendations from experts
Tips for using and storing polymer clay help you make high-quality products that can last a long time. They include:
It is recommended to lubricate the surface of your hands with rich baby cream. Such a requirement will help prevent the occurrence of an allergic reaction and the adhesion of polymer particles.
To color polymer clay, it is recommended to use liquid dyes, which are added before kneading.
Finished cold porcelain products are painted with dry dyes. For work use a fluffy brush.
To make cold porcelain products stand out for their unusual appearance, you can use sparkles or small glitters.
If you use potato starch instead of corn starch for work, the finished polymer paste will be more dense. During the sculpting process, the elements should be thin.
If the clay becomes hard after some time, then a few drops of glycerin or Vaseline will help make it plastic.
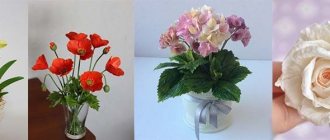
Flowers
Crafts from polymer clay, such as flowers, can be easily made by novice needlewomen.
Step-by-step technology for making calla lilies:
- Select 2 multi-colored light-colored thermoplastic blanks and make a sausage with each of them.
- Roll one piece around another.
- Roll the formed figure into a ball. Carry out similar actions until a marble shade appears.
- Next, cut the sphere into 2 equal parts.
- Form a rounded flat plate and slightly extend its edge, then pinch it with your fingers.
- Roll the opposite end into a paper bag.
- Straighten the edges, the result should be an opening bud.
- Use a toothpick to make small holes and insert beads and an earring into them.
Instructions for forming a rose:
- Make a sausage from a piece of clay, cut it into pieces, then form 9 balls of different sizes.
- Make petals from round blanks. Place the ball on your left palm and press it with the thumb of your other hand, creating a leaf. Make the edges of the part thin and compact the base.
- Do the same with all the balls.
- To assemble the inflorescence, twist the petal into a roll.
- Then attach all the pieces to the center, starting from the smallest to the largest. Each subsequent detail must cover the previous one.
Clay crafts for beginners
Where is the best place to start? From a sketch. Print or draw what you want to make. This could be an animal figurine or a small panel that would make an excellent refrigerator magnet, a medal or a horseshoe for good luck.
Decide on the material. For crafts with children, it is better to choose self-hardening polymer clay. If you are ready to spend more time, take natural ones. The work steps will be similar:
- Knead the clay.
- Roll it out, roll it into balls or sausages - it all depends on the idea.
- Cut out details, create decor.
- Connect the pieces together.
- Leave the craft to harden or bake.
- Decorate if necessary.
- Decorate with beads, ribbons, sparkles.
- Cover with varnish.
Adults can start getting acquainted with polymer clay by making flowers. It is better to start with plants with large petals: koala lilies, poppies and daisies. Once the basic techniques have been mastered, try making roses and peonies.
Keychain
To make a keychain with your favorite photo, you need to adhere to the following technology:
- Separate the required amount of plastic material, then knead and flatten it.
- Take the selected photograph and attach it to the part with the front side, align and iron, while removing air.
- Wipe the surface with a cotton swab soaked in alcohol.
- After drying, apply the alcohol solution another 2-3 times.
- Remove the paper from the image, leaving the paint layer intact.
- Use a knife to cut off excess material, giving the product the required configuration.
- Bake the keychain along with the design.
- Cool the craft and varnish it.
- Finally, attach the fittings.
Step-by-step design of a souvenir with imitation “leather”:
- Roll out a layer of polymer clay to the desired thickness.
- Use your hand to crush a piece of foil, then straighten it.
- Press the crumpled metal paper against the plastic to create prints.
- Cut the shape of the future product from raw materials.
- Make a hole for the fittings.
- Treat the edges of the workpiece with crumpled foil.
- Bake the keychain, cool and cover with brown acrylic paint.
- Wipe the craft with a towel and hard material.
- Attach the fittings.
What is better to sculpt first?
The easiest way to make a rose. To do this, you need to make a ball and give it the shape of a drop - this will be the base. Then make several smaller balls and flatten them with your fingers - these are thin petals that need to be attached around the base until you get a full-fledged flower.
To make beads or earrings, just take a square shape and cut out the required number of shapes - this will help make each one the same size. After the shape, roll into balls, and then use needles or toothpicks to make holes for the lace.
Decorations
Handicraftsmen can make designer women's jewelry from polymer clay.
Step-by-step process for designing earrings:
- Silicone molds are used for blanks.
- On one side of the part you need to insert fastener fittings.
- Level the plastic material everywhere using a toothpick.
- If you need to highlight some area with a different shade, use a soft brush.
- For stylistic earrings, take any sweet or fruit as a sample and make a small copy of it.
- The height of the finished product should be no more than the length of the phalanx of the little finger.
- Using a toothpick, apply the appropriate structure in the form of veins or lobes.
- Secure the fitting pin in the “stem” area, mask the joint with plastic of a suitable shade, and then bake the craft.
- Cut off the excess rod with pliers, bend the end with round nose pliers, then insert the connecting ring and attach the shwenze (hook) to it.
- Earrings are optionally decorated with a clay leaf, chain or beads.
- Finally, bake the product and apply the finishing touches with acrylic paint.
New Year's shares
Handmade gifts are always more valuable than store-bought ones. Have you long dreamed of trying to sculpt something or do you already know how to do it? There are plenty of ideas for New Year's crafts.
Symbol of the year. Animal figurines can be made in the form of figurines, magnets, and Christmas tree decorations. You can decorate mugs, spoons, keychains with funny animals:
- Christmas trees, snowmen, snowflakes, mittens and socks for gifts, etc. Everything that is associated with winter and the New Year can be made from clay. The functionality and size of crafts may vary.
- Jewelry: snowflake earrings and icicle pendants, beads and bracelets for fashionistas. Imagine!
Several centuries ago, working with clay was a daily necessity, but even then people noticed how calming this material was. Today there is no need to sculpt household items, but the desire to create and create something with your own hands has increased.
Working with clay, a person becomes a real creator. From the origin of an idea to its implementation is a magical process in which talents are revealed and dreams are born.
In addition, the therapeutic benefits of working with clay have long been proven, and a whole area has emerged - clay therapy.
What will motivate you to try making your first piece? A desire for creativity or an opportunity to relax and redirect attention? It doesn't matter. The main thing is that you will plunge into an amazing world that will reveal you in a new way.
Animals and birds
Master class on making an owl from baked clay:
- Draw the outlines of the bird.
- Roll out the plastic of the selected shade and sculpt the body in the image of the image you made.
- Form a head from a material of a different color.
- Using any convenient object, press the recesses of the eye sockets close to one another.
- Then beads should be inserted there.
- Using a toothpick, make incisions like feathers.
- Make an oblong nose, which needs to be attached in the space between the eyes.
- Use a needle to pierce holes for the nostrils from below.
- Create wings from plastic material in the form of droplets, lay grooves on them to depict feathers.
- Roll balls for the paws, flatten them slightly and fashion a tail.
- Attach all the parts to the base and bake the figurine.
Step-by-step process of designing a hedgehog:
- For the body, use foil to form a dense oval of small size.
- Take white plastic and roll it into a ball, then flatten it and wrap the resulting cake around the oval.
- Connect all edges of the clay plate and smooth the joints.
- Create a small ball from milk clay and attach it in the abdominal area.
- Push the navel in the center.
- Make a neck from plastic of the same color and adhere it to the body.
- Form arms and legs from 2 white sausages and attach them.
- Make the head in the same way as the body.
- Shape an oblong nose, sculpt ears from 2 balls, draw a mouth and press through the eye sockets.
- For the eyes, you need to insert brown clay blanks, and attach a black plastic ball to the tip of the nose.
- Bake the resulting figure in the oven for 15 minutes.
- Divide a thin dark brown sausage into small pieces, then form a carrot from each, these will be needles. Make a lot of such preparations.
- Place each needle on glue and secure it to the back of the figure. They can be placed in any direction.
- Bake the craft for 30 minutes. in the oven.
- Finally, tint the needles with brown acrylic, and cover the entire body with beige acrylic paint.
Materials used in the product process
The workplace must be equipped and accompanied by a favorable atmosphere. The following criteria must be adhered to:
- work must be carried out on a hard surface: wood, glass, tile;
- before starting, you should cover the work area with polyethylene or a special oilcloth or paper surface;
- an even, smooth object for rolling out flexible pieces of clay;
- a special apparatus for rolling out clay, which also contributes to smooth color transitions;
- sharp knife;
- piercing, thin objects to create indentations;
- devices for smooth finishing;
- napkins;
- pliers;
- transparent varnish.
Autumn and New Year crafts
Crafts made from polymer clay will decorate the Christmas tree.
Step-by-step technology for making a ball:
- As a base, take a foam ball or form a sphere of foil with a diameter of 3-4 cm. If the toy is made entirely of plastic, it is difficult to bake it correctly.
- Cover the created figure with a clay mass and roll it in your palms so that it acquires an even round configuration.
- Take a paperclip and insert it into the part so that it protrudes slightly.
- Roll the ball again in your hands to secure the paperclip.
- The next step involves baking the product.
- Cool the toy, then use aerosol paint to create a background shade. Dry the sphere.
- Finally, paint the craft with a brush. You can draw New Year's patterns, Santa Claus or a snowman.
- Tighten the thread into the eye of the paperclip and tie a loop.
To make a bracelet with leaf decor, you need to follow the following instructions:
- Take polymer clay of 4 warm bright shades. Separate small pieces and roll them with a rolling pin into a layer of 2 mm.
- Using a template, cut out leaves from the rolled out pieces using a knife.
- You need to make 2 parts from each color.
- Using a wavy blade, trim the edges of the leaves.
- Glue the multi-colored parts onto a tin can, making sure the edges of the leaves are securely fastened together.
- Send the product to bake in the oven for 20 minutes. at a temperature of 110-1300C.
- Cool the baked bracelet and coat it with brown acrylic paint.
- Dry the craft and sand it with sandpaper on both sides.
- Finally, apply varnish intended for polymer clay to the finished decoration.
Roll up balls and ropes
One of my favorite ways to engage children is to have them roll clay ropes (“sausages”) of different lengths and sizes.
Have them try this with their eyes closed. This way they will use their sense of touch and their hands will understand where they need to move and how hard to press. Try rolling ropes and balls of different sizes and connecting them. Random shapes will suddenly turn into people, animals and other shapes.
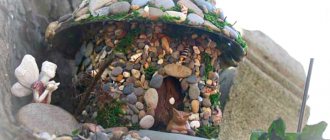
You can also use clay as a building material - along with sticks, stones, shells, beans, twigs and other inclusions - to build forts, shelters, fairy houses, bridges and the like.
Other sculpting ideas
Step-by-step preparation of clay sweets:
- Combine pieces of clay of bright rich colors.
- Form multi-colored barrels and cut each piece into 3 parts, then lay them out in a stack and squeeze through a medium-sized circle.
- Twist the resulting lollipops into a spiral and, if desired, wrap them in a flagellum.
The plastic material will make an exclusive photo frame.
Step-by-step process of its registration:
- Take plastic of 3 different shades, then stretch it and roll into small balls. One by one, put them into the syringe.
- Squeeze out the thermoplastic with a syringe.
- Fold the resulting sausages into a square, placing 3 pieces on each side.
- Separate the glass from the collapsible photo frame and degrease it with vodka or alcohol.
- Cut the formed square into plates and place them on a glass surface.
- When laying out a plastic part, leave a protrusion so that you can bend it against the side of the glass.
- Take a large bead and apply it in the form of a stamp to a multi-colored border to make an additional ornament.
- Bake the made frame in the oven at a temperature of 1300C.
- Finally, coat the product with varnish.
Due to its affordable price and elasticity, many needlewomen produce crafts from polymer clay, and at hand-made fairs you can often find amazing souvenirs made from this material. The main thing is not to be afraid to experiment and show your imagination.
We teach children
Every child will be extremely happy if, with your help or independently, they try themselves in the creative process. There are a huge number of options for clay crafts for children.
The most interesting part will undoubtedly be the process of making products from the surrounding world. Modeling cats, dogs, hedgehogs, flowers, berries and vegetables will allow you to show your imagination and develop original thinking in your little creator.
Rules for baking clay
Baking in the oven is accompanied by the following actions:
- the oven should be preheated no higher than 130 degrees;
- baking is carried out in a port wine glass, which is covered with special paper;
- the clay product is placed in a ceramic base;
- baking time 30-35 minutes;
- large-scale works are subjected to heat treatment repeatedly;
- at the end you need to wait until the degree of heating of the clay decreases without removing it from the oven.
Self-hardening paste recipe
A popular polymer clay recipe often used for crafts in Latin America.
Tools:
- PVA glue – 1 cup.
- Water – 1/2 cup.
- Corn starch - 1 cup.
- Glycerin – 1.5 tablespoons.
- White vinegar – 1.5 tablespoons.
- Cold cream with lanolin – 1.5 tablespoons.
Preparation method:
- In a heavy-bottomed saucepan, combine half a cup of water with 1 cup of cornstarch.
- Heat the mixture over low heat until the starch has dissolved.
- When the starch has dispersed, add PVA glue.
- Add 1.5 tablespoons each of white vinegar, cold cream and glycerin.
- Heat the mixture over low heat until it begins to pull away from the sides of the pan and takes shape.
- Place the clay on a flat surface and knead it well with your hands.
- Cover the clay with a damp cloth and let it cool.
- When the dough becomes homogeneous and smooth, it is ready to use.
- Store in a cool, dark place in an airtight container.
Helpful Tips:
- When the dough begins to pull away from the walls of the pan, it should be immediately removed from the heat; if it overheats, it may become excessively hard.
- Glycerin can be purchased in the baking department.