03/16/2020 Crafts with cats Share
Felting cats from wool is very exciting; it is this technique that occupies almost one of the first places in the modern world of needlework. Today, products made from wool are especially popular.
Using wool using the felting technique, you can independently create a soft and warm toy that will simultaneously carry beauty, individuality, and originality. When creating a toy, you can be sure that your child will play with an environmentally friendly toy.
Step-by-step production of a toy
The cat is not felled as a whole, but in separate parts. First the head and body, then the ears, tail. They “draw” the eyes, enlarge the cheeks.
Torso and head
For the body, take some yarn and roll it into a tight, slightly elongated ball. Using a coarse needle, begin felting a cone-shaped figure. The head is made from a smaller volume of yarn. Also roll it into a tight round ball using a coarse needle.
Place the future head on the thinner part of the body and attach it, piercing through both blanks at the same time. You will get a cone-shaped body with a ball-head. Continue to felt the inner wool with a coarse needle until the looseness eventually disappears.
Determine which side the front of the toy will be on, and use a thin needle to lay a groove along the cone of the body to imitate the legs.
To give a graceful curve to the cat's body where the butt should be, apply a ball of fur and, carefully leveling it, press it with a thin needle. Repeat extension if necessary.
Ears, paws, tail
Make the ears triangular by folding two identical pieces of yarn into such shapes at once. Use a coarse needle, then a fine one, placing the future ears on a foam cushion. Turn over often to ensure the ears are evenly dense. On one side of the triangle, leave the “shaggy” ends of the fur, with which the ears will be attached to the head.
Bend the finished ear slightly in half, spread the furry part over the spherical surface and press with a needle. Do the same with the second ear.
At the bottom, attach small balls of fur to the paws, adding volume and imitating paw pads.
For the tail, prepare the yarn in the form of a cord, twist it and fold it in half. Attach one end to the back of the cat.
“Drawing” the face
For the eyes, seal the area with a needle, then attach a small piece of blue yarn and attach, carefully “outlining” the ovals of the eyes. Slightly “sink” the eye sockets. To do this, make more punctures in the place where the yarn needs to be “kneaded” and compacted.
Make the pupils. They can simply be stitched with black or green threads. For the muzzle, attach a ball of fur just below the eyes, compacting it, and give it the desired shape. Create “paths” for the mouth. Give the cheeks a roundness by felting a little fur. Make the nose with pink wool.
Dry felting toys
– cats are almost finished. All that remains is to “smooth the fur” with a thin needle - trim it, correct it, if something is not lying right, it is bristling. Perform superficial punctures, lightly piercing the wool. For decoration, make a flower or a heart. Attach the heart to the cat's neck using a woolen thread. The charming creature will delight you with its appearance.
Caring for the product The density of the finished product should be such that when pressed or compressed, a very dense, homogeneous body is felt. If everything is felted correctly, very tightly, then such a toy is not afraid of washing. Once wet, it will not shrink and will not lose its original shape.
| Comments to the news “ Dry felting of toys. Kitty. Master Class
” is already 0:
Other options
Having mastered this technique of felting a kitten, you can try other ways to create a toy so that each animal turns out unique!
Method No. 1
For a more natural look, the kitten’s body can be made not from 2 blanks, but from 3: the back part of the body in the form of a medium-sized oval, a larger ball for the head, and a smaller one for the joint (neck and front part of the body).
In this case, it will be necessary to lengthen the front legs in relation to the hind legs and change their shape. In addition, you will have to work out more joints. But the result will be a real adorable kitten!
Method No. 2
Some craftswomen do not roll the pieces together, but sew them on. To do this, the prepared parts need to be made denser so that they are easier to process with threads. And the joints need to be carefully worked out with the main color so that the threads are not noticeable.
This method is often used if the toy is not being prepared for an exhibition, but as a gift for a child. The threads make it stronger, and you don’t have to worry about the kitten falling apart in your hands.
Step-by-step master class on creating a kitten from wool using the felting technique
In order to felt a kitten using the felting technique, we take a padding polyester for the base. Using a gypsy needle and thread, we form an egg-shaped blank from padding polyester as in the photo below:
Then be sure to fluff the wool well with your hands.
We put the fluffed wool on the egg-shaped workpiece and begin to roll it using a coarse needle No. 36 (it can be replaced with a toothpick or sharpened wire - whoever comes up with what). At the same time, remember that the needle should be stuck as deep as possible so that the wool stretches to the central part of the workpiece.
If everything is done correctly, a density will form inside, and the surface will remain loose. Let's look at the photo.
Let's prepare blanks for the paws. We carefully dump each of them to the desired state - they should be loose. We leave the wool loose on one edge.
Slowly, carefully, using the help of a needle, we roll the legs onto the body blank with loose wool (as in the photo).
We add a little wool to the junction of the paw and the body, thereby strengthening the “adhesion”.
We set the necessary bends in the kitten’s paws, fixing them with our fingers. Then we secure the result with a needle.
After this, you need to add a little wool to the muzzle area and increase the volume under the eye sockets.
Then we make indentations for the cat’s eyes of the desired size.
Then you should form a small triangular plane (the place where the nose will be attached), as well as two small identical balls - these are cheek pads.
You can also easily make a penguin - this is a cute, cute creature that can become a wonderful New Year's gift for someone!
After this, we roll the cheek balls just below the formed plane for the nose. We do the chin in exactly the same way.
Now let's add some fur to the feet of the cat's paws, and at the same time form small volumes on them.
You can partially begin to “grind” the product. We sand with a needle No. 38 - piercing each area many times. It should be noted that grinding can only be done in those places that will no longer be finished.
Now you can carefully felt the tail and give it the necessary bends. We leave the wool loose on one edge. Before attaching the kitten’s tail to the body, it also needs to be carefully sanded, as in the photo.
Then, carefully roll the tail down, while trying to stick the needle as deep as possible, thereby carefully attaching the tail to the cat’s body.
Now you need to strengthen the junction of the tail with the body and then “polish” the resulting joint. By repeatedly poking the same place with a needle, we gradually form the kitten’s butt out of wool.
And now we are sculpting eyes of the required size from polymer clay. Then we dry the eyes, sand them with sandpaper and glue them with Moment Crystal glue.
Now we are working on the smile line again. This time as clearly as possible. And after that, we roll a small flagellum between our fingers and place it on the bridge of the nose, forming wrinkles.
We make a small triangle-spout from wool of a different color and roll it onto the previously formed triangular plane.
Carefully use a needle to mark the kitten’s nostrils.
We proceed to the final stage of felting a kitten from wool - using a foam sponge or felting brush, we place two identical triangles under the ears. We periodically turn the workpieces over, otherwise they “love” to fall into the structure of the sponge.
Another wonderful toy, although a little more difficult to make: such a cute hedgehog will win your heart with its cute face!
Gently pinching the ears between your fingers, we process their edges with a needle. Remember that you need to leave the fur free in the place where the ear will be attached to the head.
Now we roll the ears to the head and form bends on them. Finally, we perform the finishing “grinding”.
Our MK has almost come to an end. All that remains is to paint his eyes and tint the entire toy as a whole. Afterwards we cover the eyes with varnish.
This concludes our step-by-step master class on dry felting a kitten. We have a magnificent cat who will delight and touch us. And finally, we wish you endless inspiration and diligence! Remember that only you can do the best!
And here is an example of another funny kitten Woof.
We hope that the result of felting pleased you! Continue reading our MKs, improve and practice! And we also advise you to find out how you can not only felt toys, but also knit them, in our article CROCHETTED TOYS WITH DIAGRAMS, DESCRIPTIONS, PHOTOS AND VIDEO MASTER CLASSES USING THE EXAMPLE OF A BUNNY AND A FROG.
Cheerful cat
We propose to create together using the felting technique a small toy - a Funny Cat. This wonderful toy can serve as a pendant for keys, a phone or a purse. At the same time, in this master class you will be able to get acquainted with two types of techniques: dry felting and wet felting.
Before work, you should make sure that you have the following tools and materials:
- Merino wool of different colors (light green, yellow, black, turquoise).
- Jewelry waxed cord.
- Two beads.
- Needles.
- Threads.
- Supergel moment.
- A special felting brush or sponge.
- Needles for felting (twisted, triangle, star, various numbers, thin and thick).
- Soap.
- Hot water.
We take a piece of turquoise wool, from which we will make the body of the cat. We entangle a piece of turquoise wool with each other. Now we make a soap solution and use it to form a body for the cat.
Other variations of dry and wet felting
Washing machine
A simplified version of wet felting. In this way, volumetric products are made. Wool is applied to a blank of the required shape, fixed with mesh, nylon, threads and sent to the washing machine. With this method, you won’t get an artistic painting with subtle drawings, but you can make bags, shoes, and mittens. But you should be prepared for the fact that the result will be unpredictable. As an option, add hats and scarves previously felted by hand.
A more convenient way is to knit a product from special yarn and felt it in a machine. But first it is better to make a sample to calculate the degree of shrinkage.
Tatyana Maksimenko has a master class on felting Christmas balls from wool.
The snowflake is embroidered on felt and sewn to the ball
Embroidery directly on the ball
The basics of balls felted in a washing machine can be supplemented with patterns:
The “Cross” master class will teach you exactly how
Application
The applique combines wet and dry methods: flat bases with convex elements. You can felt wool onto a base sweater or decorate a bag or coat and thus refresh an old item.
Applique on bags and shoes
Clothes with felted decor acquire spiritual warmth
Wet felting of mittens and dry felting of raccoons
Nunofelting
The name consists of the Japanese word nuno - cotton and English felting - felting. This type of creativity stands apart from other methods of wool felting.
This is a technique of applying a pattern to cotton, silk, chiffon, lace and similar fabrics that can allow wool fibers to pass between their fibers. Only thin merino in a combed tape or top is suitable for this, otherwise the products will be rough.
The execution procedure is similar to classic flat felting, only the wool is laid out not in a continuous layer, but according to the pattern.
The natural shrinkage process of wool gives a special charm to the product - this causes arbitrary folds to form on the base fabric and the product becomes unique.
MK video on creating a stole using the nunofelting technique. The author shows in detail the layout of wool, threads and fabric, as well as the step-by-step creation of the item.
Kitten Mandarin
This is a kitten - Tangerine! In order to make such a cute kitten using the dry felting method , we need to prepare the following materials and tools:
- Unspun wool in two colors (orange and ecru).
- Felting needles No. 38, No. 36.
- Surface treatment needle.
- Reverse tooth needle for fluffiness.
The kitten will end up red in color, and the edge itself will be light. To do this, we take ecru-colored wool as a basis. We take a needle No. 36 and fluff up the fur, forming a large oval piece from it.
Try to stick the needle as deep as possible, so that sufficient density will form inside and the surface will be loose, while maintaining its shape.
While working, we help hold the shape with our hands; this will be our torso. Now for the head we make a smaller spherical piece.
Now that the two parts are ready, they need to be connected to each other. We fold the head to the body; during operation, the needle should be directed towards the central part of the main workpiece.
To visually soften the transition of the joint, add fluffy pieces of wool and go through these places with a needle again. The needle should go as deep as possible, since the entire cavity between the joint should be compacted and filled with wool. Don't forget that we need to make the eye sockets while the workpiece is still loose. In these places where there should be eyes, we poke with a needle many times, this way the required density will be achieved as much as possible.
After this, the workpiece must be coated with the main color, orange. You need to start work from special difficult places. As a result, the entire workpiece should be “dressed” in orange wool. Don’t forget to outline the eye sockets, then draw the lines of the cat’s muzzle and make a triangular nose.
We are making pillows, so we dump two small identical balls. For them you need to take two small pieces of wool between your fingers and push them deeply with a needle, tightly to each other. We build up the chin in the same way and continue to do the cheeks, back of the head and frontal part in the same way.
After this, we glue the eyes into the eye sockets so that the wool absorbs the glue a little. We place beads on the “moment” glue and carefully press them into the holes, then we work everything around the beads, you can add wool if necessary and compact it.
For the paws, take 4 pieces of wool, scroll each one in a spiral and roll it into a cylinder shape. We roll the legs in orange and connect them to the body one by one. We form small bends in each paw and compact them with a needle. We also make the tail from a small piece of wool and scroll it in a spiral, roll it in the main color and roll it to the desired place.
We need to make ears on the sponge using a coarse needle from two pieces of wool. We periodically turn the blanks onto the sponges, then go over them with a thin needle. We pinch the ear between our fingers and process the edges, form a bend and roll it symmetrically to the head.
What kind of wool is suitable for felting?
Any wool is suitable for felting - from angora to cat. The main condition is that the hairs are thin and fall into a lump. Sometimes plant fibers are used as an additive to create decorative effects: flax, nettle, hemp, soy, silk, bamboo.
Natural carded colors
The main material is sheep, llama, alpaca, and camel wool. Each type has its own characteristics and, depending on the thickness and elasticity of the hair, is used to make different things: brooches, clothes, bags, toys, paintings and carpets.
Types of wool for felting
Sheep wool is the most accessible, so it is used by both beginning needlewomen and experienced craftsmen.
Carding is most convenient for dry felting
Lightened bleached and tinted wool in various colors is available for sale. There are designations for “fine” and “semi-fine” wool.
The difference is not only in thickness, but also in the presence of guard hairs in semi-fine yarn, which complicates the process of wet felting, but for dry felting this parameter is not so important
Merino
Leader in production thanks to the elasticity and softness of fine hairs. Merino wool produces delicate items with the smoothest surface. Hair thickness 14.5–23 microns. Strong wool with fibers of 20-23 microns goes on mass sale; finer types cost an order of magnitude more and are bought by fashion houses for exclusive collections.
Merino
Carding
Indispensable for dry felting. The wool is combed with a carder, while the fibers are straightened and laid in any direction, forming an even sheet. When dry felted, this wool wadding forms a dense mat, forming a smooth surface with fine hairs. The fiber thickness is 25–30 microns, so it is suitable for toys, bags, shoes, outerwear, rugs and paintings.
Carding and mechanized carding
Tops, combed ribbon
These are neatly combed strands of wool in which the fibers are located in one direction. Such strands consist of semi-fine and fine hairs and are indispensable for wet felting or nunofelting.
Combed tape
Tow
It consists of hairs of varying quality - both small thin and guard hairs. It is used for stuffing toys or making rough products by dry felting - felt boots, bags, carpets.
Sliver
Similar to tow, sold in strips and bundles. It is of higher quality, smoothly combed, not dyed, but contains small debris and coarse hairs. The application is the same as tow. The base of toys is made from sliver, which is then rolled with finer and more expensive wool. Suitable for dry and wet felting.
Rovnica
It is a large, loosely twisted thread, which is suitable for knitting with thick knitting needles followed by felting in a washing machine or for creating individual decorative elements of clothing, bags, shoes, paintings.
The above types of wool can be seen clearly in the video from the Fox Workshop channel:
Advice from the experts
To work, you will need several needles with different notches and different diameters. Choose kits for different types of felting, from rough processing to fine modeling of parts.
Beginners often break even thick instruments; stock up on several copies.
The large diameter ensures speed of operation. The yarn falls easier and faster, but large gaps remain that need to be filled additionally. If you felt wool long enough, the fabric takes on an even, smooth appearance. Felting pictures give an idea of the appearance of the fabric when working with different needles.
One of the indicators of changing tools from thick to thin is the difficulty of piercing the canvas.
To ensure productive speed, experienced needlewomen advise using several needles at the same time, wrapping them with tape. Needles of English, German, and American production have proven themselves well.
Unspun wool is an excellent choice for beginners. It has a stronger, coarser base with axial fibers, lends itself well to deboning and forms a high-quality fabric.
The degree of felting of the fabric depends on the angle of insertion. The tool should be inserted and withdrawn at the same angle. Felting diagrams show places of intense injections.
When working, constantly scroll the product and insert needles from different sides. This way you will avoid distortions and heterogeneity, and the product will not be loose.
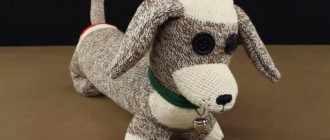
How to sew a cat from a sock with your own hands
It doesn’t matter if your child’s favorite pair of socks is torn. A parent with creative thinking will definitely be able to find the right use for them. For example, make a toy.
Sewing a cat from a sock is so easy that you can even do it with a child. For a child, this is an opportunity to develop imagination and motor skills, and for a parent, it is a chance to plunge into childhood and simply relax with their beloved child.
What you will need to make a sock cat:
- cotton wool for stuffing toys;
- a pair of colored socks (bright, terry and striped ones are best);
- scissors;
- sewing needle and thread to match the color of the socks;
- toy eyes (can be replaced with buttons);
- fishing line (for designing antennae);
- button (to decorate the nose);
- a sheet of checkered paper and a felt-tip pen (needed for modeling patterns);
- instant glue.
Photo
Before you start making blanks for your future kitten from a pair of socks, you need to model the patterns on paper. For this toy they look like this:
Photo 1. Patterns for a toy kitten with your own hands, taking into account the marking of all allowances and indicating the number of necessary parts.
Photo 2. A simple pattern for beginners for sewing a kitten, consisting of two parts of the head, body and eyes, as well as one part each of the forehead and nose pad.
Photo 3. Sewing pattern for Simon the Cat, consisting of three parts - body, tail and large round eyes, all parts need to be cut out in two pieces.
Sewing patterns
To get similar ones, you need to attach a sheet of checkered paper or tracing paper to the screen, draw the patterns along the contour and cut them out. Now you can start preparing the preparations. To do this, you will need to place both socks on the work surface with the heels up, attach a pattern to each and outline with a felt-tip pen, retreating 0.5 cm from the edge of the pattern for an allowance.
Next, you need to cut the socks as indicated on the patterns. If everything is done correctly, then you should get the following parts of the toy: from the first sock - a cat’s head and two hats, from the second - a body and a tail.
Attention! Parts for each element should be 2 pieces, since the sock consists of two layers of fabric
Sewing a cat from a sock and stuffing a toy
Now all the cut out parts need to be sewn in pairs: 2 body parts, 2 tails, 2 heads, 4 two hats. You do not need to darn all the way from the underside of the sock: you will need a small hole for subsequent stuffing.
Turn out the mended parts of the cat and stuff them tightly with cotton wool, then carefully sew up the remaining holes. The seams should be small and frequent, with an interval of no more than 2 mm.
Decoration of the cat's face
When the finished toy lies on the work surface, you can begin to decorate it. To do this, you need to glue toy eyes on the top of the kitten's face. If the eyes are replaced with buttons, then sew them on. Do the same with the button nose, sewing it under the eyes. For the antennae, you need to fold the fishing line several times, releasing about 5 cm for each, cut it off, tie it in the middle and sew it to the cat's face. To complete the look, you can put one of the hats on the kitten’s ears.
Kitten Mustache
The dry felting technique has recently become extremely popular and this is not surprising. Using our master class on dry felting and this technique, you can make amazing and magical products, unusual jewelry or cute toys.
Sometimes this technique is called felting, which means felt and needle in German. Thus, the essence of the technique becomes clear, which consists of tangling wool fibers and compacting it using special needles.
To work, you need to prepare the following materials in advance:
- For felting, the wool is white and a little pink.
- Puffer.
- Sintepon.
- Awl.
- Scissors.
- Universal glue moment.
- Felting needles No. 36 and No. 40.
- White acrylic paint.
- Fishing line.
- Ribbon.
Take a piece of padding polyester and roll it into a tight ball, then another roller. We take the ball and, using a needle, compact it and give it the correct shape, this will be the kitten’s head. We do exactly the same thing with the roller, which will be the body. Then we begin to outline the eye sockets with a needle, which should be slightly larger than the diameter of the eye.
We use a slicker to pick up the white wool; if you don’t have a slicker, you can do this with your hands. We do this in small pieces and then mix the fibers, roll them onto the wool with a No. 40 needle. We deepen the eye sockets with a needle and take an awl, pierce a hole in the middle of the eye sockets. Then the hole needs to be widened and deepened using scissors. We try on the eyes and glue them tightly, making eyelids from pieces of wool and placing them on top and bottom of the eyes. We outline the line of the nose with a needle No. 36, as well as the lines of the cheeks, mouth, you need to roll a piece of pink wool to the nose, outline the nostrils and add volume for the cheeks.
In the same way as the eyelids, we make a mouth for the cat, press it down and work it around with a needle. We take a piece of wool, fold it into a triangle, seal it with a needle on both sides and roll the side that is not processed to the cat’s head, this will be the ear. We make another ear in the same way.
Now we take the roller body and roll it with wool, leaving one side untreated. Now we bring the body to the head. All that remains is to make the paws, so we separate four identical pieces of wool from the combed ribbon. We dump each piece into a paw and roll it to the body. We bend the hind legs in the process, fold the tail and also roll it down.
We give the kitten fluffy fur; to do this, we treat the entire surface with a reverse needle. This way, you will be able to pull small bundles out. We make antennae from fishing line or monofilament. We tint the fur with pastels, draw around the eyes, mouth, nose and between the fingers with crayons. We knit a bow around the neck and the cat is ready.
Indoor microclimate
Is there a lot of yellow light bulbs in the house, is the air dry? In this case, the cat's fur may become dry and lifeless.
For the health and beauty of your pet, pay attention to the microclimate in the house. Various ways can help improve it:
- frequent wet cleaning without the use of chemicals;
- regular ventilation of rooms;
- reducing heating intensity. If this is not possible, make sure that the cat does not sleep on the radiators. Equip her with a cozy house or bed;
- using a humidifier.
If you think you're doing everything right, but your cat's appearance still isn't up to par, visit your veterinarian. Coat problems can be symptoms of various diseases. Also, do not forget about routine medical examination, vaccination, and deworming of your pet. All this can help your cat be healthy for many years and delight you with its beauty and playfulness.
https://allexpert.com.ua/chto-delat-chtoby-u-koshki-byla-krasivaya/https://www.ikirov.ru/news/32833-8-sposobov-privesti-sherst-koshki-v- poryadok https://www.vetmag.ru/advice/koshki-uhod-za-sherstyu/kak-dobitsya-krasivoj-shersti-u-koshek/
Cat Findus
We will make Findus the Cat using the dry felting technique. Each craftswoman can create her own version of the cat, its height will be 21 centimeters including ears.
For work we will need the following materials and tools:
- Wool of different colors (at your discretion).
- Felting needles %36 and No. 38.
- Sliver.
- Paper glue.
- Acrylic paints.
- Black floss yarn.
- Fine sandpaper.
- Pliers.
- Fishing line.
- Sewing needle.
- Glossy varnish.
It will take about six days to create such a kitten, if you work only on this toy without being distracted by other things. It is worth considering the fact that it takes about two days to create pants. Therefore, for such work you will need some felting experience. Perseverance and desire. In the end, the toy will have to turn out to be very dense, and therefore it will need to be felted for a long time and with high quality.
What tools are needed
You can buy a simple picture frame at a hardware store. Use standard size. Wooden frames with a noble natural shade look good with such pictures. If you can’t buy these, buy regular plastic and coat it with varnish.
For dry felting you will need a small non-woven napkin. You can buy it at a handicraft store in your city. If you don’t have this material at hand, you can use regular felt or flannel. The main requirement is that the fabric used must be fleecy and sticky.
In stores you can find so-called combed tape or tops. It is most often used for laying out paintings. All fibers used have already been combed out and arranged into neat bundles. This type of wool is suitable for both the base and the background.
The background can also be laid out using carding. Unlike combed tape, the fibers here do not look very neat. Most often they are sold in the form of runes or regular skeins. They help create artificial chaos. Suitable for creating snowdrifts and skies.
For the base, the top layer of the background, a sliver is used. This is the same tape, but pre-cleaned. It is light, but not bleached and has no coloring.
In addition, you will need thin tweezers. This tool is needed for working with small parts. Sharp nail scissors are used to straighten the painting. In order not to look for materials yourself, you can purchase a set of tools on the Tovarika trading platform in the “Hobbies and Creativity” section.
Cat on its hind legs
Who among the needlewomen has not at least once dreamed of trying to make toys by dry felting? Dry 3D felting is one of the wonderful types of creativity that allows you to make toys that you simply cannot pass by.
So, the object of our work, a Siamese cat. To work, we need wool and special needles for felting - they have special notches that, when working, pull the wool along with it and get it mixed up. Due to this, stalling occurs. You can pick up the materials in any specialized store.
Types of felting
The technology can use sheep fur, as well as alpaca, camel, llama, or even cashmere, angora and mohair. There are two main types of creating such images.
Dry felting
This method was invented not so long ago. Even in the last century, most pictures were made from wet material. This is not surprising: the dry version requires more time. But the image turns out clearer and has defined contours.
For the base you need a wooden backing from a finished frame. A napkin made of synthetics is suitable as a background. If you plan to knit it yourself, be sure to wash it before working on the picture. Select a delicate wash cycle of 50 degrees and a spin force of about 400. This is necessary so that the materials shrink a little and no gaps or debris appear in them. You can also use sticky non-woven fabric as a base.
For ease of use, attach the canvas to a soft pillow with artificial filler. Start laying out the main background elements. Manipulate fiber density to create translucent clouds and bright blue skies. Sometimes it makes more sense to lay out the composition on a colored napkin.
Create one small element and secure it with a crown needle. Use a thin blade to pierce the wool in the felting areas, trying to pull the fibers through the fabric. If we are talking about a large picture with many elements, you can purchase a tool with four needles.
Attach the finished image tightly to the prepared wooden base. Please review it carefully for any defects. If you notice an empty space, attach a piece of patch that matches the color and attach it with a needle.
Wet felting
To create such a painting from wool, you will need to follow the following steps step by step:
- Choose colored tufts for the base of your future image. Fluff the tip of the material a little so that you can easily pull out a few fibers. Take the finished skein with one hand. With your second hand, carefully pull out about 30 centimeters of mohair, depending on the length and width of the planned painting. Gently stretch the fiber.
- Find a piece of wood. Instead of a stretcher, you can use the remains of an old wall calendar. But the cardboard must be strong and solid, without holes or visible cracks. Wrap the workpiece with special bubble wrap used for transporting fragile items. Air bubbles are on the outer layer.
- Lay the material from top to bottom, with the pile in one direction. After this, create a perpendicular layer going from left to right. Carefully secure the future background and begin laying out all the elements of the work on it. Don't try to secure them - just place the wool on top in the desired shape.
- Carefully lift the painting and place a terry towel underneath so as not to wet the work area. Prepare a soap solution - add a little liquid or solid soap to regular warm water and stir the resulting liquid. Pour it into any household spray bottle.
- Cover the top of the product with a mosquito net or other translucent fabric. Start spraying the soap solution over the surface. Trying not to press on the painting, spread the soap over the work surface. “Massage” the image for 5-7 minutes to set the fur.
- Take a regular kitchen rolling pin. Wrap layers of fabric around it lengthwise and roll for 10 minutes. After this, repeat the operation, but this time in width. After each circle, check for stretching or deformation.
- Dry the fabric with a terry towel and leave for a few minutes. It will shrink a little during the process. This wool felting will help both beginning adult artists and children create paintings.
A few words about needles
There are special tools for felting wool. These are needles with notches at the end, thanks to which a shapeless lump of raw material can be given shape and density. Needles come in different sizes:
How to make a delicious bouquet on a budget of 300 rubles: tangerines, lemon and Christmas tree
Solar panels and wind generators will make the energy of the future “green”
More biodegradable plastic is produced than is recycled
- No. 36 – the thickest;
- No. 38 – medium;
- No. 40 is the thinnest.
You need to start work with a needle No. 36, and finish with a No. 40 needle. If you do not have such tools, you can use regular sewing needles. Start forming a lump with the thickest one. Then move on to thinner ones. To avoid pricking your fingers, use a thimble. Hold the needle perpendicular to the surface being treated.
How to felt: basic techniques
Making toys from felt is carried out in two ways: dry and wet. The first method is used to create three-dimensional things, and the second for flat ones.
Hedgehog, but without fog
What you need to know before you start felting wool:
- Do not forget that during work the wool shrinks by about a third, so you should stock up on a large amount.
- After pulling the wool out of the combed, smoothed strip, it is recommended to rub it in your palms. This will help the fibers become tangled so they will fall off better.
- When felting large crafts, experts advise using a sliver for the internal segment. This will help save expensive threads.
- Needles for making toys from felt should have small notches on their lower part. When using such a tool, wool fibers cling well to the notches, which contributes to their weaving together.
- Needles will need different thicknesses. Thick needles are necessary for felting itself, when wool is processed. The use of medium ones allows you to give shape to the product, and thin ones are used for small details and correcting remaining marks.
- You should handle needles very carefully; they are sharper than machine needles. They often break, although they are elastic.
Wet felting of toys (felting)
The work uses soapy water into which wool balls are dipped. When making toys from felt with your own hands, you need to make patterns, increasing them taking into account the shrinkage of the material. Step-by-step description of the work:
- First, prepare the solution: grate a bar of soap on a grater with large holes and add hot water. Stir and let sit for about 2 hours. You can also use liquid soap.
- A base layer of wool is placed on bubble wrap, with the bubbles facing up, followed by a background layer on top of it, and then a layer with a pattern. All of them should not be too thick; they should be laid out perpendicularly and overlapping. Then the workpiece is sprayed with water, covered with a mesh and soaked in a soap solution. The felting process itself is done by hand.
The fibers of wool yarn are intertwined during mechanical processing. As a result, a solid flat sheet is obtained on a polyethylene base. This is how paintings, bags, carpets, parts of toys and other products are created.
Wet felting
Additional information: It is necessary to choose the right colors of wool so that when exposed to water or a soap solution, the depth of tone is not spoiled, and also so that different shades do not mix with each other.
Dry felting kit
Dry felting method
This type of felting is more common and is recommended for beginners. The dry felting technique allows you to create three-dimensional products.
Dry-made toys
Felting is carried out with needles with a triangular and star-shaped section. You need to prepare the wool, needles for felting, a brush (foam rubber), and then proceed to practice:
- The material is overlapped on the brush, layer by layer, tangled with a needle. The base of the craft is sometimes made of padding polyester or special shapes, and the top is covered with wool.
- The needle must be held perpendicular to the craft. The creation of any toy begins with the use of a thick needle, which gradually changes to a thinner one. This is how felt New Year toys, dolls, decorative items, and accessories are made.
Cute felt toys
Mixed felting
Quite often, both types of felting are combined in one product. For example, to make a toy animal, you can make its body by dry felting, and the ears, paws and clothes by wet felting.
Cute bunny
Progress
First, we tangle the wool of the main color with each other. When tearing wool, we place the strands crosswise to maximize the tangling of the fibers.
We select the required amount of wool to form the head of our future work and, using the initial needle and fingers, begin to roll the wool into a ball shape.
We work as deep as possible with a needle, gradually compacting and collapsing the workpiece into a ball of uniform size and density. Remember, making a cat with your own hands is easy, you just need to be a little patient.
Separately, on a felting mat or sponge, we form two blanks for future cheeks in the form of small hemispheres.
We roll two blanks of cheeks to the head in the place where we plan to form the face of the future cat.
Separately, we felt the nose from pink wool. In the place where the nose will connect to the head, leave the fur free.
We roll the nose to the muzzle using the remaining unfelted wool and correct the shapes.
Using a coarse needle, we hollow out the eye sockets according to the shape of the finished eyes and glue the eyes with transparent “Moment” glue.
Separately, we felt the triangular-shaped ears, and also leave the wool in a loose state at the joints of the parts.
We form the mouth on a felting mat or sponge in the same way as described above. We work on all paired parts at the same time so that they end up absolutely identical.
We form eyelids around the eyes using small flat strips, felted separately.
Using a needle, we form the shape of the eyes, and we also work with both eyes at the same time so that the shape of the eyes is the same.
We pin the ears to the head and correct all the previously made shapes.
We dump the body of the future work in the form of an oval blank, taking into account the size and proportions relative to the head.
Next, we also felt the legs and tail separately, but we did not felt them to the final density, since in the future we will give them a bend.
We attach the front and hind legs, as well as the tail. We set the bends we need and roll to the final density.
After all the shapes are ready, we use a reverse needle to process the entire surface of the cat, thereby giving it fluffiness.
Using a sewing needle and thin fishing line, we make antennae on the muzzle, thread the fishing line with a knot at the end into the cheek, and pull the knot a little inside the felted part.
We decorate the work with accessories and brush the cat using a comb or pet brush. Ready!
This is what a cat made with your own hands from wool looks like. Very cute!
Mixed felting
Felt crafts using both techniques are original and look great in accessories and “homemade” wool products.
For example, a bag or house slippers, made using the rough “dry” method, are decorated with elegant fragments, folded using the “wet” method.
What can be made from wool? This article covers basic techniques and instructions for working with this natural material.
You can learn felting on the Internet. In video master classes, experienced craftswomen are happy to share their knowledge of what they make from wool. The moment of “feedback” is very important here. It will help you avoid common mistakes and not “reinvent the wheel.”


