Making toys at home
Modern stores are full of a variety of gaming equipment. Usually their cost is quite high, and not every parent can afford it. However, there is no need to spend money and get upset about this. Parents are excellent masters in the field of creating toys. They can sew soft animals, build houses and furniture, make themed items for playing in a hospital, restaurant, or store. In order for a new “sale point” to appear in a child’s room, the child needs goods, paper money, price tags, and a cash register. Every creative family member can make a paper cash register like a real one. You just need to put in a little effort.
Facilitating
To reduce the weight of the coil, it was decided to cut out some sections of the structure:
This manipulation allowed me to lose 168 grams of excess weight. At the same time, the strength of the sensor has practically not decreased, as can be seen in this video:
Now, with hindsight, I understand how the coil could have been made a little lighter. To do this, it was necessary to make large holes in the middle pancake in advance (before gluing everything together). Something like this:
The voids inside the structure would have almost no effect on the strength, but would reduce the total mass by another 20-30 grams. Now, of course, it’s too late to rush around, but I’ll keep it in mind for the future.
Another way to simplify the design of the sensor is to reduce the width of the outer ring (where the wire turns are laid) by 6-7 millimeters. Of course, this can be done now, but there is no such need yet.
Make a cash register out of paper, like a real cash register
The store cash register counts the cost of products, counts out change and stores savings. There are several ways to make a paper cash register with your own hands. Having acquired such a toy, the little seller will enthusiastically sell books and toys for friends and family.
You can make a simple cash register by drawing a dial on a piece of cardboard and gluing a stack of papers for receipts, but the game will become much more interesting if you make a voluminous cash register machine for a small seller with real buttons, a counting machine and a roll of receipts.
LiveInternetLiveInternet
—Categories
- FOM (flowers) (63)
- lampshades, lamps (49)
- owls (25)
- autumn (10)
- crazy-wool (6)
- Charging (4)
- repair (4)
- manicure (1)
- applique, clothing decor (8)
- affirmations, simoron, conspiracies, etc. (57)
- runes (2)
- costume jewelry (205)
- wire (46)
- Soutache (28)
- beads (273)
- necklace (64)
- pendants, pendants (31)
- books on beads (31)
- Bead embroidery (30)
- cabochons (30)
- Harnesses (30)
- beading utilities (21)
- earrings (19)
- brooches (17)
- bracelets (16)
- knitting (12)
- flowers (11)
- beaded beads (8)
- beads (7)
- felting (27)
- embroidery (1086)
- original works (152)
- Embroidery with ribbons-4 (107)
- satin stitch, volumetric embroidery (83)
- Ribbon embroidery-5 (32)
- cross stitch (10)
- ribbon embroidery (101)
- embroidery with ribbons-2 (107)
- Embroidery with ribbons-3 (100)
- Pictures for embroidery (124)
- books about embroidery (57)
- Useful tools for embroidery (97)
- fabric flowers (238)
- seams (27)
- crochet (144)
- knitting (57)
- guilloche (6)
- interior decor (41)
- kitchen decor (11)
- clothing decor (38)
- decoupage (33)
- children (62)
- for Dummies! computer, programs, wisdom.. (7)
- health, diets (46)
- From cardboard. (43)
- interesting (71)
- tested on myself (5)
- paintings, art (60)
- quilling (19)
- cinema (2)
- books (10)
- rugs (8)
- leather (42)
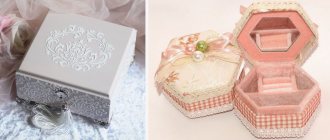
- boxes, caskets (16)
- DIY cosmetics (79)
- leather beauty (11)
- beauty! (38)
- dolls, toys (78)
- personalities (26)
- makeup (16)
- furniture, remodeling (21)
- fur (26)
- my works (78)
- music (2)
- New Year (71)
- shoes, slippers (65)
- postcards (4)
- post design (7)
- parchment (2)
- repurposed from old T-shirts, jeans, etc. (87)
- plastic bottles (15)
- gifts (13)
- packaging (6)
- pillows (13)
- useful things (110)
- wash, clean, bleach (20)
- patchwork (24)
- crazy (14)
- various master classes (26)
- recipes (302)
- side dishes (16)
- cook meat (25)
- jelly, aspic (2)
- preparations, sauces (15)
- casseroles (8)
- salting (fish, lard, etc.) (10)
- from lavash (20)
- microwave (15)
- dairy products (24)
- drinks (10)
- quick snack (sandwiches, etc.) (5)
- fish (8)
- salads (19)
- soups (1)
- dough, baking (53)
- cakes, sweets (76)
- decorate food (27)
- fondue (2)
- Health Recipes (39)
- glass painting (9)
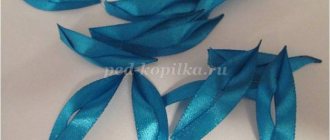
- fabric painting (26)
- garden and vegetable garden (23)
- Wedding (12)
- do it yourself (84)
- salt dough (16)
- poems (33)
- handbags (163)
- comfortable living (12)
- learning to draw (13)
- Photography (50)
- cold porcelain (31)
- flowers (37)
- templates, stencils (7)
- hats (14)
- let's sew! (128)
- humor (10)
Necessary materials
Before making a paper cash register, the master needs to prepare the materials.
- calculator (you can use a non-working one);
- box (larger than a calculator);
- plastic bowl (for example, the bottom of the container);
- cardboard;
- toilet paper roll or cardboard roll;
- scissors, stationery knife;
- hot glue;
- paper;
- old reel;;
- pencil or pen;
- markers;
- scotch.
When the necessary items have been collected, let's consider in detail how to make a cash register out of paper for money.
Types of MI by purpose
In accordance with their intended purpose, MI is divided into the following types:
- Soil models designed for underground surveys in the upper layers of soil. Devices in this category are the most common among metal detectors and treasure hunters who can assemble a metal detector with their own hands at home. The simplest homemade product has low accuracy and does not always distinguish between different types of metals. Professional instruments can detect small grains of gold, ignoring other metals.
- Depth models designed to detect targets at a depth of up to 6 meters. However, they can only “see” large objects with an area of over 400 square meters. see. Deep devices are in demand by engineering services as route finders, by geologists as specialized georadars for searching for native gold, etc.
- Underwater metal detecting devices operating underwater. They are subject to increased requirements for the tightness of the search system. The operating conditions of underwater MI in sea and fresh water differ significantly. Underwater detectors use only sound indication.
Note! Underwater MI can be used on the surface in the mode of a conventional ground metal detector. Searchers only need to adjust the length of the rod and the position of the stop to make it more convenient to use the device
- Special metal detectors:
- security devices for detecting metal products in luggage, clothing or on a person’s body during inspection;
- industrial metal detectors as part of conveyor lines, signaling the presence of metals in products;
- military devices, collectively called mine detectors;
- detectors tuned exclusively to gold objects.
In Fig. Below is a hand-held security metal detector.
Security metal detector
Working instructions
Having prepared the material, let's get to work:
- Display. We glue circles to the roll (toilet paper roll) on both sides to form a complete figure. In the middle, along the roll, we make a cut - numbers will be shown here indicating the weight and cost of the product. Cut out 12 oval shapes from cardboard. On each of them we write down a serial number.
- Cash machine buttons. We measure the dimensions of the calculator and mark them on the box. Cut out the corresponding hole. Using tape, we attach the calculator from below so that the buttons look out.
- Money box. Make a cut in the side of the box and remove the bottom. From here a plastic container will come out as a cash drawer.
- We cut out a window on the side for a spool of paper. We string the spool onto a pencil. We attach it with tape to the box from the inside. The coil should be visible on the surface. We cut strips of paper and wind them onto a reel. The edges of the paper peek out over the top of the cash register. This way the seller can issue a check to the buyer.
- From the leftover cardboard we cut out buttons with which we will fill and decorate the surface of the cash register.
- To make a cash register, like in a store, colorful and interesting, you need to paint it. We use bright markers and paints. The main part can be painted yellow, the buttons pink or red.
- Leave the painted parts until completely dry. After this, we move on to assembling the trading machine. We fix the display and buttons with hot glue.
The little seller will be delighted with the new invention and the necessary equipment for the toy store. Don't even doubt it.
Source
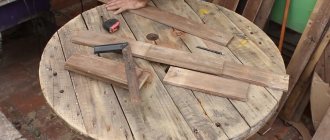
Installing a carrier from scratch
The protective sheath is cut off a few centimeters from one edge of the cable. Carefully remove the strands from the copper wires so that they are exposed. The carrier is disassembled, the wire is placed in a special groove, and the wires are passed through the clamps, having previously unscrewed the small bolts. The fasteners are clamped back with the wiring, the top cover is applied and the box is tightened from below with bolts or screws.
It's the same with a fork. Also, the protective coating of 2-3 cm is removed from the cable. The cores are removed from the wires. Disassemble the fork and unscrew the bolts on the fastenings. Wires are passed into these places, and the clamps are screwed back in. The cable is installed in the groove. Place the lid on top and tighten it with a bolt.
The benefits of origami
Anyone who has experienced the fantastic world of origami at least once will never want to leave it. In the photo of paper origami you can see amazing masterpieces that you can create with your own hands.
Origami not only develops imagination, but also makes you think logically, be attentive and focused. This activity is perfect for restless children; it will help direct energy in the right direction.
In ancient Japan, only educated people practiced origami; mastery of this art was considered a sign of intelligence. With origami, children learn to recognize geometric shapes faster than with any other activity.
Before you start practicing origami, you need to prepare all the necessary materials. First of all, this is good thick paper, the quality of which determines the quality of the figures themselves.
For all beginners, it is recommended to use patterns according to which you need to bend the paper without making mistakes. In some cases, scissors and glue are used, but this is a slightly different type of origami.
Before you start folding origami, you need to familiarize yourself with the types of this art. There are not many of them, and each of them has its own characteristics.
- Classic origami is the traditional folding of paper squares.
- Modules - creating figures and connecting them by nesting.
- Kirigami is the same as origami, only using scissors and glue.
- Wet origami - made from wet paper.
The art of paper origami for beginners has a positive effect on motor skills and helps them learn to use their imagination.
Coil for pulse metal detector made of twisted pair
From a twisted pair of wires it is possible to build a wonderful sensor, which is an indispensable component for a pulse device. Such a coil will have a search depth of more than one and a half meters. This design is distinguished by good sensitivity to various small-sized products, which include gold jewelry, small change, etc. In order to make such a coil, you need to first prepare a twisted pair wire, which can be purchased without any problems wherever radio devices are sold. The wire is made of four twisted pairs without a screen, it is very important that it be copper and not bimetallic
In order to make such a coil, you need to follow these instructions:
· Make a piece of wire, the length of which is 2.7 meters. · Mark exactly half of the section. After this, you should also measure 41 cm from each end. · According to the marks made, you need to make a ring from this wire and fix it using ordinary tape or adhesive tape. · The ends of the future coil should be slightly bent inward.
· After the above procedure, it is necessary to isolate the adhesions using special thermal tubes or adhesive tape
· In order to draw the output of the coil being manufactured, you need to take a 2 * 0.75 millimeter wire, which is in rubber insulation and has a length of 1.2 meters, and then solder it to the other ends of the future coil. After this, it is also necessary to insulate the wires.· You should decide on the most suitable coil housing. You can easily purchase a factory-made product. A regular plate made of plastic is also suitable.
· The coil must be inserted into the housing and the elements must be fixed using hot-melt adhesive. The solders and wires will also need to be fixed. · The next step is to seal the case. If you did not use a ready-made body, but a plate made of plastic, then to give greater rigidity you need to fill it with epoxy resin. First you still need to conduct a trial test of functionality, because after you glue everything together, you won’t be able to make adjustments. · In order to secure the reel to the rod, you can use a factory bracket or come up with an analogue yourself, it all depends on your choice.· After soldering the connector to the second end of the wire, the coil will be completely ready for use.
Metal detectors are used to search for metal in the soil at a certain depth. This device can be assembled independently at home, having at least minimal experience in this matter, or following the clear instructions in the instructions. The main thing is the desire and availability of the necessary tools.
Examples of models for beginners
Children aged 5–7 years are most interested in simple origami crafts, which they can later play with. It’s good if the model encourages the child to write a story. For example, having folded a boat known to everyone, you can “travel” on it to distant countries, because sailing on the waves of fantasy is no less exciting than on the real sea.
Mushroom garland
Bright mushrooms are suitable for any decor - you can use them to make an autumn bouquet or a festive garland. The nursery will turn into a fairy-tale forest, and the child will enjoy creating a beautiful and simple origami model.
You will need 2 sheets: red and white, size 15x15 cm.
- Connect the red and white squares together. At the same time we make diagonal folds on them.
- Fold the top corner of the figure towards the center.
- We do the same with the right one.
- And left.
- We bend the upper half of the model into a “valley”.
- We move the left corner back.
- Right.
- Turn the workpiece over.
- We iron all the previously made folds well so that the mushroom does not fall apart.
- Bend the right corner to the center line.
- We do the same with the left one.
- Straighten the folds made in steps 10 and 11.
- Open one half of the mushroom cap.
- We bend the adjacent “leg” to the center line.
- We do the same with the left half.
- Fold the bottom corner as shown in the picture.
- Fold the top triangle of the “hat”.
- Turn the mushroom over to the front side.
The worms that will be found in the “forest harvest” are made according to the anti-stress snake principle.
Speedboat
Almost according to the same pattern as the chicken, a tiny boat is folded. It can be used both as an independent toy and as an element of a greeting card.
The beginning is absolutely identical, fold the square along two diagonals, straighten and bend one of the corners. Only this time to the center of the figure. Mark 1/3 of the length of the resulting triangle and fold it in the opposite direction. Fold the piece again, forming a small “beak” on the top.
We bend the workpiece in half, with the stepped element inward. We fold the back part of the boat as shown in Fig. 6. Along the marked line, we move the two parts of the workpiece apart and turn it inside out (Fig. 7).
We draw windows on the cabin. You can add a decorative flag, lifebuoy and other distinctive details.
About the advantages of MONO and DD coils
So, if you have a huge field in front of you, and you need to quickly walk through it in order to find out whether the place is worthy of attention or not, then preference in this case can be given to a DD coil with a larger diameter. This type of coil emits a rectangle, and at depth the beam does not narrow and is approximately equal to the width of the coil itself.
In other words, in a unit of time you will explore a larger area of land with such a coil, and the likelihood of missing something will be minimal. But, if the field is littered (garbage metal), or, then you will have to dig with such a coil, since it will pick up nearby signals.
The beam of MONO coils narrows into a cone as it moves away from the surface of the coil, that is, at a certain depth, the coil will scan only a small area (the top of the triangle). With such a coil you need to drive more carefully, the search engine's step will be slower, and you need to make a deeper sweep of the coil on the previous pass (max).
Mono coil: general view
But this type of coils has its advantages: they very accurately show where the target is, and they are more convenient for working in “trash bins”. And if they lose a little in depth (and not on all soils, a lot depends on the search conditions and purpose), but they allow you to study the place in more detail.
In general, ideally, a treasure hunter should have experience working with both types of coils in order to draw a conclusion for himself which coil is more convenient for him. After all, in littered areas you can safely work with a DD coil; you just need to change the standard coil to a smaller coil.
General principle of operation of a DD coil
So, as you can see, although the coils differ in scanning methods, all this has little effect on the quality of search in capable hands. There are search engines who will never change their DD to MONO, there are also those who are used to working with MONO, they dig less holes, they like this type of search.
Ideas for origami
When learning the art of origami, it is important to know what figures can be made from paper. The most classic option is the crane, which is considered a symbol of happiness and success.
In Japan, there is a belief that if you make a thousand cranes, any cherished wish will come true.
You need to make a crane according to a pattern; this is not the simplest type of origami, but it is very exciting and useful. In addition to the crane, you can make many other equally interesting figures.
- Various animals and birds - owls, foxes, hares, crabs and so on;
- Flowers and plants;
- Geometric figures;
- Unusual figures in the form of a cup, heart, star and much more;
This or that type of origami is made according to a certain pattern. There are easy paper origami, as well as more complex options for more experienced craftsmen.
Origami step by step
How to repair a speaker yourself? FAQ Part4
Translated by SaorY for mozgochiny. Good afternoon, brainiacs! I think many of you know how sound is created and how the speaker of your phone or headphones works. It turns out that everything is not so complicated, and the simplest homemade speaker can be made with your own hands from available materials. One way to create a homemade speaker is presented in this brain guide, consisting of simple steps and a couple of paragraphs of theory. It’s simple, but I think many will find it interesting and useful! I know the sound quality of the craft is a little damp, but the method works and may be useful to you in creating your own speaker.
Source
| Roads, trips, who among you doesn’t like to travel? After all, it is so wonderful to cross seas and oceans, or wander through a green forest, tasting the aromas of nature, enjoying the rapture of the air. When preparing for a trip, we pack our suitcases, and in the suitcase, as you understand, there should be a needle and thread for every firefighter, because if you are going to an unfamiliar country, and plus you don’t quite know the language, a very unexpected situation can arise . Here's a joke that comes to mind: |
Origami for children
According to the shape of the coils
Let me add how metal detector coils differ in shape. There are ellipsoidal and round. Ellipse coil
better “separates” targets that are located close to each other (in theory, in practice this is imperceptible). Ellipsoidal coils have higher pinpoint mode accuracy (in practice, it’s a stretch to say that this exists), plus a little less weight (doubtful).
Round reel
has more depth compared to an ellipse. This is difficult to verify in practice - you need to test the same coil of different shapes on the same model of metal detector. But if you compare different manufacturers, it always turns out that the round one actually adds 1-2 centimeters to the coin.
In his, he indicated the type declared by the manufacturer. If the type is not specified, it means that no explicit confirmation could be found.
Among novice treasure hunters and just those who like to wander around with a metal detector from time to time, you can often hear arguments about which coil (sensor) is better. You hear so much in these disputes, people use their knowledge of physics, and some even begin to build some hypotheses.
I am not a physicist, and to be honest, during all the time I have been interested in this hobby (and this is not one or two years) I have not tried to delve into the physics of the processes taking place. By and large, the user does not need to know all the subtleties; it is enough to understand some basics and nuances. Of course, if you are passionate about electronics, if it is fundamentally important for you to know how a DD coil works, how the soil affects the radiation and perception of a signal, then, undoubtedly, you can set up various tests and take measurements, since hobby is hobby.
An ordinary digger is a person who works with maps, walks a lot, loves nature, and studies the history of his region. For him, a metal detector is just an additional tool, thanks to which he finds answers to his questions and assumptions. And if we talk about reels, then we can say with confidence that all the reels on the market are good! We can also say that MONO coils are no worse than DD coils, and vice versa. It's just that different types of coils are designed for different search conditions.
Map analysis is one of the foundations of a real search engine
The best "children's" options
The collection of simple origami patterns is constantly updated with new models. If papermaking has grown into a serious hobby, you can make thematic collections: domestic and wild animals, marine life, interior items, vegetables, fruits, flowers, and so on.
It seems that the creators of the diagrams managed to reflect in origami all the richness of the surrounding world.
Each of the presented options has detailed instructions on origami for beginners.
Examination
After our homemade metal detector coil was completely ready, we had to check it for internal breaks. The easiest way to check is to use a tester to measure the winding resistance, which normally should be very low (maximum 2.5 Ohms).
In my case, the resistance of the coil together with two meters of connecting cable turned out to be around 0.9 Ohm.
Unfortunately, this simple method will not be able to detect an interturn short circuit, so you have to rely on your accuracy when winding. A short circuit, if there is one, will immediately manifest itself after starting the circuit - the metal detector will consume increased current and have extremely low sensitivity.
Modules
Small squares of paper are used to make parts for modular origami. They are no less convenient than their classic rectangular counterparts, but are used only for tangram puzzles - flat figures assembled like puzzles. There are two types of modules: main and additional. The second option is needed for narrow long parts:
The main module folds as follows:
- We bend the square base diagonally.
- Raise the outer corners up to the center line.
- Turn the workpiece over.
- Bend the top.
- This is what should happen.
- We lower the forked part over the previously bent one.
- Fold the resulting triangle in half into a “valley”.
- The final module is presented in steps 8 – 10.
Source
Finish painting
I found an excellent paint for fiberglass and fiberglass products - epoxy resin with the addition of a dye of the desired color. Since the entire structure of my sensor is made on the basis of bauxite, the resin-based paint will have excellent adhesion and will fit like original.
I used alkyd enamel PF-115 as a black dye, adding it until the required hiding power was obtained.
As practice has shown, a layer of such paint holds very firmly, and looks as if the product was dipped in liquid plastic:
In this case, the color can be any depending on the enamel used.
The final weight of the search coil together with the cable after painting is 407 g
The cable separately weighs ~80 grams.
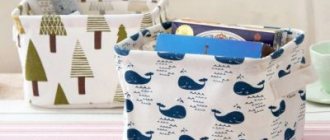
Box made from tape reels: ideas, recommendations, tips
Don't give up at the beginning of the journey. We decided to create boxes in the style of pincushions - which means you sew a variety of hats, biscorn, ziguga, sachets, turtles for your box. At the same time, they can be combined in different ways: on the product, under it, or making the box part of the decor.
In order for a product to amaze with its uniqueness, you need to develop your own signature style. And for this you need to find your own direction. Maybe these will be crafts intended only for needlewomen. For example, multi-tiered boxes in the form of a long tube, the walls of which are tied with ribbons, are in demand. When it opens, the walls swing open and 4 round boxes appear, glued diagonally. The tube is very convenient, since the tiers do not cover each other and the needlewoman can see all the material.
After creating a new model, do not rush to sell it, but try it out in action. Sometimes the bottom may fall off, despite high-quality glue. Then it’s worth securing the box with a cloth or knitted cover.
Scrapbooking master class: Shabby box made from a tape reel
I would like to present to your attention a master class of a box with fabric inside. This post will be long!
Pomogaeva Irina Aleksandrovna
Author's blog: Paper wings…
We will need: 1. Satin (you can use other fabric).2. Sintepon.3. Cardboard.4. A small piece of satin ribbon.5. PVA glue.6. Hot gun.7. Scissors.8. Pencil.9. Scotch tape tube.
10. Scrap paper and decorations for the box.
Cut out 3 circles. The first one will be the outer bottom of the box, it is the size of the tube. The second one will be the lid, it is also the size of the tube. The third will be the inner bottom, it needs to be made approximately 5-7 mm. smaller than the inner bottom of the tube.
Apply PVA glue to the edge of the tube on one side and glue the outer bottom.
Next we cut out more details.1. Satin detail. It will be inside the box. This part should be approximately 5 cm higher in height than the height of our tube and approximately 2 cm wider in width than the outer circumference of the tube (for stitching).
We sew this part by hand or by machine from the narrow side together.2. We cut out a part from padding polyester; this part will be under the satin inside the box for softness and airiness. The part should not be too thick; you can even divide the padding polyester in half or take a third.3.
We cut out a part from padding polyester according to the size of the inner bottom of the box (small). 4. Inner bottom. 5.. We cut out a part from satin to fit the inner bottom of the box. The satin part should be 1.5-2 cm larger than the bottom.6. Box lid.7.
Satin detail for covering the lid of the box. It should be 1.5-2 cm larger than the cap.
8. A piece of satin for attaching the lid to the box.
Using a hot gun, glue the padding polyester to the inner bottom of the box (small) and to the tube inside.
Now we cover the inner bottom (which has padding polyester) with satin. Using a hot gun, glue the satin to the bottom as if crosswise. And so on. At the end, we glue the edges of the satin well and carefully so that they do not stick out.
It turns out to be such a soft “pillow”.
We do the same with the lid, only there is no synthetic padding in it.
We try on the stitched inner part of the satin in the box. Part of the satin remains “lying” on the bottom, we bend the other edge around the tube and carefully glue it using a hot gun. The padding polyester remained inside
Attention, there should not be too much satin on the outside, it’s good if it is without folds at all, it will turn out neater
- Glue the inside bottom using a hot gun.
- We also glue a piece of satin to the lid and to the box with a gun.
- These are the blanks you get.
- We cut out pieces from scrap paper suitable for our design for gluing the lid, bottom and outer part of the box.
- Using PVA glue, carefully glue all the parts.
The joint between the satin and the paper can be hidden using lace (like mine) or braid. You can also glue the ties if you want, but you don’t have to glue them.
We decorate to our liking and admire the result! I got this shabby box!
Enjoy your creative endeavors!!! Thank you for your attention!
Tall box (organizer)
Several reels of the same diameter are glued along the edge. It is better to take reels from the same manufacturer so that the edges match perfectly. Then sand the surface of the resulting bushing. From a piece of thick cardboard, cut two circles along the diameter of the reel. One circle is the bottom, the second is the lid. Glue the bottom to the finished sleeve, glue the lid to a single reel.
Now they make an insert strip on the lid. To make it, take a reel of tape, cut it across, and cut the length of the tape up to 5 mm wide. The tape is folded so that it lies along the inner circumference of the lid with a protrusion of 0.5 cm beyond the edges. This creates an insert strip that will hold the lid. The tape is glued along the inner plane of the lid. All that remains is to decorate the entire jar with any fabric or film - an excellent organizer for small items is ready.