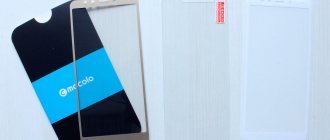
The larger the cell phone screen, the higher the chance of damage. Scratches, grease stains, dust are constant companions of large diagonal screens. Protective film will help extend the life of your cell phone or tablet display and preserve its appearance. It is not difficult to glue it with your own hands, even without experience.
phone protective film
Preparing your phone
Remove unnecessary objects from the table, move away the table lamp and other potential sources of dust. Turn off the phone, remove the battery if possible, and replace the back cover. Wipe the screen and body of the phone with a dry cloth; paper napkins leave cellulose particles. Use a mild soap solution to remove grease stains and remaining dust from the phone screen. Place the phone on the table.
phone preparation
Several directional film mask recipes
- Cucumber juice mixed with green tea and chamomile infusion will help with blackheads, enlarged pores and oily shine. Application time is 20 minutes, the effect is amazing.
- White clay in combination with gelatin and warm water is good for narrowing pores. It will only take a quarter of an hour to prepare and time for contrast washing.
- When wrinkles and sagging appear, a simple gelatin film with an added teaspoon of oil will help. Half an hour, and the face looks completely different.
- And even with inflammation, poor complexion and problematic rashes, you can make a film mask from linden and chamomile decoction with gelatin mixed in equal proportions, the preparation of which will take about 15 minutes. All ingredients must be whipped until smooth before use and applied in an even layer. You should wash your face with water after the mask.
Method using tape
Remove the film from the packaging. Without removing the protective layers, apply it to the phone screen. Align exactly with the speaker holes and buttons. Using wide tape, glue one side of the film to the side of the phone body. It is better to choose the right side, it has fewer buttons. As a result, the film should open like a book cover.
Check again that the film matches the contours of the screen and buttons accurately. Check that there is no dust on your phone's display. Peel off the bottom layer of the protective film and place it on the screen, as in the photo.
Using a bank card, remove air bubbles by smoothing towards the edge of the screen. If you find dust particles under the film, take the stickers that came with the film. Glue one to the corner of the protective film, this will make it possible to carefully separate the film from the screen. Second, use the adhesive part to remove particles from the screen. Gently press the film. Remove air bubbles if necessary. Remove the top layer of protective film.
Questions and answers
What should I do if there are still bubbles on my X One?
If, after sticking the armor film, the air does not escape from under it, then there is a high probability that the bubbles will disappear on their own within a day.
Is it possible to re-stick the film if the alignment is unsuccessful?
Yes, the bottom layer of the protector allows you to correct the situation by re-sticking it.
What will help if the display is slightly curved?
If the armor film cannot take shape, you should use a hair dryer to warm it up while smoothing the edges with a rag.
Method with soap solution
For this method you will need any spray bottle. A bottle of eau de toilette or perfume will do. Dilute a weak solution of dishwashing detergent in a pre-washed bottle. With the phone on the table, spray the screen with soapy water, avoiding any liquid getting into the speaker. Wipe the screen dry with a cloth. Make sure there is no dust on the display.
Apply a thin layer of soap solution again. Remove the bottom layer of the protective film and apply it to the screen. Align the holes for the speaker, camera, and buttons. Using a business card or bank card, gradually squeeze out the soap solution from under the protective film, holding it with your hand.
If dust gets under the film, peel it off the screen, remove the dust, apply a little soap solution again, and squeeze it out to the edges of the screen. The squeezed-out soap solution must be promptly removed with a dry cloth. After making sure that the film is installed correctly, remove its top layer.
How to properly stick a hydrogel film so that there is no debris or air underneath it
To cover the entire iPhone 11 screen the first time, you need to follow a few simple tips. At the same time, it is important to ensure that the display surface is perfectly clean and to carry out manipulations only in a dust-free room. The hydrogel film should also be properly centered.
Required Tools
To apply film to iPhone 12 or 13 Pro, you will need to prepare the following tools:
- alcohol wipe;
- microfiber cloth;
- plastic card.
Preparation
To prevent dust particles from getting under the film, it is recommended to do a wet cleaning and clean the work area before carrying out the procedure. You should also close doors and windows to prevent drafts. Before pasting, you must wash your hands with soap.
Step-by-step algorithm of actions
To properly wrap an iPhone or Samsung in film, you need to adhere to the following action plan:
- Prepare the display for pasting by thoroughly cleaning it from grease, dirt and dust. An alcohol wipe will help with this.
- Then wipe the screen with a dry cloth to remove lint. There should be no streaks left on the surface.
- Remove the bottom layer of armor film, marked with the letter “A”.
- Center the film so that it lies flat on the surface of the screen.
- Remove the bottom layer of protection by carefully lifting it up. Using a card, smooth the film over the display. You need to stick from the center to the edges, while expelling air bubbles.
- Do the same with the second half of the screen.
- With a little effort, use a suede cloth to move around the perimeter of the display.
- Remove the top mounting layer from the tread.
Sticker according to instructions
The method described in the instructions for the protective film suggests cleaning the phone screen. Make sure that the film matches its model by placing the film on the screen. Next, you need to separate part of the bottom layer of the protective film. Align it with the edge of the screen, and gradually separating the bottom layer, press the film against the screen. Use a business card to squeeze out any air bubbles. Remove top layer.
To glue the film in this way with your own hands, you need to have sufficient experience. It won't work the first time.
How to glue the loose corners of protective glass[edit]
Take a sugar cube and dissolve in two to three teaspoons of hot water. Make sure there are no hairs or specks under the peeled corner. If there are any, carefully pry up the glass and remove them, for example, using a toothpick. Next, you can use a toothpick again, drop a drop of sugar syrup under the corner of the glass and press it. Then we hold it for about five minutes, driving out the excess, and then we warm up the corner with a household hairdryer, pressing the glass tightly for 15 - 20 seconds.
In total, you need to wait 12 hours. The squeezed-out sugar mass tends to flow into all the cracks, you need to constantly soak up the excess with a napkin. The syrup does not spread evenly on the glass and tends to form droplets. The glass slides easily over the syrup and tends to move no matter how much you squeeze out. Due to the weak adhesive ability of the syrup in its raw form, you need to press the glass for a long time.
Universal film
It is not always possible to find a protective film for a specific phone or tablet model on sale. In this case, a universal film is suitable, from which you can cut the required size with your own hands. You will need:
- scissors or stationery knife;
- ruler;
- pencil;
- cardboard;
- cutting board or other hard surface.
Cut out a mock-up of the future film from a piece of cardboard. Pay attention to the coincidence of the corners of the screen, speakers, and buttons. Using a pencil, transfer the outlines onto the top layer of the protective film. Place the film on a hard surface. Using a ruler and a utility knife, carefully cut the film along the outline. Check if it matches your phone screen. You can glue using one of the above methods.
Requirements when choosing a film
To answer the question of how to properly stick a protective film on your phone, you just need to strictly adhere to a certain sequence of actions, and in this case the result will be excellent. So, first you need to choose a suitable coating among many different models. All of them can be divided into 3 groups:
- Official licensed products of the same brand as the smartphone, designed specifically for it;
- Films from other manufacturers for this device model;
- Universal films that need to be cut to fit your model.
The type of coating you choose will determine how long it will last and how good it will look on your device.
If the cost of a smartphone is quite high, and the brand is quite well-known, then you should contact either the company’s official website or consultants - large companies often make accessories for their gadgets themselves, and they last longer and look better.
For non-standard screens or rare models, the best option would be to purchase a universal coating.
How to remove the protective film from your phone: detailed instructions
Execution steps:
- The surface is degreased to increase the adhesion of the adhesive tape.
- A strip of tape is glued to one side.
- You need to simultaneously pull the adhesive tape away from the display and try to pry off the edge with a sharp wooden or plastic tool.
Such manipulations are performed if you need to free the screen from a protective film that has been in use for a long time. To remove the factory protective glass from a new mobile device, just pry the edge with your fingernail.
Fourth stage
In almost all cases, after gluing the film, bubbles appear on the phone screen. Many people start to worry about these bubbles because they think that they are quite difficult to remove. Other people simply don't pay attention to them and use their phone, trying to ignore them. In fact, all you need to fight these bubbles is two minutes and a credit card.
You just need to take a credit card and then use it to smooth out the protective film until the bubbles are gone. These bubbles are caused by air and are no big deal, you just need to grab them and smooth them out.
After completing these four steps, you will have a perfectly protected screen with a new film. In fact, you don’t need to do anything to care for the film, just wipe the screen occasionally so that it doesn’t get too dirty.
Still, there are some nuances that need to be adhered to when gluing the film, and now we’ll talk about them.
DIY protective film for smartphone
Have you ever thought about the fact that sometimes we are treated like complete suckers? How can a piece of polyethylene measuring 13 x 7 cm cost from 60 (about 4 dollars) to 200 hryvnia? If only this film would last a couple of years, another tobacco, but I don’t want to feed parasites.
I always used regular tape on simple mobile phones. In particular, it helps hide scratches on plexiglass. For the smartphone, I took thicker and wider tape. For gluing, we need adhesive tape , a narrow utility knife , a rubber spatula , of which there is plenty in household supply stores and is inexpensive, and a piece of cotton fabric.
Next, watch the video.
I would like to draw your attention to several points. 1 . The tape is thick. 2 . Tear the tape off the spool with a SHARP movement. 3 . Glue the tape with one end to the end of the mobile phone, hold the other end AT AN ANGLE so that it does not stick on its own. 4 . Press the spatula relatively firmly and move it evenly.
By the way, tape helps if there is no oleophobic coating on the glass of the smartphone. On my LG Optimus L90 Dual D410 there was no such coating and the glass was smeared even with clean hands. Scotch helped.
Source
Liquid glass
Liquid glass to protect your phone
Liquid glass is an emulsion that, when applied to the screen and exposed to warm air, hardens, forming a protective layer. It is very thin (0.0004 mm), so it remains invisible to the naked eye.
But liquid glass has not received wide recognition, and reviews are mostly negative.
Main disadvantages:
- shockproof properties are low;
- short service life (no more than 6 months);
- It is impossible to monitor the condition of the protective coating.
Types of glass
Characteristics of safety glass
Safety glasses differ in geometry, glass thickness and strength. Includes several layers: silicone, deterrent, anti-reflective, safety and oleophobic. Therefore, the level of protection is high.
Glass coating options:
- glossy - standard;
- matte - you can work comfortably in bright sunlight;
- ultra-transparent - the effect of no coating on the screen;
- private - it is impossible to see information on the screen if a person looks at it at an angle.
Depending on volume:
- 2D - a rectangle with sharp corners, protects only the screen;
- 2.5D - rounded edges, there are holes for the central button and speaker;
- 3D - designed specifically for phones with curved screens;
- 4D, 5D, 6D and 9D - they are thicker than the previous type, fit tightly and are glued to the entire screen area. The shockproof properties are more pronounced. There is no plastic frame, they are made of solid glass, which indicates the high quality of these protective accessories.
Advantages of glass:
- Protects the screen from impact when dropped.
- If there is a strong fall, the glass will break, but the screen will remain intact or the damage will be minor.
- Availability.
Smartphone screen after a fall: the protective glass is cracked, but the screen remains intact.
Disadvantages of glass:
- Options are not presented for all gadget models.
- Great thickness.
- If the phone falls on its end, the glass will not help.
Features of film for smartphone
The material is of minimal thickness (up to 1 mm) with a high elasticity index - this is good protection for your smartphone from scratches. However, it will not protect against more severe damage, for example, from an impact or fall. Enhanced smartphone protection can handle this task. This type of coating is made from high-strength materials.
Types of protection for a smartphone:
- matte;
- glossy;
- mirror
The matte protective film does not show fingerprints. It maintains the attractiveness of a mobile device. There is no need to frequently clean the product from dirt.
Any defects or fingerprints are visible on the glossy surface. This film needs to be cleaned frequently. However, this coating is superior in attractiveness to its matte counterpart. In addition, the glossy film is not visible when using the smartphone.
Mirror smartphone protection resembles gloss in properties and appearance. However, the surface reflects the surrounding objects much better. This provides a mirror effect. There are different types of coatings that differ in material properties:
- with antibacterial coating: when bacteria get on the surface, they are destroyed;
- anti-spyware: help hide information on a smartphone from strangers, with only the glow visible.
There are different coatings:
- hydrogel;
- vinyl;
- polyurethane.
The first option is distinguished by hydrophobic properties , elasticity, and the ability to restore shape. The advantage of hydrogel is the comfort when using a mobile device: the coating is not slippery, but at the same time there is a high sensitivity of the material with a protective function.
Vinyl film is reliable protection for your smartphone. It is recommended to stick it on the back cover and screen. The coating improves the appearance of the smartphone due to the pattern. However, pasting the device should be done with the utmost care, since it is more difficult to eliminate defects later. For example, the standard procedure for squeezing air bubbles out from under the coating is practically impossible when choosing vinyl, due to the high adhesion of the materials.
Read also: What to do if you break your phone and the sensor doesn’t work? Why is broken glass dangerous? Official service centers