The art of wood burning - pyrography - was given to the world by the Peruvians back in the 7th century BC, who decorated their homes with burnt products. Some researchers consider the African continent to be the birthplace of this type of creativity.
It is known that many creative personalities, such as artists Rembrandt and Picasso, writer Victor Hugo, were fond of burning.
In Rus', burning originated in the 9th century along with carving and other types of decorative and applied arts. They burned it using hot nails and other metal objects.
Thus, Permogorsk painting consisted of burning patterns and subsequent application of paints, Sergiev Posad painting involved burning on three-dimensional figures (matryoshka dolls), although due to the great demand for them, craftsmen had to switch to a faster method - painting with paints.
Burning was then used on things for practical purposes: bread bins, dishes, furniture, souvenirs, toys.
In the 19th century, steam, alcohol and gas pyrographs appeared, and in the mid-20th century, the progenitor of modern burners was invented.
Today, anyone who wants to do burning can purchase all the necessary tools in craft stores: an electric burner, wooden blanks for future products (boards, boxes, pencil boxes, three-dimensional figures), varnish and paints, as well as copying and sandpaper.
What is pyrography
Pyrography is the burning of various patterns and designs on wooden plates using a special device - a pyrograph. This activity has a rather interesting history, because even ancient people were engaged in burning on wood. Of course, it is difficult to compare the drawings of that time and today’s, because the technology of this craft has greatly advanced.
In the process of work, stencils for wood burning are used, which can be purchased separately from the pyrograph, or painted on special boards. This activity can be both fun and beneficial, because burning trains hand motor skills, imagination, and also develops artistic skills.
Pictures for burning
Wood burning pictures, especially for boys, are very popular. And here we present a number of the most interesting drawings in our opinion. There are designs for burning here for every taste!
Stencil for burning on wood of a hunter with a gun. Suitable for beginners. A simple but solid stencil!
Cool pictures for burning wood for baths are very popular. Our people love to steam.) Cool pyrography. The clock hands were also attached here.
And another picture of a bathhouse. Husband and wife in the steam room with brooms! The burning designs are fun!
In the photo the horse is galloping rapidly.
And the boys will surely like the burning pictures with horses.
The horse's head from the front. Similar pictures are also suitable for sketching for beginners.
Image for burning bull. Stencil of a galloping bull. The beginning of 2021 is precisely the year of the bull according to the eastern horoscope.
In the photo there are two funny little kittens for burning. Fun pyrography!
Stencil for wood burning with a swallow, flowers and leaves
Image for burning: a ship is sailing in a stormy sea.
Adorable puppy in the picture. They tied a bow on his head for beauty.
Can be given as a gift to a girl from a boy.
The boys like pictures for burning tanks. And here is also the legendary T-34 tank.
- Pyrography on a military theme.
- Burning Easter with Easter bunny, flowers and eggs.
- A simple burning design for a dancing unicorn.
Pictures for burning roses flowers for girls as a gift are good. Girls really like these types of burning designs.
- And these roses are in the basket.
- Lily flowers in a basket.
Adorable dog in the picture for burning. Burning designs with dogs are very popular.
https://www.youtube.com/watch?v=gBLywv-5QcQ
Bull template with smoke coming out of its nostrils. Fierce bull.
Funny hedgehog with a mushroom in his paws. The hedgehog found a big mushroom and is very happy about it! Children especially like these cool pictures for wood burning!
- Image for burning a deer for poetic natures.
- In general, sketches for burning with animals are in great demand.
And this is the finished product in the photo: a lovely girl with flowers on the kitchen board. As a gift for the hostess.
- Stencil for wood burning with two cranes.
- Cartoon mouse with a cornflower, a bell and a daisy in its hand.
- A simple drawing of a hedgehog with a smile.
- And this hedgehog with a mushroom on its spines.
Outline drawing of a cartoon bull with a long tail. 2022 is exactly the year of the bull!
- Pictures for burning a butterfly for girls are just right.
In the photo, Carlson is flying with a jar of jam or honey against the background of clouds. Burning designs with your favorite characters will delight you!
- Burning out space with an astronaut, planets and rockets.
Intricate fantasy drawing with a warrior woman. This is already for the experienced.
- Beautiful horse in the picture for burning.
Pyroprinter in the photo. This CNC-based machine can burn pictures itself.
A formidable tank in battle. Boys like burning designs on a military theme.
- Stencil for burning on wood with a tit bird.
Pictures for wood burning cats are one of the most popular. Pyrography for kids!
And this picture is a gift for my beloved grandmother!) The bunny grandson treats his bunny grandmother with an apple!
- Image for burning a formidable eagle.
- Another stencil of a galloping bull.
Burning picture of a mother holding her son. Delicate pyrography as a gift for mom.
- Stencil with a beautiful girl decorated with flowers in her hair.
Picture for wood burning two frogs. Two frogs smile at each other. Touching!) These burning drawings are quite suitable for sketching and coloring.
And this is a sad horse. For poetic and romantic natures, this is a good theme for wood burning.
Flowers and butterfly. Sketches for burning with flowers and butterflies are just what girls like best. Girls do it less often, but sometimes they also engage in burning.
Technology and features of wood burning
There are several technologies and features of this process. They look like this:
- Contour technique. All the main lines are drawn on the board, along which a simple picture is gradually sketched. This is a beginner's technique, it is better to choose it to understand the principle of operation of the device.
- Silhouette technique. In this technique, only the background is burned out, and the design itself remains the color of the board. An interesting way, because the pictures then turn out not dark, but on the contrary – light.
- Artistic technique. This is the most complex technique, as it combines the two previous methods. In it, the artist works not so much on the figures, but on the incidence of light, shadow, volume, and so on.
Interesting: Companies and organizations that are engaged in burning logos and inscriptions on various objects, of course, without using a pyrograph.
This would be strange, because the process of applying a design with your own hands takes too much time, which would make it impossible to put production on an assembly line. For this purpose, special laser machines are used that are connected to a computer. A design for burning is entered into the program, and it is gradually applied to the object.
Characteristic patterns
To make special images in the form of curling patterns on wood, it is best to use plywood for this - it is soft, light in color, and can be easily processed, so it is best suited for this type of work. Pattern application:
- Sketches of patterns for burning can be found on the corresponding website and downloaded for free. It is important to choose the pattern that you like the most. Such patterns are transferred to a wooden surface and creatively designed.
- Any artistic type patterns will look attractive on any furniture (for example, on wall shelves, cabinets, decorative elements), as well as kitchen items: rolling pin, cutting boards, wooden spoons.
- Particularly widespread are burning patterns with different floral images that will advantageously decorate any tree. Drawing such patterns is much easier than more openwork designs or lace.
Burning set
To create art and act as a pyrographer, you will need a set of several items. You should start with a burner, of which there are two types.
Loop pyrograph
This is a classic tool for burning on plywood, which was invented in the middle of the last century. It is a handle at one end of which there is a sting and a loop. It is by heating the loop that the process of depicting various figures occurs.
This tool has a power supply with a temperature controller. The only downside of this device is the fact that it cools down quite quickly. But heating does not take much time.
Soldering iron burner
This is a tool for higher level pyrographers. The tool looks a lot like a soldering iron, but performs different functions. It burns wood faster, although it takes a little longer to heat up than its loop counterpart. The advantage is a large number of replaceable nozzles, as well as a long cooling process.
After applying the drawing, the picture is processed. In addition, pictures for burning are first applied to the board, and this requires tools. The set here is:
- A simple sharpened pencil, carbon paper.
- Paints, varnish, masking tape, scissors.
- Sandpaper, pliers.
- Wet cloth, dry towel.
Having assembled this set, you can begin wood burning.
Proud Tiger
Unlike more complicated stencils, even a child can burn out an animal if you use a more simplified version of the sketch. Experienced craftsmen can use something more complex, with a large number of small lines. Drawing a tiger on a board is best suited for training a beginner pyrographer.
To help your child better develop his skill, it is best to choose a picture with additional details - plants, flowers, other animals. Such designs are most often used to decorate cutting boards in the kitchen , and also form an entire composition. Over time, the baby will begin to improve his skills and develop the ability to create more complex images in pyrography, and then he will be able to burn portraits.
Tips and secrets for beginners
To ensure that your drawings are neat from the very beginning, it is enough to follow simple rules:
- In the process of applying the first point, you can blow a little on the sting, so it will turn out neat.
- Contours are done with slow movements and one line. It is important not to scratch the wood.
- The tip often needs to be cleaned to remove burn marks. A metal brush is suitable for this.
Note!
Plasticineography - interesting options for creating pictures from plasticine on cardboard for children
DIY scrapbooking for beginners: what it is and how to do it. What you need to create a beautiful album or notebook (photo + video)
How to make a craft with your own hands: what you can do with your own hands at home
Important: There is no need to overheat the pyrograph, otherwise the lines will turn out too black.
All experienced pyrographers give this advice to their students.
Beautiful examples
Several examples of finished works will help you navigate what images you can choose.
- A wonderful option for a child. A bunny with a carrot is not so difficult to implement, but looks very cute.
Of course, you will have to monitor the entire process and help somewhere, but the result is worth it.
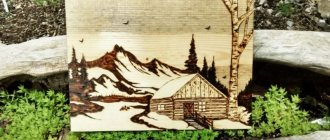
- More complex plot, but impressive . The design will most likely need to be drawn in detail on the board in pencil before the burning process begins.
- This is the option when you can copy from a picture and get a pretty decent result. A cute donkey is a good choice for a child, a recognizable and beloved character from the good old cartoon.
- Another simple option that can be implemented by a novice master. All you have to do is draw the outline of the drawing on the board and you will get a cute dog.
- A bunch of grapes, complemented by patterns, is an excellent option for the kitchen . It’s not difficult to draw one, and if you wish, you can use carbon paper.
- A realistic and picturesque plot, but accessible for execution only to a person familiar with fine art. The kitten with a butterfly looks like a real one, all the details are drawn in great detail.
Safety precautions
There is a set of rules that must be followed when burning designs on wood. The safety rules look like this:
- You cannot play with the instrument. Even a simple touch with a hot sting will cause a severe burn.
- You can only hold the pyrograph by the handle - you cannot grab the tip, even if it seems more convenient.
- Nozzles need to be changed only with pliers. You shouldn't grab it with your bare fingers.
- During operation, the device is placed only on a special stand. Remember that even after turning off the tip will still remain hot for several minutes.
- Exposed wires are wrapped with electrical tape before use. Accidental touch will cause electric shock.
These simple rules will make a picture for burning on plywood not only beautiful, but safe.
Important: If a child is working, at first an adult should look after him.
Snowflakes and snow figures
For burning, you can use more neutral images (geometric shapes, still lifes, small animals and other pictures), as well as a specific theme. Thematic ones include thematic drawings or holiday stencils. The most common ones include New Year's ones (with the image of Father Frost and the Snow Maiden, a special postcard, a garland, a gift or a decorated Christmas tree). This list of thematic images can be very long.
You can quickly find a more suitable sketch on the Internet, download it (if necessary, you can further change the drawing in Photoshop), print it and carefully transfer it to a carefully sanded surface made of plywood or other wooden blank. Attractive New Year's images, burned out with your own hands, will not only attractively decorate the house during the holidays, but will also continue to delight the owner throughout the next year.
Where to begin
First you need to correctly position the tools at your workplace:
- A soft towel lies under the elbow of your working arm.
- The tool is located on a non-stick stand.
- Not far from your work area there are pliers and a damp cloth.
- The hood or fan is turned on in the room.
You need to start working by preparing the surface.
Surface preparation
The lighting above the board should be sufficient to see the lines when drawing. Next to the board there are attachments that can be quickly changed if necessary. It is better to wear a respirator to avoid breathing smoke.
Note!
- DIY foam crafts: snowman, Christmas tree, sculptures, original figures with instructions (photo + video)
Papier mache from egg trays, boxes, cassettes: the best ideas on what can be made from egg packaging
DIY vase: step-by-step photo instructions, master class for a beautiful and unusual craft
Drawing
If designs for wood burning are applied from a stencil already prepared on a sheet of paper, then you need to use carbon paper. The image transfer looks like this:
- First, a sheet of copy paper is placed on the board.
- The printed image is placed on carbon paper.
- The image is outlined with a pencil.
- The carbon copy and printout are removed from the board.
Now you pick up a wood burner and begin the main work.
Burnout
First, the external and internal contours of the design are burned out, gradually moving to the central parts. Wood burning for children can be tiring for a child - you don't have to paint everything at once. You can rest a little and then get back to work.
Finishing
The finished pattern is sanded with a fine-grain sanding sheet. After which the picture is wiped with a towel to remove wood dust. Wood burning for beginners often occurs without the use of stencils, but if the artist liked the design, it should be coated with wood varnish. All that remains is to let the painting dry.
Airplane
Simple pictures for burning for children aged 7–9 years are contour sketches that can be easily transferred to a wooden blank using carbon paper. As you master the “drawing with fire” technique, you can move on to more complex sketches.
For example, on the Internet there are many models of military and passenger aircraft - pictures for wood burning. All that remains is to print, draw and burn. This is how easy it is to master pyrography with the help of stencils and templates. As they say, from simple to complex. Success in creative work!
Pyrography has long become an integral part of folk art - this type of decorative art is enjoyed by people of different professions, regardless of age. And all because every person is capable of mastering this technique. The main thing is desire, perseverance and accuracy, since “drawing with fire” does not like haste. In addition to the main tool (pyrograph), you also need an idea. That is, a sample or sketch according to which you will burn.
Experienced pyrographers (usually artists or designers) prefer to take interesting images from their heads. However, it is much easier for beginners to draw pictures using ready-made drawings and stencils. Start with simple subjects (for example, outline sketches of animals or motorcycles) and gradually move on to more complex exposures. This article presents the most popular ideas for pictures and drawings, which, with the proper level of preparation, you can easily burn onto a wooden blank with your own hands.
#1 Icons for wood burning
Since only talented artists can draw and burn icons on their own, it is much easier for novice pyrographers to implement this idea using ready-made stencils for burning. Be prepared for the fact that working on this “project” will take a lot of time, because icons are very complex artistic compositions. However, the end result will meet any of your expectations. You can download pictures for wood burning on the Internet. You can enlarge the picture to the desired size using any free program for working with digital images.
Print the sketch on a printer, and then transfer it to a wooden blank using tracing paper (copy paper) or other available methods that were discussed in detail in previous articles. When burning a design on wood, start first with the main contours, and only then move on to small strokes and lines. If you wish, you can decorate the frame and frame of the icon with jute filigree - the effect will be amazing.
submitted by Anton 01/13/2018, 18:14
#2 Patterns for burning
To burn an image in the form of ornate patterns on wood, it is best to use a plywood board - it is soft, light and easy to process, so it is ideal for such work. As for sketches and stencils for burning, they can also be found and downloaded for free on the Internet on thematic websites. Choose the pattern you like, transfer it to a prepared piece of wood and start creative work.
Any artistic patterns will look perfect on pieces of furniture (for example, wall shelves for books or homemade decor), as well as kitchen utensils: wooden spoons, rolling pins, cutting boards. Particularly popular are patterns for wood burning with light floral motifs that will decorate any wooden surface. They are much easier to draw than openwork compositions or “swirly” lace.
submitted by Anton 01/13/2018, 18:23
#3 Flowers for wood burning
If you have already mastered the initial technique of “drawing with fire” at home and learned how to skillfully use a pyrograph, it’s time to move on to drawing more complex images - for example, still lifes. These can be either flowers in a vase that stands on the table, or an unusual floral pattern in space. There are many ideas for burning. For beginners, you can choose primitive flower schemes and sketches (chamomile or tulip). But if you draw well, you can burn larger flowers - roses, carnations or gladioli. Such stencils for wood burning can be easily found on the Internet. Flowers always look good on a variety of decorative surfaces and cutting boards. You can even make your own exclusive painting, which you can then proudly hang on the wall or give to loved ones.
submitted by Anton 01/13/2018, 18:26
#4 New Year pictures for burning
For burning, drawings and sketches can be neutral (landscapes, geometric shapes, animals and other similar images) and thematic. The latter include drawings of a specific theme or holiday ones. The most popular pictures are New Year’s (Happy New Year cards, images of Santa Claus, decorated Christmas trees, garlands and gifts). This list can be continued for a long time.
Select a suitable stencil on the Internet, download it to your computer (if necessary, you can process the image in Photoshop), print it and carefully transfer it to a sanded plywood board or other suitable piece of wood. Beautiful New Year's pictures, burned with your own hands, will delight you not only on holidays, but also throughout the next year.
submitted by Anton 01/13/2018, 18:28
#5 Stencil for wood burning house number
For boys, designs for wood burning should have a “masculine character” - it is unlikely that young pyrographers will want to draw ornate patterns, flower arrangements or cartoon anime girls on the surface. They prefer to burn cars, ships, and architectural structures.
Therefore, the best option for boys who are interested in pyrography are paintings for wood burning not with elements of painting or still lifes, but images of cars, buildings, airplanes, weapons and military equipment. As an option, you can download house templates (country cottages, country houses, high-rise skyscrapers). Boys will burn even a simple license plate of a house with much more pleasure than flowers in vases and other feminine “things”.
submitted by Anton 01/13/2018, 18:31
#6 Pattern for burning on a cutting board
The simplest and most accessible option for beginners to consolidate theoretical skills in practice is to draw various designs using a pyrograph using a ready-made template on a kitchen cutting board. This activity will appeal to both boys and girls. You can choose any patterns and sketches to decorate wood. Why is it easier for beginners to practice on a cutting board? Because soft plywood is best suited for pyrography - it’s easier to transfer the image onto it through carbon paper (everything is drawn well), and it’s easier to burn, compared to hard wood. Create unique stories on wood and share your personal successes with others.
submitted by Anton 01/13/2018, 18:35
Paintings for wood burning
Sketches for wood burning can range from large projects with shadows and three-dimensional figures to simple drawings. It is better for beginning pyrographers not to take on complex tasks, but to gradually learn this craft.
Note!
- Paintings from buttons, panels, appliques and compositions with your own hands: how to make flowers, a butterfly, a fish or a tree craft from buttons
- Flowers made of wool (85 photos) - how to felt a flower from felt or a wool brooch. Step-by-step instructions for beginners
What can be made from wool (95 photos): felting for beginners, master class, felting techniques
Popular stories
You can draw scenes from cartoons or films. Characters from various books, stories, and so on are suitable.
Drawings of patterns for frames
Wood pyrography also includes the application of various frames in which photo cards will later be placed. You can draw both ordinary patterns and national sketches.
Animal sketches
In addition to conventional animals, you can try to draw your pet.
Nature theme
Trees, fields, flowers and other plants - all this is suitable for paintings.
As you can see, pyrography is a fascinating and interesting process. Not only an adult can be interested in it; a child or teenager can also be interested in it. And what could be better than to distract a child from gadgets and teach him such an entertaining hobby.
Please repost
0
Numbers on the stencil
Burning inscriptions on wood in the form of numbers is best suited for boys, since they are unlikely to want to draw various patterns, circular curls, floral designs or cartoon princesses on the wood. Most of all, they enjoy architectural structures, cars, ships and other equipment.
The best option for a boy who likes pyrography would be images not of still life or painting, but of architecture, transport, airplanes, and weapons. For example, a parent can download an image of a house (a summer house, a large high-rise building or a plot of land). The boy will transfer even an easy-to-apply license plate at home onto a wooden surface with passion and enthusiasm.
We analyze popular designs for burning on a cutting board
For cutting on a cutting board, 4 types of wood are typically used. All of them are different in their density and color. The lighter the wood, the softer it is, which means the lower the temperature of the burner will work. In addition, light shades of wood provide greater opportunity to create shadows and different shades of strokes, which means that it will be easier to create real “living” paintings on their surface. It is the light and soft varieties of trees that are best suited for beginning burners.
First, you need to decide whether the board will just be a decoration for the kitchen or will it still be used for its intended purpose?
If you want to use the board in the future, then the drawing should not occupy the working part of the board. A simple pattern bordering the board or a small picture in the very corner will look great.
You can make the board not just beautiful, but also useful - if you burn a simple line on it, it will be easier to cut food into slices of the same length and thickness.
Using a burnt pattern, you can also mark the functionality of the board. For example, burn bread on a board for cutting bakery products, fish on a board for fish, as well as fruits and vegetables. This will help avoid the problem of mixing the smells of products, because wooden boards very tightly hold the smell of the products being cut on them. For such burning, you can use the templates presented below, or download others from the Internet.
If you just want to create an original decorative element, then the choice of pictures will be much wider. Again, a board with a burnt image of animals divided into specific meat parts with the name of each of them can be very useful in the kitchen.
Any mother or grandmother will be very pleased to hang in the kitchen a cutting board received as a gift and made by the hands of a beloved child. But it’s enough to buy a wood burning set for children, help translate a beautiful greeting picture and teach the child how to burn it correctly. Spending time with your child will allow you to give your mother or grandmother an excellent board, and your child to acquire a new exciting hobby. Look at an example of such work in the photo:
Methods of burning drawings
Sketches are preliminary drawings with clear contour lines, along which master burners apply the image to the base. They reflect the main idea and concept of work:
- color and light planning;
- composition;
- proportionality of forms;
- plot component.
Stencils are also used, the main function of which is to apply complex compositions to a wooden surface.
The more carefully the sketch or template is worked out, the better and more professional the result will be. Unfortunately, not all pyrographers are high-class artists - mostly they are lovers of creating something with their own hands, people who gravitate toward beauty and grace, but are far from perfect in using a pencil.
Beginners just starting to dive into this fascinating field of study can be advised to use the following methods:
- search the Internet for the image you are interested in and print it on a printer;
- visit a large market that sells goods for handicrafts and creativity, and choose from a wide range of products any burning set you like, with ready-made templates, stencils and sketches;
- Alternatively, you can find a similar product in a highly specialized online store and place an order.
The last two options require some financial costs, but the first one is quite economical and affordable. Needlewomen and craftsmen often resort to it in a variety of handmade areas. Even without the necessary equipment - a printer, it will not be difficult to implement your idea by using photocopying services in any photo printing salon or office supply store.
The variety of topics and wide range of applications in various household areas place pyrography on a par with the most popular types of crafts.
If we look back at the times of the Soviet past, we can remember that burning was one of the popular activities for schoolchildren. Club activities in pioneer homes and labor lessons in schools were often devoted to this applied type of creativity. Boys and girls enjoyed burning out a variety of pictures for their mothers, fathers, and friends.
Now this direction, gaining strength, is being born anew, adapting to modern realities. New interesting topics are appearing, tools and imaging technologies have been modernized. With their help, professionals create masterpieces of wood art.
Mastering the technique
Once the design is traced onto the board, it’s time to start burning. Make sure the board is completely dry. Then heat the burner until the nib turns dark red.
Be careful when working with a hot pyrograph, it is very dangerous! It is better to do everything more slowly, but there will be no consequences.
Burning is best done from the contour to the center. That is, we first outline all the outer edges and only then move on to the inner ones. It is best to burn in separate areas: once you have worked on one, move on to the next, but in another part of the drawing. This will allow the drawing to cool evenly and will not create unnecessary lines or random strokes. When the work is completed, it can be decorated with paints. And then treat it with wax so that the board has a shine.
Let the owner of the house decide for himself whether to use your gift in everyday life or hang it on the wall or put it on a shelf. In any case, your gift will find a worthy place in the kitchen and in the heart of your friend!
Kitchen cutting board
The easiest and simplest option for a beginner in pyrography would be to draw different designs based on the finished image on a kitchen cutting board.
This hobby will appeal to everyone, regardless of gender: boys and girls. In this case, it is allowed to use wood and any types of sketches and patterns for ornamentation.
It is much easier for beginners to hone their skills on a cutting board, because it is soft and is best suited for this task - paintings are quickly transferred to it through carbon paper (everything is drawn quickly and easily), unlike harder woods.
Even a beginner in pyrography will be able to create especially attractive patterns on wood and share their achievements.
At first, nesting dolls were created by burning, but after this type of work began to be called pyrography and used in folk art. Now there are many modern devices that can be used to work with other types of surfaces (paper, bones and leather). The simple device is used for drawing simple outlines and tinted pictures.
Burning on a cutting board is no different from burning on any other wooden object. Of course, cutting boards are constantly exposed to water, a knife or other liquids. Therefore, if you are going to not just create a decorative element from a board, but decorate your work surface, then be prepared for the fact that it will not last very long. But what does service life mean compared to the joy of creating a real, albeit small, masterpiece with your own hands? Let's look at popular designs that are just right for burning on a pre-prepared cutting board.
Pyrography is a great hobby
Thanks to the advent of the electric pyrograph in the second half of the 20th century, burning became a mass hobby, and not just the lot of craftsmen, because anyone can buy a pyrograph device and use it. Pyrography differs from other types of fine art in that it is not necessary to have drawing skills to practice it. Perseverance, accuracy and patience are much more important. To create your own patterns, a developed imagination will be useful.
Another significant advantage of this hobby is that it does not require significant financial investments , and if you master pyrography at a sufficient level, you can begin to make a profit from this activity. Currently, handmade jewelry and interior items, especially those made from environmentally friendly materials, are very popular. In addition, you can always pleasantly surprise your loved ones with a unique gift made by yourself.
To practice burning, first of all you should choose a high-quality and convenient pyrograph . You can start with a simple Russian-made device, familiar to everyone since childhood. These burners are reliable and easy to use, and come with several replacement needles. The price of such devices is usually low, and they are easy to find in any children's store or in a craft supply store.
