A good craftsman never wastes anything, every little thing is used: leaves, acorns, plasticine, clay, flowers, etc. Even straw can be used, products made from it are pleasant to the touch, have beautiful colors and are easy to work with.
Luxurious ladies' hats were made from straw and used in everyday life as furniture, crafts, boxes, panels, decorations, etc.
How to prepare straw for work?
Straw is used - these are dried shoots of cereals (wheat, barley, rye or oats) that remain after threshing. It is a soft material and can be used to create exquisite works of art. And work brings pleasure.
Let's figure out how to properly make crafts from straw with your own hands. If the straw dries out, it will be difficult to make anything from it. Thin stems can break quickly.
Experts advise steaming them before work to impart plasticity to the stems of cereal crops. In this form it is easy to weave any product. Then the craft is dried to maintain the desired shape.
Beautiful shine, sunny shades (from pale yellow to light brown), ease of work and aesthetics make ordinary straw a valuable material for needlework.
To work, you only need straight stems. It is better to collect raw materials manually along the outskirts of the fields. Use the middle of the stem and the bottom of the stem. It is better to cut in the nodal parts, this makes it easier to save pieces of straw.Where can I get the material?
You can get this material in several places.:
- in a field where cereals or legumes are grown just before or after the autumn harvest;
- in a store with craft materials or pet supplies;
- from farmers;
- on various Internet platforms, for example, YandexMarket or Avito.
Before purchasing, you need to check whether the straw has the qualities you need. To do this , ask the seller about the collection time and storage conditions of this product, and also ask to show a sample.
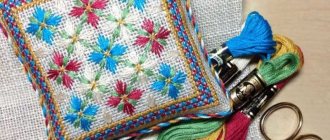
Straw applique
If primary school children will do the work, then it will be impossible to do without the help of adults.
Instructions on how to make a craft from straw:
- Smooth stems are steamed with boiling water in a deep basin (saucepan), cover with a lid and hold for several hours. They will become elastic and soft.
- You need to take the exact amount of material so that it is enough for 1 day of work. The remaining straw should be wrapped in cellophane, or in thick fabric.
- For appliqué, long strips of straw tubes are required. To do this, carefully cut the stem with scissors (knife).
- Smooth the bent stems with a hot iron, separate each ribbon and place it in a container.
- To glue shiny strips you need PVA glue and a design stencil.
- You need to select the strips by color and gradually glue them onto a piece of notebook paper or a printed stencil. There should be no gaps.
- When the applique is ready, you need to carefully iron it with an iron (hot) and place a press on it, for example, thick books.
Note! Do-it-yourself felt animals: patterns, templates, diagrams and ideas for sewing soft toys with your own hands (140 photos)
Weaving techniques and types
Before work, you need to practice on paper tubes. There are four known types of rye straw weaving:
- straight weave;
- spiral;
- flat braids;
- voluminous braids.
Spiral braid
The principle of operation is that the twisted flagellum is wrapped around a strong thread, ribbon, spine, bast, birch bark and laid out in a spiral with tight curls. The thickness of the flagellum depends on the dimensions of the future product; the shape is given during weaving. The tourniquet is rolled up in a spiral, the volume is increased in height, if necessary, it is narrowed or expanded. Products made from spiral weaving are cylindrical or spherical.
Beautiful flowers made from straws (or panels)
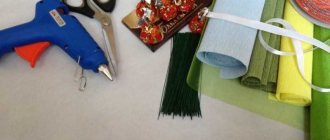
Prepare the following tools for work:
- wire 2 mm-20 cm;
- purple linen fabric;
- similar cotton threads (purple and yellowish);
- thin ribbon;
- container to bleach the straws.
Stages of work:
Place the straw in a deep container. Pour in the solution: 0.5 liters of water, hydroperite (9 tablets), ammonia (1 tsp) for 5-6 hours for uniform bleaching. You can press it down with a weight. Then rinse well and put in polyethylene for quick work.
Flower. You need 8-10 straw tubes, cut along the stem, unfold, and smooth with a hot iron.
We glue our strips onto white paper (preferably thin tracing paper) with PVA glue as a continuous sheet. Remove excess glue, roll with a rolling pin or put under a heavy press.
You need to make a stencil for flowers from cardboard. Place a stencil on the reverse side, draw 12 petals and cut out. Glue 12 petals onto purple linen fabric.
The same dense threads (twist with a rope), glue around the petal onto the fabric, leaving the “tails” at the bottom.
What is plumbing workHow to make decorative candles with your own hands at home
How to make an office organizer with your own hands at home
After drying, cut out all the blanks.
- You need to cut out a 10 cm circle from thick cardboard and glue 6 petals to it. It turns out to be a flower.
- On the other side, glue 6 more petals, and they should be slightly larger than the central ones, located between them. We are waiting for it to dry completely.
- We pierce it in the center in 2 places to tie it to the prepared wire. Cover the center nicely with straws.
- We bend the flower beautifully and cover the wire with thread or ribbon. The flower is ready.
You can make another flower from 1 layer (6 petals). Place 1-3 flowers in a small vase.
You can make an oval-shaped panel and decorate the inside with a large cage of sticks. Attach 3 flowers to the “net”, tie a ribbon or twist a thin straw into a spiral. To do this, we run scissors along the fiber of the straw, a “spiral” will spin,
Note! What you need to know about large-sized ones?
Flirty hat
A ribbon-braid is woven from four straws. By gluing the next straws, length is added, since the tape needs 15 meters for an average cap size of 57 cm. The braided braid is moistened in small sections.
In the process of sewing a hat: it is important to highlight the brim, bottom and crown. Sew the hat from the bottom. A well-moistened pigtail is bent 6 cm from the end, and the bent end is sewn with a needle and thread. Sew from the wrong side so that the front stitches are small and unnoticeable. The tape is bent again and stitched again. The bottom is sewn together in a circle, in a spiral. A well-moistened braid will not crack when sewing, and the hat can be easily shaped into any shape.
From the bottom they smoothly move to the walls of the hat. They move from the walls to the fields, forming a right angle. The approximate width of the margins is 10 cm. A hot iron is used to shape and smooth out unevenness. The end of the ribbon is sewn with several stitches. The excess is cut off.
Originally posted 2018-04-18 13:31:03.
Straw applique
The preparation of the material is described above. The straws can be steamed in water, always over low heat. Cut, steam with an iron.
You get beautiful children's crafts from straw based on a stencil, which is best drawn on tracing paper.
- Making a diaper cake with your own hands: a step-by-step master class on how to fold a gift for newborns (100 photos)
DIY crafts from egg trays: original toy ideas for children and useful crafts for adults (115 photos)
- How does an air source heat pump work?
To get different shades of straw, the iron must be at different temperatures. The hotter the iron, the darker the straw will become.
Straw basket
Making a straw basket is very simple. The main thing is to decide on the shape and size of the future basket. To make straw weaving easier, beginners can use a shoebox as a base. The bottom of the box will serve as the bottom of the basket. The straw stems are glued to the cardboard and weaving begins. Raise all stems except one. Carefully wrap the remaining straw around the vertical ones. To grow a braided stem, take the next straw, apply it to the first and lubricate it with PVA glue. The finished basket is decorated with ribbons. Make a handle for the basket from a twisted braid.
Straw boat
Separate parts, for example, sails - it is more beautiful to cut the strips in one direction.
Take turns gluing them onto dark-colored velvet paper, carefully looking at the diagram.
We make the sails light, the schooner itself is a little darker, and the sea - the wavy stripes can be darker. Place it under a press to dry the picture. Then you can put it under glass and frame it.
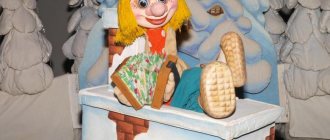
Interesting ideas for crafts made from straw:
- one flower;
- a bouquet of flowers in a vase;
- animal (bunny, bear, fox, dolphin, etc.);
- birds;
- fish with algae;
- a bunch of grapes with 2-3 small leaves.
DIY birch bark crafts - techniques and master class for making crafts for beginners (105 photos)What can be made from a construction set - methods of application and examples of what things can be created from children's construction sets (135 photos)
Crafts from baby food jars - 125 photos of original ideas for using small jars
Any drawing can be transferred to tracing paper and glued with straws onto beautiful (velvet) paper.
Wonderful crafts - wickerwork using the macrame technique, etc. You can weave a summer hat or make a three-dimensional doll or animal.
Note! Funny toys made of felt - the best patterns and patterns for sewing with your own hands. Step-by-step sewing master class (115 photos and videos)
Creative ideas for photos of straw crafts.
Raw material processing
The stem of any cereal plant, both cultivated and wild, is divided into several parts by so-called nodes. Each such part is called a knee, or an internode.
The longest knee is at the top and ends with a spike or panicle, and the shortest and thickest is at the bottom at the root. In rye, the upper limb can reach half a meter in length.
The straw in this area is narrow, with a slight tapering - a gradual decrease in the thickness of the trunk towards the top. Its walls are very thin, but quite strong. Therefore, the upper knee is an excellent material for any type of work. It can be conditionally classified as first grade.
Below are the second and third knees. They are much shorter than the first one, the walls are a little thicker, but basically they are used in the same way as the first grade straws.
The thickest knees, located closer to the root, are usually several times shorter than the upper and middle ones.
They have rigid walls, so they are most often used in weaving for making frame stands, as well as in those products where parts from tubes are needed, for example, in the manufacture of hanging decorations, squeakers for pity and spillikins.
The straw dried under a canopy is divided into two parts. One part is stored in the attic or in a dry room, tied into sheaves. The other part is pre-processed. The spike or panicle of each straw is cut off with scissors, the outer leaves are removed, and then cut into individual segments, removing the nodes. The cut knees are sorted, dividing them into three parts, taking into account length and thickness.
In order for some of the straws to acquire a uniform and rich golden color, they are kept in the sun for about two to three days.
Photos of simple DIY straw crafts
Braid - three ends
Flat plaits, woven from three or more strips of straw, are mainly used for sewing bags, hats, lampshades and many other similar products.
When weaving a three-ended pattern, the craftsman alternately overlaps the middle strip with stripes located at the edges. During the weaving process, the role of each strip (straw) changes, as it periodically appears in the middle, then on the right, then on the left.
To weave a three-ended pattern, two straws are used, and for training exercises, two multi-colored paper strips, for example white and green (Fig. 23b). The white stripe is placed horizontally, and the green stripe is placed at an angle of 45 degrees to it.
Then the ends of the green strip are bent at right angles to each other.
The white stripe is bent, in turn, at right angles to the green one, located to the right of it. At the next stage, the green strip located on the right is bent along a line running at an angle of 45 degrees. Then comes the turn of the green stripe located on the right. It is also bent at an angle of 45 degrees and overlapping
They are located in the middle with the other end of the green strip.
Starting from this stage, all braiding operations are repeated in the same order. As soon as one of the three strips runs out, it is immediately extended by slipping a new strip under its end.
When weaving all types of flat braids, be sure to follow the general rule: they do not braid towards themselves, as when twisting ropes, but away from themselves (Fig. 23d). The straws are sorted with the thumbs and forefingers, sometimes helping with the middle fingers. During the weaving process, the finished braid gradually falls down to the knees, where it is wound into a ball.
Features of the internal structure of the roof
Layout scheme and materials
A well-installed thatched roof can last about fifty years.
Recognize that this is much better than most other modern materials.
One of the main advantages of such a roof is maintaining a stable temperature. Those. The house will be cool in summer and warm in winter.
Moreover, straw has such a design that there is no need to install additional ventilation, because it is a natural material and it breathes.
A good quality thatched roof is an expensive proposition.
You will have to spend a lot of money on its arrangement, but one important criterion must be taken into account.
When laying simple roofing materials, most of the money is spent on installing ventilation, laying thermal insulation materials and vapor barriers.
But reed roofs have all of the above qualities, and therefore there is no need to spend additional money on insulating and warming your roof.