I was always upset by the lack of backlighting on the USB and Mini-jack connectors on the front panel. You’re sitting in the dark, the monitor is glowing, the keyboard is glowing, the computer is glowing, and it’s almost impossible to get your headphones into the Mini-Jack port, or even worse, a flash drive into the USB port in the dark... ugh!
Manufacturers of modern hardware have crammed backlighting into everything that can be installed, but for some reason they didn’t think about such obvious things as backlighting of USB ports! Because of this, you often have to shine your phone on yourself to perform such a simple action as connecting headphones or USB devices.
Today I will tell you how I made beautiful illumination of USB ports and mini-Jacks on my PC case using shit, sticks and blue electrical tape.
I want to warn you right away that this article will not contain warnings such as:
CAREFULLY! DO NOT PUT YOUR FINGERS INTO A SPINNING FAN - ITS BLADES ARE SHARP AND YOU CAN DAMAGE THESE BLADES!
The article goes beyond the usual instructions “How to connect a computer to a power outlet” and assumes at least the most basic knowledge of radio electronics.
What is it like?
A USB LED strip is a chain of low-current LEDs designed for 5 V power supply. It is a highly specialized design, so there are few manufacturers of such lamps. Most of them are concentrated in the countries of Southeast Asia. Online stores (Aliexpress and the like) have a lot of offers for such lighting.
There are regular, single-color options, or multi-color RGB strips, for normal operation of which you will need a control device - a controller. All of them come ready to use, with a connector attached. All that remains is to plug the plug into the socket and place the tape in the planned location.
If desired, a regular LED strip can be converted to 12 V to operate from 5 V. However, this process requires some preparation, both theoretically and practically. Some users suggest assembling a 5 V to 12 V converter, but with this solution the permissible current drops from the original value of 500 mA to 250 mA. In addition, the very point of connecting the tape to USB is lost - then you can simply take a standard 12 V power supply and connect it to the network.
It is much easier to use ready-made luminaires based on SMD 2835 LEDs, containing 60 elements/meter of length. There are single and multi-color options, with varying degrees of protection. You can purchase them and connect them to the USB socket yourself by following some technical procedures. The advantage of this option will be a more precise adjustment of the length of the tape to the dimensions of the supporting surface, and the choice of the most suitable color shade.
Important! The connection process does not pose any significant problems and is quite accessible to a person who can handle a soldering iron. These considerations attract many users who do not want to wait for parcels from Aliexpress.
How it was
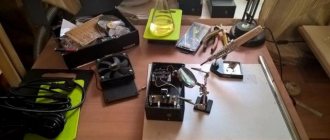
Previously, I had somehow never had the opportunity to pull out fan boards, so, having miscalculated the force a little, I successfully broke the first board. I'm usually not such a hands-on (who the hell am I kidding?). Inspired by failure (no), I began to disassemble the second fan. I didn’t want to take any risks with the second board, so I simply used a soldering iron to melt the part of the fan housing that holds the board, and then easily pulled it out.
Unfortunately, I didn’t take any photos of the fans being disassembled. There is nothing complicated there, except for removing the board - it is very easy to break. Spoiler: I will also use a piece of the broken board in the future