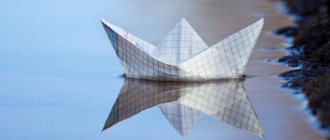
Photo: mastersamodelok.ru Origami is a pleasant and relaxing leisure activity, and it is also a great way to switch gears, take your mind off work and relieve your head. Much more interesting are figures that can do something, and not just stand beautifully on the table. It’s not for nothing that jumping frogs, floating ships or flying airplanes are so popular. It is with paper airplanes that we will now deal with!
Simple airplane made of A4 paper
Take a sheet of A4 paper - regular thin printer paper will do. Mark the central vertical and bend the upper corners towards it to create a “house”. Bend the corners towards the center again - now larger, so that they reach almost to the bottom. Fold the figure in half and bend the wings of the airplane along the line where the corners meet.
Photo: rci76.ru
Unusual airplane models
If you want something unusual, try assembling the “Piranha” model according to the diagram below.
Piranha
Glider and Swordbearer
Or fold a real glider.
The “Sword Bearer” model has excellent aerodynamic characteristics.
Airplane with a beak
Unfold a sheet of A4 paper horizontally and mark the middle. Bend the corners to the center once, and then a second time - you will get the same blank as for the simplest airplane. Fold the shape in half so that the sharp tip protrudes slightly beyond the straight base.
Bend the corners of the trapezoid again so that their straight sides meet exactly in the middle. Fold the figure in half with the flat side inward, bend the head-beak down and spread the wings to the sides. If you color this airplane, it can easily turn into a bird of prey.
Photo: dnevnikmastera.ru
Paper airplane using origami technique in 5 minutes
For the smallest fidgets, there are, of course, simpler instructions, such souvenirs turn out just as good and they fly very well too, depending on how you launch, you may not even be able to catch up; they will fly wow 100 meters, you’ll be exhausted looking for them later).
The most important thing is that you need to make the two sides the same in a mirror image so that they turn out even and then everything will definitely work out.
On one of the forums I spotted a craft called Piranha, and does it look like it’s true? The author also chose red as the color. See how cleverly you can roll up such a miracle. No special skills are required. The most primitive option with a simple model.
It turned out to be a cool thing, my boys really liked it).
By the way, you can get a little creative and give dad a little surprise.
In general, make a craft with your child so that there is something to do with your beloved family, because such work brings you very close together.
Wide paper plane
Place the A4 paper with the wide side facing you and mark the central horizontal line. On one side, mark both quarters, and bend the other in half vertically. Raise the lower right corner up to the first marking line.
Lower the upper right corner so that they neatly meet diagonally with the lower part. Bend the sharp nose towards the center and wrap the protruding tip of the upper wing around it to secure it. Fold the piece in half, unfold the wings of the plane and, if desired, paint them with spectacular stripes.
Photo: pinterest.at
8 best schemes for how to make a box out of paper
Helicopter their cardboard
The helicopter craft looks impressive. If you plan to collect a whole collection and place all the pieces of equipment on a miniature airfield, such diagrams will be very useful. The voluminous screws hang harmoniously over the beautiful body; such a sight will not leave any child indifferent.
Beer cans also make a good base for a DIY cardboard airplane. When working with them, it is better to ask your parents for help; making holes will be difficult, since the material is quite rough and dense.
There is no need to use glue; all components will be securely fixed in special grooves for each part. The simplified version will be much stronger and more practical. In the event of an unplanned wreck, dents can be easily removed with your fingertips or pliers.
Swallow plane
Take a rectangular sheet of paper, unfold its wide part towards you and fold the diagonal of the conditional square on one of the sides. Fold the second corner so that the base coincides with the base of the future triangle. Fold the top of the triangle down in the middle and turn it up again after about a centimeter. Fold the figure in half with the even part facing inward and spread the “swallow” wings.
Photo: c-deco.ru
History of paper airplanes - when did they appear?
Historians claim that the first airplanes made from sheets of paper appeared about 2 thousand years ago. But paper in those days was a scarce commodity, so airplanes made from this material were considered too expensive, which did not contribute to the growth of the popularity of the game. But paper is gradually becoming cheaper for the population, and at the same time, children's paper airplanes are gaining popularity.
The modern history of the appearance of paper airplanes can be dated back to 1930. The design bureau of Lockheed Corporation, on the advice of one of its founders, proposed creating paper mock-ups for testing real aircraft. Since that time, paper modeling has become popular, and fans of the process of creating aircraft from sheets of paper offer interesting and original ideas that help create new aircraft models.
Airplane with a reinforced nose
The advantage of such a paper plane is that it does not have a sharp nose, which instantly crumples at the first collision with a wall. Unfold the A4 sheet vertically and fold the top corners towards the center to create a “house”. Fold the “house” in half with the top of the triangle pointing straight towards the base.
Fold the upper corners of the rectangle down, but slightly at an angle: there should be a distance of 1-2 cm at the top, but the edges converge at the bottom. Press these edges with the corner of the top of the “house” and iron this fold well. Fold the figure in half and bend the airplane's wings at an angle from nose to tail.
Photo: novamett.ru
Volumetric cardboard craft
Let's move on and make a toy out of an ordinary matchbox; it will be voluminous and cute. This is a rather interesting bioplane that will delight anyone; it can be given as a souvenir for the holiday on February 23 or May 9.
We will need:
- cardboard - 2 sheets
- PVA glue
- ruler
- pencil
- scissors
- Matchbox
Stages of work:
1. Mark two strips on the cardboard with a pencil; their width should be equal to a matchbox.
2. Then use scissors to cut them out. Use these strips to make airplane wings. On another sheet, mark two 1.5 cm wide strips and also cut them to the length of the cardboard.
Move one such thin strip, and cut the second into two parts of 8 cm, remove the rest, it will not be needed. Here's what happens:
3. Now start assembling. Take a matchbox, bend a long thin strip in half and attach it, glue it to the box.
4. Using two identical strips that are wide, like boxes, make wings.
The corners can be rounded; cut them with scissors.
5. Make a tail from one short narrow strip and also round it, glue it inside. And glue the second one on top, make a triangle out of it.
6. Then you can cut out the propeller and glue it.
7. The craft is ready, enjoy your work!
Airplane with "ears"
This airplane is almost no different from a regular airplane in terms of complexity and structure, but it looks more interesting. Turn a sheet of A4 paper with the narrow side facing you and fold the upper corners into a “house”. Turn the workpiece over to the reverse side and fold the corners towards the middle again. This is precisely the main difference from the standard pattern, where both bends are made in a row on one side.
Straighten the upper part of the narrow triangle into a diamond, as in the diagram, and fold it in half downwards. Bend the corner back like a “ladder”, fold the figure in half and form wide wings with a slight slope. Such an airplane looks interesting from colored paper due to the color transition in the nose.
Photo: redbull.com
How to make a paper rocket: 10 step-by-step diagrams
Step-by-step instructions for a flying toy for beginners
The interesting thing is that almost any plane can fly a sufficient number of meters above the ground, it can be 10,000 or even more than 1,000,000, the most important condition is, depending on what height it will be launched from and whether there will be wind outside and how it will pick it up.
If you want your airplane to never fall over, then use this scheme. This toy will show you a uniform and very fast flight. You yourself will be very amazed.
If you love this type of air transport with large wings, then fold this type of airplane.
You can build it with a blunt nose, there will be no collisions.
Well, if you don’t understand diagrams and instructions at all, then watch this step-by-step video from the YouTube channel:
Fighter aircraft
Turn a rectangular sheet of A4 paper with the narrow side towards you, place the upper corners towards the center, and then again. Fold the figure in half so that the top of the triangle touches the base of the sheet. Turn the hexagonal blank over and fold the corners towards the center again - you get a heptagon.
Bend the top of the workpiece down so that it lies on the same straight line with the bases of the corners. Straighten up the narrow long nose that remains on the back side of the figure. Fold the paper fighter in half and fold the wings in straight parallel lines.
Photo: keywordsbasket.com
Common patterns
One of the most common aircraft designs is a single-seat lightweight braced monoplane with a high wing and a pulling propeller. This model of a homemade aircraft first began to appear back in 1920. Since then, the layout, design, etc. have remained virtually unchanged. The finished sample today is considered one of the most tested, reliable and structurally proven. It is because of all these advantages, as well as because of the simplicity of the aircraft drawings, that it is an almost ideal option for DIY construction, especially for a novice craftsman. Over a long period of operation and assembly of such aircraft, they acquired characteristic features. They are distinguished by such design features as a wooden two-spar wing, a welded steel aircraft fuselage, fabric skin, a pyramidal chassis, and a closed cabin with a car door.
Further, it is worth noting that there is a small variation of this type of aircraft, which was used in the 1920-1930s. The type of aircraft was called a “parasol”. This model was a high-wing aircraft, which had a wing mounted on struts and struts above the fuselage of the aircraft. This type of high-wing aircraft is also found in current amateur aircraft construction. However, when compared with the usual standard model, the “parasol” is used much less frequently, since from a design point of view it is much more difficult to manufacture such a device, and in terms of its aerodynamic characteristics it is inferior to a standard aircraft. In addition, in terms of operation, they are also worse, and access to the cabin of such a unit is quite difficult, which leads to the difficulty of using the emergency method of leaving the cabin.
Airplane with curved wings
This airplane resembles the previous one, but the shape of the wings is slightly different. Turn a sheet of A4 paper towards you with the wide side and fold the corners towards the middle once, and then a second time. Fold the workpiece in half so that the narrow apex of the triangle protrudes a couple of millimeters beyond the base.
Turn the hexagon over with the flat side up and fold the corners towards the center again - you get a heptagon. Fold the top down and turn the lower narrow nose to the same side, as in the diagram. Fold the piece in half, unfold the wings, and then bend the edges on them 90 degrees upward.
Photo: mld-mobile.ru
Cash costs
How much does it cost to build a plane? Naturally, after setting the goal, deciding on the aircraft model, after selecting the location and allocating the time, the next question is precisely the financial part of the project.
It is impossible to give a definite answer to the question about the cost of the aircraft, since all models are different, which means the materials, quality and quantity are very different. We can only say that on average, from $50,000 to $65,000 (about 3-4 million rubles) is spent. However, the actual amount may be significantly higher or significantly lower. “Building an airplane” is a fairly simple phrase that requires a serious approach not only to the practical part, but also to the financial one. The easiest way would be to consider this action as repaying a loan. In other words, you need to estimate the total cost of the project in advance, break it down into parts, after which you can spend the planned amount of money every month on purchasing the necessary parts, tools, etc.
Another important factor is the understanding that you don’t have to install anything on the plane that you won’t need for the flight. The simplest example is flashlights for flying at night. If such walks are not planned, then there is no point in buying lighting. That is, correctly set goals will help you save a significant amount of money. You can save on installing instruments if they are not needed for the flight. The construction of aircraft requires the installation of a propeller. There are constant pitch and constant speed models. The first model costs about three times less than the second, but at the same time it is not so much inferior to the constant speed propeller in terms of flight efficiency.
Space fighter
Making a paper fighter in the spirit of your favorite space saga is not at all difficult, but there is an interesting feature. Turn the A4 sheet with the narrow side towards you and roll the top part into a “roll”, as in the diagram. And only then bend the upper corners to make the usual “house”.
Turn the piece over with the flat side facing you, fold it in half and place it up inside the edges of the triangles on both sides. Turn the figure over onto a wide base, bend the upper part from corner to corner and fold the lower right corner inward. Lower the bases of the wings down 90 degrees, and then lift the edges back up another 90.
Photo: labirint.ru
How to weave a bracelet from rubber bands: 8 best patterns (video)
From improvised objects
In most cases, seemingly useless things can be very useful in creating a unique and quite interesting toy. There are a large number of options for making a propeller from a plastic bottle. This element looks believable and impressive.
Decorating a model will be a fun activity and will help any boy express himself. At the developmental stage, such manipulations are very important. Familiarity with various geometric shapes at an early age will lay the foundation for further growth in abilities.
You can easily construct an airplane with your own hands from scrap materials. Looking into the pantry and storage boxes, in every home there is a large amount of small items, these could be:
- Wooden clothespin.
- Ice cream sticks.
- Cotton swabs.
- Empty napkin rolls.
- Plastic container.
If you are lucky enough to find a large box from a refrigerator or TV, you can start planning a three-dimensional structure. Video instructions on how to make a plane out of cardboard with your own hands are available at the end of the article, but you need to get ready for painstaking work.
Each workpiece will be built separately, and at the final stages, with the help of grooves, the product must be assembled into one whole masterpiece.
Important! Before cutting the box, it is better to ask your parents whether this can be done; if the equipment is under warranty, then such things are prohibited from being disposed of.
Crane plane
Place the A4 paper with the narrow side facing you and fold the top corners towards the middle. Fold the “house” in half and unfold the part with the fold upward, and turn the triangular top inward to form a kind of beak. At the same time, bend the edge of the “beak” to the side and lift the wing up to get a figure like in the diagram.
Turn the workpiece over and do the same on the other side so that all the lines match. There will be an inner corner in the square part that needs to be straightened downwards and outwards. Raise your neck and form the head of a crane from a narrow triangular part, and form the wings with a “ladder” down and up.
Photo: labirint.ru
Selecting a shade
Bright and bold colors go well with a sporty look. When wondering how to make a military aircraft, it is better to pay attention to green or khaki.
The addition of brown and gray spots will make the design ideal for military operations in any complex missions.Several different cars, strikingly different from each other, look very good standing on the airfield. This composition will definitely attract the attention of true connoisseurs of handmade work.
Airplane piggy bank
To create such a useful thing as a piggy bank airplane, you will need a half-liter plastic bottle, a set of colored paper, double-sided tape and a pencil.
Below is a master class on crafts on the theme “airplane”:
- You need to make a gap in the bottle measuring 2*0.5 cm. Through it you will replenish your piggy bank.
- On a sheet of paper, sketch out the body and tail section in the form of a Latin “L”. Carefully cut out in duplicate.
- Attach the prepared blanks to the bottle using double-sided tape. Cut a hole in the cardboard for coins.
- Make engines out of paper. To do this, you need to cut out two rectangular parts 10*3 cm, roll them into a cylinder and glue them to the bottom of the body on both sides.
- Make wings and propeller. Glue them to the airplane.
- Cut out portholes. Fix them with glue on the body of the product.
- Prepare two stripes and glue them to the tail.
blocked
(Click on diagram to enlarge)
Although light paper airplanes are believed to fly further than heavy ones, this claim is disputed by Blackburn. Blackburn's world record-breaking airplane in 1983 was designed on the assumption that the best airplanes have short wings and are "heavy" during the launch phase when a person throws them into the air.
Although longer wings and less weight would seem to help the airplane achieve longer flight times, such a paper airplane cannot be thrown high. According to Blackburn, “to achieve maximum altitude and a good transition to gliding flight, the throw should be made with a deviation from the vertical of no more than 10 degrees.”
Dart
This is the lightest and most common version of an airplane that flies far and fast. A simple way to make an airplane out of a sheet of paper, which every aspiring “aircraft designer” should own.
How to make such a paper airplane step by step:
- Fold the paper in half vertically.
- Unfold the paper and fold each of the top corners toward the center line.
- Fold the top edges to the center line, leaving 2 cm at the bottom.
- Fold the plane in half.
- Fold the wings down, aligning the top edges with the bottom edge of the body.
- The finished paper airplane should look like this.
Children's plane
You will need: cocktail tube, colored paper, scissors, tape with a pattern.
Master Class
- Cut 2 strips of colored paper.
- Shorten one of the strips slightly.
- Connect the ends of each strip and secure with tape. You should have 2 circles.
- Attach the circles with tape on different sides of the cocktail straw as shown in the image.
- Send the structure into flight.
A children's airplane made from paper and a cocktail tube is ready!
An airplane that flies for a long time
Every child’s dream is a long-flying airplane. And now we will help you make it a reality. Using the diagram provided, you can fold a model that differs in flight duration.
Remember that flight performance is affected by the size of your aircraft.
Excess weight, which means the length of the wings, prevents the plane from flying. That is, a glider must have short, wide wings. Another friend of planning is the absolute symmetry of the model.
You need to throw it not forward, but upward. In this case, it will stay in the sky for a long time, smoothly descending from a height.
Find answers to the remaining questions and all the subtleties of folding the “Lightning Strike” paper glider in the step-by-step video tutorial.
Long flying airplane model
Due to the sharp nose, raised wings and weighted body, this airplane will stay in the air much longer than its counterparts.
Here is the procedure for creating this “engineering miracle”:
- Fold the A4 sheet in half.
- Turn over and fold the top corners to the marked fold line.
- Bend the edge of the corner again - it should be parallel to the top line of the triangle.
- Perform similar actions with the second side of the triangle.
- Once again fold the side of the bent triangular shape towards the top. Do this on both sides.
- Straighten the workpiece. Fold the corner along the 2nd curved line from above to the central axis.
- Fold the paper crosswise, focusing on the bottom edge of the fold of the triangles.
- Straighten the sheet and bend the triangle at the top along the 1st fold line, bending it towards the central axis. Perform the operation on both sides.
- Bend the workpiece perpendicularly through the point on the central axis where the sides of the triangle connect.
- Turn the product over and bend it, focusing on the lower perpendicular bend.
- Turn the sheet over again and fold the sides towards the central axis.
- Fold the raised side of the paper from the top of the triangle to the 1st fold point of the side. Carry out similar manipulations with the other side.
- Fold the workpiece in half along the central axis, bend the wings, bending 1 - 15 mm on the protruding sides to improve the soaring ability. Open the resulting paper plane for children, slightly raise the wings, straighten the edges - and you can begin testing!
Scope of application of crafts aircraft
Boys love to play with airplanes, and when their hangar is filled with different models of aircraft, it becomes a kind of pride among their peers.
If a boy is involved in a creative circle, then the airplane craft will also be useful to him as an exhibition piece.
Labor lessons at school may also require skills in making flying machines. In addition to all this, the boy’s room will be transformed if there are airplane structures standing on a shelf or hanging from the ceiling.
Amazing model Takuo Toda
Although the paper planes of the Japanese origami artist Tokuo Toda are not officially classified as fighters, they are also capable of reaching record speeds. The master's best model stayed in the air for almost 30 seconds and was listed in the Guinness Book of Things. Toda is collaborating with the Japanese space exploration agency, the Japan Aerospace Exploration Agency, and is preparing its aircraft for launch from the orbital station.
No matter how fantastic it sounds, scientists have been actively developing origami aircraft since 2008. They have already invented special paper that can withstand high temperatures and humidity. It is planned to make drones from this material that will travel between the Earth and the ISS. Since the paper is light, airplanes will be able to easily pass through all layers of the atmosphere and descend slowly without getting damaged. Thus, they will transmit messages from the ISS. In the near future, Japanese astronauts will try to launch several origami planes, 20 cm long, from their “space home”. The only disadvantage of paper “connectors” is their uncontrollability. No one can predict where or when the tiny origami model will land. However, the Japanese do not abandon the idea of putting the ancient art of papermaking at the service of “cosmic” progress.
You can make a unique origami airplane according to Takuo Toda’s design yourself. Who knows what records he will set. The main condition is to maintain symmetry and accuracy of bends.