DIY device for pressing brake caliper pistons
Hello to all DIY lovers. In this article I will tell you how to make a device for pressing in brake caliper pistons. It will be useful for those who are used to servicing their car themselves. The parts required for assembly will be made entirely from car parts, so I think there will be no difficulties with this. This homemade product will help you save your money, since the factory version costs about 1,500 rubles.
Before you start reading the article, I suggest watching a video that shows the detailed process of assembling a homemade product.
In order to make a device for pressing brake caliper pistons with your own hands, you will need:
* Angle grinder, cutting disc * Personal protective equipment, gloves, headphones and safety glasses * Metal lathe, pass-through, cutting tool * M12 and M6 tap * Two M6 bolts * M12 die * Utility knife * Hand vice * Electric drill * Drill metal * Long bolt of suitable diameter to the tip * Car steering wheel end * Brake pad * Thick washer * Round file
Step one.
First, let's redo the brake pad a little.
Using an angle grinder with a cutting disc, we remove the ears and bells for fastening. To prevent the part from accidentally flying out when sawing, secure it in a bench vice. Also, when working with an angle grinder, use personal protective equipment, wear gloves, headphones and safety glasses.
We remove the remaining friction clutches from the metal part of the pads using a stationery knife.
Step two.
Then, using an angle grinder, we saw off a part from the steering tip at the place where the internal thread ends.
Then we install the bolt in the lathe and grind off a part equal to the thickness of the washer with a through cutter to the required size in order to subsequently cut an M12 thread on it.
After this, without removing the bolt from the machine chuck, we cut the thread, securing the M12 die in a hand vice. We cut the thread itself with the machine turned off, simply rotating the chuck by hand.
We make a groove using a lathe and a cutting tool installed in the tool holder; during the process, we periodically check whether the block fits there.
After grooving, we got a groove like this on the part.
Also, a hole was made across the large bolt, into which you need to insert a metal rod to tighten it and unscrew it without a wrench.
Step six.
All the parts of the homemade device are ready, which means you can assemble everything into a single whole by lubricating the bolt threads with technical oil.
Source
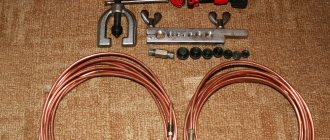
Materials for production:
That's all the materials you'll need to make the device.
The process of making a homemade product is as follows: - the brake pad needs to be ground and the ears cut off, as a result we will get something like this.
Take the steering end and cut it off.
Then we cut a thread on the wide washer, and on the end of the bolt, slightly grinding off the end, we cut the same thread.
We take the tip and grind down a groove like this.
On the block we cut an opening with a width equal to the groove on the tip.
It should turn out as shown in the photo.
We drill two holes in the washer and cut an M5 thread.
Having tightened the entire threaded part, cut off the bolts, leaving about 5 mm, and cut off the reverse side completely.
We drill a hole in the bolt and make a knob, the photo shows the device in disassembled form, and assemble it.
This homemade device for recessing brake pistons can be made with your own hands from scrap metal.
We recommend watching the author's video - making a device for recessing brake pistons.
Source of the article: https://samodelki-n.ru/prisposoblenie-dlya-utaplivaniya-tormoznyx-porshnej.html
Tool for compressing calipers from old pads
As the brake pads wear out mechanically, their thickness gradually decreases, and the piston that presses on them goes beyond the limits of its “socket”. And to install new brake pads, it must be pressed back into the cylinder. This is exactly what the caliper compression tool comes in handy for.
To make this homemade tool, you will need two brake pads from the front disc brakes, one bolt with a diameter of 12 mm and a length of 120 mm, an M12 nut, one bolt with a diameter of 6 mm and a length of 30 mm, as well as a small piece of steel chain with large links.
Main stages of work
The first step is to remove any remaining friction material from the pads. This can be done using an angle grinder. In the middle of the stripped plates we drill holes with a diameter of 6 mm. Then we drill a hole in one of the blocks to 12 mm. Next, insert the bolt into the resulting hole and screw the nut onto it.
This nut must be welded to the brake pad plate. To avoid damaging the threads of the stud during welding, simply place a piece of metal tube over it. Next, remove the tube and drill a hole with a diameter of 5 mm in the center of the bolt. Then use a tap to cut the thread for the M6 bolt.
Using a grinder, we cut off the hook ears on the brake pads, and for a more aesthetic appearance, the tool for compressing the caliper can be painted with regular spray paint. Next, you need to cut off three links from the chain and firmly connect them to each other by welding. We weld a bolt in the center of the resulting part. And now the homemade tool is completely ready for work.
Source
What is the tool used for?
The pressing device is used during brake system repairs.
When the caliper is removed from the disc, the rod remains in the pressed-out position and does not allow the part to be installed back.
To complete the repair, you need to press it into place. Many car enthusiasts use for this purpose everything that is at hand: a vice, keys, etc. However, you can make a special device that will greatly facilitate the task.
The piston is pressed down due to a screw-in worm mechanism.
Determining the need to replace brake pads
Changing the brake pads is necessary in the following cases:
- the brakes became soft;
- the car pulls to the side when driving or braking;
- the wheel gets hot;
- grinding in the pads led to damage to the discs;
- The car brakes poorly, even after the pads have been run in;
- the handbrake adjustment fails and it does not hold the car;
- when suspended, the wheel does not spin well;
- the brakes have completely disappeared, although other elements of the braking system are in good working order;
- The steering wheel hits when the car is stopped or while driving.
How to make it yourself
To make the device yourself, you need to prepare three nuts, a long bolt and old pads.
The whole process will consist of four simple steps:
- Take a drill according to the diameter of the fastener and drill a hole in the block exactly in the center.
- Weld the nut to the hole.
- Sharpen the bolt to a cone.
This tool is only suitable for front calipers. For the rear ones, you need to add a special hook to the end of the fastener, which will rotate the rod.
After repairing the brake system, do not throw away the old part. You can use it to make a simple but necessary tool for recessing pistons.
Source
Press in the caliper piston tool
We will talk about a device for pressing/"screwing in" brake caliper pistons.
I’ll say right away that the cheapest special tool for this costs at least 500 rubles.
To make a homemade device we will need:
1) Support plate with a nut (if you have a welding machine, you can take a simple iron plate and weld a nut to it). 2) An ordinary bolt (longer). 3) Ordinary nut. 4) Several ordinary washers of different diameters (for different piston diameters). 5) Nail or electrode (if we are talking about rear calipers, where the pistons “screw in” CLOCKWISE).
Most car enthusiasts press the piston in all sorts of ways: some with a bench vice, some with a gas wrench, in general, whatever is necessary. But few people know that you can quickly make a tool with your own hands, with the help of which the piston is pressed into the caliper in a few seconds. This tool is made simply, from improvised material, the only condition is that you will need electric welding.
It happens like this. We will need an arbitrary metal plate, 3 cm wide, 10 cm long, 3 mm thick, so that it does not bend under load. We also use one bolt with a diameter of 10 mm and a length of 10 cm, two oversized washers and two nuts. A hole must be drilled in the center of the plate so that the bolt shaft can fit through it.
First, using electric welding, weld the nut to the enlarged washer. This must be done carefully so as not to spoil the thread. We will do the same with the other nut and washer.
Then we weld one nut with a washer to the plate so that the holes on the plate and on the nut coincide with each other. In our case, we found a plate with a drilled hole. Since the diameter of this hole was larger than the diameter of the nut, we used an oversized washer to weld the nut to the plate. If you drill a hole in the plate yourself, you won't need a second washer.
What is the tool used for?
The pressing device is used during brake system repairs.
When the caliper is removed from the disc, the rod remains in the pressed-out position and does not allow the part to be installed back.
To complete the repair, you need to press it into place. Many car enthusiasts use for this purpose everything that is at hand: a vice, keys, etc. However, you can make a special device that will greatly facilitate the task.
The piston is pressed down due to a screw-in worm mechanism.
Ceramic brake pads: advantages and features The high-speed mode of a modern car requires a high-quality and reliable braking system. Stopping a car at...
How to make it yourself
To make the device yourself, you need to prepare three nuts, a long bolt and old pads.
The whole process will consist of four simple steps:
- Take a drill according to the diameter of the fastener and drill a hole in the block exactly in the center.
- Weld the nut to the hole.
- Sharpen the bolt to a cone.
An easy way to unscrew a stud that has broken off - detailed life hack A broken stud is a fairly common problem, especially on the exhaust manifold. Fastening metal…
- Weld two nuts to the head of the bolt to form an improvised valve.
This tool is only suitable for front calipers. For the rear ones, you need to add a special hook to the end of the fastener, which will rotate the rod.
How to repair a burnt-out muffler without welding The muffler, in addition to the main function of reducing engine noise, also performs several additional tasks - reduces...
After repairing the brake system, do not throw away the old part. You can use it to make a simple but necessary tool for recessing pistons.
Stay up to date with AUTO news - subscribe to the channel in Yandex.Zen
How to press in the caliper piston
When repairing calipers or replacing brake pads on a car, you must press the piston into the caliper to install it in place. The fact is that when you press the brake pedal under the influence of brake fluid pressure, the piston comes out of the caliper body, presses on the pad, causing the car to brake. So, when the caliper is removed from the brake disc, it remains in the pressed-out position, and it will not be possible to install it back on the disc after replacing the pads, since the piston is in the way. The part must be pressed back, only then the structure will fall into place.
Most car enthusiasts press the piston in all sorts of ways: some with a bench vice, some with a gas wrench, in general, whatever is necessary. But few people know that you can quickly make a tool with your own hands, with the help of which the piston is pressed into the caliper in a few seconds. This tool is made simply, from improvised material, the only condition is that you will need electric welding.
It happens like this. We will need an arbitrary metal plate, 3 cm wide, 10 cm long, 3 mm thick, so that it does not bend under load. We also use one bolt with a diameter of 10 mm and a length of 10 cm, two oversized washers and two nuts. A hole must be drilled in the center of the plate so that the bolt shaft can fit through it.
First, using electric welding, weld the nut to the enlarged washer. This must be done carefully so as not to spoil the thread. We will do the same with the other nut and washer.
Then we weld one nut with a washer to the plate so that the holes on the plate and on the nut coincide with each other. In our case, we found a plate with a drilled hole.
Since the diameter of this hole was larger than the diameter of the nut, we used an oversized washer to weld the nut to the plate.
If you drill a hole in the plate yourself, you won't need a second washer.
Now we take the bolt, screw the structure with the plate onto it to the middle, and screw the nut and washer onto the end of the bolt so that the washer is the last one. The tool for pressing in the caliper piston is ready.
It works like this: we install the device in such a way that its enlarged washer rests against the piston, and the plate rests against the caliper body.
We tighten the bolt with a wrench, it is screwed into the nut with the plate, it rests on the caliper body, the washer on the piston - and presses it. You just need to be careful not to tear the boot.
In this simple way you can quickly install the caliper piston in place. If you liked the article, share it on social networks.
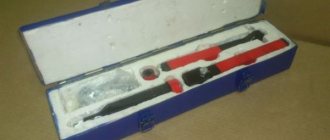
Set for pressing/screwing in caliper pistons
Hi all! In today’s review, I want to share with you my impressions of a tool for servicing car brakes, or, to be more precise, for pressing/screwing in pistons when replacing brake pads. It just so happens that I have to periodically participate in such procedures. And over time, using improvised means such as a pry bar (for pressing) or a grinder key (for screwing in) became boring. Firstly, although the result is the same, it is inconvenient. Secondly, if you are tinkering with the brakes alone, then pressing the piston with a pry bar is quite problematic. In general, something had to be done about it. Therefore, I decided to acquire the appropriate tool. Aliexpress is full of different sets, differing primarily in the number of tools included in them. I decided not to waste time on trifles and purchase a full version that allows me to service calipers with two pistons.
It took the seller about a week to send the order after payment. The parcel was sent with a full track; anyone can view information about its journey from China to Belarus here.
At the post office they gave me a decent-looking box with a plastic suitcase inside. Exactly as you can see in the pictures in the ad. I would like to say that since the moment I received it, the set has already been tested several times, so this review is written with an eye to the experience of use. Because of this, the tool does not look like new. So, the set consists of 18 tools:
Here we have two spindles with left and right threads, one thrust plate, one adapter plate for pushing in the piston and 14 adapter plates for screwing in. Each of the adapter plates is identified by a number or letter stamped on its surface. If you believe the data in the ad, as well as other information from the Internet, then this kit is suitable for servicing the brakes of the following cars:
0 - 63 mm General Motors; 2 - 51 mm Citroen XM, Xantia ua; 3 - 55 mm Alfa Romeo, Audi, Austin, BMW, Ford, Honda, Jaguar, Mercedes-Benz, Mitsubishi, Nissan, Rover, Toyota, Vw; 4 - 32 mm Alfa Romeo 164 2.0, Ford, Mazda, Saab 9000, Subaru; 5 – 36 mm Adapter mit 3/8″ innenvierkant; 6 - 42 mm Nissan Prima, VW Golf IV; 7 - 42 mm Audi 80, 90, 100, Ford Sierra ABS, Scorpio AB85, Honda Prelude, Nissan Silva 1.8 Turbo, Rover 8000, Saab 9000, Subaru L+Z, VW Golf, Passat; 8 - 47.5 mm General Motors; 9 - 54 mm General Motors. F - Opel Astra; A - Renault; M - Ford Mondeo; N - Saab; E - Cerfiro; K - Citroen.
All elements are fixed in special “pockets”, nothing falls out.
As for the manufacturing quality of the tool included in the set, there are no complaints. At the time of receipt, everything was heavily covered with some kind of smelly grease, which had to be removed. The metal is thick, during operation nothing “slipped off” or bent. The threads on the spindles are the same as on the first day. The only thing that could be a complaint is the coverage. I still don’t understand what it is, but I can’t boast of its durability. After the first use they started to wear off. This is clearly visible in the photo below, especially noticeable on the thrust plate. Otherwise, everything is very good.
Each adapter plate has 2 holes at its base, while there are two protrusions on the spindle head. Using this simple method they are attached to each other. The connection is reliable, nothing falls off if you don’t shake it, and it doesn’t spin if you handle it carefully. If you drop the tool assembled for work or carelessly throw it down, the plate will inevitably come off.
To fix the spindle in the support bracket, a thrust plate is used, which bears the main load. It simply slides onto the spindle from above. Everything ingenious is simple. This is what the tool looks like, ready for use.
View from above:
The car presented in the review was a 2006 Peugeot 607, and to be more precise, its rear brake caliper (its piston is screwed in, not pressed in). In order for it to be screwed in, there are special slots in the piston.
Having selected the adapter pad of the required size and secured the spindle in the caliper, we begin to slowly turn it. Depending on the purpose pursued and the direction of the thread, we use a spindle with a right-hand or left-hand thread.
There is no need to strain at this time, and in order to get the desired result (that is, completely press the piston into the caliper) it takes about 2 minutes. During operation, nothing slips out, falls out, or scrolls. One person can do it without any problems at all. In general, the tool works and does it very well. With its help, the above mentioned Peugeot, Kia Sportage 2011 and Mazda 6 2009 were serviced. There were no problems with any of the cars. I am sure it is compatible with all passenger cars.
To sum up everything that has been written here, I can say that I was pleased with the purchase. I was 100% satisfied with the set. Of course, if you have one car, then there is no point in buying such a suitcase; it’s cheaper to go to a service station. But if you have to do such things quite often, then it’s worth considering the purchase option, since the kit really makes the process of replacing brake pads easier.
That's probably all. Thank you for your attention and your time.
Tool for pressing in brake calipers
Be sure to check with the seller about product availability in the store before visiting. Store phone: 8(495)532-43-90
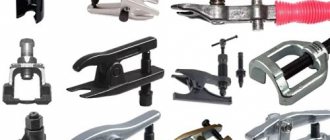
Product name: Device for pressing in brake calipers Manufacturer: LICOTA Article: ATE-4125 Purpose: Includes double-sided adapter suitable for most European and Japanese cars Side 1: Alfa Romeo, VW-Audi, PSA, Fiat, Ford, Honda, Re… →
Product name: Device for pressing in brake calipers Manufacturer: LICOTA Article number: ATE-4125
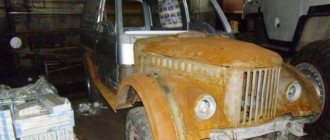
We are working on a jammed front brake piston 2108, 2109, 21099
The brake mechanisms (calipers) of the front wheels of VAZ 2108, 2109, 21099 vehicles operate under constant exposure to an external aggressive environment (salt, dirt, water, etc.). In this regard, it is recommended to inspect and service calipers and brake pads every 15 thousand km.
Jamming or “souring” of the pistons in the caliper cylinders is most often the result of a lack of periodic monitoring of the condition of the brake mechanisms, damage to their protective boots, severe wear of the brake pads in which the pistons extend too far from the cylinders, thereby coming under external influence, the presence of water or foreign substances. impurities in brake fluid.
Reference: the pistons of the brake mechanisms of the front wheels of VAZ 2108, 2109, 21099 cars have a mirror coating, the same coating is found inside the cylinders. The cylinders are equipped with rubber rings that return the pistons to their original state after extension. On the outside, the pistons are protected by anthers (protective caps with retaining rings).
Damage to the mirror coating of the pistons (“souring”) leads to a loss of their mobility in the cylinders and, as a consequence, to incomplete release of the front wheels, since the pads are constantly pressed against the brake discs.
In this case, accelerated wear of the pads, overheating and warping of the brake discs occurs, fuel consumption increases, the vehicle's controllability (pulls to the side) and its dynamics are impaired, vibration and beating appear when the brake pedal is pressed.
- There are at least two ways to develop a soured piston:
- — without removing the brake mechanism from the car;
- - with the brake mechanism removed.
- In the first case, it is necessary to jack up the car, remove the wheel, clean the outside of the caliper from dirt, disconnect and lift its floating bracket.
We remove the retaining ring and the cylinder boot, remove dirt from under it using a rag soaked in gasoline and a hard brush or toothbrush. Lightly press the brake pedal so that the piston moves out a little (a centimeter at most) from the cylinder.
We clean it again, being careful not to damage the piston mirror and remove only dirt and deposits. You cannot clean the piston with sandpaper, as this can damage the mirror. A popular way to clean deposits is to use a rough wooden block, which will remove deposits and not damage the cylinder.
Remove the cap from the brake fluid reservoir and, using an adjustable wrench or vice, push the piston back into the cylinder. We press the brake pedal, pushing out the piston, and press it down again. We carry out this procedure for developing his mobility 20-30 times.
Then we apply graphite lubricant to the protruding part of the piston, install a new boot and retaining ring.
The advantage of this method is that there is no need to drain the brake fluid from the car’s brake system circuits and pump the brakes.
In the second case, we remove the brake cylinder and disassemble and develop it. This method is suitable for a major overhaul of calipers, since it is necessary to either drain the brake fluid or plug the brake pipe, which still risks losing a certain amount of fluid and requires bleeding the brakes after the work is completed.
The piston must be squeezed out of the cylinder either before removing it (by pressing the brake pedal), or with the piston already removed, pressurized air must be supplied into the hole under the brake pipe. Before extruding, remove the retaining ring and boot from the piston. We try not to scratch the removed piston.
We clean it from dirt and oxidation using the method described above, if necessary, change the rubber sealing ring, rinse and blow through the cylinder. Before assembly, lubricate the inside of the brake cylinder with brake fluid, and lubricate the piston itself with graphite lubricant.
We press it inside the cylinder (for example, using a vice), put a new boot and retaining ring on top.
All of the above manipulations make sense only if there is minor damage to the piston or cylinder. If the piston is completely jammed and it is impossible to develop it, the brake cylinder with the piston should be replaced.
- Notes and additions
- — After developing the pistons of the brake cylinders of the front wheels of the car, it is necessary to lubricate the guide pins.
- More articles on the braking system of VAZ 2108, 2109, 21099 cars
- — Checking and adjusting the free play of the brake pedal of VAZ 2108, 2109, 21099 cars
- — Checking the brake system of VAZ 2108, 2109, 21099 cars
- — Diagram of the parking brake system of VAZ 2108, 2109, 21099 cars
- — Diagram of the working brake system of VAZ 2108, 2109, 21099 cars
- — Replacement of front brake pads on VAZ 2108, 2109, 21099 cars
- — Replacement of rear brake pads on VAZ 2108, 2109, 21099 cars
Required tools for replacing brake pads
Do-it-yourself replacement of front and rear brake pads on cars of different brands and models is carried out according to a similar algorithm, and therefore requires approximately the same sets of tools. The only difference can be, for example, in the size of the keys and other minor differences. The main tools needed to perform the job of replacing pads on a machine are shown in the table below.
Table - List of tools required to replace disc brake pads
| Name | Note |
| Key | Denomination from “10” to “22”. Depends on the size of the caliper mounting bolts. |
| Balloon wrench | To remove the wheel |
| Jack | Not required with a lift |
| Wire brush | To clean the work area |
| Clamp or other device for recessing the piston | The cost of special equipment for pressing the piston is high, so it is better to use improvised means. If difficulties arise, it is recommended to watch the thematic video. |
| Impact wrench | To unscrew the wheel |
When replacing drum shoes or parking brakes, you will also need the tools from the table below.
Table - Tools for replacing drum pads
| Name | Note |
| Pliers or other types of pliers | To remove springs |
| Screwdriver | Flat and cross |
| Mount | To disassemble the drum mechanism |
| Hammer | Medium or large size |
| Punch | Made from soft material |