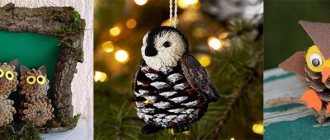
New Year at any age is associated with the expectation of something bright and fabulous. Moreover, adults sometimes believe in miracles more than children. Not only gifts make this time wonderful, but also the aroma of a Christmas tree decorated with toys. It’s especially interesting to make them with your own hands with your children. Cotton wool toys will look no less interesting than luxury products from stores.
Vintage cotton wool toys
Properties of medical wool as a material for needlework
Cotton wool is sold in every pharmacy. It is very convenient for making crafts, as it has a uniform structure, is strong and elastic, and is easy to form into any image.
Vata is soft, light, and hygroscopic. This is a natural cotton material, so it is absolutely safe; you can safely involve your child in making crafts. In addition, cotton wool is always available for purchase and is inexpensive.
Tips for beginners
- To make crafts you need ordinary cotton wool, which you can buy at a pharmacy, and PVA glue. When creating three-dimensional products, the glue is diluted with water in a ratio of 1:3. Each piece of cotton wool is dipped in the mixture or applied to the surface with a brush and glued to the base. If the part is fluffy, you need to add PVA.
- You can roll a cotton ball with your hands dipped in soapy water.
- When creating a multi-layer craft, it is necessary to dry each layer. Important: you cannot place wet work on a radiator or stove, otherwise the cotton wool will wrinkle.
- For the frames of the figures, wire or paper and tape are used.
- How to paint cotton wool? For voluminous crafts and applications, you can pre-paint the details with watercolors or gouache diluted in warm water. Paint is most often applied to the figures after the product has dried.
- Hairspray is used for fixation.
New Year's toys made of cotton wool
Let's start with the most attractive and colorful crafts - New Year's toys. For them you need to prepare the following materials: cotton wool, PVA glue, paper, bandage, white thread, steel wire. It is better to dilute the glue a little with water.
Pupae
We will show the process using the example of a pupa. First you need to twist the wire into something similar to the shape of a small doll. We wrap cotton wool tightly around this figure and wrap it with threads on top of the cotton wool. The result will be something similar to a doll blank. Then, covering the figurine with glue, we again apply layers of cotton wool, forming the doll’s clothes. The head can also be made from cotton wool, but not everyone can draw a face. Therefore, it is easier to take an old small children's doll and use the head from it. You can also buy such a head at handicraft stores.
It is better to glue the hair from natural materials. We also make clothes from cotton wool, from flat plates, cutting out the necessary parts, as if it were fabric, and covering them with glue. We put clothes on the doll. Then you need to dry the figurine and paint it with paints. The miracle doll is ready.
Other toys, Santa Claus and Snow Maiden, are made in the same way. You can create faces (molds) yourself. For this purpose, many master classes and photos on their creation are posted on the Internet.
Bunny
Roll a ball of cotton wool, this will be the head. Cut out ears from cardboard and color them inside with a pink helmet. Form a nose from a small cotton ball and paint it pink. Buy the eyes ready-made or draw them on paper and glue them on. The cheeks are also formed from cotton wool and glued. Form the body into an oval shape and glue it to the head, as well as the small tail and paws. We fix the figurine with hairspray so that it does not fall apart. The bunny is ready.
Snowman
Roll out three lumps of different sizes from the newspaper, after moistening the newspaper a little. We wrap each ball in foil, forming a snowman. The snowman’s “waist” can be removed by wrapping it in toilet paper and covering the top with foil again.
We wrap the entire figure with cotton, then with thread. Then glue thin strips of cotton wool to the workpiece along the entire volume. The workpiece is ready. Hands can be made from knitting needles, from wire, from twigs, also by wrapping them with cotton wool soaked in glue.
The nose is also done. The headdress can be shaped like a hat or like a bucket. Glue a kebab skewer to your hand. It is convenient to make a scarf from a damp cloth. All that remains is to paint the snowman to suit every taste and imagination and dry it.
Cheerful snowman
We form three balls from cotton wool for the body, each slightly larger than the previous one, and one smaller one for the arms. Dip them in paste and let dry. After that, we attach one to the other in descending order of size. We cut the hand ball in half and attach it to the sides of the middle ball of the snowman's body.
Now you need to prepare the ball for the hat and cut it in half. After drying, glue the half onto a cotton pad. We put the hat on the snowman's head. Let the figurine dry.
Paint the tip of the toothpick orange, this will be the snowman's nose. We also make a broom out of a toothpick. We paint the figurine.
Crafts made from paper and cotton wool
Toys made of cotton wool can be not only voluminous, but also flat. Such crafts are easier to do; they are useful to do with children in order to instill in them the skill of working with various materials and the desire to create.
To make such crafts, you need to cut out the desired shape from paper: an animal, a bird, a house, a sun, etc. Then you need to prepare many small balls of cotton wool, painting them with watercolors in the desired colors.
The balls must be glued one by one onto a paper base using PVA glue. Noses, eyes, beaks, tails, made from auxiliary materials, pre-painted.
Make wings, paws, ears from paper, glue to the base and paint. By showing imagination, you can create new and new ideas for creativity.
Handy things
Searching in cabinets or closets, you can find interesting examples of, at first glance, useless plastic bottles. They will be useful for creating beautiful and extraordinary pieces.
Using creativity and paint, it is quite easy to paint the outer part of the vessel; a funny smile or nose will give the product a humorous character, and the mood of all family members will rise from one glance at the design. Flowers made from cotton wool will fit perfectly into a pre-prepared vase made of plastic dishes filled with cereals and painted with unusual patterns.
By combining the basic material with other improvised items, you can achieve stunning results. Boys will be delighted with all kinds of vehicles or aircraft models, and girls will appreciate delicate and soft products that they won’t want to let go of when they hold them in their palms. The more models placed around the house, the more fun and relaxed the atmosphere in the rooms will become, and you won’t have to wait long for a good mood.
Cotton paintings
To create a painting from cotton wool, you will need several containers into which you need to pour water and drop a few drops of different dyes into each container. Paint cotton balls in different colors, dip them in containers with paint, then dry.
Take a sheet of thick paper of the required size, this will be the basis for the picture. Spread the sheet with glue and glue colored balls to it one by one, creating a pattern. By the way, it is not necessary to paint the cotton wool with balls; you can also use shapeless boards; they also make beautiful paintings. For example, by mixing blue and white cotton wool, you can lay out a cloudy sky. By placing bright balls alternately in an arch, you can form a bright rainbow.
For those who know how to draw, it is better to draw a picture on the base paper of what the author wants to see when completing the work. For those who don’t know how to draw, you can download a picture on the Internet and use it as a guide. Interesting ideas for paintings and panels: tropical flowers, exotic birds, fancy trees, fairy-tale characters, etc. This technique even got its name - cotton writing. The paintings are voluminous and create a positive emotional climate in the room.
When creating paintings, if the cotton wool is glued with flat pastes, it is important to coat it with glue along the fibers, and not across them, so that the layers do not shift and air bubbles are not created.
Gilded nuts
You will need:
- walnut shells (carefully split with a knife and remove the kernels);
- satin ribbon or lace;
- Super glue;
- beads;
- acrylic paint.
Progress:
- Cut the ribbon into pieces according to the number of nuts. Make a knot at one end of each ribbon.
- Make a loop of the appropriate size and thread on the bead.
- Take one half of a nut and spread it with glue. Place the end of the tape on it so that it goes inside and squeeze the halves together. Remove excess glue.
- Paint the nuts with gold or silver paint.
Using the same principle, you can paint cones and make them pendants. They will also look great on the Christmas tree. If you add sweets and gingerbread to the pine cones and nuts, you will get an excellent decor in the old Russian style.
Or you can use silver or gold glitter instead of paint. Then you will get a trendy decor option. First, coat the pine cone or nut with glue and sprinkle glitter on top. Very simple and effective.
Crafts for kids
The easiest way to teach young children how to create crafts from cotton wool with their own hands is by making vegetables and fruits. It is not difficult to form apples, lemons, oranges, mushrooms, carrots and other vegetables and fruits from cotton wool. One has only to show the child how to do this, how to paint finished products, and he will happily join the creative process and begin creating his own new products.
The tradition of making new and updating old New Year's toys existed in the 17-19 centuries and was passed on from generation to generation. Children were necessarily involved in this process, this instilled in them perseverance and patience, and created a pre-holiday mood in the family. This wonderful tradition is beginning to be revived in our time.
Bird
Materials for production:
- cotton wool;
- culinary foil - about 80 cm;
- glue;
- 2 brushes;
The process cannot be called complicated, but it takes time for complete drying.
- Roll a ball out of cooking foil and form it into a head with a beak and a tail.
- Moisten the workpiece with water.
- Tearing off and stretching small pieces of cotton wool, paste the workpiece with a brush. Direction: from beak to tail. You need to work very carefully so that the foil does not show through.
- In the place where the wings and tail will be, add more cotton wool in the same way, creating additional volume.
- Leave until completely dry - from 12 to 24 hours.
- Paint using a stencil.
If you attach a loop to the toy, you get a Christmas tree decoration.