Pros and cons of a hand-sewn dress
Sewing a dress with your own hands (master class, different models - later in the article) is not difficult, but you need to immediately determine whether this thing is worth the effort, money and time.
This activity has a number of pros and cons:
| Advantages | Flaws |
| Individuality of shape, silhouette. The opportunity to take into account all the nuances of the figure and create something that will fit its owner just perfectly. | Different fabrics require different approaches. An inexperienced seamstress may fail in making a product if she chooses too fancy materials. |
| There is no need to wait until the craftsman gets around to sewing the customer’s item. The time it takes to receive the finished product depends only on the owner. | One should not exclude the fact that in the absence of skills, the dress will turn out far from what was originally intended. You may have to make several attempts to make it. |
| You can choose any color, thickness and texture of fabric for sewing. | It is not possible to sew a dress without experience with all styles. Experiments can lead to the fact that the thing simply “won’t fit.” |
| Relatively lower cost than buying a dress in a store or going to a seamstress. | It is not always possible to immediately correct figure flaws with a homemade dress. You can, unknowingly, bring to the fore the negative aspects of the silhouette, rather than remove them. |
| Uniqueness of cut. |
Material selection
The fabric of the future dress should correspond to the purpose of the outfit. The most suitable fabrics for making a dress are: thick viscose, twill, wool, and knitwear.
Wool is used to make winter clothes, and viscose and other materials are used for lightweight models.
It is necessary to remember: before starting work, most types of fabrics require primary processing, that is, washing and ironing. Get to work - after completing this step, as most fabrics are prone to deformation.
It is better for beginners to start sewing a dress from jeans or knitwear, as these are the easiest fabrics to work with. It’s better to try to sew a dress from silk or any other thin expensive fabric after several training sessions. Thus, a novice needlewoman will not ruin expensive fabric due to inexperience.
Note!
- Knitted braids: simple patterns and the best master class for creating patterns with knitting needles. How to knit braids with your own hands + photo reviews
Knitting booties for newborns: detailed patterns for knitting booties for beginners + 150 photo reviews of the best products
Mittens - TOP 100 photos of the best creation ideas. Description of the technique + instructions for knitting mitts with your own hands for beginners
Where to begin?
A beginner in cutting and sewing needs to know exactly the algorithm of actions that must be followed.
Namely:
- Decide on the style, model and length of the future product. For beginners, it is best to choose a simple and uncomplicated dress form. It is better to abandon unnecessary connecting seams and many decorative details. It is optimal to complement a simple dress with original bright accessories.
- Choose the color, texture and texture of the fabric from which the dress will be made. The fabric should be such that it matches the theme of the future events to which the product will be worn. And most importantly, it is imperative to choose a material that will be easy to work with even for a sewing novice.
- Prepare all necessary auxiliary materials for sewing . You need to stock up on edges, adhesive linings, fasteners, zippers and buttons in advance. And, of course, you should never forget about needles, measuring tape, scissors, pins, crayons and hairpins.
- Make a pattern . It will be difficult for a beginner to sew a dress without a pattern. Therefore, when the seamstress takes her first steps, it is still necessary to stock up on several drawings of the future product.
In order to select all the necessary tools and materials, it is best to visit a specialized sewing store. In it, the consultant will select the fabric and materials that are required for each individual case. Patterns can be found in huge quantities on the Internet.
Next, they need to be transferred to large sheets of paper, taking into account the scale and individual dimensions of the owner of the future dress.
Sewing tools
It is necessary to start making a dress by preparing all the tools for convenient work. At the initial stage of learning how to sew outfits yourself, you can get by with the necessary minimum of tools, namely:
- pattern paper;
- cloth;
- tailor's ruler;
- chalk;
- scissors;
- measuring tape;
- needle for handwork;
- sewing threads;
- fabric pins.
With the acquisition of work experience, the arsenal of needlewomen can be replenished with other assistants, for example: a sewing machine, tailor's patterns, a mannequin, and a tool for ripping buttonholes.
What to sew first and where to get patterns?
First, it is recommended to opt for a simple dress with a simple cut. It is not so difficult to sew; the pattern for it is easiest to find on the Internet and adjust to your own parameters. Speaking of patterns: you can either order them from a professional seamstress or develop them yourself.
It is permissible to take measurements from existing clothes, then transfer them to a previously printed template.
A visual video on how to cut out and sew a simple dress yourself:
For a simple dress with a straight cut, it is possible to use an ordinary rectangular piece of fabric as a pattern, on one side of which you need to cut out a bodice, the dimensions of which can be drawn from your favorite T-shirt. This dress will be simple and elegant. You can wear this wardrobe item to any event - both for an evening walk and when going out.
Experts advise choosing plain fabrics in muted, calm colors.
How to sew a dress yourself for beginner needlewomen
Sewing a dress with your own hands (master class, different models can also be found in thematic magazines) will not be difficult even for a beginner.
There are a number of recommendations and tips that will help a novice seamstress make her work easier:
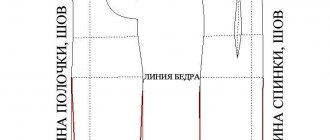
- The main measurements that will need to be taken from the model will be POG, POT and POB. This is half the circumference of the chest, waist and hips, respectively. In order to cope with this task, you need to measure the length of each parameter with a centimeter, and then divide the resulting data by two.
- It is imperative to depict each new detail of the dress as a separate element. You should never draw parts together in advance , as there is a risk of obtaining a poor-quality result - unnecessary folds, unevenness, divergence of seams and the inability to sweep away the overall structure.
- Before transferring the pattern onto the fabric, you need to additionally check that all parameters match. Particular attention should be paid to the armhole and connecting lines of all parts of the dress. If a discrepancy is detected, you can cut off the excess or glue the missing pieces to the paper model.
- Be sure to mark the lines of the hips, waist and all darts on the pattern. These are the most important components of the future silhouette, and the final work depends on the quality of their execution.
- For a beginning seamstress, you can create a pattern along with small allowances. This way, a beginner can avoid damage to the fabric as a result of an error.
- Silk, linen or cotton must first be ironed on the reverse side before cutting. If skew or large folds are detected, the material should be slightly moistened, then ironed thoroughly.
- It is also necessary to determine where the right side of the fabric is before starting the sewing process. In some cases, it will be difficult to answer this question right away. You need to focus on the edge of the material, because in factories all fabrics are rolled with their faces inside the roll, on the edges of which there are fastening needles.
Based on this, we can conclude that the punctures of the holes from the needles should be directed from the front side.
General sewing algorithm
Regardless of the type of product, it is necessary to familiarize yourself with the general sewing algorithm before starting work.
It includes several main stages of work, which together make up a single cutting and sewing process:
- Taking measurements . It is very important to correctly take all measurements from the model. The main dimensions are considered to be half the circumference of the hips, waist, chest, the distance from the elbow to the shoulder, the size of the armhole and the length of the product along the spine line. It is best to measure these points two or three times, and record the most accurate result. Sometimes it won’t hurt to leave a 2 cm allowance at the armhole and the back seam, so that you can use them as a reserve in the future in case of incorrect measurements.
- Making pattern pieces . At this stage, it is necessary to transfer all the measurements taken to the model of the dress, the model of which was chosen for sewing. It is best to move from large parts to smaller ones, leaving a few centimeters of margin. It must be remembered that it will always be possible to cut off the excess; sewing on the missing centimeters without damaging the product is almost impossible.
- Preparing for cutting . After the paper blank has been drawn, it is necessary to begin transferring the components onto the fabric and composing the future dress. It is better to depict each detail separately. After checking the dimensions, you can transfer everything from paper to cardboard or oilcloth, depending on which material is preferable to use. Here you will need to mark the most important parts of the dress with a bright line. These are: darts, bust line, waist, hips, middle of the object and lobes. Before cutting, the distance between important points is checked with a centimeter. If something doesn’t fit, then the pattern needs to be redone. The neckline and collar should be the same, as should the armhole and sleeve cap.
- Layout of the main elements of the dress. Start of cutting. Before cutting, a detailed inspection of the fabric for defects is a must. If imperfections are found, they must be outlined with chalk in order to correctly arrange the parts in the future and avoid poor-quality areas of the material. If a fleecy or patterned fabric was chosen, all parts are located strictly in one direction. The direction of the fibers is from bottom to top. On the table, the fabric should be placed wrong side up. Another option is to fold the material in half. You cannot sacrifice the allowable allowance left for allowances and seams, otherwise you may end up with unnecessary folds or even a lack of space for any part of the dress.
- Seam processing and dress sewing. First of all, a seam mark is laid along all the contours, and the dress is washed off. You need to start with small details, such as pockets, inserts, darts, wedges and shelves. Then the main seam lines are processed - along the waist, hips, chest and armhole. The back and skirt of the dress are sewn. Afterwards the upper and lower parts are connected to each other. You need to start from the back and end at the front. You need to finish by cutting the sleeves. Narrow options must first be heat treated. It is recommended to moisten the fabric before using it.
- Trying on . For the first time, you need to insert pins for fitting from top to bottom - the point is directed towards the floor. This is done in order to avoid traumatic situations, as well as to ensure greater fastening strength. You need to put on the dress, then secure with pins the place where the fasteners or zipper will be located in the future. The product is straightened and rotated so that all the main lines are located exactly in their places and are directed in the correct vector. The length of the dress is checked, compliance with the measurements of the chest, waist, hips, back and length from shoulder to elbow. The groove is checked for depth. If it is not enough, you can cut off the excess. The collar and neck of the dress are connected, the angles and method of folding the collar are determined. The sleeve is adjusted into place. You need to pin it using the same pins. Provided that the model should have pockets, their location is outlined in chalk and the parts are basted into place.
- The final stage. All previously swept parts are carefully attached to their places. You should not rush at this stage, because carefully opening a machine seam is a long and very painstaking task. It is best to check all the details as often as possible to ensure that their location corresponds to the intended plan.
Types of dresses
You can sew a dress with your own hands (master class, different models can be found on the Internet) to suit every taste. Each woman is individual, as is the structure of her figure. Each of them needs its own, special dress silhouette. You can choose either a classic, non-tight and minimalist cut, or a voluptuous, ruffled, curly cut.
Sew a dress with your own hands: master classes on different models will help you master the science of sewing on your own
Below are the most popular variations for cutting and sewing.
Tulle model
With the onset of the warm season, many girls in bright and light outfits appear on the streets. To sew a tulle skirt with your own hands, decide on the style.
For a slender figure, a fluffy multi-layered skirt is suitable. She will make the image feminine. Tulle and lining fabric are used for sewing.
The bottom layer consists of a rectangular piece of fabric, which is gathered along the top cut. Layers of tulle can be cut according to the pattern of a circle skirt or consist of rectangles.
It is better to alternate them to get a beautiful shape of the product. You can choose a long model or choose a midi one. Light and airy outfits fit harmoniously into any look.
boho
This is a very loose and comfortable type of dress. At the top it looks like a blouse and at the bottom it turns into a wide skirt. It is best to use linen fabric for this variation. In order to make this type yourself, you need to cut the material, paying careful attention to the correct folds on the dress.
Then the front and back parts are connected to each other, and the correct cutout is made on the collar. All details are processed around the seams, and the dress is turned inside out. A collar is attached to the reverse side in the neck area. All darts and sides are sewn together, sleeves and additional parts (sleeves, ruffles and fronts) are made.
The edges of the product are processed, everything is carefully stitched.
holiday outfits, shoes and jewelry, children's clothing
Clothing is the attribute by which a person is first identified and assigned to a certain nationality, religion, or profession.
Traditional costume has always been a distinctive feature of a certain nation or nationality. Although there are practically no differences in the clothing style of modern Europeans and Asians, the traditional costume still remains a source of pride for every nation.
The Tatar costume has passed through centuries and is a unique artifact by which one can judge the customs and traditions of this people.
History of the outfit
The classic Tatar costume began its history in the 18th century. Tatar attire is an abstract phenomenon, since each subgroup of this people wore clothes that had significant differences from what other representatives of this nationality wore. For example, the traditional outfit of the Crimean Tatars was very different from the clothing of the Volga Tatars. It was the latter that had the greatest influence on the design of folk costume.
The nature of the clothing was influenced by the religion and traditions of the East: it was decorated with elegant ornaments and took into account high moral standards. But the main factor that determined the appearance and composition of the Tatar outfit was a wandering lifestyle, so that the clothes were comfortable for riding. It was comfortable in both summer and winter. It is light, but at the same time warm.
You will learn about the Tatar national costume from this video.
Various materials were used to make the suit:
Nowadays, the national costume of the Tatars is almost never seen in everyday life. But it is widely used as stage and dance wear.
Features of the suit
The Tatar costume consists of a shirt (kulmek), trousers (yschtyn) and a robe. It is sewn in a minimalist color scheme. The most popular colors are burgundy, blue, yellow, white, green. The outfit, shoes and headdress are richly decorated with decorative elements. Gold embroidery, coins and beads are very popular. Floral patterns are most often used.
Men's and women's suits have few differences. In both cases there is a shirt in the form of a tunic with a deep chest neckline and wedges on the sides. It is very spacious and does not restrict movement. In Tatarstan, instead of a cutout on the chest, a stand-up collar is used. Since the shirt is very spacious, it is worn without a belt. In the past, women's tunics reached the feet in length.
The shirt was made of cotton, wool, silk and even brocade. It was decorated with bright ribbons, gold braid, the finest lace or jewelry. Women wore tesheldrek or kukrekche under it, which covered the chest neckline. Bloomers were made of thick linen fabric: women's - from plain fabric, men's - from striped fabric.
The top, which was put on the shirt, was hinged. The slight fit of this clothing gives Tatar women gracefulness. The outerwear wraps to the right and has side gussets. A Tatar outfit is impossible without a belt - knitted or textile.
The women's suit is longer than the men's and looks richer thanks to appliqués, fur and embroidery. On top of the shirt, women wore robes and blouses, elegant swinging camisoles, the length of which reached the hips or knees.
The camisole itself could be with or without sleeves. Its bottom, sleeves and hem were decorated with coins, feathers or braid. The tunic was also richly decorated. The sleeveless vest was worn over a shirt. It was made of velvet material and complemented with fur or gilded braid. The belt is another important element of the Tatar costume. It was made using large gold and silver buckles. In winter, fur coats were added to the traditional outfit.
Decorations
The wealth of the family was judged by the decorations. The quantity and quality of outfits spoke not only about the woman, but also about the couple as a whole. The girl always wore a lot of additional jewelry:
Earrings are a mandatory attribute of a Tatar woman, worn from early childhood until old age. Girls' ears were pierced at 3-4 years old. The shape of the earrings was classic or borrowed from other peoples. Neck decorations had a practical meaning: they covered the deep neckline on the chest of the costume.
Trapezoid
The first time this simple but very stylish dress was revealed to the world was in the 60s of the last century. Since then, almost every season fashionistas try to add at least one such item to their collection. Sewing such a dress with your own hands is one of the easiest options.
Master classes and different interpretations of this model are added to fashion websites every day. To sew, you need to take measurements of the chest, sleeve armholes and determine the overall length of the product. For this version of the dress, you will not need darts at the waist, so there is no need to measure this parameter.
https://www.youtube.com/watch?v=fZM5f_6ELsQ
You need to carefully measure the dimensions of the neck, then slightly increase the values at the back. This is done for greater ease of putting on, but there is no need to be too zealous - in the future a zipper will be inserted in this place. On both sides along the side seam you need to make a slight expansion towards the bottom - no more than 7 cm.
All the resulting details are sewn together, buttons, pockets, ruffles and zippers fall into place.
For the princess's friend
Our little fashionista doll also needs a beautiful outfit. How to sew a dress for a doll with your own hands?
Let's take cotton. We cut out the details of the bodice, sleeves and skirt, leaving a few millimeters for seams and fastening.
We connect and sew the parts together using a needle-forward seam. We trim the resulting outfit with thin satin ribbons or lace. The doll's dress is ready!
We hope that our article was useful to you, because it presents three options for dresses for different ages: for mother, daughter and doll. Try it, don’t be afraid to be creative and love yourself!
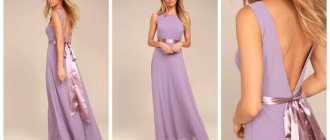
To the floor
This variation can decorate any woman both in everyday life and at a social event. There are a great many types of floor-length dresses, and every representative of the fair sex will be able to choose something of her own here. The main thing is to follow the general sewing algorithm for any other dress, but you need to pay attention to the length.
It is measured from the tailbone to the end point of the hem at the back. The upper part is worked out according to the chosen style. The most versatile and simple option would be a dress - a T-shirt. You can leave small indentations on the hem to give the hem a more trapezoidal shape.
The larger they are, the more pleated the skirt will be in the future. The bottom is made from two rectangles of equal size. All parts need to be carefully basted, tried on, checked to see if the length is suitable, and then stitched tightly.
The seams can be finished with decorative threads.
Practical and romantic: tulle skirts
It's hard to imagine something more feminine than an airy tulle skirt. Romantic or playful, they are not only very beautiful, but also much more practical than dresses: you just need to change the top and you have a completely different outfit.
A tulle skirt is easy to sew and does not require ironing at all - just hold it over a pan of boiling water, and the variety of models allows you to choose one suitable for any occasion and any type of figure.
Do you still think that a tulle skirt is only suitable for a ball gown? Then this article is for you.
Airy skirts - distant relatives of the tutu - are deservedly very popular all over the world. They first gained recognition as an evening wear item. But when the heroine of the popular TV series Carrie Bradshaw appeared in such a skirt, they “came to the masses” and are becoming more and more popular. Moreover, mixing different styles is more important now than ever, and such an expressive thing as a tulle skirt can be easily balanced with a denim jacket, simple tops, tight-fitting jumpers, T-shirts or ballet shoes.
Straight dress
This is truly the easiest type to make. Although from a design point of view it is considered elementary, in terms of elegance it is not inferior to even the most “cunning” version of the dress. To make a pattern, you need to measure the circumference of the chest and hips, and also determine the length of the future product.
When all this is ready, you need to make a pattern in the form of two (or four) rectangles, having previously drawn out the armholes for the throat and arms, leaving a cut for a zipper or buttons. Dimensions for them are taken in the same way as for any other option. The sleeves are made, respectively, as on other models.
All the details are swept together, then, after checking, they are assembled into one object.
First fitting
Before you finally decide whether the dress is ready for final tailoring, you need to try on the “raw” version of the future product. To do this, follow these steps:
- put on the dress carefully;
- check the width of the dress along all horizontal lines, namely: along the chest, shoulders and hem;
- check the depth and width of the neckline;
- check the length of the product: if the dress needs to be shortened, mark all proposed adjustments with chalk.
Don’t be upset if the dress according to your pattern requires modifications the first time. Beginning seamstresses will be helped by photo and video lessons on how to quickly sew a dress and try it on correctly.
Evening dress in half an hour
It often happens that you urgently need to come up with a dress for going out. It would be best to stick with a simple option, which will only take a short amount of time to sew. The length, according to the dress code, should not be higher than the top line of the knee.
https://www.youtube.com/watch?v=27ZpRAyME90
There is no need to make tight skirts and be zealous with darts, since it is impossible to immediately determine whether it will be comfortable to move around in a tight skirt of your own cut for a long time. You can take one large piece of fabric, sew it on the sides, after first making a cut of your own length in the middle.
Then you need to process all the edges and pull the fabric into beautiful folds at the waist level.
How to sew a plus size dress yourself
All women want to be charming, and ladies with curvy figures are no exception. For chubby women, it would be best to opt for a not too short version made of thick fabric. The style can be chosen either loose or tight (the main thing is not to overdo it, otherwise the dress will be ugly and uncomfortable to wear).
For beginners, it would be better to opt for an elongated style with a V-shaped neckline. The skirt should start just below the chest line and pleat slightly. You can mark the undercuts for the waist. It is preferable to divide the entire model into 4 parts - two rear and two front.
Accordingly, you need to sew the back parts first, then the front. Afterwards they are all assembled into a single structure.
Skirt with elastic
The product may have a belt and a zipper. A simpler option would be a model with an elastic band. It is simple and quick to make.
You just need to figure out how to sew a skirt with an elastic band with your own hands. The upper cut of the product is divided into parts and lines are drawn with chalk; this operation is repeated with an elastic band.
Then the elements are connected, precisely connecting the lines. Then, using a sewing machine, the parts are stitched together, stretching the rubber slightly. To do this, use an elastic zigzag stitch.
Maternity dress
Pregnant ladies especially need to feel beautiful and loved. A well-fitting dress will definitely help to make the right impression on others. However, it is not always possible to ensure a high-quality fit on such a figure.
Making a dress with your own hands (master class, different models for pregnant women can be found on the Internet) in this case will be the best solution.
To do this, you need to take into account several important points:
- It is best to choose stretchy fabric that is not too dense.
- It is necessary to give the girl enough room to maneuver in this dress. Pressure on various parts of the body, especially the abdomen, can have a negative impact on your health.
It would be ideal to choose an option so that the skirt starts just below the chest line and does not interfere with the free movements of the hostess. You can choose a light flowing fabric that will give the model more femininity.
Models of wedding and evening dresses for pregnant women: photos
Wedding dresses with a belt or bow above the waist look very feminine and cute.
Maternity dress made of soft, flowing fabric
An elegant dress made of heavy silk or jersey can be floor-length. But, if a woman is afraid of getting confused in such a dress, it can be shortened in an original way in the front.
Elegant dresses for pregnant women
A bag dress made of heavy fabric also looks very original, and for those who love airy lace dresses, they can be sewn from light, light lace fabrics.
Original dresses for pregnant women
Summer dress
On hot, sultry days it is not always possible to shine in all its glory. However, if you take into account several important aspects for sewing a summer dress, you can safely surprise everyone around you with your beauty in a new outfit.
For the summer season:
- The fabric selected is light and light. It's best if it's linen.
- There is no need to choose too tight-fitting styles and synthetic materials - this will cause your body to sweat too much.
- You can experiment with lace by adding a few playful inserts to the design of the dress.
You can opt for such common models as boho, trapezoid or rectangle. Also popular recently are dresses - shirts fastened with buttons. Their cut is easy to make and very comfortable to wear.
What dress will we shine in?
First, let's find out what color the Rat prefers. She loves snow white, gray and silver. Don't consider these colors boring, they also have their own shades. White: milky, ivory, cream. Ivory color also has several shades.
The gray spectrum is the most mysterious. It contains surprisingly elegant shades: pearl, ash, smoky with sparkles. Glitter has skyrocketed in popularity today. You shouldn't overdo it, but an outfit made of sparkling fabric will look the most advantageous.
The gray-pink shade is especially fashionable. In this model, every girl will look like a fairy fairy.
But the most fashionable thing is spicy mustard. The rat will also like this color.
Children's dress for girls
Girls begin to show their desire for beauty very early. This is expressed, first of all, in clothing. It doesn't take much to make a dress for a truly fashionable young lady. Most often, young ladies choose sundresses - they do not hinder the young lady’s movements, always look cute and are appropriate for any occasion.
This item is cut like a trapezoidal dress. You can play with the pattern and texture of the dress - this will definitely please the little beauty lover.
How to quickly sew a home dress without a pattern
It happens that updating your wardrobe is urgently needed, but you have neither the time nor the desire to create patterns. In this case, it is possible to make a dress without a preliminary preparatory stage in the form of a pattern. For execution, you will need a piece of fabric that matches the length of the future dress and is about three times the width of the hips.
It must be wrapped around itself like a pareo and secured with ties around the neck and shoulders. You can diversify the resulting image with a bright belt.
Sewing a dress with your own hands is an easy and very exciting process, which ultimately gives the seamstress a beautiful product that fits perfectly and pleases the eye with a well-chosen texture, type and color.
A variety of models, styles and techniques are presented in many master classes and small lessons in the public domain. Every fashionista will be able to find something unique there. You just need to stock up on desire, enthusiasm and all the necessary materials.
Article design: E. Chaikina

