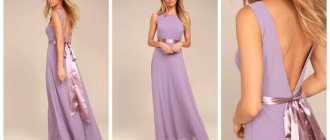
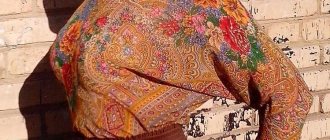
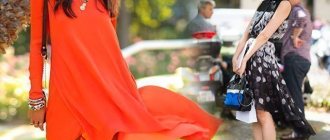
Hello, dear needlewomen. Today we will talk about such a trend in the fashion industry as Boho-chic. We will take a detailed look at how this style differs from others and study its varieties. We will also learn how to dress our tilde dolls in original outfits in the Boho style, without using special patterns.
Required elements
Boho style involves layers and airiness. As a rule, these are long skirts with frills, folds, and ruffles. Moreover, ideally the fabric should look slightly wrinkled.
Ribbons, beads, and lace are used for decoration. The outfit has a slight touch of gypsy, the main thing is not to cross the line of absurdity.
Fur is actively used in the manufacture of boho outfits. But it doesn't have to be natural! Otherwise, it will not fit into the classic principles of boho style lovers - lovers of nature and all living things.
The wonderful principle of combining incompatible details will certainly appeal to lovers of experiments, creative and unconventional girls. Combining jeans, chiffon, fur - yes please! The main thing is that it is stylish, harmonious and comfortable.
Fabric selection
Everything is simple here - we sew boho clothes exclusively from natural fabrics.
Let's consider the main ones:
- linen: very hygienic, has good moisture and breathability, and is easy to wash. Requires preliminary WTO, since linen shrinks greatly when washed;
- cotton fabrics: the material also requires preliminary WTO. Satin, poplin, calico, voile, and chintz are used. The fabrics wrinkle a lot when worn, but for the boho style this is not always a disadvantage;
- natural silk: taffeta, chiffon, crepe. Due to their strong “flowability” they are difficult to sew, but they are practically not subject to shrinkage;
- wool: since this style requires plastic and soft fabric, wool with the addition of viscose is used;
- knitwear, knitted fabric: in demand due to its unusual texture.
Choice of style
There is no doubt that this style will be most in demand among girls with curves and women of middle and older age. The outfit will hide flaws and highlight advantages.
Tips for choosing a style:
- the product should not resemble a bag or case without a shape; choose a model and fabric that “stretches” the figure;
- for obese women over 50 years old, not only the maxi length is suitable, but also the midi length;
- a good choice would be A - silhouettes, high-waisted dresses, trapeze dresses;
- asymmetry in the cut: emphasizes non-standardity, distracts from shortcomings.
For women with natural appearance and long hair, the boho style emphasizes natural beauty.
But miniature beauties need to carefully choose the details and model. Long dresses and large prints are absolutely not suitable. It is better to focus on the use of lace, ethnic patterns, and embroidery.
Let's look at how to sew a boho with your own hands, patterns and diagrams of different models.
Current color combinations and shades
As a rule, a coat in the “bohemian style” is distinguished by variegated and colorful colors, unusual prints and complex patterns. However, there are also more restrained models in classic colors - sand, beige, gray, black. It is better to complement such options with bright accessories so as not to look too boring and bland.
Models with unusual embroidery are always relevant for boho:
Geometric patterns - lines, large checks, diamonds - are still in fashion:
The more complex and intricate the design and texture, the better:
Long sundress with a box-style bottom
The boho pattern is designed for a woman who is 170 cm tall.
Size - from 46 to 52.
For such a sundress model, you will need 3 m of fabric with a width of 1.4 m. Natural material is priority - linen, cotton, satin.
Principles of modeling a long sundress pattern
We use a straight dress pattern as a basis. You can build it yourself, taking into account the maximum allowance for a loose fit.
The chest and waist darts need to be transferred to the side seam. We envisage the total length of the skirt from the waist to be 90 cm. The height of the “box” is 25 cm. We measure the size of the skirt without the box 90 cm – 25 cm = 65 cm from the waist line. Draw the bottom lines.
We narrow the front and rear panels by a small amount. In our example, the size along the bottom line is 23.5 cm.
We take measurements of three segments highlighted in red in the drawing. We calculate their sum (in our master class = 132.7 cm).
On a separate format, draw a horizontal line, put on it a segment with a length equal to the calculated amount (= 132.7 cm). We lower the perpendiculars from its ends and set aside the height of the “box” (= 25 cm). We complete the rectangle.
Next, we carry out the construction as shown in the drawing. We find the middle of the horizontal segment and draw a perpendicular down from it. To the left and to the right of it along the bottom line we put 28 cm, obtaining a total length of the segment highlighted in black of 56 cm. We connect the ends of the segment with the upper points of the rectangle with straight lines.
When sewing, these lines will be in the center of the back (front) and side seam of the sundress. In total you need to cut out 4 such parts. Each of them is stitched to all four parts of the sundress - two parts of the front and two parts of the back. Lastly, we sew down the central and side seams.
The total width of the hem of the sundress is approximately 2.24 m.
DIY sundress
This pattern of the product will be the easiest; even a novice needlewoman can handle the job. The straps need to be wide. On the back there is a small strip of material 8 cm wide and rivets.
Pair with cardigan and hat
First you need to stitch the breast and sew the straps to it. Then sew a long side seam and assemble the waistband without using a machine. Place a belt at the back. Baste the bottom and top sides. In the drawing, the breast is not trimmed, but whole.
Another version of the “box”
Dimensions are calculated for height 174 cm.
A novice dressmaker can first make a scaled model of the product to understand the design. It is enough to make a shelf on a scale of 1:10 and sew it from waste fabric.
Options for dresses and sundresses with this design are a bit like overalls.
A special feature of the model is the lower part in the form of a crown.
Modeling of the pattern is shown in the drawing.
We make a pattern for the lower part in the form of a crown by connecting the two halves along the midline.
Then you need to adjust the lower corners - make them straight, correct the bottom line. The sections marked in blue must be ironed and steamed, stretching them before stitching.
The main dimensions of the sundress are shown in the figure.
When modeling, it is important to take into account the features of the figure. For example, for women with a pronounced hourglass figure, the length of the seams in the center and sides needs to be adjusted. In the classic version, the side seams are lower than the central one.
For this type of figure, you need to bevel the bottom line. The size of the bevel along the front is equal to the difference in the distances from the waist line to the floor in the center of the front part and along the side seam. The bevel value for the rear part is determined in the same way. Of course, in this case we measure the height along the rear panel.
Blouse
On hot summer days, such blouses will be an integral part of your wardrobe. They are mainly made from natural fabrics in a loose fit, so the body does not sweat or itch.
Materials for work:
- Any natural fabric;
- Yarn, ready-made flounces;
- Scissors, machine or overlocker;
- Measuring tape and chalk.
You may be interested in this: Making a jute flower with burlap and twine
Operating technique:
- Make sketches of the blouse on cardboard or paper;
- Transfer all elements to the material;
- Carefully sew up the darts;
- Sew the back, the front of the product, then the sleeves;
- Finish the edges of the blouse using an overlocker.
Loose cardigan pattern
Boho dress in Russian style
If you look at it, the boho style has long been used in Russian national clothing. We invite you to sew a wonderful sundress or dress in boho style using the proposed pattern.
For sewing you need:
- fabric - either plain or colored, you can even make a patchwork version;
- binding for processing the neck;
- threads, sewing tools.
Description
We transfer the life-size pattern onto paper and cut it out. We mark the pattern on the fabric and cut out the details. We process the cuts with an overlocker.
We sew up the darts and sew shoulder seams on the top of the dress.
Along the upper sections of the skirt panels we machine stitch with large pitches. We stretch the thread, gathering the parts until they match the length of the bottom cut of the bodice. We sew the panels to the details of the bodice. Sew the sleeves into the armholes.
We perform side and sleeve seams. We process the lower sections of the sleeves with bias tape.
Pants patterns for plus size people
Manufacturing process:
- Transfer the pattern template onto paper and then onto fabric;
- Make even grooves;
- Sew all cut out elements;
- Sew the belt on both sides and add corsage braid;
- Sew it to the trousers, make a loop and sew on a rivet;
- Sew a fastener on the front;
- Hem the bottom of the trousers;
- Finish the edges of the pants.
Image option for men
Boho dress with raised seams
A model of a long dress with pockets, long sleeves at the cuffs, and decorative seams creating a tiered effect is an example of a classic version of the boho style.
Constructing a pattern
For modeling, we will need a pattern for a straight dress, size 48, with a semi-fitting silhouette and knee-length.
We increase the length by extending the main pattern by 30 cm.
Back
We deepen the neckline along the midline of the back by 2 cm, widen it along the shoulder seam by 3.5 cm. Connect the dots with a pattern line. We widen the armhole along the chest line by 2 cm, making a smooth connection. From the bottom of the armhole we draw a perpendicular downward, drawing a new line for the side seam.
Before
We deepen the neckline along the middle line of the front by 3 cm, widen it along the shoulder seam by 3.5 cm. We connect the points with a pattern line.
We widen the armhole along the chest line by 2 cm, making a smooth connection. From the bottom of the armhole we draw a perpendicular downward, drawing a new line for the side seam.
Sleeve
Since we have expanded the armhole, we are also increasing the length of the sleeve cap. We expand it in each direction by 2 cm.
We will not make darts at the waist; our dress has a loose silhouette.
Next, we will mark the relief seams. For each we mark two points.
For the front we have three seams:
- first: from the waist level along the midline we measure up 10 cm, the second point is the waist line;
- second: from the level of the hips we measure up 10 cm, the second point is the line of the hips;
- third: from the level of the hips down 20 cm along the side seam, along the midline - up 10 cm.
For the back, we will do two, excluding the middle one. We mark the first and third ones as mirror images of the front.
We connect the marked points with arcs.
We extend the lower edge of the backrest to the right by 15 cm.
We shorten the sleeve pattern to the size of the cuff - 15 cm.
For the cuffs, cut out a 10 cm rectangle (5 cm in finished form) to the size of the length of the sleeve along the bottom edge plus 2 cm for the fastener. Mark the place for the button.
Next, mark the location of the cut on the sleeve: a third of half the length. We put this value to the left of the center line. Draw a perpendicular 10 cm upward.
We close the chest dart. We transfer the pattern to a new sheet, transferring only the working lines.
We reduce the bottom lines by 10 cm, since at this length of the product, when closing the chest dart, we will get too much flare at the bottom. Draw a new bottom line.
We measure the length of the side seam of the front and adjust the length of the side seam of the back so that they are equal. We draw the line of the lower cut of the back.
From the marked lower points of the relief seams we draw perpendiculars to the side seams and mark new points for the arcs. We draw the arcs of the relief seams in the final version.
We will provide tucks on the tiered seams. To do this, we will duplicate the markings every 4 cm. Whether to do this up or down is up to your taste.
From the bottom point of the second tier we draw a circle with a radius of 15 cm to mark the pocket.
We take the pocket burlap pattern and cut it out. On the shelf pattern we mark the place for the pocket, placing 2 cm long marks.
The pattern is ready!
Modeling a dress in boho style: MK video
In conclusion, we offer simple boho dress patterns for plump and slender girls.

