The desire to make a car with your own hands arises from inspiration and motivation.
This could be an expensive sports car that you cannot afford to buy, or a desire to create a car with your own design. There are several ways to realize your dream. In this article I will talk about how to make a car with your own hands. Let's look at how a model base for molding a body is created, methods for making a car body, and also how you can assemble a car with your own hands from a ready-made kit (kit-car). Content:
- What do you need to know to make a car with your own hands?
- How to make your own car from scratch?
- Making a full-scale base model for creating a body
- How to create a car body with your own hands
- Kit car
- Registration of a homemade car
What do you need to know to make a car with your own hands?
The process of creating a car with your own hands cannot be called simple. Even well-known automakers sometimes make mistakes in the calculations and assembly of cars. However, if you have a great desire and ability to work with your hands, then using available materials and tools, you can make a car yourself. Among other things, this requires strong will and perseverance, then you can get impressive results.
The basic knowledge and skills that are needed are: understanding of the structure of a car, the ability to work with metal, fiberglass and putty, the ability to use a welding machine, basic knowledge of car electrics.
Some things you don't know how to do, you will have to learn in the process of creating a car. A lot can be learned from guides and information on the Internet. This site contains articles about cars built by amateurs who have little experience and learned everything in the process of building a homemade car. Here are two examples: an article “about the creation of a dragster stylized as a Ferrari Enzo” and a second article “about the creation of a Scorpione car.” Sometimes it will be wise to seek the help of specialists. Think about what you can do yourself, and for which stage it is better to involve another master. Many people want to think that they are first-class jacks of all trades and can do everything on their own, without requiring help. This is sometimes the reason why a project drags on for too long. After all, what an experienced professional can do in a day, an amateur can take a week, or even longer. For example, if you don’t know how to paint, then you can prepare the body for painting yourself, and take the car to a painter for painting. Or, covering the interior with upholstery material can be entrusted to specialists in this matter. This way, the overall process of creating a car will not seem unrealistic.
Robots
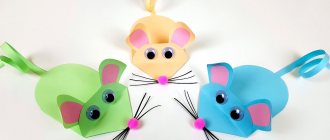
One of the simplest crafts for boys is a robot.
It's hard to find a boy who isn't interested in robots. And even a small child can make such a toy from ready-made elements.
Robot made from boxes or bottles
You can ask your child to construct a robot model from ready-made small boxes or plastic baby yogurt bottles. The easiest way to hold elements together is to use tape. The child can independently model the figure, attach the elements and color his character. The robot will not necessarily turn out to be menacing and beautiful, but it will be made with your own hands.
You can help your child secure the model’s arms and legs with laces to the large box-body of the toy. The second head box can have two paper antennas. The boy can draw a “face” and control buttons. The robot is ready to complete tasks!
With plastic bottle arms and legs attached to the body box, it will look like a stable and impressive device.
Robot made of cardboard and colored paper
Older children can make a robot entirely on their own. Cut out parts from cardboard, glue and decorate the robot in the desired style using colored paper or foil.
You can use different materials to make and design a robot.
- Cardboard and colored paper.
- Plasticine.
- Boxes and plastic bottles.
- Disposable tableware.
- Toilet paper rolls.
- Matchboxes.
- Lego construction parts.
Boys of middle school age, if desired, can complement the craft with a ready-made battery-powered mechanism. You can take it from a boring toy. Such a robot will be able to make sounds, give light signals, and roll along the surface.
Workshop and tools
You need to have a warm workshop with sufficient free space.
Making a car with your own hands requires the necessary tools. Special tools and machines make the job faster and easier, but you can do without them.
Here are the basic necessary tools that you need when creating a car with your own hands:
- It is necessary to have a good workbench with a large vice.
- Complete set of hand tools
- Drill, or better yet, a vertical drilling machine
- Bulgarian
- Welding machine (preferably semi-automatic)
- Compressor. For painting and for the operation of pneumatic tools.
- Spray gun
- Clamps of different sizes (for securing parts before welding)
- Mallets of various sizes and shapes, hammers and supports for forming metal (in the case of creating a body from sheet metal).
- English wheel machine and sheet metal bending machine (for easier sheet metal forming). As mentioned earlier, you can do without these machines, hammers and mallets, even if you make the body from sheet metal. We will look at different methods for creating a body in this article below.
Here is an example of a car whose body is made of aluminum on an “English wheel” machine. You can read more about the master and his cars in the article “Chris Runge and his cars made of polished aluminum.”
Simple paper model for children
To develop the baby’s logic and fine motor skills, experts decided to create figures, but with a lower level of complexity. The child will be pleased if you offer him an assembly of funny figures.
Cardboard modeling in examples.
How to make your own car from scratch?
Making a car from scratch involves creating all of its components and arranging them correctly. This is a very difficult process and can take an indefinitely long time. For example, American Ken Imhoff, making a copy of the Lamborghini Countach car, as close as possible to the original, made almost everything from scratch, even the wheels. As a professional metal shaper, it took him 17 years to complete the project. In an interview, he admitted that it was not a profitable activity and was like an interesting game for him. Most often, when creating a car with your own hands, an existing production car is taken as a basis and remade. This is the most realistic way to make a car with your own hands - make the frame, body and interior yourself, and take all other components ready-made from another car or several cars. This is exactly what small car manufacturers around the world have been doing for the last 50 years or more.
You need to acquire the necessary manuals for the car that will be used as a donor in order to understand the structure of all its components (engine, steering, suspension, brake system, electrics).
Paper Tools
The list is quite small, it can be shortened even more if you fold origami, because there is no need for glue:
- The paper itself is selected individually for each craft.
- Schemes on how to make three-dimensional paper crafts, if required
- Glue
- Scissors
- Pencil for transferring diagrams to paper
- Decor, for example, eyes, if the craft is an animal
Creating your own body design
Many car enthusiasts dream of owning one single car with an unusual design, the car of their dreams. You can design and make such a car yourself. The beginning of planning the design and construction of a car begins with an idea. The design can be individual, or combine existing shapes taken from other cars. For example, it could be the front that looks like one car and the rear that looks like another. When the image of your car is invented, you need to draw it. There are many graphics computer programs available to help you plan and design your car. Having decided what your car will look like, you need to understand what wheelbase will suit it. You need to choose a donor that is similar in parameters so that the wheelbase matches, or it will need to be changed.
Simple paper models for children
A wonderful souvenir is a heart. It can be cardboard, iron or plastic, it’s up to you to decide which material to choose.
Cupid's heart and arrow
Cow
Chicken and other small figures
Small sized hare
Allen Dragon
alfa romeo papercraft
Batman arkham
Assassin Creed attack
Making a full-scale base model for creating a body
To create a body, you need to make a base model. Using this base, it will be possible to customize sheet metal (formed with an English wheel machine or with hammers and mallets and applied to the model at each stage), or to mold fiberglass impregnated with polyester resin. After the body is molded, the base model does not participate in any way in the car's structure, and the finished panels are attached to the structural elements of the car's structure.
A computer (CAD or Alias program) can be used for design with further printing of full-scale drawings on a plotter. There are also ready-made templates for popular cars in electronic form, which can be purchased or found freely available on the Internet. There are also American companies that can make custom templates for the basic layout of any car.
A virtual layout diagram for creating a copy of the Mercedes-Benz SLR 300 body.
You can also use the old method of creating a base layout, without using a computer. It has its advantages. The old method of creating a mock-up base has been used by coachbuilders for many years. To do this, a drawing of all sides of the car must be drawn (see illustration) with a scale, which is drawn into squares.
In actual size, the distance between lines is 10 inches (25 cm). Using squares it will be easier to control the size and shape when making a layout. Next, to get a three-dimensional model of the drawings, you need to make a small model of the car. The model can be made from modeling clay or plasticine. As you work with clay, you will likely change a lot in your design as you get closer to the final form. This happens because the model appears to you from a different perspective. After changes in the design, you need to make changes to the drawing.
Next, the molded model is cut into transverse segments, which are outlined along the contour (see photo), and cardboard templates are made from them. Since both sides of the car are symmetrical, templates for the second side can only be made on one side. Each template should be numbered according to its location.
The next step is to enlarge these templates to full size. A projector is used to enlarge and transfer to paper. If you don’t have a projector, you can enlarge the templates by copying them onto large paper, maintaining the proportions (by squares). Then you need to make full-size templates. To create the final full-scale templates, 12mm birch plywood is best, but other materials can be used (discussed below). Now you need to put all the templates together to get a basic layout for molding the body.
Full-scale wooden base model for creating a replica of the Mercedes-Benz SLR 300 body.
Trying out molded sheet metal on a wooden mock-up of a sports car concept.
To make the base model, different materials can be used:
- Plywood
- MDF (cheaper version of plywood)
- Wire or fittings
- Polyurethane foam + cardboard (suitable for creating a fiberglass body)
- Plasticine or modeling clay
Full-scale mock-up for body molding, made from wire.
Different materials for creating a base layout have different features. Wood gives good visualization during the construction process, but burns when body panels are cooked on it. The open design (wire frame) bends well into different curves of the body, and provides easy access from the reverse side for hammering and supporting the sheet metal. Cardboard and polyurethane foam, which creates the main volume, are well suited for creating a fiberglass body (we will discuss this process below). Modeling clay is convenient in this process, but the most expensive thing. To create a full-scale model you will need more than 200 kg of clay. The cost of plasticine or clay will pay off if it is reused.
Once the 3D car model design is complete, it will serve as a mold to form the sheet metal for the car body or fiberglass body.
Master class on three-dimensional modeling and design from paper
Models are assembled from pre-prepared and bent parts. Developments must be printed on paper with a density of 170-200 g/m². This will guarantee the strength and durability of the structure.
For assembly you will need:
- scans or diagrams
- glue (do not use PVA, it will deform the paper after drying) or thin double-sided tape
- brush
- needle for applying glue in hard-to-reach places
- metal ruler
- sharp scissors, almost any straight scissors or a stationery knife, which is often supplied in a purchased set, will do
- dots for pressing folds
- any flat surface for cutting
- In order not to spoil the desktop, you need to put a piece of linoleum, plywood or glass on the surface
Paper modeling and recommendations
The main material for production is paper. In principle, you can use ordinary A4 sheets with a density of 65-80 g/m3, but if the creation is large, then it is better to use whatman paper or drawing paper (160-180 g/m3), for the smallest details you can try (if you find it, of course, I don’t smog) cigarette. When constructing paper polyhedra, I recommend working as follows: After the required pattern has been downloaded and all the tools are at hand, proceed to cutting and gluing.
Cutting out a shape from paper according to the diagram
Before you begin assembly, you need to prepare your work area. Then, print out the blanks. Make sure the parts are numbered. If there are no numbers, write them in the margins with your own hands. This will save time when gluing large crafts. There are three types of lines according to which blanks appear. Solid line - cut off a piece of paper using scissors. The dotted line bends inward on models without textures, and bends outward on models with textures. Dash-dotted - without textures outward, with textures - inward.
Cut out the blanks carefully, do not forget to leave “adhesive margins”. Thanks to them, the different parts of the product will connect to each other. Bend everything along the fold lines. If it is very long (more than 8 cm), then use a ruler.
Folding and assembling papercraft from paper
Preparing folds. In order for the part to bend in the correct position, you need to go step by step along all the lines. A non-writing pen will help you with this. Bend the element along the dotted line. Try to fold as evenly as possible and don’t be afraid to apply force, everything will be in its place when assembling. The bent edge on the outside is generously coated with glue, or you can use narrow double-sided tape, as you prefer. Look for identical numbers and connect them. The process is simple. It develops attentiveness well. The gluing is hidden inside the craft so as not to expose unevenness to everyone.
Don’t rush to connect everything at once; if your fastening method is glue, then you should wait until it dries completely and then proceed to the remaining parts. From personal experience, we recommend using double-sided tape. Take this as an option. Its use will save your time and nervous system. In addition to the usual thick adhesive tape, there is also a narrow one. Often, it turns out to be better and lasts longer than regular glue. True, working with it is quite a painstaking task, so immediately prepare tweezers in order to easily remove the protective paper. But be careful, use logic and calculate the order of fastening the parts so that there are no inconvenient moments at the end of the process.
For a beginner, paper modeling seems like a rather labor-intensive process, but you just have to try it, and this activity will become one of your family’s favorites.
The gluing procedure is a very responsible matter, as it requires perseverance and maximum care. All joints must match - this is the main secret of success during the joining process. Apply a thin, even layer of glue on both sides. You should move the parts slightly to ensure even distribution. After the parts are in the correct position, they should be pressed tightly and wait until the glue dries.
From time to time you need to use tweezers. These tools are especially useful in the final stages when you have to work inside through a small hole. You should move the parts slightly to ensure even distribution. After the parts are in the correct position, they should be pressed tightly and wait until the glue dries. From time to time you need to use tweezers or, better yet, surgical forceps. These tools are especially useful in the final stages when you have to work on the inside through a small hole. We use super glue for gluing small parts or if you need to quickly connect something.
We would like to warn you that even the smallest defects of a few millimeters can ultimately deform the entire picture.
But if it’s glue, then you should understand which company to give preference to. Check it for stickiness. It is necessary that after complete drying it does not shrink the creation and does not leave marks. In addition, gluing should occur in 15-25 seconds, this moment will show you the quality. You should also remember about safety precautions. It should not be toxic. In addition, it should set quickly enough, but not instantly. The last but very important requirement is that the glue should not be toxic. Often crafts are decorated with garlands or light bulbs, turning them into night lights.
Processing flat patterns for paper modeling
If the product is colorless or you decide to repaint it, then special paints are best suited. They are nitro-based, dry quickly, the paper does not get wet from them, the only thing is that they are expensive, several colors will cost the same as a whole plastic product. Therefore, try to carefully cover the surface with thick gouache, making sure that it does not get wet.
Strengthening a paper model in papercraft
Important: almost all of them do not have an internal frame and are easily dented when pressed, or even under their own weight, so I recommend strengthening them during assembly by gluing in at least a few spacers.
Safety precautions
- A dry place will protect against unnecessary moisture.
- Carry out the gluing process at the table, and not somewhere on the sofa or floor.
- The finished product on the edge of a table, shelf, cabinet will definitely fall.
- Wipe off dust from the finished product with a dry cloth.
- Keep your workplace in order, since the work is very painstaking and you definitely don’t need unnecessary chaos in the workpieces.
Frame and cladding (sheet metal panels)
Using a mallet and a solid wood die to shape the body panel.
This is a traditional method of making a body, used in the construction of carriages. The basic body frame is made of wood or metal. Next, the cladding sheets are attached to this frame. A body of this design is most often used by private automakers, since it is easy to design, build and repair if damaged (unlike the “monocoque” body, which is considered more advanced, but is used less frequently). The frame is the so-called space frame. A body with this frame uses many segments of profiled metal (usually steel) joined together to form a strong structure. Strength is achieved through crossbars. It is necessary to determine the loads that will act on the body and, in accordance with these loads, it is necessary to create the necessary reinforcements with profile pipes. Square pipes are easier to work with than round ones. They are easier to connect to each other. Round pipes are more difficult to connect, but are more durable. When forming sheet metal, mallets, hammers, supports, wooden stamps, and an English wheel machine are used.
Craft ideas
Paper is easy to process, so voluminous paper crafts for children can be very different:
- Flowers
- Butterflies
- Birds
- Furniture decor
- Decor for lighting items
Volumetric paper products can emphasize the dignity of the interior, fit into any style, bearing certain of its features. Such products are environmentally friendly and completely non-toxic. They can decorate any room without fear for your health.
The low cost of paper products allows them to be updated frequently, adding a new twist to the interior. So, with the renewal of paper crafts, the room changes, and expenses remain minimal.
Thick metal panels without space frame
This method does not use a load-bearing frame (space frame) onto which the sheets are welded. Instead, thicker sheets are used, which are stronger than regular sheet metal. The rigidity of the structure is provided by the mutual fastening of the panels to each other. Such bodies are mounted on a chassis and must have separate structural elements (not bearing a large load) onto which the sheets are attached. Hot rod bodies are often made this way. The disadvantage of this method is the difficulty of forming panels from thick metal and the heavy weight of the car.
Masks
An interesting accessory for games or school performances are masks made in different styles from different materials.
Suitable for this craft:
- Cardboard.
- Disposable plastic or cardboard plates.
- Textile.
- Paper.
Masks can be of any theme that is interesting to boys. These are Indians and super heroes, astronauts and aliens, ghosts and other horror stories.
There are a huge number of ideas for crafts that will be interesting to boys. To bring them to life, the main condition is the desire to create and imagination. Crafts can be used in various games, school plays or as an original gift.
Creating panels from individual segments welded together
Body panels can be created from multiple segments welded together. To do this, a wire frame is used as a basis (to control and maintain the shape), onto which all parts of the panel are welded. Depending on the size and shape, reinforcements may be added to the back of the panel. This method allows you to avoid molding complex panels using special molding machines.
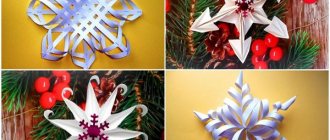
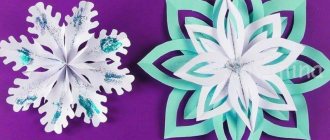
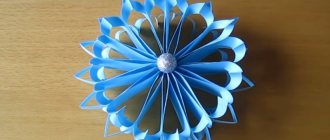
Simple paper shapes
Colorful creations will decorate any interior and will be a pleasant gift. Choose the layouts that you like. Spend time together collecting wonderful figures.
creative photo masterpiece of horse head
The unicorn is a mythical creature that girls love so much. A three-dimensional figurine will be an excellent addition for a little princess.
The trophy is a mountain deer in black and red colors.
A pink elephant can be a decoration for any YouTube blogger who films reports about the animal world of Asia.
Fiberglass body molding
Sports cars with fiberglass bodies appeared at the end of 1951.
The 1953 Chevrolet Corvette was the first production car to feature a fiberglass body.
The 1953 Chevrolet Corvette was the first production car with a fiberglass body.
The man demonstrates the light weight of the body. The fiberglass body can be molded entirely, in one solid piece.
The advantages of a fiberglass body are light weight, low cost when produced in small quantities, and non-corrosion. The disadvantages are the low visual quality of the resulting surface, which requires further leveling; fiberglass cannot play the role of a load-bearing structure capable of withstanding significant loads, so it must be installed on a frame.
To create a layout, today it is popular to use cardboard (as the main base layout, the creation of which is described above) with construction foam (to fill the gaps between cardboard templates) and further finishing the unevenness with putty.
The process of making a model of the basis of a car body using polyurethane foam.
There are two ways to form fiberglass panels. Both methods require creating a full-scale mockup (as described above).
- The body is molded directly on top of the layout. This forming will require further leveling with putty, as the surface will be rough.
- The surface of the layout is perfectly leveled and even painted. It is made into a mold using polyester resin and fiberglass. Next, the resulting form is enhanced. Its interior is very smooth and can be used to create copies of fiberglass panels with a much smoother surface than with the first method. If you need to create several copies of identical parts, then it is better to create such a shape. In other cases, fiberglass is molded directly over the full-size model.
Dinosaurs
Thanks to numerous cartoons about dinosaurs, children's interest in extinct representatives of the earth's fauna is quite great.
A craft on this topic will be of interest to both preschoolers and primary school students.
The easiest way is to make a dinosaur figurine from paper or cardboard.
Dinosaur made from a toilet paper roll
It’s easy to make a dinosaur using a toilet paper roll as a base. Boys 6-8 years old can cope with this work on their own if you prepare a template for them in advance with the upper part of the animal’s body with the head and tail.
- The finished parts must be carefully cut with scissors (they can be printed on a printer or drawn).
- The sleeve is cut lengthwise with scissors, the upper part of the body with the head and tail is fixed in the slot and glued.
- The legs can be cut out from the second sleeve; they will be strong and with the desired bend.
- Decorate the body with colored paper.
Cardboard dinosaur model
It’s fun and at the same time easy to make a three-dimensional model of a dinosaur with your own hands. To work, you will need thick box cardboard. You can draw the pattern of the parts yourself or find it in a book or on the Internet.
No glue is needed for this craft. The parts are connected using slots.
You can make interesting dinosaurs from cardboard, paper and plasticine.
Donor selection
The donor car must match the geometric parameters of your project. It is better to choose a reliable and easy-to-maintain car as a donor, the spare parts for which are not very expensive. To save money, you can, as a donor, buy a car with a damaged body.
Sometimes, when creating a car with your own hands, engines from powerful motorcycles are used. They combine light weight and decent power with a small volume.
Newspaper gift bag
This craft is distinguished not only by its environmental friendliness and affordable price, but also by the speed of execution. All you have to do is fold the newspaper into a gift bag, glue the folds and that’s it, the bag is ready. You can decorate the top with a satin ribbon or lace.
Kit car
This is another way to make a car with your own hands. A kit car (from the English kit-car) is a car kit that is sold by the manufacturer as a set of spare parts and contains detailed assembly instructions, and the buyer then assembles it himself. Typically, major mechanical systems such as the engine and transmission are taken from the donor vehicle or purchased new from individual manufacturers.
Kit cars have been around since the early years of the automobile industry. In 1896, Englishman Thomas Hyler-White developed a design for a car that could be assembled at home.
During the 1970s, kit cars had sports car-style bodies that were designed to attach to the frame of a VW Beetle. This was popular because the car's body could easily be separated from the chassis, leaving all mechanical components attached to the frame. For this reason, the VW Beetle has become one of the most popular donors of all time. Examples of such conversions include the Bradley GT, Sterling and Sebring, which were produced in the thousands and many still survive.
Modern kit cars are replicas of famous and expensive cars.
Replicas have an identical appearance to the original, but the body is made of fiberglass and polyester resin, instead of sheet metal like the original body. The attachment points for the hood, doors and trunk lid are reinforced with metal inserts laminated to fiberglass and resin. Infinity G35 coupe, prepared for installation of a new fiberglass body.
Part of the body was cut off, a power frame of the desired shape was added. Kit cars can come in different configurations. More common are kit cars that are designed only to replace the body of a specific donor (Re-body Fiberglass Kit). For example, Vaydor Body Kit produces fiberglass bodies for the 2003–2007 Infinity G35 coupe. Part of the body is cut off and a frame is installed that matches the shape of the fiberglass body. Such a conversion requires less technical knowledge, since all the technical parts remain from a working production car.
Veydor body based on the Infinity G35 coupe.
The advantage of making a car from a kit car is that it has already been done many times before and they can help you with advice. In addition, the manufacturer himself can always provide support in creating a car. If you are making an exclusive car from scratch yourself, then you can only rely on yourself.
Ships
Another good theme for crafts for boys is always sea romance. Sailboats and pirates, adventures and uninhabited islands excite the imagination of many generations of boys. And the simplest boat for a spring stream can be made from a matchbox or a couple of wood chips. Or it could be a classic paper boat.
sailboat
As a sample for work, you can take a photo of a real sailing ship. Of course, even if an exact copy can be obtained, it won’t be right away. But an attempt can turn into a real hobby over time. A high-quality replica of a sailing frigate can be an excellent gift for a friend or relative.
The hull of the ship can be made from a plastic bottle or juice box, giving it the appropriate shape. Holes will have to be made in the deck of the ship to attach the masts. Sails can be made from paper or fabric. And don’t forget about the ship’s crew and flag.
A model of the ship can be made from cardboard egg packaging.
- Half of the egg packaging is painted.
- The masts are inserted into the protruding parts of the package, and the sails and flag are attached to them.
- At the “stern” of the ship you can attach a steering wheel and a figurine of a helmsman made of paper or plasticine.
- You can hang lifebuoys on the sides of the “ship” and secure an anchor.
If you want to make a steamboat and send it sailing, then a box of milk or kefir will come in handy.
It is painted or covered with colored paper. A small box representing the ship’s superstructure and a pair of “pipes” are attached to the “deck”. Secure the lifeboat at the stern.
From large cardboard packaging from household appliances, you can make a real boat, in which you can play real sailors and go in search of adventure. If the space of the room allows, then children can use such a “ship” for games for more than one year. Then a homemade steering wheel made of cardboard, binoculars made from toilet paper rolls and an inflatable ring will perfectly complement the games!
Sport Car
Previously, we told you how to make a simple car out of paper, now we will complicate the work and make a racing car. This toy is capable of moving, for which it is enough to place the craft on a slippery and flat surface and blow on it. To make such a model, you only need office paper.
Manufacturing process:
- take a sheet and fold it in half, but not across, but lengthwise;
- we apply the corners located at the top and bottom on the right and left in the middle;
- iron everything well;
- now we form the bend of the upper side with internal triangles according to class=”aligncenter” width=”1024″ height=”680″[/img] (Step 2)
- We bend the already formed triangles to the middle of the workpiece;
- then bend the side parts inward towards the center;
- fold the bottom side of the triangle onto the top of the workpiece and bend the product in half;
- We bend the remaining corners into the resulting pockets.
The car is basically ready, you can paint it if you wish.
Simple machine
Playing with paper toys is no less interesting than with models made of plastic and metal. By playing with such products, you can organize races and make a garage for your toy. Each child will be able to decorate the craft themselves in any colors.
For the design process take:
- sheet A4;
- scissors;
- markers.
Having collected such a list, you can start making a simple machine. Now you will learn how to make a paper car.
Manufacturing process of a simple machine:
- take a sheet and cut a square out of it;
- fold the cut square in half;
- turn the edges in the opposite direction and bend them back towards the middle;
- bend the extreme sides in the reverse order and connect the figure in half;
- Now on the workpiece, you need to apply sketches that will resemble a car;
- for application, you need to wrap the upper corners and tuck them into the middle;
- in the end we get two corners, which in the same way, we fold one small one into the other large one;
- All that remains is to make the wheels;
- to do this, you need to bend the lower corners back;
- then we round them with scissors and get the front wheels;
- We do the rear wheels in the same way;
- All that remains is to bend the corners to get the headlights and decorate the product in any colors, and draw windows and doors.
After spending 10-15 minutes, you learned how to make a simple car out of paper and delighted your child with the craft.
Advanced level
Autodesk AutoCAD
Purpose : modeling of engineering structures.
Cost : from 10,250 rubles per month.
The program, originally designed for creating 2D engineering drawings, now has very powerful 3D modeling capabilities. At least this applies to everything beyond the final rendering and texture mapping. Whether it's a technical part with many small elements or a model of a huge building - AutoCAD will handle it equally well. Therefore, it is almost mandatory for technical workers to master this program. It will also be useful for working with 3D printing or cutting.
Cinema 4D
Purpose : graphic visualization of scenes.
Cost : from 5350 rubles per month.
Despite the simple interface, Cinema4D has quite wide capabilities for sculpting, rendering, creating textures and effects in animation. Plus, there are a number of tools designed to simplify and speed up the process of creating scenes. At the same time, you should not think that any user can handle the program - experience of at least basic 3D modeling is extremely necessary, and the scenes will not build themselves.
ZBrush
Purpose : sculpting models.
Cost : from $40 per month.
Anyone who enjoys working with clay and plaster in the real world will enjoy working with ZBrush tremendously. Here, too, the main area of creativity lies in the field of sculpture. After obtaining the desired contours of the face or body, the program will help you add the necessary textures, highlights and shadows to achieve the final result. Working with ZBrush is so comfortable that you can perceive it not only as a professional tool, but also as complete entertainment. By visiting any of the program’s many communities, you will see for yourself.
Blender
Purpose : sculpting models and animation.
Cost : free.
Blender is a unique symbiosis of quality and accessibility. There are tools for creating high-quality 3D models, applying textures to them, including hair and fabric, further animation and video post-processing. And all this is packed into less than 200 megabytes of space. At the same time, like any large open source project, Blender has a powerful community and is constantly acquiring new features.
Military model
Paper makes excellent military vehicles.
(Step 1)
To manufacture one of the types of military equipment you will need:
- cardboard with a dark green tint, or matchboxes;
- wooden skewers, paper and plastic tubes;
- compass, ruler and simple pencil;
- glue, scissors, black paint and brush.
Let's get started:
- We take dark green cardboard and draw 4 squares for the cabin on it. On the next sheet of the same paper we draw 3 rectangles and 2 squares. You also need to draw 3 rectangles. We cut out all the parts and glue the cabin, body, and glue 3 rectangular elements into a triangle, this will be a mount for missiles.
- We draw windows and doors on the cabin. The windows can be cut out, or you can leave them like that, but it is advisable to stick strips of paper or tape on them, this will make the craft look more impressive.
- We glue a triangle for rockets onto the body. We combine these components into a complete car. (Step 2)
- Wheels are made in the same way as for a truck. Also, 8 identical circles are cut out of black cardboard and 2 circles are glued together. Holes are made for the skewers and the wheel blanks are installed. For strength, it is advisable to dip the edges of the skewers in glue. Next, let's make rockets.
- The production of rockets for our military vehicle is carried out from cocktail straws. Take the tube and cut it into several parts. The length of one element should be 3 cm. After cutting, paint the elements black and wait until they dry. Then we glue the segments to the triangle, which is placed on the body.
Having done this work, you will get a wonderful military vehicle with missiles, which, by the way, drives. For realism, military equipment can be painted with dark camouflage spots.
Is it worth it?
According to Statista, the global augmented reality (AR), virtual reality (VR) and mixed reality (MR) market will reach $30.7 billion in 2022, and will approach $300 billion by 2024. That is, in 4 years it will grow 10 times, which will definitely lead to an increase in the demand for 3D modeling specialists.
Designing virtual worlds is a real task for the near future. In addition, 3D modelers will be in constant demand in industry, and the number of areas of application for the specialty is only growing. Therefore, if you dreamed of creating spaceships as a child, then you are close to this.
If we return to Earth, there are already 643 vacancies open on HeadHunter for the query “3D modeling”. On average, salaries start from 70 thousand rubles and reach 300 thousand rubles, for example, for the positions of Lead 3D Artist and Motion Designer 2D/3D. Specialists are required in a variety of areas and for a variety of tasks: from creating game characters and models of jewelry in ZBRUSH, designing furniture in AutoCAD, to modeling the results of treatment in dentistry, as an addition to the main specialty of a doctor.
Therefore, it is not uncommon that, realizing the potential of the industry, programmers retrain as 3D modelers. So, if you feel drawn to working with the visual, then it’s definitely worth trying yourself in this field.
Class A surfaces
These are objects that are constructed from splines of arbitrary order with the conjugation of curves and surfaces (using continuity G2 and higher) and meet certain aerodynamic and ergonomic requirements. Once created, such surfaces tend to reflect light from nearby objects. Previously, only matte coatings without glare were created, but all curves look much more realistic and clearer with gloss. It is for obtaining information about the quality of surfaces that the NURBS analysis tool, which is available in FormZ and ZW3D (Standard and Professional versions), is suitable. With this 3D machine design software you can achieve maximum realism.
If you model without such technology, you won’t be able to make effective rendering, much less animation with lighting - the shadows will always go in the wrong wave. For complex parts and surfaces, this is completely impossible - one vertex out of place will lead to a global displacement of the overall pattern.
Here are the curvatures on the body that can be achieved if you use only polygonal modeling:
Using NURBS technology in FormZ and ZW3D, it is possible to achieve a continuous display of light that does not actually refract due to offset lines, vertices, loops or nodes.
We will give you some tips on modeling a car in 3D design programs, which have the ability to split into polygons and NURBS.
Distance between rib segments
It should be as uniform as possible - between each point. Even if you have complex drawing geometry, work with curve tools. This will help you achieve minimal deviations from the continuous movement of the highlights.
Stiffening rib
In ZW3D and formZ, it is recommended to create stiffeners before converting them to class A surfaces. To easily create ribs, ZW3D has special Rib and Rib network tools, and in formZ Pro, use the Subdivision Tools set to add smoothness.
In formZ, use the N-reconstruct tools, which will allow you to edit an object without breaking it into polygons. This will allow you to work directly with the NURBS surface as a mesh. At the same time, tools for joining, combining, extending, splitting, editing each control point, inserting a node point, etc. are available.
Corrugation as the main material
To make mock-ups, it is best to take two types of cardboard - corrugated in three layers and smooth. By the way, the first one is suitable for load-bearing walls, ceilings and floors, and the first one is suitable for creating a corner for fastening individual structural parts, small-sized elements for interior and exterior decoration. A house model made from cardboard will need a base.
This can be a plate glued together from a couple of layers of corrugation, or cut out of plywood. The base or base of the layout will be drawn according to the dimensions of the future structure and can be filled with miniature decorative flower beds, vases for the garden and even benches. After this, it is important to draw on the base a diagram of the placement of the porch, walls and all kinds of extensions. After this, you can begin to create the main elements - walls with cut out window or door openings, floor and ceiling on the second floor (if you want a two-story house).
For structural assembly, you need to prepare corners from smooth thin cardboard. The longer you use the angle, the stronger the connection will be. Ideally, its length should be no less than 70% of the connection length. The width of the cardboard corner is from 1.5 to 2 cm.