This is a wonderful time - the eve of the New Year. For children, every day is filled with miracles. Preparing for your favorite holiday can be no less interesting than the holiday itself. At this time, even adults become a little children, willingly accepting this game of a wonderful fairy tale. If a child is growing up in the family, then the New Year celebrations capture everyone long before January 1: they select costumes for the Christmas tree, learn rhymes, and prepare gifts.
Home decoration is a special topic. Everyone willingly participates in such a creative process, from kids to high school students. Decorate the Christmas tree, hang balloons, snowflakes, garlands - how the family is looking forward to this moment! This is a good reason to go shopping: there is so much to offer on New Year's themes. And it’s even better to make decorations with your own hands, together with your child. You can be absolutely sure that these things will give a head start to any purchased ones: they contain so much warmth, love, and effort! For example, you can make voluminous snowflakes. This is difficult only at first glance. Once you try to create one, you will want to make more and more, using different techniques, different colors, sizes, shapes, and so on. And we will help make moments of creativity simpler and clearer.
Let's start with the simplest, but very beautiful.
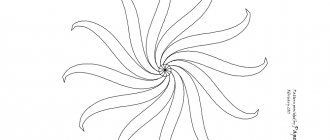
Volumetric snowflake “Galaxy”
It’s really very simple to do and won’t take much time. Therefore, even a three-year-old child can cope with the task. Of course, if an adult helps a little.
For "Galaxy" you will need 6 sheets of blue paper and 6 sheets of white. You need to immediately make squares out of them. Everyone knows how to do this: bend a sheet into a triangle, cut off the extra strip. You'll also need a circle. It will come out of just one strip. Any color. Let's take blue for example.
Take one square sheet. First, bend it along one diagonal and straighten it, then along the other. We unfold the craft with the corner of the square facing us and begin to bend the corners. The center of the square can be seen from the folds; we bring a corner to it and move our finger, aligning the fold. Do this with all four corners. It turns out to be a square.
We turn it over to the other side, again placing the corner towards us. We bend the sides towards the center. Let's run a fingernail or finger along the folds so that they are better marked.
Now we take the small corners that were bent to the other side of the workpiece and straighten them. It remains to bend them to the outside. One piece is ready. The child will do the remaining 5 on his own, the adult will only give a little guidance and advice.
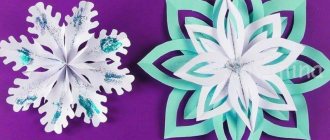
The circle gets involved in the work. It will be the basis of the snowflake on which all the blue rays are attached. We begin to glue them in pairs, opposite each other. When all six rays are in place, we can assume that the blue part of the “Galaxy” is ready.
We take white sheets of paper and make exactly the same rays out of them. The work will go twice as fast.
Take the blank again and glue the white parts on top of the blue ones. It's already beautiful. You can glue a bead or rhinestone into the middle: it will decorate the craft and cover up any rough spots.
Now you are not in the picture, but you can see with your own eyes that this voluminous snowflake is one of the most beautiful.
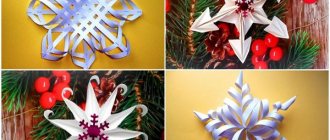
How to make a large paper snowflake from modules with your own hands
Such a “beauty” will certainly decorate the interior and also lift your spirits. Flat versions are usually glued to windows, and volumetric ones to walls, chandeliers, and cabinets. I propose to consider the option of separate modules. All the details are easy to complete; you only need a few of them.
What is necessary:
- 8 paper squares of any color with a side of 8-10 cm;
- glue;
- 1-2 beads.
Stages of work:
First we need squares of the same size. It is convenient to use paper for notes. Or take a regular A4 sheet and cut out 8 blanks.
Bend each square step by step along the first and second diagonals. Then bend the rectangular isosceles triangle with the selected height again, turn it into a square, raising the sharp corners to the right angle.
Turn the bent sharp corners outward, aligning them with the sides. Unfold the workpiece. In the original right-angled isosceles triangle, align the right angle with the middle of the base. Return the corner to its place. Now bend the triangle in height, leaving small wings.
In the resulting workpiece, bend the corner on the side opposite to the wings. Lift it so that it meets the midpoint highlighted by the previous bend. Use your fingers to squeeze this small triangle, open the larger piece and press the corner inward. Mask the small triangle inside, returning the wing piece to its place.
Prepare 8 identical parts.
Coat one wing with glue, close both wings, glue them together. You will get rays of a snowflake resembling petals with tongues in the center. Using a stick or toothpick, move the side parts to the sides so that all the parts become voluminous. Model 8 rays.
Glue the rays together, coating the triangular part selected during the bending process. Collect all the parts in a pile.
Apply glue to the last rays, open the snowflake around its circumference and press down with your fingers or tweezers to fix it in this position. Decorate the middle (on one or both sides) with a bead.
Master class on making 3D crafts “Christmas tree in a snowflake”
This is just a wonderful snowflake. Bravo to the authors who thought of combining a patterned snowflake and a New Year tree into one. This craft is so popular that it is performed in every kindergarten. Despite its simplicity, the child will need help. Especially for a three year old. Because a pencil is involved in the work.
We will need only 6 square sheets of soft green paper (dimensions approximately 8 by 8 centimeters, 10 by 10 or a little larger, but not very large), a drop of glue, scissors and a drawing tool: a pencil.
Fold the sheet in half and turn the fold towards you. Next you will need to be careful. We draw three lines. The top one goes from the left side of the fold to its right edge, from beginning to end. The second line is a centimeter and a half lower than it, starts from the fold, but ends about 1 centimeter short of the fold. The third line is also one and a half centimeters lower than the second, on the left it starts from the very fold, on the right it does not reach it by about a centimeter and goes back. One line parallel to the fold will be the trunk of the Christmas tree. Then it turns into a zigzag: the Christmas tree itself.
Cut along the drawn lines. We unfold the workpiece.
We take the upper corner of the middle strip and wrap it towards the base of the beam. Here we glue it. One ray is ready.
Let's repeat the work six more times. An adult's help will be required every time: it will be even more difficult for a child to draw even, round lines. You can use patterns if they are easier to work with.
The rays are attached in two places: at the base and approximately in the middle of the circle, overlapping. Therefore, they must be connected in series, and not opposite rays.
In the middle is a traditional bead (plastic products are easily glued with ordinary PVA glue). The decoration is ready!
DIY 3D paper snowflake
This 3D snowflake amazes with its depth. It turns out lush and airy that you just can’t take your eyes off it. A special effect is achieved by choosing contrasting shades of paper. For example, you can make a pair of white-blue, yellow-pink or green-white. In general, there are no clear guidelines for color. Despite the fact that a snowflake seems difficult to make, I assure you that a child can handle this process with ease.
For the craft we will need:
- Colored paper
- Ruler
- Scissors
- Glue stick
Step 1. On a sheet of paper, measure strips 20 centimeters long and 1.5 centimeters wide.
We need 10 such blanks. There are also 10 more in a different color.
Step 2. Bend each strip in half and measure 7 centimeters. This is just a recommendation. You can distribute the length of the cut rays by eye. Before reaching the end, cut the strip into three thin strips.
Step 3. Start assembly. To do this, we overlap from the first row, connecting the corners, as shown in the photo. Then we take it from the second row and glue it to the opposite first strip.
This way we got ten droplets of one color and ten of another.
Step 4. Connect them together. If you plan to make several snowflakes, you can experiment with alternating colors. For example, glue a yellow one and then a pink one.
Please note that the tip of each part is turned in one direction. Therefore, it is also necessary to glue. Don't get confused! Otherwise, further assembly will go wrong.
Glue together 5 rays of each color. In total we have four snowflakes.
Step 5. Select the workpiece that will be central. Let it be pink. Rotate the snowflake so that the corners of the rays look up. Apply glue to the very edge and place another snowflake on top. We connect exactly along the corner. But the top blank should now be rotated so that the rays look down. It turns out like an unopened bud.
Step 6. Next, place a yellow snowflake with a pink one collected on it. And cover it again with yellow color.
Step 7. We do the same as with the pink parts. We connect the corners of each yellow ray with glue.
It turns out a very beautiful 3D snowflake. Hang it around the room or in the classroom and these decorations will create an airy New Year's mood for everyone present.
Volumetric snowflake “Lucia”: a favorite craft for children
Who doesn’t like it when you don’t have to put in a lot of effort, but the result is amazing! This snowflake is just that case. Even if the child is under three years old, feel free to start doing it. Everything will definitely work out.
We suggest making it from yellow paper. Although any other delicate color will also work. Take 2 sheets of colored paper. There is no need to cut out the square, we work with a rectangle. Fold the sheet lengthwise like an accordion. The width of the folds should not be very large, but it is also not good to make them smaller. Keep the size to about a centimeter. Folded, now we need to draw a little. Use a fold to mark the middle of the accordion.
Step back the same distance from it and from the edges and draw three triangles on each side of the fold. On one side, the corners must be rounded. Now use scissors to cut out the triangles and cut the rounding lines. Do the same with the second sheet. Sew or tie the middles of the accordions with threads. Glue and straighten the snowflake on the sides. That's all! The volumetric snowflake “Lucia” is ready. Simple and beautiful!
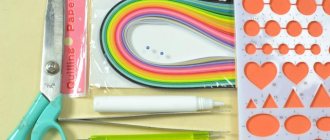
Beautiful paper snowflakes using stencils for cutting
I couldn't pass by such a beauty. I would like to surprise not only those around me, but most of all myself, with such New Year’s decorations. And a beautiful paper snowflake that you can create with your household will definitely give you that same mood. A ready-made template will help you quickly make several blanks at once.
For the craft we will need:
- Sheet of thick colored paper
- Ruler, pencil
- Fine Tip Adhesive
- Scissors
Let's take a square of 9 by 9 centimeters for such a snowflake. If you want a larger decoration, then increase it proportionally.
Step 1. Measure 2.5 centimeters from each edge of the square.
Step 2. Bend the strips along the measured lines. Apply glue to one edge and join together.
Step 3. Next, on the resulting part, we also retreat 0.5 centimeters from each edge and bend it lengthwise.
Step 4. We did this in order to later carefully and evenly fold the edges inward.
Step 5. Now bend it in half and apply glue in a thin strip. The main thing is that the glued part is only in the middle. Therefore, a glue stick is not suitable for this.
Step 6. Now we draw such a figure. To do this, measure 2 centimeters from the outer edge and draw a triangle. We step back a little from each edge and make sketches in the shape of a triangle from the sides. If you don’t want to measure and draw, just print out the snowflake stencils below with a sheet of 9 centimeters or 15.
Step 7. Cut off unnecessary parts to get a part that looks like a Christmas tree.
Step 8. After the glue has dried, peel back each edge to check if everything is done correctly. It should look like this. Great! We repeat the same thing from the first step. You will need 10 blanks to collect one snowflake.
Step 9. We will connect each other by gluing the central part. Apply a thin strip and press exactly the next part.
Step 10. Press firmly and wait for the glue to dry. Do not hurry. Otherwise, when the snowflake opens, something may come off.
Step 11. And now comes the most bewitching and magical moment. Everyone is excited. What happened?
We glue the extreme sides and decorate the windows, Christmas tree or walls.
Volumetric snowflake “Elegant”
This beauty can be made from strips that were left over from other snowflakes when a rectangular sheet was turned into a square one. In terms of materials, it is the most budget-friendly, and in terms of beauty it is in no way inferior to others.
So, we need white and blue strips of paper, scissors, glue and a ruler with a pencil.
In this work, the child gains drawing skills. The entire snowflake consists of stripes. To make them the same width, even and beautiful, you will have to work hard.
We will need 5 long strips of white paper, 10 strips of blue paper shorter than the long one, and 10 white strips of an even smaller size. We need to decide on their width. In my opinion, they should be less than a centimeter. Thin stripes look more elegant.
Now all that remains is to glue it. We bend one long white strip in half and glue the ends together. To this blank we glue a blue strip on one side, also folded in half. On the other side we glue another blue one. It turns out to be such a bud. We also glue folded white strips on the sides - those that are the shortest. One ray is ready.
We make 5 more such rays. Let's connect them together. We decorate the middle with a rhinestone, bead or sequin, and you can boast about the work done.
Making a snowflake with rhinestones
To make snowflakes you will need:
- 2 sheets of paper of different colors. Sheets must be square;
- glue stick;
- scissors;
- a simple pencil;
- one rhinestone bead.
Let's start making a snowflake.
- Fold the square sheet diagonally.
- Fold it twice more.
- Draw three arcuate lines on the folded sheet with a pencil. There will be cuts along them.
- Cut along the lines with scissors.
- We make slits in the shape of triangles at the bottom of the future snowflake.
- We unfold the workpiece.
- We bend and glue the middle strips of each ray of the snowflake in the center.
- We make another workpiece in the same way.
- We glue both blanks, trying to place the rays of each blank in a checkerboard pattern in relation to each other.
- Finally, glue a rhinestone to the center of the snowflake.
To make it clearer how to make such a snowflake, look at these photos.
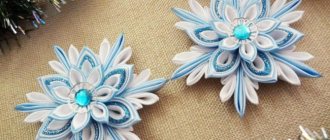
Making a blue and white snowflake
First, let's prepare:
- blue and white paper - six square sheets of each;
- a circle cut out of blue paper;
- glue;
- one rhinestone
Let's start making snowflakes.
- Take the blue sheet and fold it diagonally.
- We unfold the square and fold its sides towards the central fold.
- Turn the sheet over to the other side.
- We bend its sides towards the center. The end result should be a paper diamond.
- Turn the diamond over to the other side.
- We bend its upper layers to the sides.
- In exactly the same way we fold the five remaining blue paper squares.
- Now we take a white sheet and fold it on both sides diagonally, and then unfold it.
- We bend the corners of the resulting square towards the center, and then turn the workpiece over to the other side.
- Fold the sides towards the center.
- We unscrew the side holes on the back side of the workpiece.
- Fold the sides towards the center.
- We take the remaining five white sheets and do with them in exactly the same way.
- Glue two blue blanks opposite each other to the circle.
- Then glue the remaining four blue blanks to the circle. We try to keep them at an equal distance from each other.
- Next, we glue the white blanks onto the blue ones, trying to keep them in a checkerboard pattern (white-blue, white-blue, etc.).
- Glue a rhinestone to the center of the snowflake.
A little difficult? But if you look at these photos, which show the step-by-step steps of making such a snowflake, then everything immediately becomes very, very clear.
Volumetric snowflake “Geometry”
Despite the name, it is done simply, if not elementary. The boys will gladly do it. Take 2 sheets of colored paper, preferably different colors. For example, white and blue.
We fold the sheet in three and cut it into three parts along the resulting folds.
We bend one part in half, turn the fold towards us and make four cuts: the two outer ones are long, the two middle ones are half as long.
We bend the large strip in one direction, the small one in the other.
We do the same with all the stripes. Then we glue them along the planes. The snowflake turns out strict and stable. Decorate the table next to the computer.
We decorate the house for the New Year with voluminous snowflakes
In anticipation of the winter holidays, think about how best to decorate your apartment or any living space with crafts. Even the simplest compositions will look impressive if you play them skillfully. You can place handmade products anywhere:
- decorate the Christmas tree. White shiny crafts will stand out brightly against a green background; moreover, they are light and will not pull back the branches;
- create a snow chandelier. If your apartment has high ceilings, then make a hanging garland with different tiers;
- place them on the festive table among the dishes, they will bring a New Year's mood;
- hang your own handicrafts in a doorway or hallway so that visiting guests can see your creations from the threshold;
- attach crafts to windows, glass doors or glass using double-sided tape;
- create a New Year's corner on the wall in your bedroom or children's room.
Decorate New Year gifts for colleagues and loved ones with voluminous snowflakes; it will be very unusual and pleasant to receive a craft.
Don’t be afraid to experiment, because interesting solutions arise in the creative process. New Year's voluminous snowflakes will easily create a magical atmosphere in your home, you don't even have to buy additional decorations. Take some free time to create New Year's beauty, and the festive mood will already come to your home. Happy New Year!
Larisa
Hello! My name is Lara. I am a housewife and I love being one. Don’t think that my responsibilities are only kitchen, washing, ironing and cleaning. I organize my time in a much more interesting way. One of my passions is this site for women. On it I publish topics that interest not only me, but also those around me.
Volumetric snowflake “Air”
It is also performed on the basis of an accordion. But the width of the folds should be larger: we will draw patterns on them.
We need 2 rectangular sheets of colored paper in regular A4 size. Take one sheet and fold it lengthwise like an accordion.
We draw a pattern on the fold: simple, uncomplicated, semicircles, stripes.
We cut it out and put it on a second sheet, already folded like an accordion. We transfer the pattern onto it.
Now we cut out the blanks. We straighten it, admire it and continue.
Glue the second one to the edge of one accordion. We assemble the “accordion” at one of the bases and glue it to the arc side.
The “Air” snowflake is ready. A version of its manufacture can be seen in the step-by-step video instructions:
Spiny snowflake - Kusudama's ball
Another master class on making thorns. This ball is very similar to kusudama, isn’t it? But unlike her, making such a ball is as easy as shelling pears!
Kusudama is a spherical figure made of modules of various shapes and sizes. The word kusudama is translated from Japanese as “medicine ball”.
Will be needed
- A4 sheet
- scissors
- needle
- threads
Progress:
We make a square (circle), then fold it into triangles 3 times. And then we make cuts along the fold lines.
It is very important not to cut to the end. The result is triangles. And we will roll them into little balls.
We make cute caps with a pointed end. We bend the tip into the middle. This is how we consolidate our creation. We do this with all the elements.
As a result, we get an 8-pointed star or a circle with needles. And we need to make 10 such figures. When we have done all the elements.
We begin to assemble the figure. Take a needle and thread and a button. You can also use a school eraser to cut off a small square.
We pass the needle and thread through the button so that the knot holds and the craft does not tear. And we string our figures onto it, bottom down.
First, we collect 5 pieces in a checkerboard pattern, then we pin the next 5 circles, with the inside facing down.
Try to arrange the needles in a checkerboard pattern. At the end there is a button again. Then we tighten the thread. And we fix it. We get this cute prickly ball.
What if you make several of these hedgehogs? You can make a beautiful garland. And decorate any room with them - at home, in kindergarten or at school.
Snowflake 3D: “Grace”
The option is more complicated. It is better to do it with an older child.
It all starts quite simply. 2 sheets of colored paper, scissors, thread and glue are what you need. We place an A4 sheet along the table “lying”: the long side of the rectangle is located towards the child.
We bend it along the length, then again and again. It turns out to be a long strip. We bend it in half and mark its middle with a fold.
We round it on both sides. We tie the middle with threads that are the same color as the paper.
Now we cut all the folds of the strips so that each petal is separate. They are connected to each other only in the middle.
Fold each petal in half and glue it in the middle. We make two cuts at the end. The middle strip remains, the outer ones fold, as if turning inside out.
We straighten the work, giving it the shape of a snowflake. We decorate the middle.
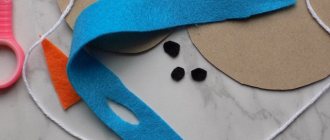
How to make a voluminous snowflake in the shape of a heart - instructions
You should always confess your love for loved ones. And especially on holidays. I suggest expressing your feelings with hearts.
The first thing to do is cut out a circle. To do this, we will use a plate, pencil and scissors.
Next, bend the workpiece in half. And, starting from the edge, fold the accordion. Make sure that the fracture lines are parallel to the middle of the circle.
Now let's return the workpiece to the accordion and bend it in half. All that remains is to fasten the middle with glue.
Our wonderful heart is ready!
Volumetric snowflake “Vorozheya”
This snowflake is simple to make, but you can complicate it by coming up with decorations.
It is based on 12 squares. They should differ in color and shape. It is better to take 6 squares with a side of 10 centimeters in a light shade, and let the squares 6 centimeters wide be darker. You will also need a cardboard circle with a diameter of 4 centimeters.
Roll each square into a bag and glue it together.
Using sharp corners, glue all the bags onto the circle, alternating large and small.
In principle, the snowflake is ready, but you can improve it. For example, decorate with simple snowflakes. Glue a white snowflake on top.
Attach a satin ribbon to the reverse side so that the “Vorozhey” can be hung.
Snowflake using modular origami technique
Modular origami is considered more complex than regular origami. Fold the first module according to the photo diagram, make a huge number of them and start assembling them according to the photo master class. Creating such a masterpiece requires a lot of time and patience. There are also huge advantages - you develop fine motor skills and will be able to surprise others with such a gorgeous snowflake.
Master Class
- Start assembly from the middle, forming a center of 12 modules.
- Insert the edges of the module into the pocket of the other modules.
- Attach the modules in a checkerboard pattern from one edge; a chain of two fastened rows should form - the outer row is 6 modules, and the outer row is 5.
- Turn out the remaining module and connect the ends of the chain with it, forming a ring.
- Increase the length of the beams by attaching modules.
- Add a module of a different color to each beam and continue building with the main one.
- Add modules until the snowflake reaches the desired size.
The snowflake using modular origami technique is ready! I recommend watching this video!
Snowflake from paper origami modules Step-by-step assembly for beginners
Snowflakes always please the eye and lift your spirits. Make the best, original three-dimensional snowflakes and give them as a gift. Then your loved ones will feel the fairy tale at home, remembering you.
Volumetric snowflake “New Year’s star”
They made a snowflake like this during labor lessons. It is also suitable for “preparation” - at 6 years old a child will be able to do it under the guidance of an adult.
To make it look elegant, you need to choose paper or cardboard with glitter. We take two sheets. Let's start working with one of them.
Draw a circle. Cut it out and divide it into 8 equal parts. We make the petals as shown in the figure. We bend the corners. It turns out to be an eight-pointed star. Fold it so that the fold goes to each ray through the center.
Place the workpiece on the second sheet and cut it according to the shape of the first element.
The bent triangles will serve as fastenings. We coat them with glue and apply them to the lower workpiece.
If you make the same star from the second sheet, then the snowflake will turn out the same on both sides.
Simple volumetric 3D paper snowflakes
When you need to make something quick and simple, take this snowflake as an idea. Bright red rays will stand out festively against the background of a green Christmas tree. Great idea to use as Christmas tree decorations.
For the craft we will need:
- Colored paper, preferably 180 g/m2
- Note paper 76 x 76 mm
- Ruler, pencil
- Glue
- Scissors
- Double-sided tape
Step 1. Measure out strips measuring 25 by 2 centimeters and cut them evenly. We will need 6 pieces.
Step 2. Connect the edges and cut diagonally, as shown in the photo
Step 3 . Next, we form a droplet from each strip. Fold overlapping with sharp corners.
Step 4. Glue each one, coating it with glue on the inside.
Step 5. To assemble the snowflake together, you can use glue or double-sided tape. We glue each ray at the points of contact at the widest part
Step 6. Assembling all the parts
In order to make a core, you can roll a ball of foil or assemble such a flower in origami style
Step 7. Fold the 75 by 75 mm paper in half. Post-it notes are ideal for these purposes.
Step 8. Next, unfold and fold with opposite corners. It is necessary to ensure that we have such guides on the paper, both along and diagonally.
Step 9. Bend each corner to the center and.
Step 10. Turn over to the other side. It turns out the same square, but smaller in size.
Step 11. Now we bend those lines that are indicated in the picture inward, and where they are solid, outward.
Step 12. Again we have a square shape, but very small.
Step 13. From the sides we bend the corners to the middle and then wrap them inward. (the photo below shows this moment). Next, we bend the paper to the center, where the arrows are.
The previous step, how to press along the edges is shown in this photo.
Step 14. Bend the petals with a ruler, open the cup and the core for the snowflake is ready.
Volumetric snowflake “Snow Queen”
White, flawless and beautiful. Regular office paper will do.
From one sheet of A4 we make a square: we bend it into a triangle, and cut off a strip from the bottom. We cut the second sheet in half, and also make squares from the halves.
First we work with the square. We fold it into a triangle, bend it again and again.
On the side opposite the fold, cut strips.
We'll do the same with smaller squares. Divide a strip cut from a large square into two squares. From them we get the same blanks.
Now in the center of the large snowflake we glue a smaller snowflake, and attach the smallest one to it. We do the same on the other side of the workpiece. "The Snow Queen" is ready!
Beautiful snowflake ballerina with printable templates
For those who like to create masterpieces, I suggest making fragile, slender paper ballerinas for the New Year. The work is, of course, painstaking, but the result is worth it: your craft will undoubtedly amaze everyone around you, and you can decorate your apartment with it for many years in a row.
Source https://www.youtube.com/watch?v=WzI1n3Imum8
You will need:
- White paper;
- glue or double-sided tape;
- stationery knife.
How to do:
Cut out a ballerina figure from paper. If you are good at drawing, then draw the silhouette yourself. If not, then use ready-made templates. Click on the picture and right-click to save it to your folder.
Fold the sheet into a square, cut it out, fold it into a triangle, make arbitrary symmetrical cuts. You can make any other patterns that you like best. The resulting snowflake will be a ballerina's dress.
Now glue the paper dress to the ballerina using glue or secure the tutu with double-sided tape. Make some snowflakes this way.
It is not necessary to repeat yourself, so use different figures in different poses, then the crafts will look very interesting. Here are the options for “skirts” for a ballerina.
Scandinavian snowflake made from strips of paper - assembly diagram
Making the next winter beauty will take a little time. It can be hung on the Christmas tree or on door handles.
Such products are called Scandinavian or Norwegian.
We cut the sheet into strips 0.7-1.5 cm wide. There should be 12 paper strips.
We take 2 ribbons and put them crosswise and glue them together. Add 2 more vertical stripes to create a weave.
The distance between the paper strips is arbitrary, but not greater than the width of the workpiece.
Now let's add 2 more ribbons to the braided line so that we get a cross with a braided middle. Don't forget to glue the joints.
Let's add some openwork - connect the outer rays of the cross. There should be two such blanks.
Now we place one face down and cover it with the second. We thread the unbraided tails of one into the loops of the other. Secure with glue.
All that remains is to cut off the protruding tails and hang them on the tree!
Now let's use a little imagination. This is the kind of ice you get if you make it from different colors and add curls.
Don't be afraid to fantasize!
Add stripes and curls! Intertwine!
Paper snowflake accordion
Fold the sheet into a uniform accordion shape, bend it in half, draw a pattern and cut it. Unfold, glue the edges of the snowflake into a circle and carefully straighten it. By the way, even single-sided colored paper will work perfectly.
Photo: elleonora.ru
How to make a Christmas tree out of paper: 12 beautiful DIY ideas
It's interesting to know
- It is believed that in nature there are no two snowflakes with the same pattern. The shape and size of miniature ice crystals largely depends on the temperature and humidity of the air. The higher both of these indicators are, the more complex the structure of snowflakes; they have graceful outgrowths - “needles”, forming a lace pattern.
- Initially, all crystals have the shape of a hexagonal prism. It is determined by the molecular structure of the ice lattice. As they approach the ground, the snowflakes transform, “overgrown” with additional crystals, which are deposited on the tops of the prism. Over 5,000 varieties of ice “stars” are known.
- The crystals are transparent, but their faces refract light differently. This is responsible for the visible whiteness of the snow cover. If the chemical composition of atmospheric water is changed, the snow can turn red, blue, even black.
- A snowflake is 95% air, so it is almost weightless and falls slowly.
- Japanese physicist Ukihiro Nakaya was the first to classify “sky crystals” in the 1930s. The unique “Snowflake Museum” on the island of Hokkaido is named after him.
- When falling into water, ice crystals produce a very high-pitched sound, inaudible to the human ear. But the fish not only hear it well, but also react by rushing into the loose water.
- There are over 350 million snowflakes in one cubic meter of snow. Each is about 5mm in size. However, in 1887, in the American state of Montana, a specimen with a diameter of 38 cm was recorded. Calm weather contributes to the formation of such large flakes.
- Tiny ice crystals, turning into multi-ton blocks of snow, can, according to scientists, even influence the speed of the Earth. In winter, the total mass of snow cover in both hemispheres reaches 13.5 billion tons. The white “blanket” that envelops the planet reflects up to 90% of the sun's rays. Thus, low temperatures are maintained at the earth's surface.
- Russia is traditionally considered the snowiest country.
- Snowflakes, like other crystals, can be grown artificially. The first sample was received by Ukihiro Nakaya in 1936. The scientist dreamed of growing a crystal with twelve sides, but this is not yet feasible. Today, artificial snow is grown, for example, by the American laboratory of Kenneth Libbrecht.