These crafts will turn your home into a winter wonderland. Small copies of real houses will add comfort and magic to your New Year's interior. They can be made from paper, cardboard, Whatman paper, foam plastic, felt, salt dough, plywood. You can involve your household in this exciting activity by arranging fun family gatherings for crafts.
Paper and cardboard
The easiest way to make a house with your own hands is to use cardboard or thick paper. You need to draw a layout of the house on a piece of paper, cut it out and glue it together!
Winter city made of paper + template
The simplest paper craft in the form of a winter city. Print the template, cut and glue! The city is ready! And in the evening, you can put electric candles in the back and the whole structure will sparkle with new colors!
New Year's house cut and glue
For the first option, you need to print the scan on thick paper. Color it with colored pencils and cut it out. We bend all the lines and glue the house together. We glue the roof separately. A simple New Year's house made of paper is ready.
Christmas Toy Shop + Cutting Template
The next house will consist of separate modules. We print all the parts and cut them out. We cover the windows with lilac paper. Adding brown elements. Glue all the walls together and attach the top part. We complement the house with signs and a canopy. Glue the bottom and place the house on a cardboard stand. We decorate the New Year's craft with wreaths and a horse with gifts.
Note! The house template consists of 11 sheets! They all need to be printed and cut out.
Paper house templates
Using the templates below, you can glue together interesting houses. You can color and decorate them to your taste.
Note! Templates for complex houses are placed on several sheets! In our gallery they are arranged sequentially. Be careful!
Electric New Year's lamps "slides"
Several decades ago, when creating New Year's lanterns, ordinary burning candles were used as light sources. Modern technologies are focused on efficiency and increased safety during operation, so most garlands and lamps run on LEDs. Such candles with LED diodes can function almost around the clock, since they are completely safe and cannot become a source of ignition. These are technically simple and intuitive devices.
“Christmas slide”, or simply “slide”, is a New Year’s lamp with built-in electric candles, which will be an ideal decoration for a store or catering establishment. They are often installed in living rooms, decorated with coniferous and wooden figures (snowman, Santa Claus, Snow Maiden, angel or deer). In some cases, lamps are decorated with huge compositions using birch bark.
You can create such a device yourself, using simple candles and any available decorations. This would be a great idea if there are small children in the house who would be interested in creating such a work of art.
This approach can be called fresh and original. Despite the simplicity of the design, such a solution when decorating a room will enhance the festive atmosphere. The lighting fixture can use regular light bulbs or imitation candles.
New Year's house made of cardboard box
You can make beautiful versions of New Year's houses from various unnecessary boxes. We will use boxes of all sizes.
Square box
Open the lid and bottom of the cardboard box. We cut off the excess from the side parts to make triangles. Cut off the bottom. We make a roof from the lid and fill it with the remaining cardboard. We cut out the windows and door. We cover the walls with self-adhesive paper with a pattern of bricks and boards. We attach shutters to the windows. We decorate the house with a mailbox and a number. We place a battery-powered candle or garland inside. The New Year's house-candlestick made of corrugated cardboard is ready.
Milk packaging
Cute houses can be made from tetra packs. The box can be painted with gouache and windows and doors can be drawn or glued on. Or you can cut holes for windows and doors, then you will get a kind of flashlight, inside of which you can place an electric candle or a garland.
City skyscrapers
Let's make New Year's houses from milk cartons. Making such crafts is not difficult, so it is suitable for children. We cover the boxes with white paint. To prevent the paint from showing through, you can cover them in several layers. We paint the roofs with different colors. We draw windows and doors. We outline them with a black marker and add partitions. Drawing tiles. Mini houses are ready.
Gingerbread houses
From the same boxes you can make openwork houses. We cover the boxes with parchment or craft paper. Cut out small windows and doors. We outline them with a white marker. We place battery-powered candles inside. The result is very beautiful New Year's crafts with lighting.
Box from Raffaello
Carefully open the package. Cut out two triangles from embossed cardboard. Glue them onto the lid and cut off the excess. We make a border around the edges. We attach the roof itself, decorated with a red ribbon. We make windows and place flowers. You can put sweets inside the box and give the house as a New Year's gift.
Tea box
Cut off the top of the tea box. Cover the entire surface with burlap. We make a cardboard roof and wrap it with twine. We decorate the house with vegetation, beads and coffee beans. A do-it-yourself house is suitable for a kindergarten.
Cereal box
To make these New Year's houses, we will need cereal boxes. Carefully open them and place the inside side towards you. Draw a line along the box. We make cuts along the side bends to this line. We push through the bends and cut off the lid. Glue the box together. We connect the side parts to form a pitched roof. We cut the remaining parts to height. We leave valves on the side to connect all the elements. Glue the side edges, placing the flaps inside. All that remains is to cover the houses with colored paper.
Silhouette cutting and protruding
A DIY Christmas village doesn’t have to be voluminous. To decorate a window with this craft, you will need:
- Whatman paper, sheet of cardboard;
- Pencil, ruler;
- Stationery knife and glue;
- Templates of two or three houses, stylized Christmas trees and trees.
Whatman paper must be smooth, so it must first be ironed with a warm iron. Step back 3-5 cm from the bottom edge and draw a line along the entire length of the sheet. Draw a village - snow-covered houses, trees, benches, Christmas trees, etc. To do this, you can use printed and cut out templates. It is important that the overall lines of the top and bottom are unbroken. Be sure to draw carved windows and gaps between the branches.
Cut off the top line of whatman paper. After this, cut out small parts with a stationery knife. Fold the sheet along the marked bottom line. Cut out several long strips 1.5-2 cm wide from thick cardboard. Step back 4 cm from one edge and bend. Glue these supports to the back of the paper village. You need to glue it so that the bent leg is attached to the bent strip of whatman paper, and the other end to the internal parts of the houses. This gives the structure stability.
This cut-out craft can be supplemented with a diode garland by running a wire from the back of the sheet. Soft lighting will give a festive look and decorate the window both from the inside and from the outside.
In the same way, you can decorate a window by gluing cut out houses to it using regular soap. The technique of cut-out pictures is called “vytynanka”; there are many ready-made templates for printing, which are cut out with a knife on paper or a simple blade.
DIY winter house made from paper tubes
We divide the A4 sheets into 3 parts. We twist each strip and seal it with glue. We lay out the tubes around the perimeter of the square. We continue to add tubes, leaving gaps for windows and doors. On the inside of the house we insert a blue background on the windows. We make crossbars and a window sill. We place a long tube in the center and place a roof on it. We glue a row of tubes and wrap them with paper. We install it as a ladder. We make railings from thin tubes. We cover the top of the house with paper tiles. You can add a swing to the house, made using the same technique from paper tubes.
House from a glass jar - step-by-step MK how to make it yourself
Let's make decorative houses from a jar and salt dough. You need to prepare a jar with a lid and foil. We roll strips of different thicknesses from foil. Wrap the strip around the bottom of the jar and glue it. In the same way we make a window, a door and a tubercle on the roof. Give the tubercle the shape of a mushroom. We attach the chimney from wire. Cover all parts with salt dough. We give relief to the bottom using a stick. We push pebbles on the door and window. We make a rough surface with an old toothbrush. Cover the surface of the jar with a thin layer of dough. We cut out a window and several holes in the walls. We place crossbars in the windows. Create a wood effect on the door. Cover the chimney and mushroom with dough. We complement the house with details in the form of a door handle, mushrooms, bricks. We paint the house with watercolors or gouache paints. The result is a magical house made from salt dough.
"House in the village"
Author: Maria Gershkul. Work for the “New Year's Crafts” competition.
Composition “House in the Village”. A very interesting idea for New Year's decorations, as well as as a gift. The process of making this craft is very exciting and gives you a New Year’s mood.
To work you need:
- A4 sheets (preferably drafts);
- Stationery knife, scissors, pencil;
- A small, empty box (for example 10/12/11);
- PVA glue;
- Thick cardboard;
- White, soft toilet paper;
- Thin cardboard;
- Glue "Moment";
- Cotton wool;
- Gouache, brushes;
- Salty dough.
Execution process:
Fold A4 sheets in half and cut. We twist the cut sheets into tubes with a diameter of approximately 7 mm. We seal the edges of the tube with PVA. You need to wind approximately 60 of these tubes, depending on the size of the box.
Next, take a box; you can leave the bottom and 4 walls. Select 2 parallel walls, on the side of which we will have the upper triangular parts of the house facade - pediments. Measure them on thin cardboard, cut them out and glue them to these walls.
Now we measure and cut out the required number of windows, at our discretion. Cover the entire house with newspaper and paint the inside with gouache.\
Next, we glue the finished tubes using PVA glue, in the form of a log house. We control the length of the tubes: if necessary, cut them with a knife. In the places where the windows connect, we measure the tubes, cut them and glue them. We cover the surface of the resulting log house with toilet paper, carefully covering it with PVA, pressing it with a brush. When the house dries, you can safely paint it with gouache, having determined the appropriate color.
We measure out the roof from thick cardboard, cut it out and glue it to the house with Moment glue. Cover the finished roof with PVA glue and cut out a connector for the pipe. We glue the pipe made of thin cardboard with Moment glue to the connector and paint it with gouache. Smoke - padding polyester. We apply snow-white cotton wool to the finished roof. We cover it with PVA on top. When the roof is dry, for maximum whiteness you can paint it with white gouache and cover it with liquid glitter.
Cut out window frames from thin cardboard, stick decorative tape or tape on them and attach them to the connectors on the house.
The well is made in the same way as the house. Plasticine bucket, rope - twine.
The shards, felt boots, star, bullfinches on the composition are made of salt dough, painted with honey paints.
A fence made of willow branches, secured with salt dough. A tree is a dry twig, fir trees are cones. The snowman is made using threads, inflatable balls, and PVA glue.
DIY New Year's house made from cotton swabs
Place two cotton swabs parallel to each other on shiny cardboard. We place two more sticks across them. Glue on the triangular roof and add a few more layers of ear sticks. We place Santa Claus inside the New Year's house. We complement the picture with a New Year's landscape made of disks and cotton wool. The cotton swab house is ready.
Winter house made of cotton pads - applique for kids
For the New Year, you can make applications from colored cardboard and cotton pads. We cut out houses from colored paper and glue them onto cardboard. We cut the disks in half and place them on the houses as a roof. We draw a tree trunk with branches and complement it with round disks. We decorate the picture with snowflakes cut out with a figured hole punch. Similarly, you can make the second option with multi-story buildings and a purple background.
Benefits of holiday lights
To this we can add the following positive points:
- The devices are characterized by durability and high efficiency. Sometimes they can be used as the main sources of room lighting during New Year, Christmas, etc. celebrations.
- Any New Year's lamp supports several operating modes, illuminating the room with a continuous or dynamic (irridescent) light flux.
- These are universal products at affordable prices, designed to decorate various objects, from residential buildings to offices, retail spaces and store windows. In the latter case, this approach allows you to increase the attention of potential visitors and buyers of the establishment and predispose them to purchase.
How to make a house from branches with your own hands
A house made from natural materials, in particular from twigs, looks very cool. Even residents of big cities can find such material without problems. In addition to the branches themselves, you can additionally use cones, acorns, moss and other natural materials that are available.
Wooden hut made of twigs step by step with photos
Let's look at how to make a New Year's house from branches step by step. We will need even branches of the same thickness. Cut branches to the same length. We cut holes in each to connect them to each other. Lay out a square. We continue to lay out the house, connecting all the branches with wood glue. Leave holes for windows and doors. We shorten the branches towards the top. We make a roof from parallel branches. We build a chimney from a thick branch. The result was a miniature model of a log house. If you paint it blue, you will get an ice house from a fairy tale.
House made of branches on a cardboard base - step-by-step MK
Another idea is a house made of branches and other natural materials. We glue the cardboard box. We cover the walls with twigs. We build a roof out of cardboard for the house and cover it with tassels of reeds. Place dried leaves on the bottom of the box lid. We glue people together from acorns and matches. We decorate the patio with flowers and a twig.
Option #3. Old Man-Lesovich's House
Old Man-Lesovich's hut
Making such a craft can take a lot of time, up to several days. This is a great opportunity to get even closer to your child! What is needed for such a house? How to make such a composition? Just follow our recommendations.
- To work, you will need a cookie or cake package. Decorate it with pieces of old wallpaper, create a background of an autumn forest. Use pine cones, acorns and matches to make the inhabitants of the forest - the Old Man of the Forest, as well as his friend the hedgehog.
- Take a kefir box and make a house out of it. Cover the walls with dill sticks (choose large ones) to create the effect of logs. To make stumps under which the hedgehog will live, use branch cuts.
- To make a path to the pond, use colored beans and semolina. To create a water effect, use colored paper and make pebbles from plum pits.
- Decorate a clearing with a forest with moss, leaves and branches.
We decorate the forest and clearing with pieces of moss
House made of toothpicks, wooden skewers or matches
If you couldn’t find branches to create a house, you can use wooden skewers, toothpicks or matches.
Two-story tower made of wooden skewers step by step
Let's make a house model from wooden skewers. Place the skewers on top of each other. Leave holes for windows. When the first floor is ready, lay out long skewers. The hanging part will serve as the base of the balcony. We are building a second floor with a door and windows. Making a roof out of matches. Add sides and a chimney.
Miniature matchstick house - step-by-step master class
You can build a small house from ordinary matches. We lay out two matches. Glue a row of eight matches across. Repeat this action across the first layer. Next, place two matches on each layer. We make the roof using this diagram. Add a small chimney.
Option No. 10. Houses for gnomes (alternative option)
DIY houses for gnomes
Making such houses is not difficult. To begin, prepare:
- toilet paper rolls;
- brush;
- felt;
- paints (both acrylic and watercolor can be used);
- PVA glue;
- scissors.
What you need for work
After preparing everything you need, start manufacturing. Proceed in accordance with the instructions below.
Table. Master class on creating houses for gnomes.
| Steps, photo | Description of actions |
| Step 1 | First, paint the cardboard sleeves with paint. Choose the colors you like best. |
| Step 2 | Next, make a door in each house. To do this, make a cutout in the sleeve in the shape of an inverted letter P. |
| Step 3 | Use felt to make the roof. Cut an isosceles triangle from the material, form it into a cone, and glue the ends together. |
| Step 4 | In our example, a triangle was made with sides of 15 cm and a base of 15 cm. |
| Step 5 | Finally, glue the roofs to the pre-painted houses. That's it, the crafts are ready! |
How to make a house from paper vines (newspaper tubes)
Let's prepare brown and blue paper tubes. We weave the bottom from brown tubes. We form a pot from blue tubes. On top we weave a roof with a window. We decorate the house with flowers and twigs. Add a braided braid to the door. The decorative house made from paper tubes is ready.
New Year's house made of ceiling tiles or foam plastic
We print the necessary templates and transfer them to sheets of foam plastic or ceiling tiles. We cut out all the details with a knife. We glue the walls and roof with glue. We cut out windows and holes on the doors. We draw all the details with a marker. We decorate the houses with New Year's wreaths and a Christmas tree. We place a light source inside. It turned out to be a simple Christmas house.
New Year's vytynanki - houses and village
Vytynanki is a very exciting form of creativity. To create them, a minimum number of items is required - paper, pencil, breadboard or stationery knife. Download ready-made diagrams from the Internet or draw figures and landscapes and cut out the details along a thin contour. The vytynanka is similar to the “silhouette” technique; the products can be glued to window glass or bent, making it stable and decorating the fireplace, shelves, or table.
Download the templates and print them on a printer or redraw them by hand. Transfer the outlines onto a piece of whatman paper and carefully cut out each detail with a stationery knife.
Options for houses and small villages, you can download the full-size archive template here.
If you don’t quite understand the nuances of the technique, watch the detailed master class.
DIY popsicle stick house
Another cool idea for a house is popsicle sticks. It’s unlikely that anyone has such a quantity of sticks at home, but you can buy them in specialized stores, for example, in pastry shops or on WB.
House on wheels
Let's prepare a wooden plank and several sheets of thick cardboard. The board will serve as the floor of the New Year's house. We cut out the walls from cardboard and attach them with a glue gun. We make the crossbars in the windows from skewers of different diameters. We cover all the walls with ice cream sticks. We make opening shutters and attach them to small awnings. Adding a deck with a picket fence. We thread the skewers through the wheels and attach them to the house. We install the stairs. Inside the house we glue wallpaper from any material and hang curtains. Add a round roof and cover it with skewers. We paint the structure white. We decorate the craft with flowers and decorative grass.
Dollhouse
Let's look at another interesting dollhouse idea. We lay out about fifteen sticks in a row. Glue them together and add two crossbars for strength. We make four such structures. Glue three walls to the floor. We construct the roof in a similar way. We install a small shelf inside the house. We place pillows, a small rug and a bed on the roof. We use the remaining popsicle sticks to make a ladder.
Option No. 8. Houses for gnomes
DIY cardboard house: gnome's home
For work, prepare:
- cardboard toilet paper rolls;
- multi-colored sparkles;
- paper (white and colored);
- glue (PVA is possible);
- glue stick;
- black felt-tip pen.
Step 1: Cut one sleeve in half. Cut two more so that you get one short piece and one long piece from each. Thanks to this, the houses will turn out to be of different sizes.
Bushings are cut
Step 2. Cut the paper into 15-centimeter strips (their width should be several centimeters greater than the width of the cylinders that will be wrapped in them).
Step 3. Take colored paper, cut out doors and windows from it. Draw the details of the windows and door handles with a felt-tip pen.
Step 4. Glue the resulting doors and windows to the white stripes using a glue stick.
Doors and windows glued to a strip of paper
Step 5. Wrap the strips around the corresponding cylinders and secure with glue. Fold excess paper inside the cylinders.
Fold the excess paper into the cylinder
Step 6. Make several cones using colored paper and glue the ends. The cones themselves must be glued to the houses.
On a note! You can put a little glue on each cone and then sprinkle it with glitter - it will be a kind of imitation of snow.
Cone made of colored paper
Ready-made housing for gnomes
Making a house from scrap materials
We'll show you a few more options for making New Year's houses made from scrap materials.
New Year's house made of cookies
This gingerbread house will decorate any New Year's table. You need to prepare cookies, icing and candies for decoration. Mix all the ingredients for the glaze and place it in a pastry bag. Cut off the tip of the bag. Cut off the top of two cookies. From another cookie we make two triangles and connect them to the rectangles using icing. We connect three cookies together. We glue two walls with triangular tops to them. Glue the roof. We coat it with glaze and decorate it with sweets. Gingerbread houses can be placed on a plate with powdered sugar and Christmas trees. The result was beautiful, and most importantly, delicious New Year's houses.
Matchbox house
We cover match boxes in any color. Inside we draw miniature rooms and paint them. We finish drawing the bricks and windows. We glue the boxes together and put residents in them.
Chocolate house - step-by-step MK with photos
Cut out the details from chocolate. To hold two tiles together, you can slightly heat the joints. We connect all the tiles. Decorate the sweet craft with marmalade, marshmallows or candies. If you sprinkle a New Year's house with powdered sugar, you will get a snow house.
Making a house with your own hands from salt dough
Roll a small cylinder out of foil. Wrap it in a layer of salted dough. We cut rectangles and form the front door. We cover the entire surface of the house with pebbles made from dough balls. We place the craft on a stand with the same stones. We decorate it with flowers. For the roof we will use the top part of the bottle, wrapped in foil. Cut out flowers with a cookie cutter. Make a round hole in the middle to separate all the petals. Cover the bottle with petals. We fashion a tail on top. We press out the veins on all the petals. Drying the craft. We paint the sunflowers yellow, the base brown, and the house itself red-brown. The voluminous house can be varnished.
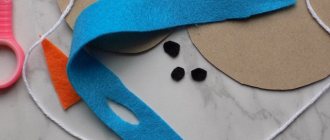
DIY New Year's house made of felt
Let's make Christmas houses from felt. We cut out the parts using templates from light brown felt. We sew all the walls together as shown in the photo. We embroider the windows and decorate them with candy canes. We sew white stripes onto the corners with red threads. We sew figured stripes and colored buttons onto the roof. We complement the New Year's toy with gingerbread men.
Option number 9. Paper house
DIY paper house
To create such beauty, prepare:
- a cardboard box (from cereal, for example);
- masking tape;
- ruler;
- clothespin;
- pencil;
- PVA glue;
- scissors.
Tools and materials
Step 1. First, open the box completely and then place it on the table.
The box is being cut
Step 2. Draw a longitudinal line on it about 2.5 cm below the middle.
A straight line is drawn
Step 3: Make cuts on the cardboard as shown in the image below. The dots here are where exactly the cuts should be.
Incisions are made
Step 4. Next, cut off those parts indicated by crosses.
Unnecessary parts of the box are cut off
Step 5. Turn the cardboard over and apply a small amount of glue to the fold (see photo).
Glue is applied to the bend
Step 6. Then fold the box, but with the pattern inside, and then secure it with glue.
The box is folded with the pattern facing inward
Then it is fixed with glue
Result of work
Step 7. The opposite narrow sides must be bent so that the roof of the house is ultimately formed. Each part is bent in half.
Bend opposite narrow sides
Step 8: Trim the wide sides to glue them to the roof section formed in the previous step. Cut generously - you will bend it and glue it.
Trimming wide sides
You need to cut with reserve
You should get something like this
Step 9. As a result, you will have a house like this. Decorate it as you wish.
These houses can be decorated as you wish.
For example, you can cover it with multi-colored paper, and draw doors and windows using a felt-tip pen.
Decorated houses
How to make a house from foamiran
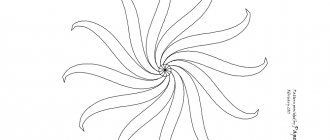
Let's make a three-dimensional house from foamiran.
We cut out all the parts according to the pattern in the gallery, glue them together, paint them and add decorative elements. All is ready! You can also make a flashlight like this. Please note that the third sheet of the pattern must be lowered down under the first sheet.
DIY plasticine house
Redraw the drawing onto paper and cut it out. Cover the entire surface with plasticine. To make your home seem more interesting, you can use several shades of brown. Also, there is no need to try to make the coating even - the walls should be embossed. Next, we complement the walls with windows and doors. Carefully connect the walls of the house. We roll thin strands into spirals and decorate the corners with them. Cut the cardboard roof to size. We make identical leaves and cover the cardboard with them. We attach it to the top of the house. We complement the craft with grass and a figurine in the shape of a cat. Such a New Year's house can be made from clay.
We have looked at various options for New Year's crafts, the making of which will take all family members. Making such crafts is quite simple and economical, because most of them use unnecessary materials. If you show your imagination, you can come up with even more original New Year's ideas.
How to bring light to a glowing house
It’s quite difficult to call the mesmerizing light that fills a glowing New Year’s house and evokes the most pleasant sensations of Christmas magic as backlighting.
- Lighting in the house can be done using a garland. There are wired garlands that operate from an outlet, and there are battery-powered ones.
The lighting in these houses was carried out using a Christmas tree garland powered by an outlet.
- The light may also look like this - these are LED tea lights.
LED tealight candles