Let me tell you right away that for this box (as well as for the earrings) I drew the pattern in the colors of Huichol works. The box is double: the bottom, walls and lid are all in two layers. On each side you can give a different pattern by changing the combination of colors.
The size of the internal space is about 4x4 cm and the height is 2 cm. At the same time, several small decorations can be placed in it.
MATERIALS
- beads 10/0 in different colors, but black is required. I worked with Chinese beads, but you can use Czech ones. Choose beads with a large enough hole - sometimes you will need to go through more than two times in the same one. But Julia Pretl has Japanese beads everywhere, but the boxes are not woven in two layers; — 5 beautiful beads for the legs (I used 8 mm resin beads) and one for the lid; - 5 green bicones 8 mm, but you can change the color on the walls and insert beads of a different color; - monofilament (other threads will not work here) or fishing line 0.15-0.16.
We weave the bottom of the box
We weave mosaics in a circle. 1st row: collect 5 white beads, close them in a ring and tie a knot. 2nd row : weave 1 blue bead between white beads. This and the following photos show the end of the row - the needle passes through two beads. 3rd row : weave 2 blue beads between the blue ones of the second row. This is how the corners of the pentagon are formed.
4th row: on the corners between two blue weaves 1 black, between the corners 1 blue. There is a slight shift in this row: if until now the needle came out at the end of the row at the corner, now the row will end in the middle. Be careful, follow the set according to the diagram. 5th row : weave 1 blue for the entire row. 6th row : at the corners, pick up 1 purple-1 black-1 purple, then 1 blue. 7th row: at the corners between two purple ones, pick up 2 black ones, then 1 purple one. 8th row : at the corners between two black ones, pick up 1 yellow, then 1 purple.
9th row: from corner to corner, cast on 1 black-1 purple-1 purple-1 black. 10th row: at the corners 1 yellow-1 black-1 yellow, then 1 black-1 purple-1 black. 11th row: at the corners between two yellow ones, dial 2 red ones, then 1 yellow-1 black-1 black-1 yellow. 12th row : from corner to corner, cast on 1 orange-1 yellow-1 black-1 yellow-1 orange.
To sew on one of them, add 1 black bead along the 13th row along the entire perimeter. This row will become common to the two halves. Sew the two halves as shown in the photo, passing alternately through the beads of one and the other part.
You can sew on the legs right away - it will be more difficult to do later.
Building walls
Interior wall
First we will weave the inner wall, mine is green (especially so that it is better to see which is which). At the bottom we retreat two rows from the edge, on the 14th according to the scheme, we begin to assemble a row with a mosaic. At the corners, where there are three beads, pick up one black bead - we will visually separate the walls from one another.
We continue to weave mosaic walls to a height of 5 rows. From the 6th we look at the diagram:
The first shows a diagram for the outer wall, as well as the location of the bicones relative to the plane of the walls. The second shows how bicones are woven. From the 6th row we weave a black edging for the bicone: two rows with a regular mosaic, the edging color in diagram 3 for the inner wall is green, and for the outer wall it will be black and green. In the 8th row we make a gap in the edging - we pass the needle through three beads (green in the diagram), in the 9th we already skip 5 beads. In the 10th row we insert bicones. It seems to me that it will be much smoother if you add one bead on both sides of the bicone - this way the wall will not be pulled together when weaving subsequent rows.
11th row: we begin to close the edging. We came out of the black one (the previous row, on the edge of the edging), pick up one black bead, go into the bicone, again one black bead and into the edging black bead. 12th row: close the edging. Coming out of the black one, collect 5 black beads over the bicone at once and weave them into the black one at the other end of the edging.
Diagram 3 shows the order in which the edging beads pass in rows. In the 13th row, from above the bicone, pass the needle through 5 black beads at once, and in the 14th row, 3 black beads; from the 15th row, the usual mosaic will begin again. On the 18th row we put on an internal jumper - I make it to give rigidity to the side of the box. We collect one bead along the entire perimeter, two at the corners (this row, in mathematical terms, is the projection of the 15th row at the bottom of the box). I typed it in silver (the color doesn’t matter - it won’t be visible).
Next we weave the remaining two rows of the 19th and 20th in green. The 19th is woven from the 18th row (not from the jumper between the walls!) and is located behind the jumper - it should be on the outside. Then, along the perimeter, we assemble another, already external, jumper - in the photo I have it in color, since I decided that the drawing would go to it from the outer wall.
External wall
On the 16th row of the bottom (aka the last one), we assemble row by row with a mosaic. Figure in diagram 3 (see above). The edging of the bicone will be green. We weave seven rows with a pattern, in the 8th and 9th there were gaps in the edging. Next, in the 10th row, we pass the needle into the bicone, which was previously inserted into the inner wall, then we weave the outer one again. 11th row we begin to close the green border: 1 green bead on the outer wall, again we go through the bicone, 1 green bead. In the 12th row we close the green border: above the bicone we collect 5 green beads at once. In the next 13-14 rows we weave the same way as we wove the inner wall. We weave rows 15-18 with a regular mosaic according to the pattern. Since on the 18th row we must connect two walls with an internal jumper, we sew the wall with the jumper through the outer beads, as we usually sew a mosaic canvas. The photo shows how to sew a corner correctly: on the corner of the jumper we collected two (silver) beads, and on the outer wall there is now one (black) bead on the corner.
It should be between the two corner jumpers. After stitching, we weave two more rows, the 19th and 20th pattern according to the pattern, then we sew the wall with the outer jumper, as we did before.
Weaving a lid
All of these double boxes have one feature: if you weave the lid the same size as the bottom, it will not cover the side of the box. Therefore, I make it two more rows - 16 rows + 2 rows in our diagram (they are not finished, but I think you can finish them yourself). Weave two halves: one 18 rows, the second 18 + 1 row for stitching. The 18th row on both halves and the row for stitching is black.
It is also necessary that the lid does not fall off the box and closes tightly. For this you need an inner side. To make it tougher, I made it double. For this box, we calculate the space for the side as follows: 18 rows, the entire lid minus 2 rows (those that are additional), minus 3 rows of double walls, minus another row (so that the lid does not fit on the walls) - a total of 6 rows. At the 7th from the edge (or at the 10th from the middle of the diagram) there will be the outer part of the side, at the 9th from the edge (or at the 8th from the middle of the diagram) the inner part. That's where we start. We weave 4 rows with a mosaic, make one jumper. We move on to the outer part - we also weave 4 rows, at the end we sew two parts of the side.
When the lid is woven, sew a bead on top - it will act as a handle. The result is a pentagonal box with bicones in the walls. Also a couple of photos from different angles:
AFTERWORD This is not the only box of this shape in my collection. In 2010, in the spring, I wove my very first box with a flower and a little later, in the summer, a small turquoise one.
All boxes are woven thanks to Julia Pretl's book
“Little Bead Boxes” . Here are some of her works, as well as diagrams for them, taken from this book:
Also from this book I took a template according to which you can create your own diagram for your box
The box was an experiment: testing how the bicone would look. You can not weave anything, but simply weave, for example, with white beads in the places reserved for bicones. Well, you can always take Delica and weave it in one layer...
We weave a round box of beads with our own hands in a master class
To work, you will need rings approximately 7 cm in diameter - 4 pieces, one of them for the lid, 3 for the frame of the box itself, beads of several shades and beads. You can make them from wire. The frame rings need to be braided with square strands. It is imperative that the size and shape of all the strands be the same, otherwise the box will have an untidy appearance. The colors of the harnesses can be changed.
Let's look at weaving a square strand for a box in more detail.
First you need to weave a belt of three rows, it should be slightly shorter than required for the girth of the ring. Then close the harness directly on the ring.
We braid all the rings in the same way, with absolutely identical square strands, this is very important. After this we connect the rings together. The connection diagram of two rings is visible in the photo:
We weave in the same way in a circle, all over the ring, leaving gaps of three crosses. To the resulting part of two rings, add a third one, attaching it in the same way. We fill the gaps with beads (for example, “cat’s eye”).
After this, you can begin weaving the lid and bottom of the box. Round parts need to be woven according to the pattern shown below. It is quite popular on the Internet, but for this box it will need to be expanded a little by adding a few rows, otherwise the diameter will be small.
We sew the resulting round parts with “snowflakes” to the bottom ring of the box frame and lid.
After this, you need to sew the legs of beads or seed beads to the ring of the bottom of the box. This is an optional detail, so you can omit it if you wish. Weaving them is very simple, by analogy with the jumpers between the warp rings (one cross in height).
We finish weaving the lid. To do this, we braid another additional row of square rope to the ring. Then we add 1 more flat row (without a rope) of beads to the lid so that it fits onto the box. The box is ready! This option weaves relatively quickly and is suitable for beginner needlewomen.
The original version of this box is made of Japanese beads in one layer. However, those who work with inexpensive Chinese beads may encounter a small problem - the box does not hold its shape very well. This problem can be solved by making parts in 2 layers. This thing looks great. The inner and outer parts can be woven in different colors and patterns to suit your taste, but it will take longer to work. So the decision is yours.
First you need to weave the bottom of the box. This detail is made in a circle using the mosaic technique. In this way you need to make 4 rows of red beads.
Then we weave all subsequent rows with other beads according to the pattern. Those who decide to do the work in 2 layers need to weave a second similar half plus one connecting row.
We move on to weaving the inner wall. The triangle consists of 15 rows of beads, including the first 3, cast on at the beginning. Stepping back from the edge of the 2nd row, towards the 13th row we collect beads using mosaic techniques for the inner wall.
In this master class there are only 28 rows, you can choose any other even number, depending on the desired height of the box.
Mosaic weaving in a circle is different in that each new row will “move” to the right by one bead. At the end of the second row, the needle passes the corner bead of the first row and the first bead of the second. In the third shift there will be already 2 beads from the corner. You need to weave in a circle, but not spirally.
The design of the box between the walls. Usually small triangular boxes hold their shape well. However, for greater reliability it is worth making a white stiffening jumper. After the 26th row of the wall, we collect beads along the perimeter, and two at the corners. This is necessary so that when connecting the walls there is no distortion at the corners. Since we retreat 2 rows from the edge, the white beads will be above the 14th row from the bottom, and at 15 the outer wall begins.
After this, we collect beads for the 27th and 28th rows. This must be done carefully so that the thread does not break. The 27th row will be on the inside, and the white jumper will be on the outside.
At the end of the work, the jumper will be closed by the last two rows, and there will also be a connecting jumper along the edge of the side of the box (purple).
Let's start weaving the outer wall of the box. We collect beads along the 15th row of the bottom (the side connecting one is not involved).
We connect the wall with the jumper by weaving white beads from the 26th row of the outer wall. At the corners, the sequence is the same as when weaving a triangle: the needle goes into a white bead, grabs two more and again goes out into the corner white one.
Now you need to connect the outer and inner walls together; to do this, we collect the last 2 rows with the same pattern.
Let's start making the lid halves. Their size should be 2 rows larger than the bottom. To do this, we collect the 16th and 17th rows and the connecting row along the edge.
To ensure that the lid fits in firmly, we assemble the side according to the same pattern as the walls. We weave it from the 9th row. We perform 4 rows with 1 more connecting row. We start the second layer of the side from the 11th row. Connect the layers together. You need to sew a bead onto the lid, and also attach beads for the legs. The box is ready!
Weaving pattern
Yes, that’s the whole pattern, we will weave according to the swirl + cross pattern.
First you need to braid the first ring with a square strand. It weaves easily - with a cross chain. To do this, string four beads onto a thread, collect them into a ring, then put a bead on each thread (woven into two threads) and connect it into a second ring with an additional bead. So weave three rows into a cross of the required length. The chain should be slightly shorter than your ring. Close the tourniquet on the ring and braid the missing section - you will end up with a fourth row of “cross” that will completely cover your ring.
The remaining rings are woven in a similar way - three rings are the frame for the box, the fourth is for the lid. All rings must be the same, otherwise the box will turn out uneven! You can choose the colors of the beads at your discretion, or you can follow the photo instructions - I have auxiliary “crosses” in white on a black background. Then it will be easier to sew rings to each other using them. You will get a kind of black and white pattern.
Now you need to connect the three rings of the box together. They are connected with strands in a cross along the entire ring - a gap of three crosses is maintained. To do this, come out of one cross of the ring upwards, as it were, and begin to weave a plait-cross upwards. I didn’t leave the gaps “empty”, but attached oval beads - you can also take some interesting beads that suit the size. This way you will fill the voids and the base of the box will become stronger. The rings will be connected to each other not only by strands, but also by additional beads.
The bottom of the box and the lid are made according to the swirl pattern. Everything is very simple here: you put six beads on a wire, alternating white and black colors, and connect them into a ring. Next comes the second row: one bead at a time, the third row already consists of three beads, the fourth - of five. Check the diagram - it clearly shows how to combine the colors of beads so that the end result is exactly swirls, and not just a set of beads of different colors. Depending on the size of your box, the size of the finished swirl will depend - you may need to add rows to the swirl or vice versa - make it smaller so that it fits your ring perfectly.
The resulting swirls must be attached to the bottom of the box and the lid. This is done with auxiliary beads. But our lid is not finished yet - we need to add a row of beads to its bottom so that it fits onto the lid itself. To do this, string four and two beads sequentially around the entire ring, connecting them to each other - in the photo you can see how this is done. There is nothing complicated here. The row will turn out flat - we don’t need a tourniquet, it kind of wraps around the box, lying on it.
If you wish, you can attach legs to the box - they can be made according to the principle of square strands with which you connected the rings to each other. Or you can leave it like that - the box stands perfectly without any legs!
This is the beaded box we made
– you can give it to your loved ones or leave it on your shelf so that it reminds you of the pleasant process of beading! Don't stop there, think about how you can improve this master class, come up with a unique box design!
Beaded heart box for Valentine's Day
A beaded box can be a good addition to a valentine's gift or a beaded heart. Using this pattern, you can weave a bead box with your own hands.
There are several ways you can do this.
The first method is very simple. Take a transparent plastic box and decorate it with ribbon and beads. Beads can be glued to the box using a glue gun. Here is an example of such a box on this site.
You can also make a box entirely from beads. For example, from squares. Like this.
The principle of assembling such a box is simple but labor-intensive. You need to first weave the cubes, then connect them together. It is described in detail here.
You can weave a box like this from large beads and small beads.
Beaded boxes always look very feminine and elegant. They come in different shapes (circle, triangle, square, heart, etc.) and will be a nice gift for every girl. It is in these boxes that you want to hide your most expensive little things. In this article we invite you to create such a small but very elegant box of beads; the master class will help you complete the task faster. This weaving method is suitable for everyone and even beginners.
Triangular box
The process of making a box from beads can be traced using the example of a master class for beginners who have at least a little experience working with beads.
To create such a box you will need beads in the colors of the rainbow. If you take Chinese beads, then the size of the beads is tenth, and if you take Czech beads, then 6-8. We will also need scissors, needles, fishing line, wire, a diagram and tweezers.
This type of box has a double bottom, so according to the pattern below you need to weave a couple of triangles. One will consist of 15 rows, and add one bead to the other. It is also worth remembering that on a larger triangle you need to collect one bead at the corners.
These are the triangles we got:
Now we must connect them by weaving beads one by one. After we have connected the bottom, we begin weaving the inner wall. On the 13th row, which is indicated by red dots, start casting the first row, which is shown by white dots in the diagram.
We make the inner wall using the mosaic weaving technique, so you shouldn’t be surprised that the rows will move to the right. In the photo, small green dots show the first beads of the first and second row, and also indicate the correct path of the needle.
In total we need to weave about twenty-six rows. Next, you can make a small “bridge” between the walls of the box. It will add some rigidity. It is necessary to string white beads along the entire length of the inner and outer walls, and two pieces at the corners. This is how it should turn out:
After we have woven 26 rows, we need to make two more. And after them you need to make an external jumper. Then we finished weaving the inner wall, we begin to make the outer one. Its weaving begins not from the 13th, but from the 15th row on the bottom.
Next we weave 26 rows again, up to the inner bridge of white beads. Now look at the photo below. It shows the jumper itself, the 26th row of the outer wall and the 28th row of the inner wall. We need to connect the outer wall to the lintel. The location of the needle is also indicated in the photo in red.
We collect two more rows and connect the walls again.
The fourth step will be weaving the lid for the box. We need to weave two triangles again according to the pattern, but the number of their rows should be two more beads.
We sew them together, you can also glue a bead if you wish.
On the 9th row you need to weave a side.
On the 11th row we also weave 4 rows of beads for the side.
Next you need to connect them together.
You can sew three large beads on the bottom.
So our box is ready. By experimenting with bead colors, you can get original colors for the box.
And you can decorate a cute box not only with flowers and ribbons.
Tools and materials Time: 4 hours • Difficulty: 3/10
- bicone beads with a diameter of 4 mm;
- round beads of the same size (they will help create interesting patterns on the box);
- beading line;
- needle for working with beads.
Step-by-step master class
In your work, you can reproduce the color scheme proposed by the author of the master class, or you can come up with your own.
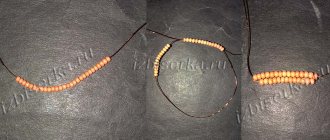
Step 1: make a chain of crosses
Getting started will be extremely simple. You need to weave a chain of crosses.
To do this, we cut off a long thread (you shouldn’t take it too long, otherwise it will simply get tangled, it’s easier to add it later and start working with another segment) and string three bicones (or any other faceted beads) onto it, send it to the center of the segment, and then cross both tails of the thread in the next bead or bicone strung.
Next, we string one bead on each tail, and cross the threads in the next bicone. So we continue to form the chain until it reaches the length you need. This creates the length of one side.
Step 2: weave the chain perpendicularly
We turn the work, sending the right tail to the right bead, and the left one to the same place, but only so that it comes out on the other side of the bead. We weave another chain, forming the second side, and turn the work again. And so on until all 4 sides of the box are woven.
Step 3: form the base of the box lid
And now in your hands you have a ready-made top for the box with a small hole in the center. We won't fill it out yet.
Step 4: extending the base of the box
Now let's start building up the base. We form it in approximately the same way as we wove a chain - adding beads and crossing the threads in the next bead along the way.
When the base reaches the size you need (here you are free to make as many rows as you like), you can begin to lift the work, forming the sides. To do this, you go up again, but place the next row perpendicular to the base. We string a couple of beads onto the right tail and cross both tails into the next bead.
Step 5: Making a Pattern of Round Beads
For the next segment we take round beads. That is, we pass the lower tail through the top bead of the previous row, string a round bead onto the top one, and cross the threads in the next round bead.
So we continue to weave upward until the box is ready. Periodically, you insert round beads into the work to create a bright and interesting pattern.
Step 5: fill the base
- The base is done last.
A beautiful box of beads is ready. We hope you found our step-by-step master class and weaving pattern useful.
Christina All posts by the author (1123)
Source: https://pleteniebiserom.ru/2015/06/shkatulka-iz-busin/
Cute hedgehog
You can also make figures of various animals from beads, for example, a hedgehog. We propose to consider weaving patterns for such a figurine.
How to do this kind of work? Looking at the first drawing, you need to weave a hedgehog belt, then according to Fig. 2 you need to make a tummy, and using the diagram in figure 3, you need to weave the back. Then fasten the ends of the belt and put it on the blank. Next, we begin to weave the second part indicated in figure 1. The weaving is exactly the same as the belt weaving pattern; we make decreases as necessary. The nose needs to be woven using the pattern in figure 4, making a smooth decrease. Now you need to sew the eyes and nose onto the hedgehog’s face.
How to make thorns? We string 9 black beads and 1 white, overtake the last bead and insert the thread into the black beads. It turns out a kind of thorn that needs to be attached to the back of the hedgehog. Using the brick stitch technique, make a leaf. And you will get such a cute hedgehog. It will be a wonderful decoration not only for the box, but also for the desktop.
Beaded heart box for Valentine's Day
A beaded box can be a good addition to a valentine's gift or a beaded heart. Using this pattern, you can weave a bead box with your own hands.
There are several ways you can do this.
The first method is very simple. Take a transparent plastic box and decorate it with ribbon and beads. Beads can be glued to the box using a glue gun. Here is an example of such a box on this site.
You can also make a box entirely from beads. For example, from squares. Like this.
The principle of assembling such a box is simple but labor-intensive. You need to first weave the cubes, then connect them together. It is described in detail here.
You can weave a box like this from large beads and small beads.
Show Control Panel
- Published: Feb 6, 2017
- Shop “Melody of Beads” melodiabisera.ru/?promo_id=193982 5% discount with code fr555 A very beautiful ashtray made from a glass jar tied with beads. I was both surprised and delighted when they ordered me to make an ashtray out of beads