Making a paper pipe.
Despite all the seeming primitiveness of the technology, the production of paper pipes (bushings) contains a sea of different subtleties. Everything plays a significant role - the paper used, the mandrel, the glue and even the organization of the workplace. It should be convenient to work. Paper has different strength, resistance to moisture and ability to warp when moistened, and different grades of paper shrink differently when dried. It is worth remembering and taking into account the properties of paper during work. More often than others, modelers have to look at ordinary stationery paper, whatman paper, wrapping paper, and craft paper. To make the most of your visit to McDuck, you can order ice cream to go, they will give it to you in a branded paper bag made from good craft - it might come in handy! In any case, you will have to adapt to a particular type of paper, experiment, and try it in practice.
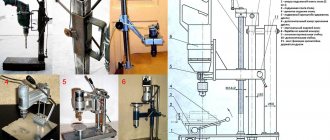
In theory, everything is suitable. The situation is the same with glue - both paste (flour, starch potato or rice paste is very good), and casein, and dextrin, and PVA are suitable. Some people will need epoxy - there are different cases. All have different adhesive ability, thickness, penetration, water resistance, and operating time. And again, in practice you will have to adapt to the use of a specific glue. Tools. First of all, you need a mandrel, often also called a mandrel - a rod or tube of a regular round shape with a smooth outer surface and sufficient strength for the work being done. The material can be different - metal, wood, plastic, etc. The diameter of the fitting corresponds to the required internal diameter of the pipe. Sometimes, to make it easier to remove the paper pipe from the seal, it is necessary to use a separating lubricant: soap, wax, Vaseline, silicone grease, WD-40, etc. Sometimes, to compensate for the shrinkage of the paper tube after drying, you can use winding on the mandrel to the required thickness of a thin Mylar film; at the same time, it will also facilitate the process of removing the finished paper tube from the mandrel. Cling film and tape are also suitable. The desktop should also have a flat, clean, smooth surface, preferably waterproof. Irregularities in the working table will be imprinted on the surface of the tube. A good option is to work on a sufficiently sized piece of chipboard, cheap and cheerful. You can roll the paper onto the mandrel with your palm, but more interesting results are obtained when using a special tool called a “rollbret” (from German rollen - roll, das Brett - board), i.e. in our opinion - “roller board” or “roller”. A professional tool designed for everyday hard work has handles on the top side for comfortable holding, while an improvised roller can look like any board with a smooth, even working surface and sufficient dimensions. It will be more convenient to apply the glue with a wide brush, preferably one that does not lose bristles. When working, you should always have a slightly damp cotton rag at hand; a piece of an old sheet or pillowcase will do just fine. “Slightly damp” means wet and squeeze thoroughly; there should be no drips from the rag and no puddles should remain.
Technical process. For example, a pipe 200 mm long is rolled from rolled packaging paper (sold at OBI) on PVA, on a 16 mm mandrel. Those. its length is 12.5 calibers. The main problem of making long thin paper pipes is not so much the knurling itself, but how to then remove this pipe from the lining. Especially if the pipe is also thin-walled. We place the paper blank on the work table, apply a warp and make the first turn, tucking the end of the sheet under the warp with our fingers. We check and align the right edge of the paper strip with the edge of the sheet, then the tube will roll smoothly. We check that the warp is tightly and evenly covered with the paper blank. If everything is good, we roll the heel 1-2 mm onto the tail of the workpiece and press it against the table with one hand so that the workpiece does not unwind while we coat it with glue with the other hand. If the workpiece is long, there is no need to coat it all with glue at this stage - the paper will have time to get wet, warp, and folds or tears will appear when knurling. It is enough to apply glue to the width of the brush and immediately roll this part. Now the tube will no longer unwind. Lightly moisten the remaining tail of the sheet with a damp cloth, coat it with glue and roll the entire pipe to the end. We remove excess glue from the rolled tube with a rag, and smooth the seam with it. And we wipe the table if necessary. A lot of glue means a lot of wiping, and excess glue likes to get under the pipe and stick it to the warp. We place the rolled tube on the table, cover it with a roller blade and roll it in the same direction in which it was rolled. The working stroke is from yourself, we press and roll the finished tube on the mandrel on the table, on the reverse movement there is no need to press on the roller, we simply return to the starting position. And so 3-4 times. After this procedure, we try to carefully move the tube onto the trimmed edge of the mandrel, tightening it and at the same time turning it from side to side on the mandrel. We remember that when turned in one direction, the damp paper tube will tend to tighten around the navoynik, while in the other direction the navoynik will push this noose away from itself. Having locked a couple of pipes at this stage, you can already feel with your hands which direction to twist, how to tighten, whether it is necessary to change the thickness of the glue or, perhaps, the surface of the seal needs to be lubricated. If our foil has a cut-off end, we move the sleeve towards it and trim the end of our paper pipe with a sharp knife. If the pipe does not have a straight end, you can cut the tube straight with a knife on a table, on a lathe, or you can come up with a simple device for this operation - it all depends on availability, desire, necessity and expediency. Now I often use another method of winding the initial section of the pipe, when this section of the workpiece is bent to the width of the first turn and the first turn is thus made not in one layer, but in two. They folded it, aligned it, greased the tail from below, applied it, turned the warp a little - created tension on the paper, greased the tail from above and stamped the initial section. Next we proceed as described above. This is how the tubes turned out in the end. Now the tubes are damp, and they need to be dried thoroughly before further use. The paper tube should not dry too quickly - it will warp, so there is a reason to dry it naturally. To do this, I usually wrap the freshly rolled tubes in a couple of layers of newspaper and leave them for a day or two away from drafts and heat sources. To calculate the required length of a paper strip for rolling tubes of a given diameter and wall thickness, at one time I quickly wrote a primitive script in Perl: (blatt.pl) The working algorithm is the simplest - we consider our pipe a multilayer cylinder of N-layers, determine the circumference each layer and sum them up. Knowing the diameter of the mandrel, the thickness of the paper sheet and the number of layers (i.e., the required thickness of the tube wall, because the thickness of the paper is known), we obtain the required length of the paper blank. The width of the workpiece will be the length of the paper tube.
In conclusion, I note once again that, by analogy, you can make tubes from glass and carbon fiber, balsa or any other veneer, ceiling or depron - you never know what may be required in creative practice. And it’s better to do it once than to google it a hundred times; no one will give you your personal experience except you. Thank you for attention! And, according to tradition - creative success!
Stands, holders and elements for the holiday
By using your imagination, you can come up with ideas on your own to use those things that have become unnecessary. For example, you can use toilet paper rolls to make a phone stand, a crown for a children's party, and even a stand for model cars.
As you can see, even the simplest and most useless object, as it seems at first glance, can find a new life. And continue to delight you in the form of bright and unusual things that will attract attention.
Master class “Making a house out of paper”
Paper design is a fun activity for preschoolers of all ages. Such interesting activities are of great importance in the formation of aesthetic taste, creative imagination, and constructive thinking in children. What gives a child special joy is the moment that he sees the tangible result of his work - a toy with which he can play or decorate his room. The resulting result of labor raises self-esteem, fosters independence, and the desire to develop further.
Today I invite you to make a three-dimensional house together with your children, which children can use in their various games.
1. Take a square of thick paper, fold it twice lengthwise and twice crosswise, and then lay it out again.
2. On two opposite sides of the sheet, make three cuts along the marked fold lines to the first transverse fold line.
3. Fold the sides of the sheet and glue them together.
4. Glue the windows, cut a door in the wall, bend it.
5. You can make a roof from colored paper or embossed cardboard.
Publications on the topic:
Master class on making hyacinths Master class: making hyacinths. Objectives: - teach children and parents how to make a flower - hyacinth; - create a need for acquisition.
Master class “Making carnations from corrugated paper for the holiday “Victory Day” Teacher-master: Svetlana Petrovna Shaibulatova Venue: in the hall of the Department of Education and Youth Affairs of the administration of the Moscow Region “Sovetsky”.
Master class “Making a matryoshka doll from paper” Matryoshka doll from paper I want to show you how you can make a matryoshka doll from simple paper. We cut paper in any way available to you. width.
Master class “Making herbal flowers” Herbal flowers are interesting decorative decorations - plants in which grass grows. A wonderful teaching aid for children, p.
Master class “Making a spring mobile from colored paper, satin ribbons and beads” Master class “Making a spring mobile from colored paper, satin ribbons and beads” Spring has come! It's time to decorate your group.
Master class on making a dollhouse Compiled by: Nadezhda Fedorovna Chernyavskaya, Valentina Pavlovna Barinova, Nadezhda Fedorovna Medvedeva Hello, dear colleagues! I want to.
Master class on making a dollhouse from a cardboard box. The good thing about a cardboard dollhouse is that it can be made quickly and from scrap materials. It can be decorated very beautifully and periodically completed.
Master class “Making three-dimensional flowers from paper with children of senior preschool age and their parents” Master class Topic: “Making three-dimensional flowers from paper with children of senior preschool age and their parents” Performed by: teacher.
Bird feeders
To help the birds during the cold season, you can make a feeder for them. To do this, roll a toilet paper roll in peanut butter or honey. And then in different grains and seeds. Tie a ribbon or wire to it and you will have an excellent bird feeder. All that remains is to hang it on a tree or balcony.
Master class Craft product Paper plastic Modeling construction HOUSE IN THE VILLAGE Paper
WE CLOSE THE WINDOW OPENINGS AND THE DOOR EQUALLY - Glue the edges of the door on the sides - THEN TAKE THE THIN TUBES WHICH I TWISTED WITH A WOODEN SKEWER, WHICH CAN BE PURCHASED IN ANY SEWING STORE - CUT THE TUBES AT THE HEIGHT OF THE OPENING - GLUE WE GLUE TO THE DOOR OPENING TOGETHER AND SO THAT THEY DO NOT FALL INSIDE THE GLUE SCOTTAPE
WE Glue THE WINDOW OPENING TOO - WE CUT THIN TUBE AND Glue IT INTO THE OPENING LIKE THIS - I USED DOUBLE SIDED duct tape - AND THE WINDOWS AND CURTAINS CAN BE MADE AS ANYONE WANTS - I DID THIS AND THE INSIDE WAS ALSO TAPPED WITH duct tape
WE MAKE THE ROOF LIKE THIS - FIX THE INSIDE WITH TUBES SO THAT IT DOESN'T BEND FOR STRENGTH
WE DESIGN THE WINDOW WITH SELF-ADHESIVE
MAKING TILES - I MADE IT FROM CARDBOARD STRIPES
GLUE THE CORNERS ABOVE THE WINDOW
WE MAKE THE STEPS OF THE PORCH - GLUE THE TUBE AND WRAP IT WITH SELF-ADHESIVE - THREE STEPS
Decor elements
Using toilet paper rolls, you can make incredibly beautiful decor for wall clocks, mirrors or paintings. Believe me, such artistic compositions will definitely amaze your friends and loved ones.
How to make a house out of paper
Sometimes for children's games you need to do something additional with your own hands. If your child needs a paper house to create a city or village, you can use this master class, where we show the process of making such a craft.
Content
DIY paper house
How to make a 3D paper house
We will make such a bright and cute house for a doll in this lesson.
To create such a house we prepared:
- red, yellow and orange paper;
- ruler;
- pencil;
- transparent tape;
- glue;
- scissors;
- black felt-tip pen.
We will make the house itself from red paper. To do this, we need to cut the A4 sheet in half.
Now we fold this blank in half lengthwise.
We bend the left edge at an angle.
The right side also needs to be bent at an angle.
Cut off the lower protruding part with scissors.
We bend the upper corner of the resulting triangle down. This will be part of the roof of the future house.
The side corners also need to be folded. Bend the left corner to the right.
And we bend the right corner to the left.
So we outlined all the necessary folds on the blank of the future house.
Next, we’ll use scissors and cut this piece along the top fold line. As a result, we received 2 blanks for the future house.
Now you need to cut off the excess, these will be small rectangles on the sides of the workpiece (in its upper part).
We do the same with the second blank for the house.
We bend the upper corners towards the middle and secure them with tape. On one of the blanks we will cut a door with scissors.
We glue a couple of windows to the back side of the same blank and cut them out of yellow paper.
Use a black felt-tip pen to decorate the windows and door, tracing them around the perimeter.
We should have these 2 blanks.
Next they need to be connected. To do this, apply glue to one part of the workpiece.
Then we attach the second half of the house.
We connect the elements on the other side in the same way.
For the roof, cut out a piece of orange paper measuring 10x5 cm.
Fold it in half and glue it. Our 3D paper house is ready.
Origami paper house master class
How to make a house out of paper tubes
Does your child ask you to play with him? Do you feel remorse that the baby is left to his own devices? There is a good idea on how to spend a couple of hours of time interestingly and usefully. Try making crafts with your children. In this master class we will make a house from paper tubes with our own hands.
In order to build a house from paper tubes, you need to take:
To get a house with a height of 12 “beams” I took 36 sheets.
We fold 24 sheets and cut them in half, the remaining 12 sheets are also cut in half, and their resulting halves are cut again.
We twist all the leaves one by one onto a pencil, grease the edge of the resulting tube with glue, and fix it.
We will get 48 long “bars” and 48 short ones.
Let’s start making paper crafts for children “House”. On any plane, preferably rigid, we fix the first four tubes in the form of a square, so that between two long tubes there are two short ones.
Next, we continue to “build”, alternating long and short tubes on each “wall”. Apply glue to each tube on one side. The first row can also be glued to the base for better fixation. The walls are ready.
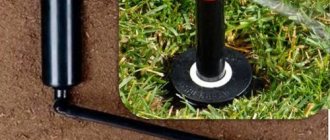
We construct doors and steps from a sheet of paper of any size, here you can use your imagination; I stiffened the steps using the same tubes. We draw and glue the windows.
Now we take a sheet of cardboard, bend it in the middle, make cuts along the edges, as indicated in the photo, bend the edges, and glue the “gables” to them.
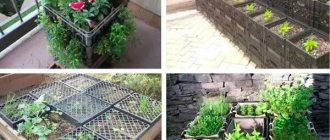
We install the roof on the walls, it will fit onto the upper tubes and will hold tightly. You can create any kind of yard around the house, you can build wells, a vegetable garden, a river - let your child show his imagination.
The paper house is ready! Isn’t it true that DIY crafts for children are not only useful, but also interesting?
How to make a house using origami technique from colored paper step by step
Origami is a very exciting hobby that anyone can master. And paper is a simple, inexpensive and accessible material for interesting crafts. In this master class we will make an origami house from colored paper. Such a house can stand on its own without supports. An origami house is not difficult to make, so you can make it together with your children.
To make an origami house we will need:
- colored paper;
- scissors;
- colored pencils (felt-tip pens, markers, gel pens).
The paper for such a craft should be colored on one side and white on the other. This MK uses blue color, but it can be any color you like. Cut out an even square from a sheet of paper. And then we bend it in half. Iron the fold well.
We marked the middle line. This is the main line on the workpiece.
Unfold and take the upper right corner, bend it to the resulting fold. It turns out a blue triangle.
Take the right side of the paper and bend it towards the center, towards the middle fold.
We also bend the left side of the paper towards the fold line, towards the middle.
Now let's bend the bottom part up to the corner of the triangle as shown in the photo. Now we have the white part of the paper completely covered and the necessary lines have been drawn in order to fold the house along them.
Now let’s unfold the entire sheet of paper, except for the triangle. Below is a horizontal fold line.
Now we bend it in the other direction along the horizontal fold line that we have at the bottom. That is, you need to bend the colored side towards each other.
And we also bend the right side along the fold to the middle line, like a book. Here we have made the right side of the house. Now half the roof and half the wall are ready.
We also bend the left side of the workpiece towards the middle.
We bend the left corner so that we get a triangular roof, that is, also towards the middle. The roof is ready, but we also need to make a pipe for it.
Then we bend the newly formed corner slightly upward. This is how we form a pipe on the roof of the house.
From the front side the house will look like this. It has a colored roof and chimney, and its wall is white.
Now all that remains is to draw a window with curtains and flowers on the windowsill with colored pencils. You can also use felt-tip pens or markers instead of pencils. You can decorate the house the way you want. For example, instead of a window, you can draw a door or all together.
A little theory.
As is known, the magnification of a telescope, or scientifically, a “spotting scope” or “telescope” is equal to the ratio of the focal lengths of the lens and eyepiece K = F / f.
And determining these values is very simple. It is enough to point the lens under study at a distant light source (the sun, a lantern outside the window, an electric light bulb at home or just a window in a shaded room), and place a white screen (a sheet of paper, preferably cardboard) behind the lens and, by moving the screen relative to the lens, achieve a sharp image on the screen . The image will be reduced and inverted.
All that remains is to measure the distance from the lens to the screen, although this is quite inconvenient; you feel the lack of a third hand. But you can ask someone from your household to help you or show miracles of dexterity and ingenuity yourself. Moreover, these actions are the same for both the lens and the eyepiece.
DIY paper house. Step-by-step instructions + 500 photos
how to make a paper house
Looking for fun projects to keep your kids creative? Then there is an excellent collection for you with step-by-step photos on how to make a paper house for children, which will become an absolute hit! Try making these DIY paper houses with your kids. This is an interesting activity that will put an end to over-indulgence in TV screens and gadget monitors.
An important feature of paper crafts is that the materials needed for making are easily available. Kids can have fun making their own paper houses. This will help them develop their skills and imagination. There are 15 models of paper houses presented here, look at them all, you will probably like some option.
- Paper house crafts
- Paper house templates for cutting
- Gingerbread houses made of paper
- DIY paper city
- Houses made of paper tubes
Little paper house
This tutorial shows you how to make a simple DIY cardboard miniature house. Using this method, you can create so many small houses out of paper that it will be enough to build up a small village! You can change the shape, size, colors, details. anything! Just let your imagination guide you, and who knows, maybe you can even create your dream home (miniatures)! All you need are pieces of cardboard (or construction paper), hot glue (or PVA), a cardboard cutter, and brown, green, and gray acrylic paint. If you want to add more details, you can, and your paper house will look even better!
Paper house craft for children
If you have children who spend a lot of time at home during the holidays, it is important to find something to do for them. When it comes to leisure time, the peculiarity of children is that not only their minds and fingers should be involved, but also their imagination. Paper crafts are one thing that can spark children's imagination, but you have to present it correctly. Once you find the approach, you can spend hours captivating children with projects like DIY paper houses that will keep them happy and creative. Here is an example of one of these crafts, just look at the step-by-step photos, children will surely like this idea.
DIY paper house
Here is an example of how to make a two-story paper house using thick paper. The model is folded without glue, all parts are simply connected to each other.
Below in the gallery are step-by-step photos showing how to fold and connect all the parts.
Paper house for the New Year
See how to make a cute Christmas tree house out of paper. Handmade toys are much more interesting than store-bought ones. To make a paper house you will need landscape paper or cardboard, acrylic paints and some foam to make some snow. How to make a house out of paper is shown in the master class with step-by-step photos.
Paper house instructions
This stylish little cottage is a very simple craft. How to make a paper house with your own hands can be found in detailed instructions on the website.
To work you will need cardboard or colored thick paper. The cutting template can be downloaded from the website.
How to make a paper house
See an example of how to make a paper house with your own hands. This is an easy craft for kids and a great activity for adults.
You will need a thick sheet of paper. The author of the project used paper from a regular packaging box. You can use appliqué paper, but keep in mind that you need to fold the house. So if the paper is too thick, it will be difficult to make simple folds, and if it is too thin, it will be difficult to keep the structure folded without the paper straightening out. See the master class below in the step-by-step photos.
DIY paper houses for children
This paper house project involves a lot of cutting and folding work, but is perfect for school-aged children. They can decorate the house and then ask an adult to help them cut and fold the model. The step-by-step photos below show how to make a template, cut and glue the finished house. Tip: Make a simple sample model first so kids can understand what each surface is (floor, roof, wall, etc.).
Templates for paper houses
How to make a city out of paper
This is not just a craft, but real magic. Watch how to make your own paper city and decorate it with holiday lights.
To create such beauty, you only need whatman paper, a New Year's garland and a little imagination. Detailed step-by-step instructions can be found on the website.
Paper haunted houses
This tutorial will show you how to make paper haunted houses for Halloween! You can fill them with candy and make them illuminated (but without candles) and use them as lamps! To make them you will need templates, which you can download on the website, paper of your choice, glue, pencil, scissors, Xacto knife (model knife, great thing for needlework). Look at the master class in step-by-step photos.
Gingerbread house made of paper
Check out how to make a Halloween themed paper gingerbread house! Install an LED light in the middle and the house will become a great light fixture! First print and cut out the patterns, then the window panes. Save the door template for later. Then fold along the fold lines. Trace all the fold lines and tabs, fold one side of the door. Then cut out all the pieces and fold along the fold lines. Cut window panes along the top and one side of the door (the one that is not folded over). Fold the door along the line. Then simply assemble the paper house by applying hot glue to all the tabs. How to decorate a paper house can be found in the instructions on the website.
See the master class below in the step-by-step photos.
Here are two more examples of how to make a gingerbread house out of paper with your own hands. First, be sure to draw in the fold lines, pressing firmly with the pencil as you draw. Fold all the fold lines. Cut out the windows using sharp-tipped scissors or an Xacto knife. Glue the walls. To attach the roof, start by applying hot glue to the lip of one of the side walls, then push the roof into place. Lift the other side of the roof, then quickly apply glue to the remaining tabs and press the roof down. That's all, in short.
The second example is also a great project that kids can decorate with stickers, gel paper, patterned paper, pom poms, glitter—whatever their heart desires! You can cover the paper gingerbread house with felt and add cute candies. But pruning is definitely an adult's job. The main material for this project is corrugated cardboard. This project is very simple if done so that the cardboard bends in the direction of the corrugation. Make the cut lines so that they are in the same corrugation direction (parallel ribs or grooves). How to make a paper house with your own hands is shown in detail in step-by-step photos.
House made of paper tubes
Here's a great idea for a children's craft - a house made of paper tubes with your own hands.
There is nothing complicated in this craft, you just need to make a sufficient number of paper tubes - logs, from which you can then put together such a hut. If you have any questions about the step-by-step photos, read the step-by-step instructions on the website.
If you liked the idea of making houses out of paper tubes, try this option.
Prepare more starting material and make a whole complex, a rustic courtyard with a porch and a swing.
Look at more examples of how you can make houses from paper tubes
Fairytale house made of paper
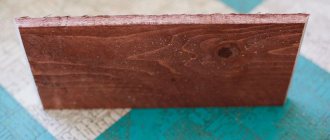
See how to make a charming fairytale paper house that looks like a tree stump. This guide will show you what you need to recreate this perfect happy home. At first glance, it may seem like real tree bark has been applied to the house... but in fact, it's just paper! To make tree bark and roots on miniature stumps, you can use rolled paper. But for this fairy-tale house, the author found a simpler way to simulate the texture - irregularly shaped paper embossed with wood. If you want to make the base for a small house, simply cut a piece of cardboard larger than the house, paint it, and glue the bottom of the house to the cardboard. The step-by-step photos presented here are not very detailed, but you can read very detailed instructions on the author’s website, which not only describes each step, but also lists all the necessary materials and parts with dimensions.
Advent calendar
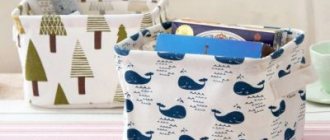
Every year the tradition of making advent calendars becomes more and more popular. Most often they are made for children to make the anticipation of the new year interesting. To do this, you need to make separate cells according to the dates of the month. And then put various goodies and small surprises there. Why not use toilet paper rolls instead of cells?
Origami houses. Diagrams, step-by-step photos, instructions
origami house made of paper
Turn any sheet of paper into an origami house using the step-by-step photographs and instructions presented in this article. Here are 15 of the most interesting examples of how to make a paper house with your own hands, which will definitely inspire you to make your own crafts!
The process of making a paper house with your own hands is in most cases very simple. You won’t even notice how you will soon have a whole village, or maybe even a town, of these wonderful paper houses. Children can use them for play, or as a gift along with a birthday card.
How to make an origami house
Check out how to make a cute little origami house with a pipe. This simple model is made from one sheet of square paper. This origami craft will be a great decoration for Halloween and a wonderful activity for children. Making your own paper house is very easy, although younger children may need help from an adult to make the roof and chimney.
Photo source: origami.guide/furniture/origami-houses/origami-house/2/
Origami house made of paper
Here is another interesting origami house, which is very easy to put together even for a child. Take a square piece of paper and fold the top half. Then fold the left half to the right. Open all folds. Fold the left and right edges towards the center. Open the left flap and flatten it. Repeat on the right side and you're done. Isn't it easy? Just look at the step-by-step photos.
Volumetric paper house
To fold an origami house using these patterns, you will need two small sheets of paper. There is no special origami technique used here, but you need to learn how to make a basic petal fold.
You will need one dark gray sheet (20 cm x 20 cm) for the roof, and a lighter sheet (17 cm x 17 cm) for the wall.
How to make an origami house
This is a traditional version of an origami house that is very easy to make. For this model you will need to use the origami squash technique fold. You can use any type of paper, but it is better to use different colors for the front and back sides. You can do as in this example, that is, deliberately choose a front side pattern to simulate a roof. The sheet size in this case is 15cm x 15cm. If you are just learning the origami technique, you can use a larger size, it will be easier to fold.
Simple paper house
The example presented here is the simplest origami house that you can fold with your own hands. One of the techniques you will use for this pattern is the squash fold. In simple terms, this is a way to compress a sheet into the desired shape. It is not one fold, but some combination. The difficulty is that this must be done at the same time whenever possible. In the photo, the squash fold is shown with arrows. It is necessary to open two layers from the cent. In general, this is easier to do than to describe in words - look at the diagrams presented in the gallery.
Volumetric origami house
This three-dimensional origami house is an imitation of a real house, which is shown in the picture on the right.
The model is a 3D version of an origami house. A little more difficult to fold compared to flat models. Use the diagrams below and everything will work out.
Origami for children house
Make a paper house with these easy instructions with step-by-step photos. Most of the folds are quite simple, with the exception of the roof overhang, which can be a little tricky if this is your first origami model. But don't worry because these simple instructions with pictures show each step in great detail. Just follow the instructions to learn how to make this origami house.
How to fold a paper house
This model is a traditional version of an origami house that is very easy to fold. Just take a piece of paper and bend it in the direction of the arrow as shown in the photo. Then fold the paper along the dotted line in the direction of the arrow. Open the paper as shown in the photo to make a small pocket. Then straighten the edges of the pocket. Fold along the dotted line in the direction of the arrow and insert the edge into the pocket. That's all, the origami house is ready.
Here is another similar model of an origami paper house, but it folds a little differently. Also, take a sheet of square paper and fold it in half, as shown in the photo. After folding, you should get a rectangle, half the width in height. Then we bend the bottom side towards the center. Then we do the same with the top part and combine the sides. You will get a small square. After this, we unfold and again bend the sides towards the center. Then, as shown in the photo, we make a triangle from one square. Then we make a triangle from the upper right square. And that’s it, draw the door, windows, decorate and the paper house is ready.
Paper origami cottage
A simple example of how to fold an origami house from a sheet of paper.
How to do this, look at the step-by-step photos in the gallery.
Paper house diagram
Everyone at some point in their life thinks about their dream home. Here you will learn how to make your own origami house out of paper, which you can fold and decorate as you wish. You may not be able to live in it, but show everyone that you understand design. Below are diagrams according to which you can easily fold this origami model. In fact, it is not difficult, even for a beginner in the art of origami. If you have any questions, there are detailed instructions on the website, you will find the link below under the pictures with diagrams.
So, the first stage, we fold the walls of the house.
The diagram shows with dotted lines where the folds are.
Then we fold the roof
Now you need to secure the roof to the walls
Our origami house is ready.
Paper house schemes
Paper house craft
Creating a 3D shape from a flat piece of paper is a great way to teach your child about shapes and volume. This paper house is an easy craft and a great activity for kids. Whether you're trying to build a small neighborhood for toys, a diorama for a school project, or just for fun, small origami houses are easy to make from almost nothing but paper. Look at the master class in step-by-step photos, gather the children and you can start creating.
How to make an origami paper house
Make your own little origami house using colored paper and colored pencils to draw windows and doors. The house can stand without support, and if you also make a few origami trees, you will get a wonderful composition. If you are not familiar with the origami technique, you can read the instructions on the website, link under the gallery. And if this is not your first paper craft using the origami technique, just look at the master class with step-by-step photos.
Paper skyscraper
The possibilities for crafts are endless; using this pattern you can even make a skyscraper out of paper.
Below, see step-by-step photos of the master class.
How to make a house from a sheet of paper
Make some DIY paper houses using this easy beginner's method! The materials you will need are a square shaped piece of paper, scissors and glue. Fold the sheet in half and unfold. Then fold the edges into a fold and unfold again. Fold the sides together as if you were going to fold them in half, but don't fold them over. Fold the sides to the mark and unfold. Carefully trim the top and bottom pleat lines to the fold. Fold the edges of the top and bottom center squares towards the fold line. Fold the inner edges in to line them up with the edges of the flaps. Raise the sides. Apply glue to the inner flap. Align the top and bottom edges of the flaps and glue. Repeat on the other side. The paper house is ready.
General information
When making cardboard sleeves, you can use a spiral and direct method of winding (winding) layers of paper of different densities.
Rolled products are made from cellulose or waste paper. The manufacturer's logo is often depicted on the outside of the pressed cardboard tube, which can be any color. Winding pulp and paper roll materials is much cheaper than manufacturing cylindrical glass, metal, plastic, and wooden analogues.
If we talk about standardization as such, then the wall thickness, diameter, length of pressed cardboard pipes, and other product parameters can be arbitrary, depending on the wishes of the customer. Although, all products must comply with the uniform requirements of TU 5450–003–11499586–98.
Making a corner
The layout of some apartments involves the formation of a corner part in the most visible place. As a result, the family thinks for a long time about how to decorate or hide this defect. One solution is to make a corner fireplace. The design is not overly complicated, so all family members can take part in the work.
DIY corner fireplace
To begin, you need to prepare the following materials:
- Transparent tape.
- LED strip, garland or battery-powered candles for decoration.
- Construction knife and large scissors.
- Self-adhesive film or wallpaper with a brick pattern.
- Cardboard box, above average size.
The first step is to measure and determine the amount of cardboard that will be needed to completely cover the corner. If the fireplace is smaller, it will look like it is pushed into a corner. If the problem part is located at the transition from one room to another, the design will not only create comfort, but also avoid impacts on doorways.
Calculate the correct measurements for your future fireplace
How to decorate?
When the triangle is ready, it needs to be firmly glued with tape. If the design allows, the fireplace is covered with self-adhesive film. To decorate a homemade fireplace, you can use wallpaper with various patterns.
Make a rigid frame for stability
Now it's time to start making the shelf. If you don't have plywood or other suitable hard material on hand, leftover cardboard will do. The only condition is to make it more durable; you need to use several layers. To finish the stand, self-adhesive wood effect is usually used.
Feel free to cover it with themed wallpaper and decorate it
Next we are decorating the inside. To make a homemade fireplace glow from the inside, previously prepared electronic candles, garlands or LED strips are used. They can be folded inside and covered with artificial firewood, which will create a burning effect. This hearth can also serve as a night light.
An antique approach to business
Believe it or not, the photos below show cardboard antiques. It turns out that this happens too. Such furniture, of course, can hardly be used for its intended purpose. But as an interior exhibit that surprises guests, it will work very well.
The designer and the craftsman approached the matter thoroughly. They managed to embody authentic classic elements and design with talent in furniture made from old cardboard.
We even managed to create a zigzag chaise longue made from cardboard that imitates leather upholstery. Luxurious things were made from waste material.
Let's start work!
So, the design of the simplest magnifying tube includes two glasses (or lenses). One will serve as a lens, and from the second we will make an eyepiece. Both pieces of glass must be biconvex, and the magnification of the device should be calculated according to the ratio of the focal lengths of the eyepiece (f) and objective (F). It looks like this: K = F/f.
All that remains is to find suitable lenses. If you have a lot of unnecessary items in your attic or garage, this will make the task much easier. The more different glasses you discover, the more likely it is that they can be “tailored” to the simple optical design of your pipe.
The best option is glass from old glasses, preferably round, so that there is no need to further process them. Also suitable:
For the New Year
The New Year's house for children will differ only in its external decoration. The craft pattern will be the same. To give the product a fabulous, New Year's look, cover it with glitter, cotton wool, and attach paper snowflakes.
You can put a small artificial Christmas tree inside and decorate it, and Father Frost and the Snow Maiden or a snowman can live in this house.
This is how a New Year's house for children will look in the photo.
You can put it under the Christmas tree or decorate your room with it.
If you want to make a small dollhouse, it is recommended to take designer cardboard or just thick paper. Cardboard from under household appliances will look rough and will be difficult to glue together.
Windows from the inside can be imitated with tape. If you want to light it up, stock up on a flashlight, turn it on and put it inside the house. You can use a garland. This is what this craft for children looks like in the photo.
Crafts for children are always an opportunity for parents and kids to communicate and show their creative abilities. Let your house be the way you dream of it!
Do you throw away cardboard because it takes up too much space? But it can become material for your creativity. For example, you can build a house...
From Masterweb
04/12/2018 00:01 Do you throw away cardboard because it takes up a lot of space? But it can become material for your creativity. For example, you can build a cardboard house for children or for a pet. Find ideas for such crafts below.