Every girl loves to play with dolls. I want to dress them up, create houses like people’s. Everything you need for games can be done with your own hands.
It is enough to take a closer look at the means at hand and put in a little effort.
Younger girls will receive help from their parents, while older children can handle many tasks on their own.
You can come up with ideas for clothes, jewelry, and doll house items or do everything using ready-made examples and master classes.
Do-it-yourself clothes for dolls
Sewing a new thing for your favorite toy seems like a very difficult process.
- We need special precise patterns, strictly measured sizes, unique models.
- But in fact, there are many ideas on how to easily and quickly sew new clothes for a doll.
- The fastest dress can be made even without a needle and thread.
- All you need to do is make slits for the arms in a piece of fabric and add a thin belt.
- The dress is ready!
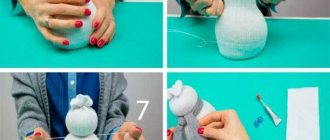
You can easily make unique wardrobe items from a sock left without a pair. Moreover, one sock is suitable for “producing” several things from its different parts.
- An elastic sock is suitable for creating a skirt or top.
- If you add the top part to the elastic band, you get a tight dress with open shoulders.
- The cap will be made from a toe, and the heel will be suitable for a hood or voluminous snood.
To learn how to sew more complex, elegant things, you can take a master class on tailoring and other crafts for dolls. Then the doll will have dresses that are not inferior in design to the purchased ones.
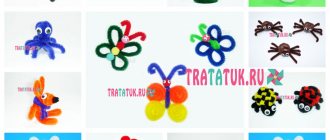
Jewelry for dolls made of beads
Girls love to dress up dolls, making them look like princesses. In addition to beautiful clothes, jewelry is needed for a chic look. They are easy to make with your own hands. The dolls will be able to make various earrings, beads, and crowns. To work you will need beads, beads, polymer clay.
The base can be thin wire or strong thread. Additionally, the work may require the use of a needle, pliers and other tools. Decorative elements are carefully placed on the base.
You can use different techniques to achieve the desired decoration design for your doll.
It is important to take care of the safety of products; playing with them should not pose a danger to a child of any age.
You can make beads from ready-made decorative elements or make the components of the required design yourself from polymer clay.
To obtain decoration, beads can be placed on an elastic band. In this case, you won’t have to strictly measure your head circumference or worry about the fastener.
The beads will fit in size anyway. By analogy, you can make other accessories to decorate the doll's image: headbands, straps, bracelets.
Jewelry and accessories
To create a chic holiday look, decorations are essential crafts for Barbie dolls. You can make a beautiful decoration for your princess using already unnecessary or broken jewelry. Every woman can find such handy material.
You may also need:
- Wire,
- pliers,
- Glue,
- Polymer plasticine,
- Pins,
- Threads.
What else can you do for dolls?
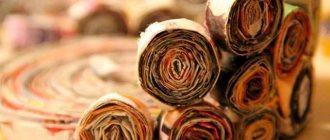
For example, update the furniture for a dollhouse. Matchboxes, egg containers, scraps of fabric and leather, wooden and plywood blanks - and this is not all the materials for furniture production.
Earrings
To make earrings, you can use
- Beads, beads strung on wire,
- Ordinary pins with balls, or you can make them from a chain.
Hand-made jewelry is often presented by craftswomen in their photos of crafts for dolls. Beaded hairpins, brooches and necklaces, as well as handbags, clutches, straps and other fashion accessories decorated with stones and beads evoke admiration.
Stationery for dolls (getting ready for school)
Greetings, dear guests of my blog! Finally, I’m fulfilling my promise - I’ll show you stationery and all sorts of school stuff that will surely come in handy for any doll.
Anyone who already knows me and my little Mishutka Darinka understands that I don’t play with dolls - my hobby for the second year now is a small toy Mishutka and her house, which I made myself for my youngest daughter Katyusha - https://stranamasterov.ru /node/713606 (“House for Mishutka - part 1”)
So, let's begin)
You are visiting Mishutka again! Mishutka is the same age as my daughter Katya, she is 6 and a half years old. They will both go to school in the fall, and they need to be well prepared for school.
Katyusha already reads perfectly. Mishutka is also not far behind her. This is the ABC book they both learned to read from.
Only Katya is real, and Mishutka is like a puppet.
This is the size of Mishutka’s ABC book.
This is almost an analogue of the real one, only there are no pages with text for reading - only those where there are letters on each page. Otherwise the primer would not have been naturally thick.
The idea for the primer came after I came across a picture in a children's magazine of Zhukova's primer, from which my Katya learned to read. The picture is bright, good quality and the right size. Why not take advantage of such luck?
Having found the pages of the primer in electronic form on the Internet, I reduced them to the size I needed, arranged the spreads - 2 pictures side by side, according to the location in the real primer. Then I placed everything on a sheet of paper in Word and printed it on a color printer.
This is what each page looked like
This page was not on the Internet, so I had to re-photograph it from Katya’s Bukvarik.
I glued the spreads together in pairs and made a little book. The cover in the Primer is made according to my MK “Books for a Dollhouse” https://stranamasterov.ru/node/922660
Real and doll ABC books)
This is such a cutie! With such a wonderful book, Mishutka will definitely learn to read well)
Mishutka has almost everything ready for school. This is a diary for good grades!
I found this beautiful spread of a real diary on the Internet.
And this is the first page.
Using the same principle as the Primer, I printed out the pages.
Beautiful covers were also found on the Internet. Mishutka chose Shchodennik with a bear for herself.
Cut out the pages to the required size. Fold the spreads in half and glue them in pairs. I recommend a glue stick for such work - it doesn’t soak the paper! At the beginning there is a page for signing the diary.
We are preparing the cover. Cut out the cardboard: front side, end, back side. The front and back are 1mm wider and higher than the page block. The distance between them is equal to the thickness of the block with pages. We bend along the lines. Choosing paper for the diary cover. I like the colored coated one. We glue the cardboard cover onto its reverse side, cutting it off, leaving an allowance of about.5 cm, cut off the corners and fold the allowance onto the cardboard, glue it (everything is like in books, only we don’t cut the cardboard cover)
We glue the inner block with pages into the resulting cover.
Paste a picture on the front. I recommend that before cutting out a picture from a sheet of paper, laminate it with tape, then cut it along the outline and stick it on the book!
This is such a fun diary!
There are a lot of interesting and useful things around us for a doll's life. You just have to take a closer look)
On almost every notebook, coloring book, development book or copybook, manufacturers place small images of notebooks and books on the reverse side for advertising purposes. They are great for doll needs. Bright, good paper, etc. Obviously they look advantageous compared to printing them on a printer.
These cute notebooks appeared at Mishutka’s after revising Katya’s old notebooks.
To prevent notebooks from getting wrinkled in your briefcase, you definitely need a folder for notebooks.
I repeat once again - there are so many interesting and useful things around us that many would consider to be garbage. Everyone, but not us - lovers of miniatures) As soon as I thought about what to make a folder out of, a case for a travel sewing kit (buttons, tiny scissors and threads) immediately caught my eye.
By cutting it to length and giving a new shape to the flap, in 2 minutes we got such a wonderful folder - just like a real one!
Fortunately, the notebook paper could also be at least halved and printed on a printer for greater naturalness. But I'll leave it like that for now)
Notebooks are securely protected!)
And this is a sketch notebook)
In these copybooks, Mishutka, like Katyusha, trains her pen, i.e. paw)))
The covers for the copybooks are also cut out from the back of Katya’s old copybooks.
And the inner sheets were found on the Internet, reduced, arranged and pasted into the covers.
All pages are different. If desired, Katya can help Mishutka write)
And I found these copybooks on the Internet, they came with pages. I also decided to reduce it and print it on a printer for a change. Notice how faded the covers in these copybooks are compared to the previous typographic ones.
Internal pages
The back of the notebooks is also beautiful)
And this is a very necessary and useful thing on any table - a plastic organizer for papers, in our case for copybooks.
A Tic-Tac box will come in handy for this organizer. If you remember, I have already made a napkin stand from such a box https://stranamasterov.ru/node/922256. Then I used scraps of plastic after cutting out this paper organizer)
Plastic can be easily cut with a utility knife.
For decoration I found a quick sticker. You can, of course, design it in a more interesting way)
Thanks to this stand, Mishutka will have order on her table.
An integral attribute on the desk is a glass for pencils and pens.
The plastic cap was turned into a cute coaster using decoupage.
There's plenty of everything here: pencils, pens, scissors...
Pencils made from toothpicks, painted, opened with varnish. The handles are also made from toothpicks, painted with nail polish and acrylic paint. Plastic doll scissors, handles painted with nail polish.
And this is almost a real wooden triangle...
... and wooden rulers.
All made from wooden sticks for stirring coffee.
Spacious glass!
Rulers will definitely come in handy for Mishutka at school)
To prevent pencils and pens from lying around your briefcase, you definitely need a pencil case.
In the case for the travel sewing kit, from which I made a folder for notebooks, there was a tiny transparent case with buttons and needles in 2 compartments. Having cut off 1 of them and decorated it with a sticker, I got this convenient pencil case.
Very easy to use)
Like all children, Mishutka has her favorite colored pencils.
Pencils made from painted toothpicks. And the box is from a sewing machine needle box. I carefully cut the box and lid to length. On top I pasted a picture from a magazine with an image of almost pencils (felt-tip pens)))) But, in my opinion, it turned out great!)
For drawing, of course, you need an album.
The cover with the hedgehog was cut out from the cover of old coloring books, the inscription was from the back of a real sketchbook.
You can draw with pencils)
You can also draw with paints...
I also made a box of paints from a box of sewing machine needles.
Sorry, due to lack of time now, I will add comments to these photos later)
This is the watercolor Mishutka now has. Somehow I lost sight of the fact that there is no brush. We must do it!
Almost real)
And this is fun modeling clay! I glued the box together, the picture is also from a magazine.
Everything is real inside)
Plasticine is also real)
At school you will definitely need a folder for work.
I printed out a picture of a folder, decided on the size, laminated it with tape and cut it out. Cut out a folder from cardboard (see photo) Bend along the lines Glue the picture in front.
We cut off a little corners at the top and bottom lapels. Cut out 2 cardboard pieces that are the same size as the folder. We make 2 holes in one of the cardboard parts, the same ones in the back of the folder. We thread the elastic band through and glue the cardboard to the folder. We trim the ends of the elastic and glue it, making the elastic looser so that it later secures the folder.
The face and back of the folder. We glue the valves inside to form a pocket. In the second cardboard we also make 2 holes for the elastic.
We thread a thin elastic band and glue it to the back. We glue the cardboard from the inside onto the lid of the folder. The folder is ready!
The folder will contain colored paper. The picture for the colored paper was also cut out from a magazine.
The paper is real, of course)
A folder for colored cardboard is very easy to make. We decide on the size, make a drawing and glue the flap, forming a pocket for the cardboard. The picture on the front side is cut out from the packaging of real cardboard.
Everything will be useful for handicrafts)
Scissors, cardboard, paper...
Everything fit perfectly!
To study geography, Mishutka also needs a globe!
Globe - cropped keychain. On top is a wooden bead, cut to a hole, put on and glued to the metal part, colored with a marker. The stand is a painted bead from an old broken wooden abacus and a button from the cloak of my mother’s youth))))
And this is the writing corner of the future schoolgirl - Mishutka. It is not equipped yet. A table lamp in progress. And there is no drawer for a bunch of stationery - I’ll redo the table.
stranamasterov.ru
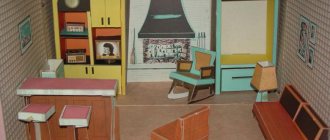
Doll furniture
Doll houses are a source of special pride for little doll owners. You can arrange it to your liking, constantly update or change furnishings, improve, decorate.
It’s difficult to make a house on your own, you’ll need your dad’s help, but it’s possible. These can be complex multi-story structures or simple one-story options with several rooms.
Houses can be made from:
- plywood,
- Drywall,
- OSB or even cardboard.
As a craft for dolls, you can make furniture and household appliances into a doll's house from paper, cardboard and other available materials.
Clothes for a doll
The most enjoyable part of caring for a doll is preparing the wardrobe. All girls love to dress up their charges. The arsenal should include various dresses, skirts, sweaters, and trousers. All this is easy to do with your own hands.
Dress
There is nothing easier to sew or knit a dress for a doll. You can use ready-made patterns. All that remains is to make the parts and assemble them into a single thing. If there are no patterns, then you can make a simple dress. To do this, a long strip of material is gathered together. It will become a skirt.
Smaller strips are sewn on top, which correspond to the length from the waist in front to a similar level in the back. These will be the straps of the sundress. When sewing, they can be crossed. There is a fastener at the back of the product. These can be standard buttons, zipper, Velcro.
Skirt
Sewing a skirt for a doll is even easier than sewing a dress. You can create a beautiful circle skirt in half an hour. To do this, cut out a large circle from the fabric, cut out a similar smaller hole in it, which will correspond to the waist circumference adjusted for a comfortable fit.
A belt is sewn at the top. You can insert an elastic band into it. All that remains is to process the remaining cuts and complete the decor.
Trousers
Sewing trousers for a doll is already more difficult. A beautiful option will turn out when using patterns. A simple model can be made in an elementary way.
To do this, just trace the outline of the doll from the waist to the ankles. Then they make increases for a free fit.
Using the resulting light pattern, seams are made in the required places. It is better to sew such trousers from loosely stretching fabrics.
Clothes made from sock
Simple wardrobe items can be made from an ordinary sock. Even a child can cope with the task. It is enough to cut off the sock. Remove the toe and heel. The remaining rounded section can easily become a dress, skirt, or even shorts or trousers.
It is enough to show your imagination. If you put a little effort into design, you can easily get real masterpieces as a result.
Children's clothing
When preparing a wardrobe for a doll, pay attention to the dimensions of the toy. For large items, it is not necessary to purposefully sew clothes. To replenish your wardrobe, you can use real children's clothes designed for infancy.
They do not need to be altered; they are suitable for use in their original form.
Making crafts for dolls is interesting and easy. Kids will try to make every effort while working, and adults will remember their childhood. There are many techniques available for the job. Choosing your option will not be difficult.
Dresser
- Three matchboxes will make an excellent bedside table or miniature chest of drawers.
- Glue the outer parts of the boxes together, then glue cardboard rectangles to the sides, back and top.
- Line the ends of the inner parts of the boxes with toothpicks to create chest of drawers, and glue handles on them.
- Paint the chest of drawers with dark paint and insert drawers.
Sofas, beds, ottomans, chairs and tables, wardrobes, computer, TV. How to make such crafts for dolls? You can use the experience of other masters or use your own imagination.
What dolls need at school
Every schoolchild knows what supplies will be useful to him in his studies, what to wear them in and what the office at school looks like, but not everyone knows how to make everything for dolls for school with their own hands. The idea seems grandiose and impracticable, but making an absolute copy of the school for puppet students will captivate you so much that time will fly by.
So, what exactly will little schoolchildren need:
- briefcase or backpack;
- notebooks and textbooks on various subjects;
- diary;
- pencil case with stationery (pens of different colors, ruler, pencil, sharpener, eraser);
- album, brushes and paints or markers;
- school furniture (desks, blackboard, educational posters, globe, book racks or shelves);
- if schoolchildren are modern - a laptop, a smartphone.
How to make everything for dolls for school if you have nothing at hand except paper, pen, cardboard and glue. It's easy and simple if you use a little imagination! But of course, the set will turn out much more beautiful if you print out blanks of real educational materials on a printer or paint everything yourself.
Plasticine fantasies
- Plasticine is an excellent material for creativity and creating minimalistic, precise objects.
- Girls enthusiastically make crafts from plasticine for dolls.
- Using modern types of plastic masses, clay, dough, you can create various clothes for dolls.
- After hardening, its properties are in no way different from clothes made from traditional materials.
- Shoes and handbags, jewelry and gadgets, all this can be made from plasticine as closely as possible to the real thing.
Food made from plasticine turns out bright and appetizing. With its help, you can set the table for the doll and her guests, serving various dishes, make dishes, a vase of flowers and many other useful things. What else to do for a doll world made of plasticine, your imagination will tell you.
From thought to action, school furniture
You can start by decorating the classroom. Take a box of the required size, stick on printed or drawn windows with curtains, cut a hole for the door and paste it over.
How to make everything for school for dolls is more or less clear, but what to do with the school board and furniture. Again, don’t forget to use your imagination: you can make the board separately or decorate it on the wall of the box by simply drawing it; You can get a little more involved and cut out rectangles from cardboard, glue them to a solid cardboard rectangle with tape (these will be the opening/closing doors of the board) and glue the entire structure to the wall with glue.
It’s easier to make desks from matchboxes, gluing cut pieces of juice tubes instead of legs, or making them plasticine. Then you can simply paint the finished desks. And chairs can be easily made from cardboard and the same sticks.
A wardrobe or chest of drawers can also be made from matchboxes. There the teacher will store his teaching aids and student notebooks. You can put a globe made of plasticine on the cabinet.
All that remains is to decorate the office with portraits of writers and hang educational posters: a world map, the alphabet, multiplication tables, etc.
Crafts from different materials
- An unusual approach to standard materials is also used in the manufacture of doll accessories.
- Chairs and a bench made from school rulers or ice cream sticks will take their rightful place in a doll house.
- Crockery and cutlery can be cut from a plastic liner from a box of chocolates.
- The balloon will make a swimsuit for Barbie and a backpack for her shoes.
- Paper clips can easily be turned into coat hangers.
You too can create and invent a world for your favorite doll!
Bag for a doll made of polymer clay
An excellent accessory for a doll will be a bag made of polymer clay. To complete a product, a mock-up is first created. To do this, determine the parameters of the bag and draw a pattern. Based on the plan, they work with clay:
- The material is rolled out and, if necessary, a pattern is created on the surface. The finished parts are fastened together.
- To make it more convincing, you can place a layer of fabric on the inner surface.
- Lastly, do the handle. This can also be made from clay or using a chain. By analogy, you can create other accessories for the doll and her home.
Photos of crafts for dolls
Bedroom set
Take cardboard packaging (from hair dye or cream), cardboard, foil, colored paper, scissors and glue.
- cut the cardboard box to the height of the dressing table;
- Glue foil onto a piece of cardboard equal in width to the workpiece. This will be a mirror;
- cut out the material on the front. To imitate legroom, cover the cardboard with paper that matches the color of the rest of the furniture. An interesting solution is the remains of self-adhesive wood-look wallpaper;
- Connect the mirror to the tabletop;
- On the cabinet, draw drawers with a thin marker and glue handles made of oblong beads.
The dressing table is ready!
Clothes and other additional details: we do it ourselves
DIY hat for Barbie
Making an unusual hat for a doll is very simple. You will need :
- Pattern.
- White thin fabric - the base will be made from it.
- Fabric for the outer surface - to taste.
- Lace and ribbons for decoration.
- Glue: moment and PVA.
- Scissors.
The pattern consists of three elements:
- crown;
- fields;
- bottom.
Step-by-step master class:
- Saturate white fabric with PVA glue; it will become rigid and hold its shape.
- A shape is cut out of the dried fabric according to the pattern.
- Parts are also cut out from the fabric for the outer side of the hat according to the pattern.
- Using “Moment”, the white bottoms are glued to the crown.
- Next, the fields are glued.
- Now the form is covered with decorative fabric using the same “Moment” in the following sequence: bottom, brim, crown.
- The most interesting thing remains - decorating the hat with lace, feathers, ribbons - whatever your imagination allows.
Using the same principle, you can make other hats: caps, top hats.
Doll glasses
Making such an accessory with your own hands is very simple. You will need :
- Corrugated paper.
- Thin wire.
Step-by-step instruction:
- The wire is covered with a piece of paper.
- It is cut into two equal parts - these are blanks for the frame with temples.
- A short part of the wire is also cut off - this is the connecting element.
- Long wires are bent in a circle. To make it even, you should use a round bubble of the required size. So, if glasses are made for a designer doll, you can use the cap from a bottle of nail polish, for Barbie - a small cosmetic pencil.
- The arms are covered with paper, the remaining paper is cut off.
- A short wire should also be bent using a lighter or a thin brush. The remaining wire is cut off with scissors.
- The parts are carefully coated with glue at the joints.
- The frame is connected into a single whole.
- You need to wait until the glue dries and cover the joints with paper.
- The original glasses are almost ready. Now you need to bend the arms so that the frame looks like a real one and remove the remaining wire.
- To make the glasses original, you can cover the finished product with nail glitter.
The history of Barbie
Barbie was officially born, according to sources, in 1959 in the USA. Her mother was an American businesswoman, Ruth Hendler.
It was her daughter who inspired Ruth to create a fundamentally new toy for girls. Watching her daughter’s games, she noticed that baby dolls, popular at that time, did not provide the opportunity to act out adult situations from life. So the woman came up with the idea of making an “adult” doll that could participate in a child’s modeling of reality. Her husband, who headed Mattel at the time, helped her realize her idea.
Ruth and her husband Eliot named the doll after their daughter. Few people know that Barbie's full name is Barbara Millicent Roberts.
Barbie today
For a long time, Barbie was the best-selling toy in the world - according to statistics, every three seconds in different parts of the globe someone purchased a beauty. However, in recent years the popularity of the original doll has noticeably declined. This is due to the fact that new toys for girls have appeared on the market, which have captured the interest of the children's audience.
Thus, the main competitors today are considered to be the Bratz company, which has released dolls in the form of large-headed teenage girls. Moreover, in 2006, Mattel began legal proceedings against Bratz, accusing them of plagiarism. During the process, production of Bratz dolls was temporarily suspended. But in 2011, the decision was reversed, and Mattel paid a fine of $88 million to opponents for false accusations.
Facts about Barbie
This doll is known all over the world. However, her biography contains many interesting facts that not everyone is familiar with.
- Barbie's birthday is considered to be March 9, 1959. It was on this day that the doll was first presented at a toy exhibition in New York.
- Barbie's zodiac sign is Pisces.
- Barbie has a large family: seven siblings (Skipper, Stacy, Chelsea, Chrissy, Kelly, Tutty and Todd) and two cousins (Francie and Jessie).
- Barbie's boyfriend, Ken, is 2 years and 2 days younger than her.
- In 2004, Mattel announced the separation of the couple - Barbie and Ken. But in 2011 they reunited again.
- During the disagreement, Barbie was dating an Australian surfer, Blaine.
- Barbie never had children. All the children she has been seen with are her younger siblings.
- The classic Barbie figure, from the point of view of human anatomy, is considered unhealthy. However, in 2015, Barbie manufacturers introduced 3 new types of realistic figures. These are “Curvy”, “Tall” and “Small”. And now Barbie dolls are made to look like real, anatomically correct girls.
- Barbie's first pet, contrary to popular belief, was the horse Dancer.
- Barbie's best friend is Midge. Their friendship began in 1963 and continues to this day.