What is a keychain? Is it a small trinket that brings back pleasant memories, or is it a stylish and fashionable accessory for your keys, backpack or wallet? For some, a keychain is a whole set of necessary tools, but for others it is a hidden payment system in which a Sim-card is hidden.
Or perhaps you are some kind of ardent fan of movies, video games and want to make yourself a favorite character or something that would remind you of your favorite game or movie universe?
You can make an original Gordon Freeman crowbar from wire and polymer clay, you can make a whole alien from leather, beads and wire, or you can recreate an entire cartoon character.
What a keychain will be for you is up to you to decide, and we are sure that even now. At the initial stage of reading, you are already holding that very idea by the tail, which you will put into action in your craft.
Choosing the right material
The choice of material is the very first and most important step in the manufacture of any keychain. The material must be of high quality in order to maximize the use of a beautiful item. Some give the keychain mysterious meanings: a talisman for good luck, a talisman or protection against damage from the evil eye.
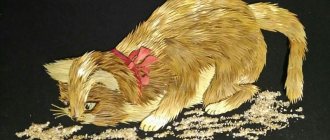
List of materials from which a keychain can be made: office paper, sewing threads, fabric, beads for embroidery, plasticine for modeling, various elastic bands or ribbons, amulets stones.
Various hooks, pieces of straps, bottle caps, strings, pencils and much more are also suitable. Images of some materials can be seen below.
Required Tools
- Electric or manual jigsaw - for sawing;
- Screwdriver - for screwing in and out of screws;
- Electric drill or hammer drill - for drilling holes;
- Wood files – for initial smoothing of the surface;
- Grinding machine or sandpaper of different grain sizes - for final smoothing of the surface;
- Clamps - for clamping and fixing parts during their assembly and gluing;
- Vise - for clamping parts when sawing and drilling.
A pencil and measuring tools – a square and a ruler – will also come in handy. After all, crafts made from plywood, the drawings of which are themselves complex, have to be adjusted and aligned many times. If the workpiece has patterns, then you will need a stencil.
Expert opinion
Strebizh Viktor Fedorovich, leading construction foreman
We fold one end of the lavsan in half, thread the resulting loop through the hole in the heart, then you need to thread both ends of the lavsan into the same loop. If you want to clarify something, please contact me!
DIY keychain for car
There are many different options for car key fobs. Using these instructions, you can make a keychain with a car number to give it a special personality and belonging to a specific car.
The main working tool is a file (a metal file works best). You will also need stationery scissors, a knife, and a paint brush (small diameter). If you don't have a brush, you can use a cotton swab.
The choice of file depends on the material that will be used as the base.
- If plywood is used as a base, a file for woodworking is required.
- When choosing plywood, special attention should be paid to its strength and thickness.
- A sheet of plywood, 5-6 mm thick, is the best option.
We use beads
The keychain with beads is the most popular.
- beads can be of different sizes and from different materials;
- leather lace;
- ring.
- one end of the lace is tied into a knot.
- The beads are strung one by one on a cord. You can arrange them according to size, alternating colors, randomly. It is recommended to use beads on the same line from one material: wood, glass, metal.
- After the last bead, a second knot is tied.
- The remaining part of the lace is passed through the key ring and secured with a knot. The excess piece of skin is cut off.
- The work is done.
If you use thin wire or fishing line instead of lace, you can string buttons of different colors and sizes on them. The thread should end with a bead or beads. Then the work will look complete.
Making a key fob with a car number
First you need to cut a blank similar to a car license plate (rectangular) from metal or plywood sheet.
Plexiglas can also be used as the main material. A product made from it will take on an aristocratically beautiful and unique look.
The edges of the cut rectangle must be processed with a file, then with fine-grained sandpaper.
This way we prevent splinters and small metal residues from getting into the skin and protect ourselves from injury. An example is shown in the photos below.
When the workpiece is completely ready, the state number of the car for which the key fob is being made is printed on the printer and stuck on. Excess protrusions are trimmed with scissors.
Laminating paper will increase its service life. The product will be protected from moisture, weathering and accidental damage.
The number is glued to the workpiece using double-sided office tape or special glue for wood or metal. When the keychain is ready, a small hole is drilled at its edge to thread the ring through. A key or additional paraphernalia will be attached to this ring.
A thick layer of varnish gives the product a realistic convexity. Car varnish works well. An example of a finished accessory can be seen in the photo below.
Cartridge container for oil perfumes
- First of all, let's separate the neck of the cartridge case. We cut off the bell, after which we should adjust the internal thread to the end of the sleeve. We screw the thread onto the pencil, just do not overdo it with force, otherwise it will turn. Next, smoothly turning the pencil, we remove the outer layer of metal on an emery wheel to the required size. After this, we recommend sanding with zero-grit sandpaper. This is necessary so that the solder can better hold the parts together in the future. We continue to do this until the internal thread fits into the sleeve.
- Then we wet the elements with soldering acid, install the threads inside the sleeve, align the edges, heat the sleeve body and solder the threads.
- As soon as the metal of the sleeve warms up to the required temperature, it is enough to lightly touch the parts with solder, and then the solder itself will spread over all the gaps. Now let's make the lid. Using metal scissors, we cut out a cone from brass, imitation of a bullet, of the appropriate caliber. We solder the external thread to the bullet.
- We seal the perfume with a cork, check that it seals the container tightly.
- Finally, we glue one of the magnets to the capsule, and the other to the rope with the ring. This way you will definitely not lose the cork after opening the perfume.
This keychain will appeal to the female half. If desired, the surface of the sleeve can be coated with impact-resistant varnish, then oxides will not form and the surface will not develop cracks.
On YouTube video hosting you can watch detailed instructions for making such cartridges.
Expert opinion
Strebizh Viktor Fedorovich, leading construction foreman
In general, it is a souvenir, gift and decorative element that can have a useful function or act as a means of advertising. If you want to clarify something, please contact me!
What other keychains are there?
A car keychain in the form of a license plate for a car is not the only product option that you can make yourself. Appearance, purpose, materials used are limited only by the author’s imagination.
Above we discussed the answer to the question: how to make a car key fob with your own hands. However, you can make a product from beads, paper or other available materials that you are lucky enough to find at home.
Below are photographs of various keychains made from different materials that any beginner can make. For example, the algorithm is analyzed: how to make a keychain from beads with your own hands.
Simple options
There are several methods that may be suitable for beginners. Their implementation does not require a lot of energy. We are talking about paper, thread and polymer clay.
Paper
The simplest and most accessible material is paper. You can make a variety of objects from it that can highlight your style and allow you to show your imagination. You can use any waste paper: old magazines, notebook covers, boxes and cardboard.
- First, you should cut the selected type of parchment into several triangles.
- Next, you should attach a toothpick to them, roll up the triangular strips and glue the narrow end using glue.
- Next, the workpiece is coated with varnish, put on a rope and decorated with beads. You can also use the origami technique.
The main advantage of this type of craft is the ease of its implementation. Even a child can make such an accessory. The main disadvantage is its fragility.
Threads and elastic bands
You can make bright, interesting jewelry from simple threads or yarn. You just need to decide on the color of the yarn or rubber.
In the first option, you will need a ring - the basis of the product. It should be wrapped with yarn. A pattern is knitted in the middle. A similar method is used to make a keychain from rubber bands. Take several pieces and tie knots. This decoration will look quite stylish. You can give it to your significant other, since its appearance does not have a specific gender purpose.
Plasticine or clay
Polymer clay is an ideal option for creating jewelry. With its help you can create objects of different colors. Clay allows you to sculpt a variety of shapes. It is also particularly durable.
It should be remembered that the material must be stored under certain conditions. The material must be used sparingly. The metal ring plays the role of fastening. It needs to be secured before baking. Otherwise, a special hole will have to be made in the finished product. If you make even one mistake, the keychain can be ruined. Sometimes the clay is dried with a hair dryer, but more often it is baked in the oven. If you first apply varnish to the workpiece, you can give the product additional shine. Such decorations have an original look and last a long time.
Making keychains from beads
This product can be made in different shapes, colors, themes. The choice of which depends entirely on the imagination of the author.
Before starting production, a beginner can use a ready-made example of creation or come up with his own (pre-draw on paper). Whatever option is chosen, the creation principle will be approximately the same.
Volumetric figures
- Draw a sketch of the figure, taking into account different angles;
- Draw a drawing according to the sketch (therefore, several planes must be observed to establish the required volume);
- Cut out several sections of thick plywood that will serve as a supporting base;
- Adjust the load-bearing parts according to the design;
- Cut holes in the load-bearing parts for auxiliary parts;
- Saw thin plywood into several pieces;
- Process the workpieces to give them the desired shape;
- Insert finished parts (former blanks) into load-bearing parts.
The fastening of auxiliary parts to the supporting parts occurs thanks not only to well-thought-out holes, but also to wood glue. The main thing is that the finished do-it-yourself plywood crafts should be free of glue drips, roughness and dents.
Preparatory stage
Before you start making a keychain with your own hands, you need to draw a diagram or find a ready-made diagram for making such products. Then, the necessary materials are prepared so that during the work you will not be distracted by searching for them.
List of required materials:
- A set of beads of one or several colors, depending on the chosen color;
- The fishing line on which the beads will be attached;
- Stationery scissors;
- A diagram so that the product turns out exactly as originally intended;
- A ring for key rings on which keys will be placed.
In the form of a brush
An alternative method that is absolutely simple to implement and does not require any effort:
- A wide strip of skin is cut off.
- Using scissors, cuts are made so that 1 cm remains to the edge.
- Collapse.
- Features fringe and a spiral wire top.
- Putting on the ring.
This cute, tassel-shaped item can now be used to keep keys to your home, work or car.
Creating a keychain after preparation
There are many schemes on the Internet for making keychains on various topics. A master can easily find a suitable diagram on the topic: how to make a keychain from paper and beads.
The photo below shows a variant of the scheme for creating a beaded product in the shape of a flower.
Creation algorithm:
- The fishing line is cut and bent in half;
- The beads are threaded through the first end to the middle, the second is threaded through it.
- The next row is placed on a larger bead. This manipulation ensures the naturalness of the future flower.
- After the middle, the number of beads in the row decreases. An example can be seen in the picture below.
- The core of the flower can be made using a large bead of a bright color (yellow, red or another).
- Finally, all elements are fastened together, and the core secures the structure.
This product can be easily attached to items of clothing, hand luggage or to a key ring. It will not be difficult for a beginner to make it, because the algorithm describes all the nuances: how to easily make a keychain from beads.
Using the same principle, you can make a product from any available materials.
Plastic for accessory
Required material:
- plastic bottle;
- scissors;
- figure template;
- nail polish;
- beads;
- fishing line;
- ring.
Work algorithm:
- The plastic bottle is cut with a cutter, first in half, then into strips. Figures, such as flowers, are cut out according to the template;
- plastic figures are coated on both sides with nail polish;
- a hole is made in the center of each flower;
- a bead is strung on a fishing line, then it is folded in half and a knot is tied;
- Flowers are strung on a double fishing line, alternating with beads;
- After the whole strip is assembled, you need to secure the fishing line to the key ring with a knot.
- The work is completed.
Photo of a homemade keychain
Wooden small crafts
Types of manufacturing
Note. Making small trinkets in the form of keychains can be divided into four main categories. The first is automatic (laser and milling) processing, the second is drawing on the surface of the plate, the third is burning and the fourth, the most difficult type in the manufacture of such objects, is sculptural cutting on wood.
- In terms of the least amount of labor costs, as we have already mentioned, we can call laser and milling cutting - wooden keychains made in this way look very beautiful and not any master will be able to reproduce any drawing or even a portrait with such accuracy in such a small area .
As a rule, automation of the process makes it possible to put the production of such small souvenirs on an industrial basis and this can be done not only in large production workshops, but also by single artisans in any utility room where there is a connection to 200V.
Netsuke - new life
- The most difficult thing is hand cutting miniature sculptures, this type of applied art is also known as netsuke, which in Japan means miniature decorative sculpture. This type of art was also very popular in the northern regions of the Russian Federation, then, during the Soviet era, it fell into decline, but is now being revived. There is no doubt that some of these crafts are real masterpieces, so their price is also appropriate.
Painted keychains – paints and varnish
- Miniature painting can also be called a rather complex art, requiring not only talent, but remarkable perseverance and excellent vision, because the accuracy of the rendering of any image depends on this. Pay attention to the photo above - several dozen finished products are presented there - on each of them a miniature image is made in oil, and then the whole thing is opened with varnish. Such a souvenir can sit next to your keys for decades without losing its visual appeal.
- At the moment, in Russia there has been a revival of interest in burning and for some it has even grown into a real hobby, but this is the most relevant method of decorating small wooden crafts that are now being discussed. A smooth miniature plaque in the form of a medallion is taken as a basis and a simple drawing or inscription is applied on it with a pencil, repeating the burning along the contour of the lines. Most often, burners are also made independently, using old chargers for batteries of phones, players, and the like.
DIY - paints
Let's look at one of the options for making homemade keychains, and first we need a round piece of wood, which can be made on a woodworking lathe or use some ready-made holder, for example, a wooden handle from a Soviet-style plunger.
It is also best to cut the plates on a lathe - this way they turn out smooth, with the same thickness over the entire area. Then these blanks need to be sanded with sandpaper and additionally polished with felt until shiny.
A pencil sketch was made on each of the medallions.
After grinding and polishing, make a hole for a ring or carabiner, but it should not be almost in the middle and at the same time, be careful not to place it very close to the edge so that the wood does not crack. But now, before applying the image with paints, you can sketch the drawing in pencil.
In this case, the drawing was made with acrylic paints, although the instructions recommend working on wood with oil - this option is more resistant to abrasion and maintains freshness. After the paints have dried, the product must be completely varnished. In order not to miss any part of the area, lower each of the keychains directly into the jar, threading it onto a thread.
Do it yourself - burning
We use a wooden spatula as a workpiece
Now let's see how you can make the same keychain, only using burning, and as a blank we use an ordinary wooden spatula for frying food. For those who do not know how to draw, you can use ready-made life-size pictures - in our case, this is an inscription and an image. To keep the picture on the surface, we glue it with tape.
Now, directly through the tape and paper, we burn the desired image. We won’t get it clear the first time, so when you remove the tape and paper, correct it.
Note. You can just as easily draw an image with a pencil, but this is only if you know how.
Thread a ring or carabiner
Now cut out the keychain of the desired shape, open it with varnish, drill a hole in it and thread a ring or carabiner through it.
Question answer
Yes, practically anyone. Felt, leather, beads, wood, any other fabric, metal. Even beer caps can come in handy.
No, it's not difficult. Some keychains can be made in two minutes without wasting a bit of your nerves.
No, men can do this very well. In the article we gave examples of men's work.
No. Even if this is your first time doing this, it will not be difficult for you. Just follow the instructions.
Most people love to beautifully decorate their keys, phone or backpack with an original and unique keychain. Nowadays, finding such an important craft is not difficult. Many stores offer a wide range of keychains of all shapes and sizes. But none of them compares to a homemade accessory. You can make such a craft from almost any available material, and for this you will not need a lot of time and effort.
What is a jigsaw: general description
A jigsaw is a tool designed for cutting various contours from plywood, including curved ones. It is equipped with a blade with fine teeth that can make an even cut of plywood without the formation of significant burrs.
Hand tool
The ancestor of this type of tool is a manual jigsaw. It consists of a metal arc in the shape of the letter “U”, between the ends of which a sawing blade is stretched and attached to clamps. They securely hold the file during operation and allow you to adjust its tension. On one side of the frame there is a handle.
The clamps on the tool can rotate, creating different planes for sawing, thereby providing the opportunity for wood carving of varying complexity.
When cutting from plywood with a hand jigsaw, you need to be careful: its design is quite fragile, and during intensive work, the blade often breaks from force and heat, so it has to be replaced. To do this, each master must have several dozen spare files.
When working with a jigsaw to carve internal contours, it is convenient to use such an auxiliary board as in the photo: it will help both protect the table and solve the problem of convenient placement of the workpiece.