15.11.2021
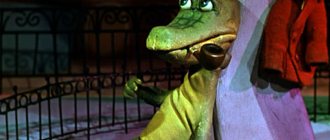
The symbol of the coming 2022 is a black water tiger. The Asian symbol represents courage and bravery. Children in art classes in kindergartens and schools traditionally make crafts in the form of the symbol of the year. A tiger or tigress made with your own hands for the New Year can become both an independent gift and an addition to the main one.
Tiger - kind, wise and brave
In just a little while, 2022 will come. The Tiger will become its symbol. The sign rewards its owners with kindness, deep wisdom, intelligence and an irresistible desire to master everything unknown and new. Children who are lucky enough to be born in the year of the Tiger will be extremely calm and restrained. These people lose their composure only in some cases; they maintain clarity of mind in all situations, and even in the most extreme circumstances they manage not to lose their presence of mind.
Next year, you can safely go after your dreams and make the changes that you have been dreaming of for years. Anyone who wants to change jobs can do so without fear. In addition, there is a chance to change the field of activity.
The tiger is an obstinate and restive animal. You must always be on guard with him. He is curious, almost fearless, and incredibly loves to learn new things. To attract his location, you should decorate the house with symbols with his images. By the way, you can make them yourself.
DIY symbol of the year 2022: master class with step-by-step photos
New Year's Christmas tree craft for kindergarten from all sorts of things
Young children who can already handle scissors and a needle can make these Christmas trees out of paper.
For the first craft you will need:
- scissors;
- wooden skewers;
- glue;
- ruler;
- hole puncher;
- pencil;
- improvised materials and decorations.
Take green colored paper. Folds like an accordion and is cut into a triangle shape. Next, holes are made in the center using a hole punch and wooden skewers are inserted through them. After this, using available materials: beads, tinsel, etc., you can decorate our Christmas tree. If you are going to use such a craft as a Christmas tree decoration, then you need to make a loop from a thread and glue it to the product. If the Christmas tree will serve as a separate decoration, you can make a stand from cardboard.
The forest beauty can also be made from fluffy drape or felt.
For the craft you will need:
- green material;
- scissors;
- thread and needle;
- padding polyester or cotton wool for filling;
- old jewelry, beads, buttons, etc.
The craft itself is very easy to do. To do this, 2 cones are cut out of a convenient material. Then they should be sewn over the edge or with straight stitches. Filling is placed inside and the Christmas tree is decorated with buttons or other decorations.
You can make a forest tree like this out of paper.
You can learn how to do it from the following pictures:
The Christmas tree can also be made from double-layer cardboard.
The technology for its manufacture is very simple.
An unusual Christmas tree comes out of newspapers and magazines.
The craft is very easy to make. First, squares are cut out from biscuits or magazines, and then they are strung on skewers.
This Christmas tree can be decorated with artificial snow.
Thick glossy magazines with paper clips can serve as a good basis for a New Year's beauty.
To make New Year's crafts, you can also use green crepe paper.
Every home can have a green plastic bottle. You can make an original forest beauty out of it.
Materials for crafts can be the most unexpected things, such as toilet paper rolls.
You can try making Christmas trees from threads. Moreover, they can be very different.
Another option is also possible. True, to do this, you first need to make a cone out of thick paper or cardboard, and then wrap green threads around it. After that, you can decorate it as you wish.
You can use a different technology. Threads are wound randomly around the same cone, which are then smeared generously with glue. After it dries, the cone is removed, and you get these beauties:
Fluffy Christmas trees can also be made from pompoms. They are very easy to make. After making the balls, they are sewn together to create a craft like this.
The Christmas tree can be made in a vintage style. To do this, pieces of lace fabric are glued onto a paper cone.
It may not be strange, but Christmas tree souvenirs can be made from food, such as pasta.
But this Christmas tree is made from dried orange slices.
Cotton wool, metal wire, paper strips, wooden twigs and even bottle caps can be used for crafts.
DIY symbol of 2022 tiger from a paper cup
A do-it-yourself tiger cub made from a glass is one of the simplest crafts. To make it, you need to prepare the following materials:
- 1 paper cup;
- colored pencils or watercolors;
- wire;
- orange shoe lace.
The glass should be placed bottom to top and painted orange. On both sides, draw four identical rectangles in black, imitating stripes. In the middle we draw the eyes, nose and mouth. At the very base we make a white breast.
Next you need to cut two identical pieces of wire to make the ears. We thread the wire into pre-cut pieces of lace, bend it in a semicircle and attach it to the top of the glass (where its bottom is).
Now you should cut a longer piece of wire for the tail and also thread it through the lace. We bend it gracefully and fix it behind the tiger cub.
Symbol of 2022 tiger from a paper cup (option 1)
You can make a tiger cub from a paper cup in a slightly different way. For the craft you will need:
- cup;
- orange paint;
- black and orange paper;
- black marker;
- a piece of felt;
- eyes;
- glue.
Again, turn the glass upside down and paint with orange paints. We cut out six identical strips from black paper and glue three on each side. We also cut off two narrower and shorter strips, which must be glued vertically from the very top in the middle (on the head).
We cut out two oval ears from orange paper, decorate them with black stripes and fix them on the tiger’s head (bottom of the cup). Next we glue on the eyes (you can buy them at any craft store). We cut out a triangular nose from black felt and also glue it. We draw a mouth with a marker.
This is the easiest way to make a tiger with your own hands. A master class with step-by-step photos will facilitate the creative process and allow you to bring good luck into your home and your own life in the New Year.
Symbol of 2022 tiger from a paper cup (option 2)
Templates
Blanks for paper crafts can be printed in advance with a design or you can invite children to complete them themselves.
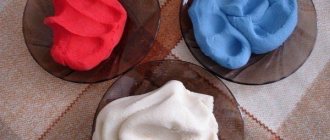
DIY tiger made of plasticine
To sculpt a tiger cub, you will need to take a piece of orange, black and yellow plasticine. From a red piece we fashion a body and a head, which we fix to the body with a match.
Body base
Fixing the head
Next we make a yellow muzzle and ears from an orange piece. We attach all this to the face and head, respectively.
Muzzle
Ears
We make eyes from black plasticine and glue them on the face.
Eyes
We fix the eyes
Glue the black nose
Then we sculpt four legs and a thin tail with a black tassel. We fix them on the tiger.
Forepaws
Paws Hind legs
Tail with tassel
We decorate the body with thin black stripes and voila: the plasticine tiger cub is ready.
Glue Tiger strips with your own hands from plasticine
The tiger cub can be made using a slightly different technique.
Tiger made of solidified mass
Christmas tree toy with Tiger Cub
For a Christmas tree, you can create a three-dimensional or soft origami tiger from a piece of felt:
- finished pattern;
- scissors;
- small buttons - eyes;
- orange felt;
- filler;
- threads
Description of actions:
- Having chosen a template, print it or copy it from the screen onto paper, attaching a sheet. Cut out pieces of the desired size from felt.
- Sew strips along the body, finish the head - attach the eyes (ready-made or from buttons), nose, and also the inside of the ear.
- Connect the ear parts in pairs and fill them with filler.
- Connect the halves of the tail, then the body, place the filler inside. Sew on the head, then the loop on top.
The result will be a small soft toy.
Symbol of 2022 from a Christmas ball
To create a tiger from a Christmas ball you need to prepare:
- an ordinary ball for a Christmas tree. The optimal diameter is 8 cm;
- black, orange and white acrylic paints, a brush and a small sponge;
- artificial berries, cones and pine needles;
- children's sock with the top cut off;
- a small piece of white natural fabric.
Mix white paint with orange and paint the ball with a sponge, leaving the upper part unpainted. First, apply one layer, let it dry, and then paint the ball again.
When the paint has completely dried, we draw the face and stripes in white and black. In order for the paint to adhere well, we fix it with acrylic varnish.
Let's start making the hat: through the hole intended for the thread, we thread a pre-cut piece of twine lace. We pull a sock over it and glue it onto the ball using a glue gun so that we get a hat.
We gather the hat down and secure the top with a pre-threaded lace. We cut through the upper edges of the cap to make something like noodles.
We sew ears from fabric and paint their edges with orange paint. Glue the ears on top of the hat. We decorate the headdress with pine needles, cones and berries.
Symbol of 2022 from a Christmas ball (video):
Brooch "Tiger Cub"
A small symbolic decoration for clothing will be a welcome gift for a friend or child. Materials to sew a tiger:
- felt pieces in 2 colors;
- buttons - eyes, nose;
- black outline;
- pin;
- needle, thread;
- glue gun.
Step-by-step instruction:
- Cut out a muzzle + several strips from pieces of felt in the desired colors.
- Glue/sew on the eyes and nose and pre-prepared strips.
- Draw the contours of the beast's mustache and his face.
Almost ready, all that remains is to turn the product over and attach a pin.
DIY symbol of 2022 tiger made of felt
Felt tiger
Felt tiger No. 1
Felt tiger (hand puppet)
For this craft you will need a sheet of orange felt, a piece of black material and two small pieces of milky and pink shades. We make two separate patterns for the torso and head.
We connect both parts. Sew with black thread. Leave the lower part free.
We attach eyes and a pre-cut nose to the muzzle. We distribute strips of black felt over the body. We decorate the ears and paws with black and white circles, respectively.
Hand puppet “Tiger” made of felt
Patterns
When choosing a topic for a lesson, you need to take into account the age and skills of the children. For kids, a work of 5-7 parts is enough. Schoolchildren can show their imagination; they can only be given the basic details.
DIY Tiger drawing
At first glance, it seems that only a professional artist can draw such a beautiful animal as a tiger. In fact, even someone with a pencil and an eraser can do this. All you need is to find a template on the Internet on which all the details of the tiger will be barely visible.
Next, take a black pencil and begin to carefully draw the tiger along the existing lines. We draw the contours in bold to make the feline representative attractive.
Draw the nose, eyes, mouth
Draw the entire head Draw the front paws
Draw the entire body. Paint over the stripes with black paint.
We paint the finished drawing with paints.
DIY Tiger drawing
Applications in the form of a tiger - crafts for kindergarten
A cute image of a wild cat will serve as a good gift for loved ones. The work is not difficult, but will require careful preparation on the part of adults. It is convenient to use ready-made templates.
There are many application options. But they are all performed according to general instructions:
- parts are cut out from the prepared stencil;
- lay out the blanks on cardboard, determining their best position, and stick them on;
- eyes, mouth, stripes, ears are cut out or drawn.
The finished craft should be placed in a frame. This way you can save it. Another design option is to paste narrow strips of colored paper or felt around the perimeter.
Advent calendar
An Advent calendar is not just a beautiful craft, but also an opportunity to delight your loved ones with little surprises long before the holiday. This is an English tradition - on December 1, children are given a box with windows containing sweet gifts.
Materials:
- cardboard;
- colored paper (wallpaper);
- shiny foamiran;
- scrap paper;
- glitter, baking soda;
- hairspray, glue;
- stencils, templates, decor.
Master Class:
- We mark a strip 6x25.5 cm wide on cardboard, cut it out, and cover it with colored paper or wallpaper. For the calendar you will need 4 parts for the frame, 2 for the roof, 3 for the crossbar, as well as 2 short ones, 4 even shorter ones and 21 parts for the shelves.
- Now let's prepare the basis for the calendar in the form of a house - cut it out of cardboard and paste it on. We glue the side walls to the base, and then fix the shelves at a distance of 5 cm, glue the partition and continue gluing the shelves.
- Finally, we glue the lid and cut out the parts for the chimney, glue and glue it to the lid.
- We cut out the doors from scrap paper and cut it into 6x5 cm pieces.
- Using the blunt side of a stationery knife, we draw along the segments, stepping back 1 cm from each edge, then bend them on each side.
- We glue the doors into the calendar compartments.
- We cut out 3x3 cm squares from shiny foamiran and use a stencil to draw numbers from 1 to 31 using a white corrector. We glue date plates onto the doors.
- We glue together layers of cardboard, red velvet paper and shiny foamiran - this will be the door. We glue it into the calendar, decorate it with a wreath made of an artificial branch and glue a sign with the date.
- Mix baking soda with white glitter. We take a brick stencil, apply it to the side walls of the calendar, apply hairspray on top and sprinkle with glitter soda. The bricks will also need to be secured with varnish.
- We cover the inner upper part with white paint and hide sweets or other small gifts behind the doors, and the largest one can be hidden behind the door.
The upper part of the calendar can be supplemented with fir branches, themed figurines or Christmas tree decorations.
New Year's crafts are always interesting and very exciting, and do not require large expenses. In addition, being creative develops creativity and imagination, allowing you to do something unusual and exclusive. Even from simple scrap materials you can create a real handmade masterpiece.
What should you consider before starting work?
- When applying a pattern to fabric, it is necessary to take into account the direction of the pile and the grain thread.
- It is not necessary to sweep away all the details. To save time, they can be pinned together with needles or pins.
- We sew a hole for stuffing with a hidden seam.
- It is recommended to make a small allowance at the folds so that the fabric does not tighten.
- You can sew parts both from the wrong side and from the front, changing the types of seams.
IMPORTANT! It is not recommended to work with smooth fabrics, such as silk. When using it as the main material, you can get tired. Silk crumbles and slips, so the toys may turn out to be asymmetrical.
Master class No. 4: Candy bowl “TIGER CUB”
We will need:
- striped fur;
- a piece of white fur for the muzzle;
- light fabric for the inside of the candy bowl;
- self-adhesive film;
- cotton wool or padding polyester for stuffing;
- needle, thread;
- scissors.
Instructions:
- Cover a cardboard or metal candy box with fabric and fur. Top view: The bottom of the box can be lined with fur of a different color or fabric. Bottom view:
- Sew the head, paws and tail. The head consists of two ovals or circles of the appropriate size for your box. Each ear is an elongated oval, folded in half. Each foot is two stitched ovals. The tail is a strip folded in half. Stuff the head with cotton wool or padding polyester, but it is better to leave the paws and tail without stuffing. Decorate the tiger's face: sew a figure eight out of white fur, cut out and attach the eyes, nose, and whiskers using self-adhesive film.
- Sew the head, paws and tail to the body.
The candy bowl is ready!