Due to its amazing qualities, foamiran serves as an excellent material for making jewelry. It makes very delicate hairpins, crabs, elastic bands with flowers and headbands. A DIY headband decoration with flowers made from foamiran can decorate the head of a girl or girl.
How to make a headband from foamiran?
DIY foamiran headbands: master class with step-by-step photos
To make a headband you need:
- white and green foamiran
- metal base for bezel
- wire thick (0.7-1 mm) and thin (0.4 mm)
- white floral ribbon
- dry pastel
- wet wipes
- scissors
- glue gun
- iron
- toothpick
- decorations (beads, ladybug)
Craft materials
Flower buds made of foamiran
We begin assembling the buds. For each bud, take a piece of thick wire 7-10 cm long, bend one end down.
Heat up the glue gun. We take one petal and apply it with its lower edge to the bent end of the wire. We drip glue there. Wrap the petal around the wire. This will be the middle of the bud.
Wrap the petal around the wire
Glue each petal to the bud one by one. We make a slight overlap on the previous petal. Apply glue only to the bottom edge of the petal.
Glue the petals overlapping
Let me remind you that it will take 15 petals for a large bud, and 7 petals for a small one.
This is what the finished large bud will look like.
Big bud
And this is what a small bud will look like.
Little bud
This is how we make all the buds.
Small and large buds
How to make a crown for a Snowflake from beads and seed beads - step-by-step tutorial with photos
Necessary tools and materials: pliers, beads and seed beads of different colors and sizes, metal wire with a diameter of 0.3-0.4 mm, 1 mm and 1.5 mm.
Step-by-step instruction:
- Make a base for the crown using 1.5 mm thick wire. The diameter of the decoration depends on the volume of the child’s head.
- Cut off part of the wire and close the circle, turning it to the edges.
- In order for the structure to be reliable, it is necessary to make two bases and connect them by wrapping them around the perimeter with wire.
- Prepare the frame for the peak of the crown.
- You need to take a wire 1mm thick and cut it into pieces of the required length.
The height of the peaks must be chosen independently. Peaks 10 cm high, which should be located on both sides of the teeth of the crown, look great on the crown.
- Make a margin of 3 cm for attaching to the base. To do this, you can use pieces of wire 23 cm long.
- If the child is small, it is enough to make only 5 peaks on the crown. For older children, the peaks may be 7, 8, 9.
- Wire 1 mm thick bends well, so it is recommended to use it to create peaks in the desired shape.
- The peaks are attached to the base of the crown quite simply - the tips need to be twisted near the base.
- Take the largest and most beautiful beads with which you need to decorate the crown. Use small ones to decorate other parts of the crown.
- To secure the beads to the peak, the thinnest wire is used; 1 bead is strung on it.
- Then the wire is passed directly through the bead. This will ensure that each bead piece sits on top of another piece, being secured to the top of the prong by wrapping the wire around it.
- Different beads of color and size are put on a thin wire. It is recommended to alternate all the details in random order to create a specific pattern or beautiful decoration. For decoration, pieces of tulle or decorative flowers are suitable.
White flower decorations
We make additional decoration. To do this, we take thin wire, beads and pieces of white foamiran. We cut out the shape of flowers from pieces of foamiran.
Wire, bead and white foamiran
We string a bead onto the wire to the middle. Bend the wire in half and twist it tightly.
Twisting the wire with the bead
We put a flower made of foamiran on a wire under a bead. Glue it to the bead using a glue gun.
Glue the flower to the bead
Let's make some flowers.
Making some flowers
Take the floral tape and carefully wrap the wire around the stem.
Wrap the leg with wire
We wrap each flower.
We wrap all the flowers
How to make a Snowflake crown from paper using the origami technique
Necessary tools and materials: two sheets of A4 paper.
Step-by-step instruction:
- Fold the top corners down into an even triangle.
- Bend the remaining edge of the formed triangle again, smooth the fold and cut along it with a knife or scissors.
- Make a triangle to make a square.
- Fold the square in half and cut.
- Fold each of the two halves in half and cut.
Similar actions need to be done with the second A4 sheet. There will be 8 squares in total, each of which needs to be worked on separately.
- Fold the square into a triangle and iron the fold, and then straighten it.
- On the strip that has already appeared, bend one edge, and then the second.
- Fold the bottom tip.
- Fold down again, and then again.
Do this with each of the eight squares to create an origami crown.
- Bend the edges and insert one piece into the other. Do this with all the preparations.
- Close the long chain into a ring.
If desired, you can glue the parts at the joints so that the crown does not fall apart.
Base-rim
We take the base-rim, it can be found in craft stores.
Base-rim
We wrap it with floral tape in 1-2 layers along the entire length.
Wrapping the headband
We attach them with hot glue, and then with floral tape, pressing firmly.
We fix the flowers on the rim
We attach the buds and decorations to the headband, forming a composition. The foamiran headband master class is coming to an end.
Foamiran headband master class
It can be decorated with a ladybug or any other materials (berries, butterflies, etc.).
Decorating the headband
The headband with roses from foamiran is ready!
DIY foamiran headbands will complement a magical fairy or princess outfit for a girl. Girls may also need a similar decoration, for example, for a flower photo shoot. They can complement a stage look or decorate the bride’s head. Headband with roses made of foamiran
DIY Snowflake Crown made of wire and tinsel step by step
Necessary tools and materials: wire from 1 to 1.5 meters long, you should choose aluminum wire, since it weighs little and bends well; tinsel of silver or other color.
Step-by-step instruction:
- The base is made, for which wire is used.
- Wrap the workpiece with tinsel.
This must be done from the very top, leaving one end of the tinsel at the beginning of the work. Then the spire, the first sidewall, the back part, and the second sidewall are wrapped. At the very end you need to wrap the front part.
Volumetric balls, stars and Christmas trees
Bulk Christmas tree decorations are made simply and quickly. So you can make a lot of the same type of decorations at once and decorate not only the New Year’s beauty with them, but also hang them, for example, under the ceiling, like garlands, or in a window opening.
To speed up the process even more, it is worth cutting out one template that can be applied to the foamiran and traced. Let us remind you that you cannot draw on foamiran with a pencil or pen; it will be impossible to get rid of these marks. The outline can be applied with a toothpick or an empty pen refill, then cut out with sharp scissors.
Master class from MARLENA-Hand Made.
You can trace any round object, such as a glass or cup. In this master class, the size of the ball is 6 cm. This is the average size of a Christmas tree toy. You can focus on the size of your Christmas tree: for a large tree and toys it is worth making larger ones. For a ball, the diameter is 8-12 cm.
- 1. So, for one ball on the Christmas tree you will need 10 parts of the same size. You can combine several colors, two, or three, to make your New Year's craft more interesting and colorful.
2. All round foamiran blanks are bent in half and glued together in pairs. Please note that you only need to glue the halves, alternating parts of different colors.
- 3. The result should be a closed ball, the edges of which resemble the pages of an open book.
- 4. For hanging, cut out a circle with a diameter of 2 cm.
- 5. A thick thread or rope, a piece of ribbon of a suitable color, is threaded into its center, the end is tied with a large knot, it can be glued for reliability.
- 6. A small circle with a loop is carefully glued to the center of the ball (see photo).
- 7. You can add tinsel or a fluffy chenille “brush” of silver or gold color along the edge.
- 8. Volumetric decorations in the form of a Christmas tree and a star from foamiran are made according to the same principle.
- 9. The hanging ribbon can be additionally decorated with a small bell or bead at the bottom. To do this, before gluing the last parts, the rope must be passed through the center of the toy and fixed with glue for strength.
What are they?
Dolls made from Thomas are considered the pinnacle of craftsmanship. They are much more budget-friendly than traditional versions made of porcelain, wood and acrylic. That is why the material has become widespread in theater circles. But even outside the theater, such dolls have a right to life - they become children's toys or memorable souvenirs. The childhood industry widely uses foamiran to create educational puzzles, soft construction sets, New Year's toys and many other products.
A special place is occupied by bath toys, due to its high porosity, foamiran seems to stick to the tile. Plastic figures made from it delight children while bathing and make water procedures more exciting. And to prevent children from tearing and eating such products, they are made from thickened sheets of fom.
Working with foamiran is included in the practice of developing a child’s fine motor skills.
When working with children, it is not at all necessary to limit yourself to cutting out beautiful shapes. You can come up with stylish and practical crafts, these can be various mosaics, refrigerator magnets, as well as frames for children's drawings. Foamiran is in wide demand for making New Year's toys. Christmas trees, garlands, Christmas balls and even pine cones are made from it. The material is indispensable for making realistic masks for the children's New Year's carnival.
Various toys for the Christmas tree
These bumps will be much more elegant and voluminous if they are made from foamiran
You can also make a variety of balls with appliques - click on the pictures to enlarge:
More templates you may need. I would like to remind you that our Santa Claus does not have a clown’s hat, but a boyar’s hat without a balabon and his beard is much longer.
Christmas trees will also look harmonious from foamiran. In principle, everything that is made from felt can be made from foamiran, even better, because foamiran has two advantages - it holds the shape that is given to it when heated or twisted, and prints can be made on it. This means that the Christmas trees can be fluffier and the toys more natural; remember how in the article about crafts for school, there was a cookie - a heart made of foamiran. It's very easy to make and looks edible.
New Year card
Another simple and interesting craft. It can be used as an original gift! Glue, foamiran and thick paper are all you need for this. And a little more free time and imagination for decorating!
The algorithm of actions is simple:
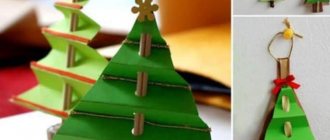
- You need to cut out a Christmas tree, which will consist of four parts. The first is the base with fringe (slots on the foamiran). It should be the biggest. All the higher elements are narrower.
- To achieve a voluminous effect, you can use an iron or twist the strips with your hands.
- We glue the blanks one by one (from bottom to top) onto the postcard. You can make a yellow foamiran star as a decoration.
Offer to make such a craft for your own child - he will succeed, he will be absolutely delighted!
