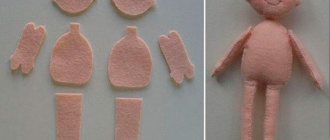
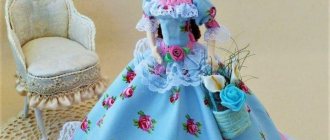
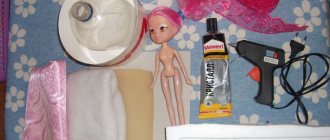
If you are interested in how to make a paper doll, I present to you an idea with step-by-step photos and a detailed explanation. This paper doll is not at all difficult to make, but children may need adult help at some points. The doll turns out wonderful, in a fluffy, voluminous dress, a real princess. The main thing in the craft is the skirt, and the top of the doll can be at your discretion and flight of fancy. My doll turned out to be big-eyed and funny, but if you give her a different face, the princess can be sweet, sad, cheerful and perky, serious and stately.
Why are paper dolls so popular?
Despite the fact that our children have everything they need for development - construction sets, puzzles, interactive toys and technical innovations - dolls with clothes cut out of paper remain at the peak of popularity.
- Girls can sit for hours coming up with new outfits and fashionable accessories for paper dolls. It's so fun and interesting! And most importantly, it gives room for creativity, because the costs are minimal - a sheet of white paper and pencils.
- Different models of clothing can be borrowed from other dolls, creating the necessary toy wardrobe.
- Real Bratz or Barbie, Winx or Monster High dolls have a very meager set of clothes, since not every girl knows how to sew, and store-bought outfits are quite expensive. Paper models can have hundreds of bright and original outfits that a girl can come up with on her own or copy from a fashion magazine.
Paper dolls can be printed on regular white paper and then glued to cardboard, or you can immediately use thick paper. You just need to print out the dolls and cut them out - and the new game “Dress the Doll!” ready! And how many different outfits you can come up with for it!
Making a Japanese paper doll
Before making this type of doll, let us note that they are very popular in Japan. In addition, a separate holiday called Hina is dedicated to them, which is held every year in early March. This doll is called “Chiogami”. It is too early for us to consider a complex version of its manufacture, but it is worth making in a simplified form.
Prepare:
- three-layer napkins (use with a colorful pattern);
- scissors;
- cardboard (thin one will be required)
- multi-colored paper;
- glue stick.
Now we’ll learn how to make a Japanese doll with your own hands from paper:
- Draw two circles on a white sheet of paper. Their diameter should be no more than three centimeters. If it makes it easier for you, use a compass. On the same sheet we draw a strip 10 centimeters long and 1 centimeter wide. You will also need a rectangle 8x15 centimeters. We cut out all the drawn blanks. Japanese doll beginning of production
- We fold the resulting paper strip and glue it onto one circle. We secure the workpiece with the second circle from above. We've got a head.
- Place the resulting paper blank on a napkin. We fold the part that protrudes and at the same time place white paper. You should get a collar. Glue the neck and head.
- The doll needs clothes, so without departing from tradition, we will make a kimono for it. “Swaddling” the doll. First, fold the napkin on the left and also symmetrically on the right. To give the doll volume, unfold the kimono on the right. Glue a wide strip of napkin in the middle. This will be the obi belt.
- Now let's start making the sleeves. Take a napkin measuring 9x15 centimeters and fold it into 3 layers. We bend the resulting blank in the middle and glue it to the back of the kimono.
- The final stage of the craft will be making a hairstyle. Cut out a black circle, its diameter should be slightly larger than the head. Cut the resulting figure into two parts. We glue one to the back of the head, the other to the place of the bangs. The doll is ready.
From cutting paper
Paper dolls are a game from our childhood. Of course, it’s no wonder that every modern girl has taken over from her mother an interest in paper beauties.
In order for the clothes to stay on the doll and not fall, special “folds” need to be made on the shoulders, as well as on the waist and, if possible, on the hips. For panties and shorts, folds are made at the hips and legs.
These cute baby dolls are just like children! You can play with them, draw them a beautiful bed, clothes and furry pets. But there is one thing: such paper toys are short-lived, even if glued to thick cardboard. They cannot be bathed, sat or fed (like real baby dolls, for example). But, nevertheless, interest in such toys does not fade. Patterns of paper dolls for cutting out “Kids”:
Tataway doll with clothes
And this is a paper bag for a Tataway doll - it can also be printed, cut and glued
4 more cute baby dolls to cut out with clothes
Dolls from the "Toddlers" set
You can download the “Babies” archive here (there are a total of 26 dolls with clothes in the set).
Glasses for dolls made of cardboard
For Barbie, Monster High and baby dolls, you can make bright and unusual accessories - cardboard glasses with colored lenses.
Shapes of frames, lenses and temples of glasses made of cardboard.
Prepare:
- cardboard
- transparent color film
- pencil
- scissors
- glue
- scotch
- felt-tip pens, markers, glitter pens, nail polishes, etc.
- ruler and measuring tape
Cardboard glasses.
- Face shapes and head sizes of dolls can be completely different. To make cardboard glasses fit, you better measure the distance between the eyes of a particular doll, the size of the eyes themselves, the distance from the eyebrows to the lower eyelid, etc.
- Look at the possible shapes of lenses, frames, and temples of glasses, choose the one that you like and suits the style of the doll.
- Draw a sheet of cardboard according to your dimensions, draw glasses and arms.
- Carefully cut out the glasses. If the cardboard is thin, duplicate the parts and glue them together.
- From transparent colored film, cut out parts to fit the size of the glasses lenses.
- Glue the “lenses” to the glasses.
- Color and decorate the glasses as you wish.
- Fold down the temples of your glasses.
In national costumes
Thematic selection of paper dolls with national clothes. The advantage of such a selection is that the girl gets to know different folk costumes: Mongolian, Northern peoples, Mexican, Russian, etc.
These costume cutting stencils reflect the national traditions of different countries, which can be useful for the little budding designer. But such baby dolls do not have a model appearance, like Barbie or Winx. But we hope that your girls will like them too:
It is worth noting that these dolls were sent to us by our reader, Irina S. The archive contains 7 sheets (+ 2 additional costumes), you can download it here
The next set of dolls in national costumes for cutting
You can download the full 1.29 MB archive here, the archive contains 12 sheets, we only posted half).
Puppets for finger theater
Finger puppet theater is great entertainment for children aged 2 years and older. You can make your own dolls-characters of his favorite fairy tale and dramatize it. And if the baby is already 3 years old or older, he will be happy to take part in creating the dolls.
IMPORTANT: The easiest option is to download finger puppet templates, cut them out and glue them to cardboard for strength.
Cardboard puppets for finger theater: template.
Cardboard puppets for finger theater: boy and girl. Cardboard puppets for finger theater: three little pigs and a wolf.
Cardboard puppets for finger theater: animals.
Cardboard puppets for finger theater: characters from “Kolobok”. Cardboard puppets for finger theater: princesses. If you want to make finger puppets from cardboard yourself, prepare:
- cardboard
- simple pencil
- eraser
- ruler
- stationery and manicure scissors
- materials and tools for painting and decorating dolls
Homemade cardboard puppet for finger theater.
- Draw the characters of your future production. Their size should be such that you can make 2-4 holes for your or your child’s fingers.
- Color and decorate the dolls, then cut them out.
- If the cardboard is thin, make the toy in two layers.
Paper Barbie with clothes
Well, what girl doesn’t dream of a Barbie doll or something similar? By printing a doll on a sheet of paper with clothes, you can conduct very interesting experiments by combining various wardrobe items.
The doll’s slender figure will help girls create bright images, because it’s very easy:
- Just trace the contour of the doll's figure, give it the desired shape (skirts, dresses and trousers), and then paint the clothes using your imagination - and the new thing for the doll is ready!
- Glue a box from colored cardboard, decorate it or paint it and use it as a “closet” for doll clothes;
- If fragile paper clothes suddenly get damaged (torn or wrinkled), then they can be easily replaced with new ones - you just need to print out a new template for the paper doll and clothes - and that’s it!
You can download the entire archive with clothes for the doll here (2.47 MB). There are a total of 8 cutting templates in the archive.
The Barbie doll has its own history, which begins in the distant 50s. The first doll was released in 1959 in the USA in the state of Wisconsin, since then it has gained immense popularity, and, of course. it was copied on paper by those who could not buy the real thing.
In addition to paper Barbie dolls, the following stencils for cutting are quite popular - Bill and Candy - paper dolls from the Second World War, with clothes, taken from foreign magazines:
Guitar for dolls made of cardboard
Having cardboard on hand, you can make a three-dimensional guitar from cardboard, which will suit not only paper dolls, but also baby dolls, dolls like Barbie or Monster High. Prepare:
- guitar cutting template
- white office paper or landscape sheets
- white cardboard
- pencil
- ruler
- marker
- scissors
- glue
- floss or silver threads
- beads
Template for a guitar made of cardboard.
- Download or draw a guitar template. You will need to break it down into parts.
- Transfer the guitar soundboard onto the cardboard. You need to do this four times: twice without the rosette (the round shaped hole on the guitar), twice with the rosette.
- The guitar neck requires two parts.
- Draw three or four parallel lines on the cardboard. The distance between them is about 0.7 cm. Draw the teeth between the two outermost ones. This detail is needed to make the deck voluminous.
- Carefully cut out the parts of the guitar. Start assembling the musical instrument as shown in the picture.
- Glue the part with the teeth between the two parts of the deck - with and without a rosette.
- Glue two more deck parts on top.
- Glue the guitar neck together and attach it to the soundboard.
- Paint the guitar with paint or nail polish in the colors you want.
- When the paint dries, draw horizontal stripes on the fretboard - frets.
- Using thread, beads and glue, make strings for the guitar.
- Decorate your guitar with stickers, patterns, glitter at your discretion.
Guitar made of cardboard: materials, tools and blanks. Assembling a guitar from cardboard.
Cardboard guitar decor. Cardboard guitars for dolls.
Paper Bratz with clothes
The popularity of the cartoon of the same name led to the fact that the main characters began to be copied, including in the form of paper copies. Fashion dolls made from cutting paper can easily compete with the same Barbie or Winx. Cute, beautiful, with big expressive eyes, the Brothers have already managed to find their young fans.
A special feature of Bratz dolls is the presence of fashionable, modern and stylish outfits. The finished templates just need to be printed, cut out and glued onto thick cardboard so that the dolls do not tear.
Quick volume version of the doll
We have already considered several options for dolls. Now we’ll learn how to make a three-dimensional doll with your own hands from paper. This is the simplest craft. What is required of you:
- We roll thick colored paper into a cone, glue the edges together, cut off all excess;
- using a simple pencil, draw the outline of the future craft;
- Let's use paints or markers and decorate our doll;
- We glue the finished top of the doll to the cone so that the transition is smooth; you can smooth the cutout with napkins.
Using this principle, you can make not only an ordinary doll, but also a real cartoon princess. Of course, this will require printing the top, finished part of the doll.
Other interesting patterns for cutting
Each age will have its own doll that will be interesting. For very young children, these are baby dolls and baby dolls; for older people, it is better to find teenage dolls or the same Bratz or Winx. The peculiarity of such dolls is that they are quite cheap for parents, so if a girl doesn’t like the doll or is torn, replacing it will not be difficult.
October doll with clothes to cut out
Masha doll templates
Paper doll Alenka with clothes
It can be printed.
Bobbt Shapto and Little Miss Muffet paper dolls
More very interesting dolls with outfits from a foreign magazine
Julie paper doll with clothes from a foreign magazine
Three dolls with clothes taken from foreign magazines, on one sheet:
Paper dolls from the Soviet past
“Getting” a bright magazine in Soviet times was a great rarity and luck. Well, if it also printed dolls with clothes for cutting out, the girls were simply happy. Toy dolls were cut out, and new outfits were invented for them.
The first Soviet paper doll was released in 1972 and her name, of course, was Mashenka. The game was released in the city of Perm and was called “Dress Mashenka”.
Well, unfortunately, we don’t have Mashenka, but we will provide you with other paper beauties from that time. By the way, all their outfits are in the style of the 70s and 80s:
Soviet paper dolls were not as colorful as they are now. And the quality of the paper on which they were printed left much to be desired.
Paper animal dolls
You can cut out not only girl dolls from paper (although such toys are more common), but also all kinds of animals - cats, bears, dogs. Such animals in the game can talk, make friends, get to know each other, and dress up. In general, they can be played with in the same way as paper dolls.
You can download an additional archive with animal dolls here (size 5.5 MB, 18 sheets)
Movable twitch doll
It is easy to make a movable doll with hinges of any configuration from cardboard. It's so convenient to play. It is also suitable for home puppet theater.
Movable cardboard dolls.
Prepare:
- templates for dolls (you can take them from this article, download them on the Internet or draw them yourself)
- cardboard
- hole punch or awl
- rivets (smallest)
- glue
- scissors
- materials and tools for drawing and coloring
- materials and tools for sewing, if you plan to make clothes for the doll from their fabrics
Materials and tools for making a movable doll from cardboard.
- Print out a template for your doll. If you draw it, remember that every detail must be finished. Typically, movable pupae articulate at the neck, shoulders, elbows, hips, knees, and ankles. You may have more or less joints.
- Transfer the blank onto cardboard, if necessary, paint and decorate the doll’s clothes.
- Carefully cut out the doll.
- Connect the joints with rivets. Make holes with an awl. You can also use small screws, like those found in eyeglass frames.
- If you are making clothes for a doll from fabric, proceed to this stage.
- Assemble the doll if you like, make accessories for it.
Movable cardboard doll: step 1. Movable cardboard doll: step 2. Movable cardboard doll: step 3. Movable cardboard doll: step 4. Movable cardboard doll.
You can get these cute dolls:
A family of jointed cardboard dolls.
Cardboard dolls on joints.
You can choose one of these templates.
Template for a jointed cardboard doll. Template for a movable doll made of cardboard. Mobile fairy made of cardboard: template.
Movable girl doll: template. Articulated cardboard clown: template.
Pucker dog made of cardboard: template. Twitchy cat made of cardboard: template.
IMPORTANT: If you want to turn your cardboard jointed doll into a jerk, attach the arm and leg pieces from the back. Make holes in each of them, as shown in the figure, and thread a connecting thread into these holes. Hang a bead on the end of the connecting thread. You can also attach a stick holder to the jerker.
Details of a twitch doll.
Scheme of fastening parts and connecting threads.
Cardboard twitchers. You can attach a stick holder to the twitch.
Black and white dolls for coloring yourself
Of course, what could be better than finding and printing a ready-made bright doll with clothes? But, it’s even more interesting to paint her and her outfits the way you want. The same dress can be in a variety of colors; the skirt can be made white. and red, turn trousers into jeans or classic ones. In general, black and white options are just right for beginner little designers.
Colored product
If you have little time and no desire to do a labor-intensive task, then you can make a red and white accordion doll. For it you will need a sheet of red and white double-sided paper, a red felt-tip pen, an eraser, glue, scissors, a small piece of red and white tape (preferably striped), and a simple black pen. Scheme of work:
- Fold a red sheet of paper like an accordion: fold a strip 1 cm wide from one edge of the paper, turn the sheet over and fold it again by a centimeter. Do the same along the entire length of the sheet.
- Bend the resulting accordion in the middle.
- Take a white sheet of paper and cut it in half. Take one piece and draw two vertical lines on it along the edges with a red marker. Place small dots in a clean space.
- Fold the same half like an accordion and also bend it in half.
- Lubricate the inner parts of the red sheet, folded like an accordion, with glue and fasten them together.
- Put a white one on the red accordion and tie them on top with an elastic band.
- From a white sheet, cut out the doll's head - a circle.
- Make a headdress: glue a strip of red paper onto the toy’s forehead, bend the free edges back, trim off the excess.
- Draw facial features on the circle.
- Cover the head from the wrong side with glue and glue it to the top of the accordion.
- Make a bow from the ribbon and decorate the doll with it.
- The toy is ready.
Creating something with your own hands is a very interesting activity that requires a lot of perseverance. Together with your child, you can make a paper doll with your own hands, which will allow you to have a wonderful and useful time.
Items for paper dolls
Well, what is a paper doll without its house or castle? Rooms, interior items, furniture made of paper. They are the ones who create the necessary atmosphere. It is better to print furniture for a doll in three-dimensional form, that is, which needs to be “assembled”, glued together and get a miniature copy of a real crib, sofa or house.
Doll made of cardboard and fabric
Cardboard dolls can be “dressed” in dresses and suits made of fabric. Take one that doesn't fray. Then all you have to do is cut out the clothing parts and simply glue them to the doll's body. You can also make beautiful dolls in kimonos, in the Japanese style, from cardboard and fabric. Take:
- scraps of fabric
- cardboard
- scissors
- pencil
- ruler
- compass
- glue
Doll made of cardboard and fabric: blanks. Doll made of cardboard and fabric: step 1. Doll made of cardboard and fabric: step 2.
Doll made of cardboard and fabric: step 3. Doll made of cardboard and fabric: step 4. Dolls made of cardboard and fabric.
- Draw on cardboard, and then cut out two circles with the same diameter, two identical strips and a rectangle.
- Assemble the doll: glue two strips and two circles, glue them to the rectangle.
- Use colored or painted white cardboard to create a hairstyle for the doll.
- Place the workpiece on a piece of fabric, wrap it as shown in the pictures below.
- Use another piece of fabric to make kimono sleeves.
Disney princesses
If your child prefers to play with Disney princesses rather than ordinary girls, you can make paper dolls based on them. Just redraw or print the pictures below. New clothes for them can be drawn and cut out in the same way as for everyone else, the main thing here is imagination!
The pictures above depict princesses from famous cartoons. Anna from Frozen, Charlotte from The Princess and the Frog and Ariel from The Little Mermaid. All the outfits are exactly the same as what these girls wore in the original cartoons, so the girl who plays with the cut-out dolls will be able to repeat all her favorite scenes from the cartoons.
In these pictures you can see heroines from older Disney cartoons: Snow White, Wendy from the story of Peter Pan, Alice from Wonderland and Aurora - Sleeping Beauty. In this selection, the girls have only one original dress; the rest were given to them by the artist’s imagination. So future doll owners will not be afraid to experiment and create their own designer dresses for paper dolls.
But Elsa from “Frozen” and the well-known Cinderella. Their outfits are in the same color scheme, so if you print both pictures, you can make the princesses swap outfits with each other.
What paper is suitable for making a skirt?
Not every paper is suitable for the job. Many craftswomen prefer to work only with newspapers. The paper must be strong so that it is convenient to model the product from it. Colored paper works well, since the product will not have to be painted in the future.
How can you fasten a paper skirt?
A variety of tools may come in handy while working. The parts are well fastened together using:
- glue gun or regular glue;
- stapler;
- tape;
- a stronger connection is obtained using a sewing machine and strong threads.
Also prepare a simple pencil, scissors, measuring tape and various sewing supplies in advance. You should think in advance about what materials the decorative decorations will be made from.
Materials for work
To conduct master classes on making decorative dresses for dolls, you will need to prepare the following materials:
- Corrugated paper.
- Plain paper.
- Scissors.
- Glue.
- Several sheets of thick cardboard.
- Paper napkins.
- Toilet paper.
- Templates for the outlines of the dress.
The master classes presented in the following are intended for creating only doll dresses, which can be used to form a doll’s wardrobe, school crafts, or to create sketches of clothing models.
