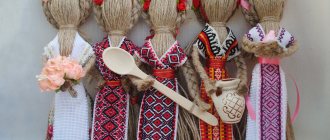
Dolls vary, as do their prices. Naturally, the more beautiful the doll, the more expensive it will be, and if it comes to handmade work, prices immediately skyrocket. But in order not to spend extra money on purchasing such products, it is better to make dolls at home yourself. In our article you will find various ways to quickly sew beautiful dolls.
Felt doll
To sew a felt doll, you need to print the template provided below. Depending on the desired size of the doll you want to obtain, you will need to print the appropriate template size.
Each part on the template is signed and marked with the required quantity. We transfer the pattern to the fabric and leave 2-5 mm for seam allowances. Carefully cut out the parts from felt and stitch them together. Holes must be left on each part in order to turn out the product and its filling with filler.
We turn all the parts inside out, fill them with filling and sew them up. We adjust the seams on the sole, which need to be combined with the seams on the shin. We carefully stitch everything on a sewing machine.
To make the head you will need a round foam ball, which needs to be wrapped in padding polyester. Next, we put it into our body and sew up the hole on top. To keep the body and head in place, you need to insert a toothpick wrapped in padding polyester into the body and head, as indicated in the picture. To keep the filler on the toothpick, you need to coat it with glue.
Next, we sew the legs and arms to our finished body. We sew the legs and arms through small buttons to make it as neat as possible. Next, we make a wig from threads or rain, sew clothes for the doll and draw her face.
Advantages and disadvantages
The main features of the material include the following:
- can take any form;
- easy to process;
- individual elements made of polystyrene foam are connected in several ways - nails, glue, putty;
- has a certain strength and at the same time is very light;
- not exposed to moisture;
- the product can be placed outdoors;
- no need to use expensive materials or special tools during processing;
- does not break during transportation;
- beautifully painted;
- Patterns can be easily applied to the material.
You also need to know about the negative properties of the substance. This:
- During work, a lot of dust remains, which naturally requires thorough wet cleaning;
- It is necessary to work extremely carefully due to the fragility of the material.
Taking into account both positive and negative properties will help craftsmen in their work on making crafts from foam plastic.
Doll on a frame
You'll need:
- Steel wire;
- Pliers;
- Scissors;
- Plasticine;
- Newspapers;
- PVA glue;
- Sanding paper;
- Super glue;
- Toilet paper;
- Filler;
- Threads;
- Thin and dense fabric;
- Needle;
- Acrylic paints;
- Thin brush;
- Clear nail polish;
- Fabric for dress;
- Satin ribbon;
- Velvet cardboard;
- Lace;
- False eyelashes;
- Simple pencil;
- Stacks;
- Toothpicks.
Manufacturing process:
First you need to make a wire frame. To do this, determine for yourself the optimal size of the doll and begin twisting the wire frame. On the wire itself you need to mark the places of the elbows and knees.
Next, we sculpt the head from ordinary plasticine. The head needs to be covered with pieces of newspaper, which are soaked in PVA glue. Each layer must have time to dry before applying the next. Using the same technique we glue the doll’s legs.
When the head is dry, you need to cut it in half and take out the plasticine, and glue the halves back together. Take a pumice stone and gently sand the doll's legs and head until they are smooth.
Next, mix 1/1 toilet paper with glue and add a little water. We use glue to form the face of our doll and glue it in place on the head. When everything is dry, we sand again.
Next, we wrap the entire frame with filler, as indicated in the figure, and secure it with ordinary threads. Make 5 small pieces of wire - these will be your fingers and palm. They need to be covered with light fabric. Then we screw the base to the arm, and make the second arm in the same way.
We paint the head with acrylic paint, draw the face, and cover the body itself with thin fabric. Next, we sew a dress and put it on the doll. We color the doll's legs and draw stockings. We cover the entire face with colorless varnish, and put a fluffy satin ribbon on the head, like hair. The tape must be glued using superglue.
Then we make shoes from velvet cardboard and put them on the doll. The final touch is gluing the eyelashes.
Doll made of threads
You'll need:
- Thick knitting threads in two colors of your choice;
- Multi-colored pieces of felt;
- Buttons and beads;
- Scissors;
- Cardboard;
- Glue.
Manufacturing process:
First you need to wind threads of the main color on a piece of cardboard, then remove these threads and tie the ends of the thread together. The skein of thread should be tied in such a way that the result is a visual neck and head.
Next, we make arms and legs in a similar way. As a result, we form the body of the doll and secure the waist. The face itself is made of felt, which needs to be glued to the base of the head threads. We make hair from threads, only of a different color, and on a piece of felt we draw the doll’s eyes, nose and mouth. You can buy doll eyes at the store and glue them on.
Next, you can sew any outfit, shoes for the doll and complement the look with accessories.
Progress
The selected design is applied to tracing paper and then onto a piece of foam plastic. Then:
- Carefully cut out the image applied to the material with a knife.
- The figurine is painted with paints.
- To make it more durable and protect it from damage, the souvenir is coated with varnish.
- The figurine is glued to a thick piece of cardboard.
- A frame is drawn up.
- Along the perimeter of the three-dimensional image we place flowers, beads, and snowflakes.
All that remains is to take the completed panel to a kindergarten or school.
Ballerinas made from napkins
You will need wire and napkins of different colors. Also water, PVA glue and scissors. Take the wire and bend it into the shape of a man. Form a small loop for the head, long arms and even longer legs.
Next, mix PVA glue and water 1:1 and dip pieces of napkin in the solution and cover the entire frame of the doll. Next, we fold the napkin in several layers, as indicated in the picture, and make a dress, with a hole in the center for the legs and body of the doll. We make the dress itself in layers from formed napkins.
We put the dress on the ballerina and shape the waist using thread in the color of the napkin. Afterwards, the dress can be painted in any color and decorated with any decor.
Doll magnet made of foamiran
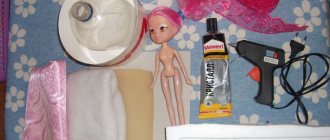
You'll need:
- Glue gun;
- Foamiran of different colors;
- Scissors;
- Iron;
- Polystyrene foam semicircle;
- Magnet;
- Colored pens or markers.
Manufacturing process:
You need to cut out 10*10 squares from flesh-colored foamiran and apply it to the heated sole of the iron for a couple of seconds. Next, you need to wrap a foam semicircle in it, glue the edges, and cut off the excess with scissors.
Next, cut out a circle from foamiran and close our form to hide the foam. We glue a magnet on it. Then we cut out the hair from dark foamiran, as shown in the picture. We fix them with rubber bands and glue them to the doll’s head. You can make bangs from the same foamiran.
Next, cut out the hands and fingers and paint the nails. We glue the handles to the head and draw a face using colored pens or markers.
Features of the material
Foamiran is environmentally friendly, easy to cut, can be washed and painted with acrylic. It is often used to create children's products: soft puzzles, books, toys and rugs. Blanks made of plastic suede are fastened to each other using a regular glue gun. The products do not absorb water, quickly restore their shape when crushed and soften when exposed to heat. The material can be used to create interior dolls.

