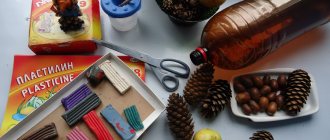
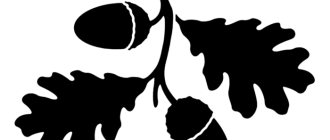
Autumn generously provides natural materials for creativity. Acorn crafts can decorate your home and make great gifts.
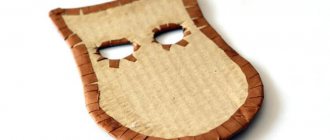
Cute faces
To make this craft you will need:
- acorns with and without caps;
- thin markers;
- acrylic paints;
- thin twine or strong thread.
Manufacturing technique:
- The collected oak fruits must be cleaned of dirt, thoroughly washed and dried.
- Carefully remove the cap.
- Make 2 holes in it, pull a thread through them, carefully tie it and hide the knot under the hat.
- Apply acrylic paint of the desired color in 3 layers to each acorn and let it dry.
- Draw eyes and mouth with a thin marker, and cheeks with pink acrylic paint.
- Carefully glue the cap on.
- The craft can not be painted, but coated with colorless varnish.
There are many options for using funny faces. You can paint all the acorns yellow and make funny smiley faces, collect them together and attach them to your backpack. If you weave a long braid from twine or thread, then you can wear an autumn decoration made of acorns around your neck.
New Year's costume for boys
At the matinee, your son wanted to be not a ninja, not a hero, but a snake? How to fulfill such a desire? New Year's costumes for boys will not be difficult to assemble for mothers who are good at using a sewing machine. It will be based on a black jumpsuit or pants and a turtleneck. The head must be hidden under a black mask. For this purpose, you can use an old black hat, in which you should cut a hole for the eyes. And then you need to complement the snake costume with the appropriate paraphernalia. It is necessary to sew the hood and belly pad.
Let's start with the overlay, because it will be the base. We make it from dense black material; chevron fabric or drape is well suited for this purpose. We cut out an oval from it, the lower part of which must be given a pointed shape. We sew pieces of yellow fabric into a black mesh onto the top of the appliqué. They will create a pattern on the snake's belly. Now let's start making the hood. To make your task easier, you can not sew it, but cut it from an unnecessary black coat or raincoat. We decorate the inside of the hood with yellow fabric. You can copy the drawing from our sample. We cut out eyes and fangs from felt. We attach them to the edge of the hood. We sew the stylized head of the snake to the overlay. All that remains is to dress my son in the custom-made suit and belt the overlay with a black belt.
Beautiful dolls
To make baby dolls, you need to prepare:
- acorns with caps and short branches on which they grew (fruits should be selected as small, round and light-colored as possible);
- acorns are larger and have an elongated shape;
- black thin marker;
- matches;
- acrylic paints;
- scraps of colored material.
Manufacturing technique:
- Gently rinse the acorns and dry.
- Sort into small ones with branches on caps, which will become the head of the baby doll, and elongated ones without caps - the future body.
- Color each long fruit using 2 shades of the same color: the bottom is light green, the rest of the body is bright green, or vice versa. Color everything in one color or make the dolls multi-colored.
- After the paint has dried, carefully connect the body of the doll and the head tightly using matches.
- Draw eyes with a marker.
- Cut scarves from soft fabric and tie them around the necks of toys.
If the fruits are too dark, then some pupae’s faces are lightened using pastel-colored paints. By varying the shades, you can make an international set of baby dolls from autumn acorns, which will delight the kids.
For the head, you can use wooden beads, onto which a hat with a twig is glued.
Costume for girls
A masquerade outfit can be made quickly if it is based on a good idea. How to put together a snake costume for a girl in just 2 hours? You need to show skill and ingenuity. The basis of the costume will be a green jumpsuit. It can be replaced with a dress or matching pants and turtleneck. The main part of the costume is the head of the snake. We will make it from wire or any other material that is suitable for creating a frame. We create two large parabolas and fasten them on one side. We lay a stiffening rib in the middle.
Now you need to make a fabric shell. We take measurements from the frame and draw a pattern on paper. We transfer it to fabric and sew a cover from green material. It is not necessary to make its two sides the same. You can use green and yellow fabric. When the cover is ready, we stretch it onto the frame, and sew this entire structure to the overalls or dress. We dress up the girl in a costume and wrap a green ribbon around her head. All that remains is to attach the snake's head to the tape.
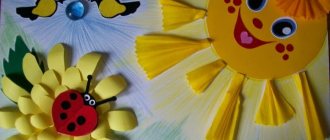
Birdie
You can make an adorable bird. To do this, you need to sculpt eyes, beak, wings from plasticine, and paint the craft with acrylic paints. Several birds with colorful wings can be glued to a tree branch. The result is a wonderful composition that will decorate the room.
Simple applications
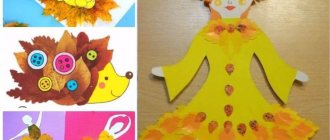
Laying out various figures from leaves: animals and fairy-tale characters is one of the favorite activities of children. Therefore, such crafts are very popular in kindergarten groups in the fall. Children's imagination sometimes even suggests fantastic images, and any child will enjoy choosing materials for their implementation. In addition, leaves can be cut out no worse than paper, and this allows you to create almost any composition in the form of appliqués.
One of children’s favorite types of application is sprinkling with crushed dry leaves. Well-dried leaves are simply crumbled by hand, then using glue (PVA in a tube with a spout is perfect) they draw a picture, for example, a flower, the outline of a tree or an animal. Then sprinkle the picture with crushed leaves, wait for the application to dry a little, and shake off the excess crumbs.
Table composition
This small craft made from acorns in the Japanese style will decorate any holiday table. It is made as follows:
- The collected acorns are washed and dried.
- Carefully remove the caps.
- The fruits are painted in different colors with acrylic paints or colored varnish.
- 2 holes are made in the caps and a thick thread is pulled through them, forming a loop of the required length, the knot is tied under the cap.
- Hats are glued on top.
- Place a ceramic vase and a napkin holder (salt shaker, sugar bowl, etc.) on a wicker or simple shallow tray. The rest of the space is covered with a layer of acorns.
- A tree branch is inserted into a vase, and painted acorns are hung on it.
LiveInternetLiveInternet
—Categories
- PAINT (3)
- HOW TO CONGRATULATE A HAPPY BIRTHDAY ON Li-ru 2. Like (1)
- AVATARKS (2)
- SELF-TANNING WITH YOUR HANDS. RECIPES. (1)
- ANTI-VIRUSES (1)
- ARGUMENTS (2)
- Inspirational Quotes! (1)
- ALL ABOUT COMPUTER (13)
- icons (1)
- SUNNY STUFF (1)
- KNITTING (1)
- DECOUPAGE (1)
- Decoupage tricks (1)
- FOR COFFEE LOVERS (1)
- FOR MOTHER (1)
- FOR THOSE WHO BELIEVE (6)
- Collection of prayers for all occasions (4)
- DIARY (209)
- how to remove some words under cut (2)
- animated pictures (12)
- Clipart (7)
- transition buttons (10)
- Comments with code (4)
- Lettering (2)
- HELP FOR BEGINNERS (15)
- Dividers (5)
- frames (95)
- Emoticons (9)
- Schemes (20)
- Flash drives (20)
- BLANKS (2)
- HEALTH (31)
- 13 brain foods (1)
- medicinal plants (3)
- TREATING WENE (1)
- Tinctures, ointments, recipes (12)
- Blood thinning, folk remedies (1)
- INTERESTING (4)
- WISH FULFILLER (1)
- How to download your favorite video from YouTube (1)
- COSMETICS (10)
- face mask (7)
- CROSSWORDS (0)
- COOKBOOK (44)
- 100 dessert recipes (1)
- 100 recipes for chicken with mushrooms (1)
- 100 recipes for dinner (1)
- Pancakes (1)
- Zucchini (1)
- Multicooker (4)
- various dishes (21)
- SWEETS (8)
- PERSONAL (2)
- MAKEUP (5)
- Makeup for blue eyes (1)
- MY CAT VASKA (4)
- MUSIC (2)
- OUR OUTDOOR HOLIDAYS (3)
- On the Berd River (1)
- On the Berd River near the village of Chupino. (1)
- Our holiday on the banks of the Suenga River (1)
- ABOUT THE ZODIAC SIGNS (4)
- zodiac signs (2)
- Confusions of zodiac signs (1)
- WALLPAPERS (0)
- OPTICAL ILLUSION (1)
- REVELATIONS OF THE SAVIOR (1)
- NEWSPAPER WEAVING (1)
- DIY CRAFTS (78)
- Christmas decorations (5)
- Topiary (4)
- CONGRATULATIONS, WISHES, CARDS (9)
- POSTCARDS (2)
- USEFUL TIPS (15)
- HOW TO CHOOSE A BRA (1)
- HOW TO WHITE WHITE THINGS (1)
- SIGNS (2)
- Elijah's day (1)
- PARABLES, APHORISMS, STATEMENTS (4)
- PSYCHOLOGY, GESTURES, DECEPTION (3)
- Psychology of poverty (1)
- GARDEN AND VEGETABLE VEGETABLE (51)
- All about raspberries (1)
- My summer garden (11)
- Harvesting (1)
- flowers for the garden (16)
- ANCIENT MEASUREMENTS (0)
- STATUSES (1)
- BACKGROUND,BORDERS (1)
- PHOTOSHOP (24)
- BREAD MAKER LG HB-155CJ, RECIPES (4)
- Cupcakes (2)
- FLOWERS (19)
- indoor flowers (8)
- SEWING NEEDLEWORK (47)
- We sew toys ourselves (9)
- Interesting ideas (19)
- Curtain collection (1)
- Cute pillows (4)
- Bags (2)
- Sewing, modeling (50)
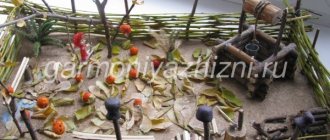
Wall panel
To create an original panel with your own hands, you will need to cut a tree 1-1.5 cm thick, which can be shaped into a square, oval, or another shape. The size is chosen at your discretion. The manufacturing technique is simple:
- Twigs of different lengths and thicknesses are glued onto a wooden blank, and acorn caps are attached to them using glue.
- Cones of different heights are glued to the ends or along the branches.
- Acorns without caps are attached to the branches at the bottom of the composition, forming a seven-flowered flower from them.
- After the glue has dried, a hole for a nail is drilled behind the wooden base and the finished panel of acorns and cones is hung on the wall.
If you paint the acorns or cones before gluing, the panel will turn out colorful and will look good in a child’s room. For the living room, kitchen, hallway or bedroom, it is better to leave the composition in natural colors.
Crafts for children in grades 1-2
Crafts made from pine, spruce and cedar cones at an exhibition at school always arouse the interest of the jury. Schoolchildren aged 7-8 years old are capable of more complex schemes for making figures and compositions.
Hedgehog made from pine cones and a plastic bottle, step-by-step master class
The hedgehog craft from cones is simply made using a plastic bottle. Step-by-step instructions will help you do everything correctly and quickly.
Prepare the necessary materials:
- A plastic bottle with a volume of 0.5 to 1.5 liters;
- Glue gun;
- Cones at least 20-30 pieces;
- Scissors;
- Paints (gouache or acrylic);
- Brushes;
- Wire;
- Varnish for covering the surface at the last stage of creativity.
Next, proceed step by step:
- Cut off the top and bottom of the bottle.
- Coat the cut parts with glue using a gun and insert them into each other.
- Wait for the frame to dry.
- Paint the workpiece black (kuzbasslak or acrylic paints).
- Draw eyes on the muzzle in white, pupils in brown or blue, eyebrows, and mark the boundaries with the body.
- Cut wire blanks for the mustache and thread them into the lid.
- Glue cones onto the body of the animal. They need to be placed tightly.
- Apply polish to the hedgehog's torso and face.
As a result, you will get such a funny animal that will definitely take first place at the exhibition and will be useful for decorating the nursery’s interior after returning home.
Basket
For a large basket you will need at least 40-50 pine cones, wire, glue, cardboard.
Fasten the scaly material together with wire using the “Ring” method (wrap it around an axis) and build a structure of the desired shape.
Typically, a homemade basket consists of two or three tiers of cones, the bottom is lined with cardboard or moss, and a handle is attached to the top.
Nest with eggs
A very interesting craft that will come in handy for Easter is a nest. To make it you need to prepare:
- several acorns;
- acrylic paints or gouache;
- an old toothbrush;
- toothpicks;
- plasticine and twine.
Manufacturing technique:
- In each acorn, make a hole with an awl or a thick needle, insert a toothpick into it to make painting easier, and apply bright paint in 3 layers.
- Stick toothpicks into a piece of plasticine and leave until the paint dries completely.
- After the paint has dried, the fruits are sprayed with black color, slightly diluted with water, using a toothbrush.
- A nest is made from yarn, twine or rope, wrapped around the palm of your hand and placed in several layers on the bottom. You can add thin straws.
- After drying, the workpieces are placed in a nest.
Autumn crafts made from acorns are ready.
Crafts from cones and chestnuts
Within the city limits, in parks, you can often find chestnuts brought to Russia from America. This plant attracts people's attention with its unusual fruits - round dark balls. This is the best material for autumn crafts: it lends itself well to trimming, is lightweight, and is simply attached with plasticine and glue. Using chestnut nuts and cones, you can create a whole gallery of original figures.
Bunny
The big-eared bunny is the favorite toy of many children, so the kids will definitely like this idea for a craft. Use cones for the body, and chestnuts for the head. Paws and ears can be made of white plasticine or sticks, twigs, thin leaves or grass. To decorate the figurine, place a carrot or an apple in the toy's handles.
Snail
You can make a snail from chestnuts and cones. The nuts will be useful for the body: they need to be pierced with an awl and strung on a stiff wire to form the desired bend of the body. Place the cone on the back of the snail and secure with plasticine. It is better to make the babies from plasticine of different colors, and use a chestnut instead of a shell.
little man
Chestnuts and cones make not only funny animals and insects, but also little people. There are a lot of ideas for creating such figures. Chestnuts or oblong cones are used for the body, ropes with wire or branches are used for arms and legs, and acorn tops are used for caps.
Topiary
Quite a complex and multi-stage job, the child will need adult help. Topiary is an artificial tree in a pot. The craft consists of a crown, base and trunk.
The autumn version of topiary is made from cones, acorns, colorful leaves and chestnuts. Use a foam ball to secure the decorations to the crown. Make the trunk from a thick branch and wrap it with brown knitting thread. After the craft is ready, fill the clay flower pot with cement solution and place the trunk inside. Wait until the base hardens and the craft is ready.
After the end of the exhibition in kindergarten or school, do not throw away the “masterpiece” of cones and chestnuts. Decorate your living room, nursery or garden room with a beautiful craft.
bunches of grapes
For the autumn harvest festival or for a kitchen panel, you can make bunches of grapes using:
- acorns;
- wires;
- sewed;
- corrugated colored paper;
- varnish, paints and brushes.
Manufacturing technique:
- Remove the caps, wash and dry the acorns.
- Insert an awl into the hardest surface that was under the cap and carefully make a through hole. There is no need to sharply pierce the fruit, otherwise it will split.
- Insert the wire, bend the hook at one end, carefully pulling the long end of the wire, and push the hook into the workpiece.
- Corrugated light green paper is glued onto the wire, the acorns are covered with dark purple and green paint, and after drying, a colorless varnish is applied on top. You can make bunches of grapes from green unripe acorns.
- The finished “berries” are collected into a bunch using the technique of weaving a flower wreath.
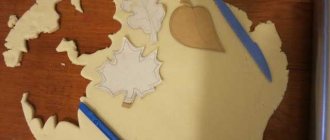
- Leaves can be used dry from the herbarium or printed on a printer. Corrugated paper is glued onto them and the veins are pressed out. The leaves are varnished and fixed at the top of the grape bunch.
In a similar way, you can make an olive branch, which will also become a kind of decor for the kitchen.
Autumn is the most generous time of the year for collecting leaves, chestnuts, spruce and pine cones, twigs and acorns, from which you can make simple and charming crafts all year round.
On the topic: methodological developments, presentations and notes
“...Children are creators even when they simply with delight, sticking out their tongues, smear plasticine directly onto a piece of wallpaper with their palm.” John Allan “Landscape of a Child’s Soul” This is a summary of a comprehensive lesson for children.
Program content: Strengthen the ability to compose descriptive stories from drawings about your hometown, based on the plan; develop monologue speech, improve dialogic speech skills. Exercise.
Notes for physical education instructors using step aerobics technology in their work.
Summary of educational activities on cognitive development for children of the preparatory group “Winter Wonders” Goal: To develop the ability to engage in experimental activities.
The lesson summary aims to form children's ideas about the defenders of the country during the Great Patriotic War, to cultivate respect and feelings of gratitude for those who defended the Motherland.
Date: Topic: “Let's tie a bow for the doll” Goal: Improve counting skills within 10 Tasks: Improve counting skills within 10 and practice counting according to the model. Continue to form.
Summary of educational activities Topic: Quest - game “In search of treasures” Educational area: “Cognitive development” Form of organization of activities: .
Source
Dragon
Autumn crafts made from acorns and chestnuts are interesting.
Here is one of them - the fabulous Serpent Gorynych. It’s not at all difficult to make; for this you will need:
- acorns;
- chestnut kernels;
- corrugated paper;
- toothpicks;
- plasticine and soft fabric.
Manufacturing technique:
- 3 toothpicks are inserted into the chestnut kernel, located horizontally, at the top and 2 at the bottom.
- Acorns without caps, also arranged transversely, are pricked onto each top toothpick.
- Half acorns are pricked onto the bottom toothpicks with the whole side up - these are Gorynych’s shoes.
- Eyes, a tail, a button nose, a crest and a tongue are made from colored plasticine (the tongue can be made from corrugated paper and then glued).
- To prevent Gorynych from freezing, a scarf made of soft fabric is tied around his neck.
Instead of a tuft, you can glue an acorn hat on your head, which will give the Snake a stylish look. If desired, you can combine the crest and the hat.
Crafts from pine cones and felt
Felt is a soft and pliable material, ideal for decorating pine cone crafts and creating large, colorful pieces. The fabric is used to make beaks and wings for birds, to sew clothes for chestnut dolls and much more. The result is a cute figurine that looks like a living creature.
Owls
Use the body for the pine cone, and soft multi-colored felt will be useful for the wings, eyes and nose of the owl. The material is easily attached to the eagle owl's body with glue.
You can make large and small shapes by cutting out large and small fabric parts.
bear
To make a handsome forest creature, you will need a little material: 1 pine cone and 20 felt. As a result, a couple of charming animals will live in your home, and your child will learn to create cute masterpieces with his own hands.
Squirrel
In the same way, make protein from felt and pine cones. The body can be painted with orange paint, then the figures will be brighter and more beautiful.
Hedgehogs
Felt hedgehogs made from pine cones are especially cute and attractive to children, even without real prickly needles. Although the spines can be made using toothpicks.
Use felt to create the animal's face, eyes and mouth. Cut out the parts using a stencil that is easy to make with your own hands.
Making crafts from pine cones with your own hands quickly and beautifully is not at all difficult. You just need to awaken your imagination, and the creative process will go by itself. And remember that with the help of simple toys made from natural materials, children not only develop thinking and motor skills, learn to communicate with each other, but also learn about the world around them.