Stylized images of the sun always evoke a positive reaction from children and adults. The image of the luminary is associated with warmth, the spring awakening of nature and a pleasant summer vacation.
Crafts in the form of a cheerful, bright sun at the end of winter, after the boring cold, when since ancient times people celebrated Maslenitsa and prepared for the arrival of spring, are especially uplifting.
At this time, many kindergartens and schools hold competitions on the theme of national holidays and children are asked to make homemade sun crafts with their own hands, which the little ones learn to do together with older family members.
Various craft options
In children's creativity there cannot be two identical works, but making a sun still requires a certain set of elements that can be made from any materials. The main detail of the craft is always the central disk of the celestial body.
Then you need to make and attach to it many stylized rays diverging in different directions from the center of the circle. At the same time, it is important to decide how the product will be attached - glued to paper or cardboard, hung on a string or placed on a stick for festive events.
If desired, on the disc itself you can depict a human face with a playful smile and freckles.
Tirlika
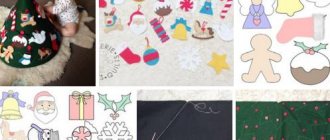
On this page you will find our Master Classes: how to sew a bombon blanket, a high-speed method for assembling a patchwork quilt and a bombon blanket, how to sew a letter pillow, how to sew a cloud pillow, how to sew an elephant pillow, how to sew a Whale pillow, how to sew a flower from chiffon, how to sew a nest (cocoon) for a baby, how to sew a border-fence, how to sew a Unicorn, patterns for animal borders and you will also find patterns for them
ATTENTION! When purchasing, carefully check that your e-mail address is filled out correctly. You will receive a download link.
Master Class
Video format HD quality. Duration 18 minutes Cost 0 rub.
Pattern
PDF file format for printing on a printer
Craft for the little ones
The simplest and most understandable craft for preschool children may be a paper sun craft.
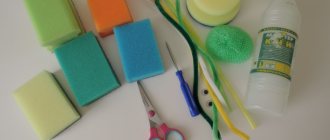
To work you will need the most common set of materials:
- colored or corrugated paper in yellow, orange or red;
- glue in convenient packaging so that it is safe for the child to use it;
- special scissors for child labor;
- cardboard or a piece of thick paper to give a rigid shape to a craft or a base for applique.
To create a solar disk, you need to draw it on colored paper using any round object of the required size, which can be a saucer or plate. To draw the border of the rays, you will need to draw a circle of larger diameter.
The rays can be made from bent strips of paper, braid, fingers circled on paper of a different color and pasted in a circle, or bright corrugated paper.
Shape and size
First of all, you need to decide on the size and shape of the finished product. Also remember to leave a small gap for the seam. To cut two identical pieces, fold the fabric in half and fasten it with tailor's pins. The desired shape can be drawn onto the fabric using drawing tools on the inside of the fabric. This way you won't have to scrub away the stains when you're done.
Volumetric work on a stick
To make a craft for a 5-6 year old child in kindergarten, for events dedicated to Maslenitsa, you can use cardboard and colored paper. Two disks of different diameters are cut out of cardboard, gluing one of them onto the other.
On a smaller circle you can draw the eyes, mouth and nose, which will be in the center of the product. The rays are made from multi-colored paper, which can be yellow, red, orange, or golden. Fragments of paper are folded like an accordion, the assembled edge of which is attached to the outer diameter of the circle blank.
Depending on the size of the Maslenitsa sun craft, it can be made on a stick or skewer to decorate a festive dish.
Handy household items for crafts
As a basis for making sun crafts, you can use ready-made round plastic products, such as lids from various containers or disposable plates. To paint such products in the desired colors, you can use acrylic paints and a type of glue suitable for plastic, one of which is silicone.
The face of the luminary can be drawn using paints and markers, both on the inside of the plate and on the outside. Rays in the form of palms drawn and cut out of cardboard are attached along the edge of the plate with a strip of glue.
When gluing the application to a wall or cardboard, you can use rubber gloves of appropriate bright colors instead of cardboard palms. It can be interesting to work with the use of multi-colored cocktail tubes.
What is needed for a masterpiece?
After you have decided on the star, you can select the tools. If you have a mania for creating ordinary things, you need to get tools, paper clips, scissors. All you have to do is depict a ball, lines, facial expressions. Then you need to separate it, color it, make changes. There is nothing difficult in the chosen task.
If you want an amazing toy, you definitely need cutting tools, a needle, stuffing, and buttons. It depends on the person’s imagination.
If the desire is for the unknown, it is proposed to make heavenly happiness from pasta.
The sun made from tires looks aesthetically and unusually. This system is quite simple. You will need screws, a car tire, linoleum or plastic, paint, bottles with corks.
We dig the car part into the ground so that it holds and does not fall. Then, using nails, we attach the lids from the flasks. Then we put in the cans. This is already light with stripes emanating from it.
Then we bring the middle part of the required size. It is attached with nails. It is important to prepare it in advance. And then it’s a matter of taste. There is an opportunity to add a cute face, you can leave it as it turned out.
CD - discs for making the sun
Used computer disks are suitable for making sun crafts for kindergarten or junior school. It is advisable to choose two discs with a yellow tint, which are placed together with the sides with the inscriptions, so that the iridescent coatings are on the outside.
Thanks to the holes in the center, two discs can be tied together with a beautiful thick thread or braid. From the same threads you can continue the rays, braiding them into tight braids. At the end of the work, the center of the disk is sealed with a circle of colored paper with a face drawn on it with felt-tip pens.
Soft toy “sun”
From multi-colored felt or other soft and thick material, you can cut out two circles of different diameters, the edges of which can be beautifully decorated in the form of stylized rays so that they are not too thin and long.
You can place a round piece of foam rubber or synthetic padding in the middle, which will provide volume to the product. The smaller part can be glued to the larger one along the edge of the filler. From material of other colors, eyes and smiling lips are sewn or glued onto it.
How to make a sunflower from felt with your own hands. Master class with step-by-step photos
Good day, dear readers. Today I want to share a master class with step-by-step photographs of the process of making a sunflower, everything in stages. I'll tell you and show you how to make a sunflower from fert, which can be glued to a headband or elastic band. My flower turned out to be 13 cm in diameter. The sunflower turns out beautiful and bright, our daughter really liked it. It's easy and quick to do. I needed three colors of felt: brown and two colors of yellow (one slightly brighter, one darker). But you can use 2 colors - yellow and brown. I use hot glue, you can try instant glue.
I work with felt and felt, felt (mine) is yellow, softer, thinner and more delicate, and felt is denser. You can read my stories about this material in the article on what felt is and how to make succulents from this material.
How to make a felt sunflower with your own hands
When creating the flower, I did not use special patterns, templates or patterns. I think that such a simple flower can be made by anyone, and you don’t need to have any special knowledge or skills.
What is needed to create a sunflower:
- Felt (I have 3 colors)
- Scissors and ruler
- Glue gun
Flower of the Sun - creation process:
I repeat that making a felt sunflower is very simple. First, we need to make the middle of the flower. In my case, I use brown felt.
I cut a strip of felt 22 cm long and 2 cm wide.
I used 3 of these strips. You see for yourself how much you need. Do you want the middle to be larger or smaller? You can - 3-5 pieces, then the sunflower will be a little larger.
I glue the strip along the edge with hot glue, not the whole strip, but just along the edge. As a result, when I glued it, the strip turned out to be 1 cm.
I don't cut it all the way with scissors. Approximately 2-5 mm. I twist the brown felt tightly in a spiral.
It turns out the middle of the flower is like a gerbera made from foamiran. By the way, I myself did not expect that I would end up with such a beautiful and realistic gerbera flower.
Only there I cut off 1 strip, but here I needed 3 pieces.
Next, I cut out squares 3 cm by 3 cm. And squares 4.5 cm by 3.5 cm.
I cut out 10 pieces. - 3 by 3 cm. (I use two different shades of yellow: light and dark.)
And 9 pcs. - 4.5 by 3.5 cm. You may need a little more or a little less petals.
From these squares I make petals. I bend the square in half to form a petal shape.
We unfold the petal and bend it on one side and on the other at the bottom of the petal.
I glue a drop of glue on one side and the other.
There are 2 petals in the photo. One is glued on only one side (to show you), and the other is glued on both sides.
I hope the principle is clear to you. You don’t have to do this, but I wanted to do my felt sunflower this way.
Using hot glue, I glue the petals 3 cm by 3 cm to the bottom edge of the center.
I glue each petal, trying not to move left or right, up or down. I glue them carefully.
I ended up with a row of 10 yellow sunflower petals.
Now we need to cut the petals of a different size, a little larger. I cut out squares 4.5 cm by 3.5 cm. I fold the square in half and cut out a petal shape with scissors, as in the first case, only my color is brighter. I repeat, you don’t have to change the color of the felt.
In the same way, I glue the edge of the petals on one side and the other.
As in the first case, I don’t want to repeat myself with the photo.
I glue the second row of petals. I'll show you what everything looks like from the back so you can understand how to glue it.
I got 9 petals. In principle, it was possible to fit 10 pieces if they were glued closer to each other.
I also want to cover the underside of the flower with a circle of felt. To do this, I cut out a circle, I didn’t get a circle, but an oval, I cut it out randomly, from yellow felt.
My square size is 5.5 cm by 5.5 cm, I just rounded the edges. And I glue it with hot glue.
And this is what I get. This is such a beautiful and bright flower. All that remains is to glue the flower to the headband or elastic band.
I made such a wonderful and very simple felt sunflower, I hope the photos will help you make the same flower. Or maybe even better.
Create with love! I'm glad you like my master classes.
Write your comments. Thank you for coming, reading, writing. This is important and valuable to me.
narodnayamedicina.com
Application made from natural materials
On a sheet of sky-colored office paper you can make an applique from ready-made elements collected during an autumn walk in the park.
Beautiful, bright dried yellow leaves from maples, birches or reddish ones from park shrubs and fruit trees can be successfully used for an applique in the form of a sun, where the center is made of rounded crimson leaves, and the rays are made of yellow and even greenish leaves with carved edges.
Crafts for a country house
An image of the sun made from plastic bottles, wheels from an old children's bicycle, or a picture of the sun cut out of plywood can be used to decorate your home area. A sun craft for a dacha looks original, woven from wicker and installed in the middle of a flower bed or decorating the wall of a veranda.
You can knit an original rug in the shape of a smiling sun to decorate your home or bathhouse. In the kitchen you can place a panel in the form of a stylized celestial body made from salted dough or pasta of various shapes.
In this case, the spaghetti will perfectly represent the rays, and the middle will be round pasta. Natural products are treated with a primer and coated with paint. You can finally seal the work with water-based varnish.
The sun as a decorative element of a summer cottage
At all times, the sun was perceived as an attribute of good. The presence of such an item will decorate the summer cottage, add joy and light. It can be made as an independent decorative element, or be built into the design of objects. The production of such crafts is available to the head of the family and school-age children.
When setting up you will need:
- welding machine;
- drill with a set of drills, jigsaw;
- hacksaw for wood, metal;
- chalk, pencil, measuring tool;
- 6-8mm wire or 14-16mm metal rod;
- chipboard;
- car tires;
- plastic bottles;
- bolts with a diameter of 6-8 mm, washers, nuts;
- paints for exterior work on metal and wood;
- solvent, paint brushes;
- shovels;
- cement, concrete.