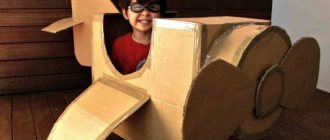
Boys love to make various techniques. This number also includes airplanes. You can use various materials for crafts, although making an airplane is not that easy.
Preschoolers need help in this matter, but school-age boys can handle some of the crafts on their own. An airplane made with your own hands will become the pride of the boy and the decoration of his room. You can also surprise your friends and classmates with this craft.
Making models from plywood
Making models of airplanes from plywood with your own hands, and not just airplanes, was a popular activity for schoolchildren in Soviet times. Drawings and diagrams of models were published in the Young Technician magazines, and aircraft modeling clubs were in almost every Palace of Pioneers. Every self-respecting teenager has made at least one model airplane out of plywood with a jigsaw. We invite you to remember your childhood and make an airplane out of plywood. The model of the legendary Pe-2 dive bomber was chosen as a prototype.
We offer for assembly a project published in the supplement to the magazine “Young Technician” for 1980 (No. 2), but you, of course, can choose any project that you like. The plane is made of plywood with a thickness of 1.5 to 4 mm; the main parts of the body, ribs, and tail are made from it. Of course, it is better to have special plywood for modeling.
Chronicle of a dive bomber
Pe-2 is a formidable fighting machine from the Second World War. The development of the aircraft began back in 1938 at the NKVD design bureau. The author of the project is aviation engineer V.M. Petlyakov. Serial production of the aircraft began in 1940 at the Kazan Aviation Plant.
The Pe-2 bomber, according to the NATO Buck classification, is the most mass-produced Soviet bomber. It belongs to the low-wing type and has a two-fin tail. The car has excellent aerodynamic qualities, the potential of which was not even fully exploited during the Great Patriotic War. The photos of the planes clearly show how outstanding this machine was.
- wingspan - 17.13 m;
- length – 12.66 m;
- engine power – 2x1100 hp;
- wing area – 40.5 m²;
- crew – 3 people: pilot, navigator, gunner;
- maximum speed – 540 km/h;
- high altitude ceiling – 8700 m;
- combat load - up to 1000 kg (in the bomb bay and on external sling);
The Pe-2 aircraft was produced from 1941 to 1945. It was finally withdrawn from service in 1954.
Where to begin
Let's start making an airplane out of plywood with our own hands by constructing a working drawing of the parts. To make a drawing of an airplane from plywood, you can take graph paper. Using a 32x32 mm grid, draw out the body of the aircraft, the image of which is shown in photo 1. The drawing of the wing end rib is shown in photo 2. We draw this part using a 10x10 mm grid.
What and how to do
To make the fuselage you will need two plywood parts. Cutting out elements with a jigsaw must be done carefully. If there is no stationary jigsaw machine, then it is better to use a manual one. Between the plywood parts we will make a thick foam insert. A transparent cockpit canopy can be made from a thin sheet of plexiglass.
For stabilizers and elevators, you can take, if available, 4 mm thick linden plates or make them also from plywood. For the manufacture of spars and the leading and trailing edges of the wing, it is better to have lime slats with a thickness of 5x27, 15x15 and 5x20 mm. Cut ribs from plywood 2 mm thick. The connection of the spar and ribs is shown in photo 3. Assemble and glue the wing elements. Attach the resulting wing parts to the body by carefully sawing the grooves. After this, you can attach the motor guns. If you install engines in the motor guns, then at the end of the work you can not only admire the result, but also send the model airplane into flight on a cord. Micromotors with a volume of up to 2.5 cm³ are suitable for this.
For the landing gear, use steel wire with a diameter of 4 mm. The photo shows the design of the racks. The chassis struts and the bracket for the wheel axle can be soldered from a tube. The wheel has a collapsible hub that rotates on a hub. The wheel itself can be machined from rubber. The tail wheel has a similar design.
We process the assembled airplane model with fine sandpaper. Cover the body and wings along the ribs with paper. Mica paper is suitable for these purposes. Mica paper (BDH paper) is made from cotton and has long fibers. Then coat everything with two coats of varnish. After drying, secure the remaining parts - machine guns, gas tanks, steering rod. Taking into account the layout of the aircraft, paint it with nitro paint.
Results
Cutting an airplane out of plywood, assembling it and setting it up for flight is a fascinating process, but it requires painstaking work. But the product will be a wonderful gift for a child, if, of course, you can give your creation to little hands that can turn a beautiful product into a pile of plywood chips in the blink of an eye.
Perhaps if you involve the boy himself in the work, then the production time will, of course, increase, but who knows, maybe you are raising a new aircraft designer?
The plane can become a toy or a blank for further painting or decoupage. The wings and propeller are made from thin planks from vegetable crates, and the fuselage is made from 6 mm plywood. It would be better if everything was made of wood, but I was afraid that the openwork cabin would be too fragile
In profile. The wings and wheel struts are inserted into tight slots in the fuselage and could be held in place by a tight fit. But for strength, PVA wood glue was also used. Small smudges of glue are cut off after drying with a sharp knife. If they are serious, it is better to wash them immediately with a damp cloth, then the varnish in this case may be stained with glue residues.
All parts are carefully sanded before assembly. The collected ones are more difficult to skin.
The axles of the propeller and wheels are studs, although this is not the best choice. It was worth rounding the cap a little and sanding it. The screw and wheels are drilled to ensure free rotation. In the fuselage and landing gear there are holes for the axles of a smaller diameter so that the nails would hold tightly, but would not split the plywood into layers.
The propeller blades are cut at an angle, like fan blades. This can be seen in the last photo, a top view of the plane. So if you blow on it, the propeller will start to rotate and it seems that the airplane is about to take off!
Here I give my drawing for cutting out an airplane. 1 square = 10mm Screw from a board 8mm thick, the rest can be made from 4-6mm plywood
Modern toy stores are simply bursting with a large assortment of all kinds of cars, bears, construction sets and much more. But remember the old days, when there was no such abundance. Then, in clubs and craft classes, we were taught to make toys ourselves, and the main material for creativity was plywood for modeling. It is precisely these crafts that we will tell you about today.
Delicate performance
Having gained experience while studying design aspects at home in labor education lessons, you can express yourself well and show your abilities in creativity. A cardboard fighter will definitely make any boy stand out from the rest of the class.
While the girls are busy with flowers and animals, you can share your knowledge with friends and collect a whole collection of colorful models. Communication in a team will have a good effect on the collective team spirit.
You should approach your work carefully and carefully. When thinking about how to make a paper airplane, you need to take into account the size and purpose for which it is being designed.
A compact product is suitable for gaming moments, but it is better to send a three-dimensional composition to an exhibition. Well-thought-out details will indicate the coordinated actions of a person and will contribute to a positive assessment of efforts.
Preparation of material and tools
Like any business, and making a toy for a child is a very important step, you must first prepare both the material and the tools that will be needed in constructing the model.
If you are missing something from the list above, buy these missing items urgently.
- A hand jigsaw for wood, an electric tool in our case is not an assistant for us, we do everything by hand.
- Model plywood, usually the thickness of the material is three and seven millimeters, otherwise it is also called three-layer and seven-layer, respectively.
- Pencil, ruler.
- Sandpaper and square file for processing aircraft parts.
- PVA glue or any other glue that is intended for gluing wood.
- Great patience and desire to bring joy to the child.
We need to start our design, of course, by marking out all the parts of the future airplane, namely: the fuselage, wings and stabilizer. You can first draw a drawing on paper, and then transfer it to the plywood itself, or you can immediately draw the details on the plywood, whichever is more convenient for you.
Since our model of an airplane made of plywood was invented on the fly, there are no exact dimensions and, accordingly, a template or drawing. But as an example, we will take a certain size of the wingspan, and we will build on it when assembling our aircraft.
Let's make the wingspan thirty centimeters long, this is perhaps the most optimal option; for those who find such an airplane small, they can increase the size of the wings and thereby make the airplane a little larger.
Cutting out blanks with a jigsaw
As you can see in the photo, all the components can be easily drawn by hand, there is nothing complicated here. Let's start with the fuselage, the length of which can be made ten millimeters larger than the wings. Just draw the body itself by hand as shown in the picture.
Immediately on the fuselage body, make tenon joints for attaching the wings. Due to such connections, prefabricated plywood models are quite strong and can be easily connected with glue, so be sure to use them.
Let's move on to the wings, as we have already decided, the wings will be thirty centimeters long, respectively eight to ten centimeters wide. Remember the main thing, the lower wing should be no more than ten millimeters shorter than the upper one.
All that remains is to draw the struts to support the wings, the rear flap, and the stabilizer. When everything is ready, you can start cutting out the parts with a jigsaw. Carefully cut out all the parts for the plane based on the outlines you drew. Don’t be discouraged if there are some unevenness somewhere, in any case, you try, and you will succeed.
Advice! The cut parts must be sanded with sandpaper immediately before assembling the model. Once you assemble the plane, it will be inconvenient to polish it, as the model can be damaged.
Assembling our plane
As a rule, modeling from plywood is an interesting and meticulous task, and if you have already prepared tenon joints on the fuselage, now you need to make grooves on the wings for fastening to the body and for the struts supporting the wings.
Feel free to use a file while working and adjust the connections as accurately as possible. Start assembly by installing the stabilizer, which you will glue to the tail of the toy.
At the next stage, our instructions recommend installing the wings in their place. To do this, apply glue to the joint and install the upper wing. Having turned the model over, we install racks to support the wings, and also pre-apply glue to the attachment points.
There is very little left and our homemade plane will be ready, we install the lower wing and our assembled structure. Also carefully coat all the butt joints on the assembled model with glue and place the plane on the shelf, allowing the glue to dry completely.
It’s not at all difficult to make such an airplane, of course it’s not an ideal option, and if you want, you can look for other drawings of prefabricated plywood models, because the flight of fancy and creative ideas don’t end there. Let's take a look at what other crafts can be made from wood.
We continue to make homemade products
Well, let's not stop halfway, but let's try to please the child some more, with some kind of plywood craft. If you focus on a boy, then it is possible that you want to know how to make a tank out of plywood? Quite a logical question, let's try to answer it.
As an example, we invite you to consider our small model of a plywood tank, which is easy to manufacture and, when assembled, looks no worse than tanks made from plastic construction sets.
Let's look at all the design stages in order, and start with the materials that are needed for modeling.
- Plywood is, of course, the basis of our model; in this case, the thickness of the plywood should be two to three millimeters. With such plywood it will be very convenient to cut out parts and then assemble them.
- Copy paper, with its help we will transfer the drawing to the workpiece.
- A set of needle files will help in processing tenon joints when assembling the model.
- A hand jigsaw and files for it, as for the files, prepare several of them, usually when cutting a model from plywood with your own hands, the files tend to break.
- Glue, preferably using PVA, it interacts well with wood and becomes discolored after drying.
- Sandpaper and clear varnish.
Advice! It is recommended that before starting to outline the details of the tank, the prepared material, plywood, should be cleaned with emery cloth and the surface made smooth. This approach will ensure more accurate copying of the drawing onto the plywood surface.
Copy the drawing and cut out the elements of the tank
The next step in constructing a tank model will be to transfer all the component parts of the model from paper to plywood. In the modeling process, namely answering the question of how to make a tank from plywood, model drawings play a very important role.
Tank model drawing. Part 1
Now that you have a ready-made template of parts in your hands, you need to transfer it to plywood using carbon paper. Outlining the details is best done with a simple pencil or using an empty ballpoint pen.
Do not forget about the numbering of parts; when copying, also transfer them to the material. In the future, when assembling, it will be easier for you to navigate the details. The rules of assembly are the joining of parts in sequence according to numbers: number one is connected to number one, number two is connected to number two, respectively.
When everything is ready and the drawing has been transferred to plywood, you can start cutting out the parts. We won’t teach you how to use a jigsaw, but we will give you a recommendation. After you cut out all the parts, be sure to sand them down, so you will smooth out all the corners left by the jigsaw and ultimately get a neat model.
Now, in order of numerical designation, we begin to assemble our model of the tank; after joining, we coat all connections with glue and let them dry a little. After assembling all the components, you should have a tank model that is almost ready.
As in any other matter, it remains to put an end to it, and our point is to treat the assembled model with colorless varnish. Believe me, the price of such a homemade toy is not comparable to the joy of your baby who will play with it, you can be sure that you did not waste your time making such a model.
What else can be made from plywood
In fact, modeling has enormous potential for creativity; plywood as a material is ideal for these purposes. Various plywood car models are very popular; as a rule, they are easy to manufacture and are in demand among children.
Here, for example, is a simple model of a truck; its manufacture will require very little material, and it will not take much time to assemble. If you take into account that you already have all the necessary tools, you can make such a craft without much effort.
In order to make such a truck, it is enough to transfer the template and all the spare parts of the car onto the material. Then collect all the parts and connect them together. These drawings of plywood car models have a common base and on this base you can assemble various versions of trucks.
If you get creative, you can make a closed van instead of a body, or cut out a fire escape, fantasize and bring your ideas to life together with your child.
Making a boomerang yourself
Another very interesting toy is the boomerang. In fact, this toy was considered a throwing weapon in the old days, but today both adults and children really enjoy the flight of this unique invention and return it to the place from which it was launched.
Let's figure out how to make a boomerang from plywood, while respecting all its aerodynamic properties. As a rule, first of all we need a material, in our case it will be plywood ten millimeters thick, and a template.
For the template, you will need a sheet of paper measuring fifty by sixty centimeters, and apply a grid with a mesh size of fifty millimeters on this sheet of paper. Then we draw the boomerang itself on the template, try to do this as shown in the figure below.
After the boomerang template is ready, we cut it along the contour and transfer it to our plywood blank and follow a simple procedure:
- We trace the contours of the template with a pencil on the workpiece.
- Using a hand jigsaw, cut out the boomerang according to the contours.
- The resulting boomerang must be further processed and given aerodynamic properties.
- We clamp the boomerang blank with a clamp and use a small plane from the center to the edges to remove the excess wooden covering.
- As a result of processing, we should get a uniform transition from the edge to the center. The central part should be ten millimeters thick, the edges of the boomerang six millimeters. Try to make the transition smooth and not jagged.
- The next step is to be thorough. The boomerang must be perfectly smooth, this directly affects the aerodynamics.
- Now the toy needs to be opened with varnish and, after drying, painted in a bright color. Typically, bright colors will make the toy easy to spot in flight or when searching after it lands.
Information! The boomerang by its nature belongs to the category of dangerous toys, so be careful when launching it so as not to harm yourself and the people around you. It is advisable to launch in the field, in places where there are not crowded people and no residential buildings.
Algorithm for creating a toy airplane
Let's look at step-by-step instructions on how to make an airplane. This will allow you to create a craft without any problems if you strictly follow the instructions for creating a toy airplane.
We take blue paint and paint the wings of the future airplane. Then we take red paint and paint the clothespins, which will later become the basis of the airplane. To create the hind wings, you need to cut the stick into two parts. Scissors must be used to round the cut edge.
The tail of the plane consists of a piece of stick. Cut a piece of 10 millimeters from the stick. To do this we use a stationery knife. The edge should not be smooth.
Using sandpaper, sand the surface of the wooden sticks. We paint the resulting parts and glue them together.
Sandbox on the playground
For children, a sandbox must be present on the playground. It can be made in several ways from inexpensive materials.
Build a sandbox from a tire from a tractor or other large machine. Cover the bottom with non-woven material that will allow moisture to pass into the soil, but will not allow the soil to mix with sand. Lay the tire on top and fill the structure with sifted river sand.
A beautiful sandbox can be made from stumps. Select the required number of stumps and treat them with an antiseptic to prevent the tree from rotting. Lay out the rope in a sandbox shape in the place where you plan to place it. You can get creative and give the sandbox the appearance of a boat, a flower with petals, an airplane, or just make curved contours. Dig the stumps along the contour that you marked with the rope.
By using thick stumps located at the same level, children will also have paths along which they can run or sit.
Build a sandbox using planks. First, dig a hole about 50 cm deep in the place where it will be located and fill it with crushed stone. In this case, after rain the sand will dry out quickly. Screw a box out of four boards and four bars. Take longer bars so that their lower ends also serve as legs. Paint the wooden edge of the sandbox with bright oil paint. On the sides you can draw cartoon characters or large berries and fruits. Dig the legs into the ground along the contour of the hole and fill it with sand for games.
Airplane diagrams
We present to your attention the 12 best origami patterns. Choose the best option for you and use the step-by-step diagram to make an airplane. We wish you success and creative mood!
Baby swing
When building a swing, it is very important to follow safety precautions. The supports must be strong and the fasteners very reliable. Also consider the availability of free space in front of and behind the swing.
For supports, take two thick beams about three meters long. Treat it with antiseptic impregnation. Dig two holes, approximately 50 cm deep. Install the timber and fill it with concrete or cement.
After the solution has dried, attach a metal water pipe to the top of the supports. Tie a rope with a seat to the crossbar. If the seat is wooden, try to give its corners a rounded shape.
It is convenient to use a child's car seat for swings.
The acquisition of knowledge
Building an airplane with your own hands is a labor-intensive and time-consuming task, but it is not at all as difficult as it seems at first glance. Many novice craftsmen who would like to try their hand at it think that they do not know how to paint, rivet and cook. In fact, learning all these skills is quite simple, it only takes a little time.
It is important to view the problem in this way. A home airplane, built with your own hands, is a mechanical device with a minimal set of electrical components, as well as a complete absence of complex hydraulic parts. All this can be studied and collected independently.
For example, what engine is on the plane? The most standard aircraft engine consists of the same structural parts as a motorcycle or boat engine. These are the simplest and most standard models that are perfect for building your first homemade aircraft. Next comes the practical part of the assembly. Riveting is a fairly simple process that can be mastered in just one day. As for working with a welding machine, everything is also simple here, you just have to spend more time on training so that the welding seams have good performance and are fairly even. As for any work with wood, it is used in everyday life quite often, and therefore the technique of processing it, as well as the tools for performing all the necessary operations, are not difficult to master and acquire.
Elements for outdoor games
Mount a basketball hoop on a beam or tree. Determine its height based on the child’s height. You can make a maze out of old tires. Cut them in half and dig them into the ground in a certain order. Install the horizontal bar. Make a flat badminton court.
Sources:
- Schematic model of the airframe
- wooden airplane model
Such a task, difficult at first glance, as building a wooden airplane on your own, can be done by any aviation enthusiast, even a schoolchild who regularly attends an aircraft modeling club. Do not think that this model of aircraft is intended to carry passengers on board. For all his efforts, the inventor will be rewarded with excellent flying characteristics of the aircraft and its high strength. The creators who launch their wooden gliders gain experience in controlling and adjusting free-flying aircraft models, and also receive unforgettable, incomparable impressions from the real flight of a wooden airplane constructed with their own hands.
Let's look at what you might need for this. Most likely, the materials and tools from the following list will be sufficient:
- pine slats;
- jigsaw;
- PVA glue;
- plane;
- aluminum wire;
- Styrofoam;
- lavsan film;
- household iron with thermostat.
Let's assume that you have prepared everything you need. This means that you are ready to go and can proceed directly to the design process.
This is the initial stage of work on modeling a wooden airplane. Take your slats (5x5 mm cross-section) and glue them together using PVA glue. When the glue is completely dry, you can reinforce the frame structure with internal corners, which can be made from foam plastic. This material is excellent for aircraft modeling, as it has sufficient strength with minimal weight. Therefore, you can also cut the upper end of the keel from a small piece of foam with a knife. You can use balsa. The front and rear edges of the frame must be rounded. Mylar film will be useful for the keel, which will look much more attractive if covered with such colored film. The steering wheel needs to be glued to the trailing edge. As a rule, it is cut out of cardboard with a thickness of about 0.5 mm.
Gliding airplane
Another criterion by which paper airplanes are evaluated is the ability to stay in the air for a long time.
The maximum recorded record is 29 seconds. But maybe you can overcome it. To do this, you can use a model developed by engineer Can Blackburn.
Let's now look at the assembly step by step:
- Take a sheet of A4 format. We fold the edges of the sheet towards the middle, and the distance between the corners should be about 3 cm.
- Bend the top edge 2 cm.
- Unfold the workpiece and repeat the procedure again. At the same time, we increase the distance between the corners slightly.
- Unfolds the workpiece and bends it 8 more times. It should look like a kind of accordion.
- Bend 3 cm of the top edge and fold the workpiece in half.
- We bend the wings, wrap the tips up.
- To make it more clear, you can use the step-by-step diagram below.
Making a stabilizer
We also assemble this part from pine slats of the same cross-section as in the case of the frame of our model. Having rounded the edges, also reinforce it with foam elements. Bend the end parts of the future stabilizer from the prepared wire. You can also use an aluminum knitting needle, a piece of wire, or other suitable material. The ending must be tightly wound to the frame with threads treated with PVA glue or epoxy resin. When you have a finished stabilizer, just like the keel, cover it with a thin layer of lavsan film.
Place to work
Naturally, for such work it is necessary to have a suitable place. However, it is worth noting that size in this case is not critical.
A light single-engine aircraft, for example, can be built in a basement, trailer, shipping container, etc. A great place would be a double garage. In many cases, even a one-person garage is enough, but this is provided that a separate place is planned where finished aircraft components such as wings and other parts can be stored. When considering how to build an airplane yourself, many believe that a city hangar, for example, is a suitable place. In fact, this is far from the case. Firstly, few people live close enough to such a building. Secondly, airplane hangars are places where there is often a lack of light. In summer, it is much hotter in such buildings than even outside, and in winter, on the contrary, it is colder than outside.
Trial run
To carry out a test run, it is better to use the gym premises. If you don't have this option, choose a calm day. With a gentle throw along the horizon, launch the model airplane. Try to achieve the lowest descent speed, for which use adjusting wedges made of wood. They should be placed between the fuselage and the pylon. Gain experience in "piloting" techniques so you can confidently demonstrate your design skills on your own wooden airplane. Successful launches will bring a sea of positive emotions not only to you, but also to the curious public.
Aircraft modeling helps a person develop in many directions. By studying in a circle or on your own, you acquire knowledge and skills when working with accessible, environmentally friendly, familiar materials, such as wood, PVA glue, cardboard, plywood, polystyrene foam, and so on. Also, at the same time, you learn to analyze your actions and make competent decisions in the most unusual situations. A person who is interested in aircraft modeling develops needs for self-realization and self-knowledge. Interest in the design and modeling process is developing. In addition to practical skills, a culture of communication with colleagues in the circle is formed, as well as important moral and volitional qualities such as determination, will, self-discipline, a sense of mutual assistance and collectivism. Of particular importance in our time is the formation of healthy lifestyle skills and patriotism. During the classes you can learn a lot about significant personalities in the history of aircraft manufacturing and aviation in general.
Origami fighter
A three-dimensional military fighter is also being created using the origami technique. For this craft you will need a regular sheet of office paper.
Execution order:
1. Bend the sheets from both sides up and down. Intersecting diagonal lines are formed.
2. Roll the sheet horizontally. Fold part of the sheet to the left along the vertical axis. Place the right corners inside the workpiece.
3. Turn the sheet over along the horizontal line and fold a vertical strip towards the middle.
4. Bend the corners along a horizontal line. Place them inside the part. Bend the workpiece so that there is a triangle.
5. Bend the lower part of the outer layer to a horizontal line. Flip the folded portion up and split it in half. And straighten the bottom part up.
6. Straighten the folded corners and fold the workpiece along the drawn lines like this: the blue lines are a “mountain”, and the red lines are a “valley”. The top and bottom parts should move towards the horizontal line.
7. A blank similar to an arrow has formed. Flip it horizontally and you get a tail unit.
8. Fold the top corner down along a horizontal line. Bend the wing upward through the horizontal axis. Do the same with the second wing.
9. Sharpen the nose of the plane by bending the corners horizontally. Bend the entire piece to make an airplane. Raise the tail vertically and tuck the corners of the wings inside.
The origami fighter is ready to fly.
Common patterns
One of the most common aircraft designs is a single-seat lightweight braced monoplane with a high wing and a pulling propeller. This model of a homemade aircraft first began to appear back in 1920. Since then, the layout, design, etc. have remained virtually unchanged. The finished sample today is considered one of the most tested, reliable and structurally proven. It is because of all these advantages, as well as because of the simplicity of the aircraft drawings, that it is an almost ideal option for DIY construction, especially for a novice craftsman. Over a long period of operation and assembly of such aircraft, they acquired characteristic features. They are distinguished by such design features as a wooden two-spar wing, a welded steel aircraft fuselage, fabric skin, a pyramidal chassis, and a closed cabin with a car door.
Why is it worth taking the time to do this?
This type of activity is very useful for a child. He will develop abstract and creative thinking, as well as increase self-esteem, which is quite important.
Having taught his son this business, he can then teach his friends, which will give rise to collective employment. Perhaps in the future he will strive to become a pilot or mechanic.
And the most important thing is that your child will receive very valuable attention, which many children lack.
Source
How to make a flying airplane: diagrams, models, ideas and DIY construction options (85 photos)
Handicraft mothers help boys with this and come up with interesting designs for fidgets. Airplanes are especially difficult to make, as they have a large variety of parts.
If your little designer wants to make a craft airplane with his own hands, and you can’t think of anything to use, then it’s worth looking at photos of ready-made options.
In fact, materials for an airplane model are not at all difficult to find; they can be found in any home. We will describe for you the process of creating several types of aircraft from different components.