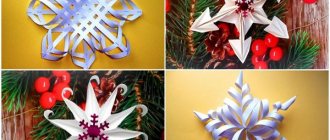
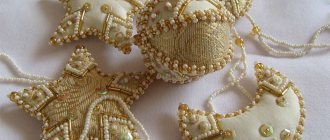
Good afternoon, readers and seekers of creative ideas! We will consider one of the unchangeable attributes of New Year's symbols and decorations in this article. More recently, we have already learned how to make voluminous snowflakes from paper, which can be hung on a Christmas tree or decorated in rooms as decor, as well as New Year’s decorations for windows.
And today I would like to show you how to weave snowflakes from beads and beads. These materials require immersion in painstaking work, but the results are simply amazing in their beauty. Delicate, airy - indistinguishable from real ones. It’s as if they were magnified a hundred times and now you can look at every facet without a microscope.
Light is refracted in each bead, making the radiance so fabulous and mysterious. And only at first it seems that everything is complicated. But I invite you to walk through the article together and see that all this can be done even by novice craftsmen who have never had beading skills. If you are still getting acquainted with the options and you don’t have the material, then be sure to save the article in your bookmarks so that you can return to creativity fully armed later.
Snowflakes can be either white or blue, or in completely unexpected colors. After all, this is your fairy tale and your New Year. Turn ideas into reality. Today we are a little magicians.
Beaded snowflake for beginners: step-by-step master class
Weaving snowflakes from beads is a very cute and simply fabulous New Year's activity. Shining beads and small beads create an incredible harmony of color, shape and structure, imitating the crystals of a real snowflake.
Even if you are new to beading, you can create an incredible DIY snowflake. Let's look at the simplest diagrams and instructions .
Snowflake made of beads and bugles: instructions for beginners
To work you will need:
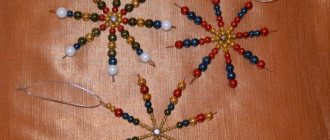
- 6-8 identical pieces of thin wire;
- a small piece of foam;
- beads, beads and glass beads;
- scissors;
- gold or silver paint.
- To begin with, we measure the pieces of wire so that they are the same.
- At the end of each segment we make a loop so that the beads do not fly off.
- We string beads and glass beads onto pieces of wire in the order you like best.
- Maintain symmetry and try to string small beads at the base, and large ones closer to the edge of the wire piece.
- Insert the finished “rays” of snowflakes into a small piece of foam plastic so that they touch each other at one point and resemble a snowflake.
- The foam can be coated with gold or silver paint.
Also, a large bead with several holes is often used as the “center” for a snowflake. Snowflakes made from beads and beads, created by yourself, look very beautiful and festive.
You can decorate a Christmas tree with a finished snowflake, hang several products on the windows as a garland, or decorate the walls of your house.
A very simple and accessible master class on how to make a snowflake from beads, watch the video.
Tools and materials
Beading is a very exciting and budget-friendly hobby. To create jewelry you don't need to spend a lot on consumables.
You need to prepare:
- Beads. If you choose transparent or white, the snowflake will look like a real one.
- Fishing line, thin wire or thread. One product will take approximately one and a half meters.
- Beads, glass beads, pearls, various metal trinkets (depending on the idea).
For the base you can use nylon, synthetic or reinforced threads. It is important that they are durable and not “shaggy”. Thin wire is suitable for Christmas tree decorations, so the product will better retain its shape.
Due to the small size of the beads, using regular needles is not always convenient, so the tip of the thread can be coated with nail polish. You can purchase special needles for beading.
Decorative snowflake made of beads: DIY winter decoration
If you have started weaving snowflakes from beads, you simply need a detailed description of the entire process. As well as step-by-step photos so you don't miss a single detail.
For this New Year's craft you will need:
- beads;
- bugles;
- bead needle;
- fishing line, diameter 0.4 mm.
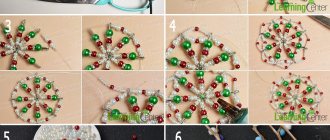
How to make a snowflake: a master class with photos for beginners
1. We fix the first bead on a piece of fishing line about 1 meter long.
2. Add 7 beads and pass the end of the fishing line through the first attached bead.
3. Add 11 more beads , insert the needle and pull it through the 6th bead.
4. This “curl” is one of the facets of the future snowflake.
5. We pass the needle through 5 beads to the base of the edge and through one bead in the middle.
6. Repeat as we did in steps 3-5 until we have 8 faces of the snowflake.
7. Select one edge and pass the needle and fishing line through the beads to the top.
8. Add 2 bugles.
9. Make a loop on the adjacent edge and tighten it.
10. We continue to add 2 bugles , moving from edge to edge of the snowflake in a circle.
11. Pull the needle and fishing line up another 2 beads.
12. This time, to connect the edges, we use the combination: bugle bead-bead-bugle bead and again tighten the loop on the adjacent edge.
13. Move in a circle, adding links of bugles and beads.
14. At the end, we secure the structure with a knot.
A beautiful and unusual snowflake made of beads with your own hands is ready. It can be hung on a Christmas tree or used as a pendant.
Beaded snowflakes: diagrams and step-by-step photos
Above we showed you the simplest options for creating a snowflake from beads with your own hands. There are also more intricate diagrams, as well as detailed instructions that tell you step by step the entire process of making a snowflake.
Let's look at the photo of the most beautiful ideas for snowflakes made of beads and beads with your own hands.
Often, snowflake weaving patterns begin in the same way - with a circle at the base. And crystals, branches and patterns are created in different ways. In the diagram you can see the direction in which you should move in the process of creating a snowflake from beads with your own hands. And also count the number of beads that should be added at one stage or another.
For several ideas for New Year's snowflakes made of beads, seed beads and bugles, watch the video instructions.
Snowflake made of beads and wire - a simple master class.
And this is a snowflake made of wire and beads.
Dog paw
You will need: white and black beads, felt, cardboard, a simple pencil, nail scissors, thin fishing line, a needle.
Master Class
- Print out the foot template and transfer it to felt.
- Thread a thin line into the needle and tie a knot at the end.
- Thread the needle in such a way that it comes out on the outer contour of the design and string a white bead.
- Catch the bead with a stitch, return the needle behind the bead and thread again.
- Sew on one white bead at a time, filling the first row (outline of the foot pad).
- Embroider the second row with black beads, then fill the entire footpad in rows in the same way.
- Embroider the outline of the outer finger with white beads and the inside with black beads.
- Embroider the remaining toes in the same way.
- Trim off any excess felt.
- Trace the paw onto cardboard and felt, then cut it out.
- Strengthen the foot in this way: connect the cardboard and felt (the cardboard should be between the felt), sew the edges of the layers by adding a white bead to each stitch.
The beaded dog paw is ready! It can be a brooch, a Christmas tree decoration, a decor for a gift, or whatever you want... Come up with your own design or figurine, select the color scheme of the beads and feel free to create holiday masterpieces.
I recommend watching this video!
Christmas decorations . Beading. Bell made of 8mm and 3mm stone
Snowflake made of beads: options for fabulous DIY crafts
For the New Year, you can weave not only Christmas tree decorations in the shape of snowflakes from beads, but also themed decorations: earrings, bracelets, brooches and even necklaces. See the photo for options for patterns for New Year's snowflakes made of beads.
Such products will serve as an excellent gift for the New Year 2022, made with love with your own hands.
Beaded greeting cards
On such significant holidays as New Year and Christmas, you cannot do without a colorful greeting card. Today, as an addition to the main gift, it has become customary to give handmade cards. Of course, you can always find plenty of them in online craft stores. But, you must agree that it is doubly nice to receive an original and colorful postcard made not by someone else’s aunt, but by close friends or relatives.
There are many ideas for New Year cards using beads as decoration, and the main thing here is to learn how to work with these small beads. It takes a lot of patience and hard work to embroider or weave even the smallest picture to decorate a greeting card. But if you’ve already taken up the tug... And to be honest, this activity is incredibly captivating!
To decorate postcards, beads are used in three ways.
- First, they embroider an image or even a whole plot on canvas, and then paste the picture onto the cardboard base of the postcard.
- Immediately sew or glue the beads to the base in the form of a three-dimensional pattern.
- First, three-dimensional figures (Christmas trees, snowflakes, snowmen, etc.) are woven separately, and then they are glued or sewn to a cardboard base. Be sure to watch the video on how to weave a Christmas tree using parallel weaving. This will be wonderfully useful for designing such a New Year's card.
