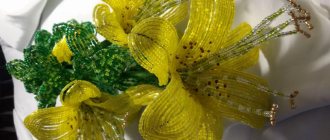
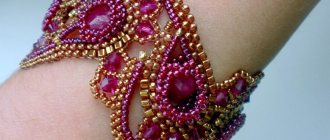
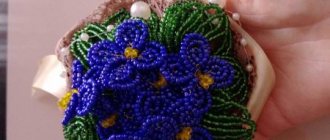
Beads are an amazing material: inexpensive, beautiful and very obedient in the hands of a master. However, why only masters? Beads are also favorable to beginning needlewomen who are just mastering the art of weaving.
In the wake of the Covid-19 pandemic and the self-isolation it caused, the art of beading has skyrocketed in popularity. Celebrities are sporting affordable jewelry made from this material, new brands of beaded jewelry are appearing, and world high fashion houses are including them in their collections.
In short, beaded jewelry in 2022 is not just jewelry that is worn because there is not enough money for jewelry. This is a deafening trend that has clearly come seriously and for a long time.
Having mastered the art of beading, you will always be able to create unique bows with a piquant twist. We hope that after reading this publication, your first steps in beading will become more successful and easier.
What kind of jewelry is made from beads?
The first thing you need to do is choose the product you will make. You can create anything from beads. Everything depends only on the author’s imagination. It can be:
- Bracelets;
- Rings;
- Beads;
- Necklace;
- Earrings;
- Belts;
- Hairpins;
- Headbands;
- Bags;
- Pendants;
- Keyrings;
- Souvenirs and more.
Be sure to take time and look at photos of beaded jewelry on the Internet. There's definitely something you'll like.
Beaded rings
In their creation, all the same techniques can be used that are used for the above jewelry.
Below are several options with diagrams.
How to learn to weave with beads
Once the goal is defined, you need to start implementing it. And this requires knowledge. Skills will appear during the learning process. You can learn how to weave beads using video tutorials on YouTube.
In addition, there are many thematic sites and groups on social networks, where there is a lot of information on beadwork. There you can ask for advice and share your successes. By the way, this is a good motivation not to abandon what you started.
You can also purchase printed books on beading. It is sold in all bookstores. And it's probably on newsstands.
We recommend reading:
- DIY hairpins: step-by-step guide + instructions. 100 photos of finished hair jewelry. Master class for beginners
- DIY brooch - the best step-by-step instructions with description. Photos of finished products, as well as a master class for beginners
How to weave rubber band bracelets with your own hands - a review of the best weaving patterns. TOP 100 photos of different methods and beautiful weaving patterns
What can you weave?
Beads themselves are a very bright and effective material. Children love it for its rich colors, shine and shimmer in the sun. Therefore, any craft will be created with pleasure. But in order not to scare the child away, you need to start with simple beading patterns for children.
It could be:
- favorite animal;
- bracelet;
- beads;
- brooch;
- applique;
- hairpin with butterfly;
- flowers.
Girls love jewelry very much, and bright beads can create something original, beautiful, and most importantly, light.
We offer several patterns for beading a bracelet for children:
- make 6 pieces of fishing line;
- tie a knot on one side;
- string all the segments with beads of any color (can be plain or multi-colored);
- connect the ends of all the segments together on one side;
- distribute into three strands of two sections;
- braid the strands;
- secure the ends with a clasp or elastic.
Below are visual diagrams of beaded bracelets for children.
Another pattern for beginners to weave chains with beads for children:
- put an arbitrary number of beads on the thread (about 10 pieces);
- then pick up another 4-5 beads;
- pass the needle through the 10th bead and tighten the thread;
- you will get a bud;
- Follow this pattern until you reach the desired length.
Crafts
Beading for little ones is a very exciting activity. Glittery toys are enticing to little ones, and this is a great way to get them involved in crafting. Crafts for children aged 8 years old from beads can be created from more complex patterns.
But first, we offer easy butterfly beading patterns for beginners:
- take a 30 cm wire;
- prepare beads of different colors;
- string beads onto the wire in the middle;
- pass both ends through the bead towards each other;
- thus weave the torso;
- separate the wire into two halves;
- put 18 pieces on each segment;
- create a loop;
- attach to the body;
- also make the upper wings, but increasing the number of beads to 26;
- use wire to make antennae;
- Make eyes from black beads as in the diagram.
Decorations
Children love bright decorations. They can easily be involved in creating their own bracelet or beads. The main thing is that the schemes are not complicated, and the child enjoys the process.
In creative stores you can find ready-made kits that contain everything you need. The child can choose what he likes best, so he will become interested already at the purchase stage. For girls, choose mother-of-pearl, rainbow or pearl beads.
How to choose beads
First of all, beads. It is sold in craft stores. And it can be ordered in online stores. But it’s still better to choose the beads yourself first.
This way you can touch it, see the size, color, and evaluate how it will look in the finished product. And order already when you gain experience.
Usually in the description of the jewelry it is written which beads to take. Namely its size, sometimes the manufacturer. Products made from small beads look neater and more elegant. But first, it’s better to take medium or large-sized material.
Be sure to pay attention to the quality of the product. The beads should not stick together inside the package. Otherwise the paint will peel off quickly. And the decoration will have to be thrown away.
We recommend reading:
- DIY headband with flowers: 120 photos of the best ideas. Simple instructions with real examples and full descriptions. Master class and secrets from craftswomen
- DIY satin ribbon bows: TOP-200 photos of the best options. Step-by-step instructions + master class with description (video lessons + diagrams)
- How to make a box - an overview of the best ideas for creating a box from different materials. 150 photos of new designs, instructions, diagrams, execution techniques, video
Hairpin
For such a hairpin you will not need much material - craft wire and beads.
Progress:
- You need to string enough beads onto the wire so that you can form a bow out of them;
- The ends of the wire need to be wrapped in a figure eight and secured;
- You can string beads of a different color onto the tails of the bow;
- Now all that remains is to glue the bow onto a hairpin or bobby pin so that you can wear it on your hair.
Fastening elements
You also cannot do without small devices in the form of fasteners, end switches, carabiners, pins, and the like. Otherwise, the decoration will not be complete, and it will be uncomfortable to wear. All this is usually sold next to beads. Choose depending on the product.
For light shades and black, silver metallic elements are better suited. For warm colors: green, yellow, red, it is better to take gold or bronze details. The quality of these elements depends on the manufacturer.
How to learn how to make jewelry from beads and apply these elements can also be seen in video lessons.
The benefits of beading for children
Beading for children is a great way to spend quality time with your child. Despite the fact that each child is individual, some conquer the heights of beadwork quickly, relying on talent, others need more diligence and patience, and others simply spend their leisure time interestingly.
The most important thing is that all activities benefit the baby:
- develop fine motor skills, coordination, imagination and creative thinking;
- contribute to the development of perseverance and attentiveness;
- the child learns to read simple and complex diagrams, imagines a finished craft;
- the child experiments and combines different colors, shades and textures of beads;
- the child learns to finish what he starts;
- joint activities can bring the family together;
- the child will be able to make and prepare his own gift, made with his own hands.
If a child needs help, be sure to help him. But don’t insist on your opinion, just show the right path.
By forcing your child to do beadwork, you may turn him away from needlework forever. Let him decide what to do and how.
Another important stage is the circle of like-minded people. As a child, you need to communicate with peers, and in studios this will be very easy to do. Clubs are a great opportunity to meet friends who have the same interests and tastes.
Other materials and tools
You will also need a base in the form of wire or fishing line. You can use monofilament or durable synthetic thread. Select so that the beads can be easily strung. Clear thread works best.
Be sure to buy a special bead needle. A few are better.
To work, prepare scissors and quick-drying transparent glue, such as Moment Crystal. Pliers, tape.
We recommend reading:
- DIY pendant - step-by-step master class with instructions. Photos of finished works with an unusual design. Schemes, new items, recommendations from craftswomen
- Paper orchid: the best step-by-step instructions with real examples. Master class + video lessons for beginners (100 photo ideas)
- Hair jewelry - 120 photos of original ideas. Instructions on how to make a beautiful decoration with your own hands (master class + video lesson)
Cover your work table with a light-colored cloth or towel with a small pile. This makes it easier to collect the beads if they fall apart. Find a well-lit area and a comfortable chair.
We weave an elegant necklace
Let's try to make a necklace with our own hands from two colors of medium-sized beads. You can use other colors at your discretion. In this case, these are turquoise and gray colors.
We cut the thread into 12 pieces of 75 cm each. We string turquoise beads onto 6 threads, and gray beads onto the remaining 6. We secure the ends so that the beads do not run away.
Now we lay out the pieces on the table as follows: 3 gray, 3 turquoise, 3 gray and 3 turquoise. We collect the upper ends of the threads into a bundle and seal them with tape on the table. Let's fix them this way. In my work I will always use 4 bundles of three threads: 2 gray and 2 turquoise. The weaving process is reminiscent of braiding a 4-part braid.
Take the outermost turquoise bundle and place it below the 2nd bundle of the same color. In this case, the 3rd beam (gray) remains below. The result is number 4. Tighten.
Now we do the same thing, only with gray threads, but in a mirror way. We weave in this way until the end. It turns out to be a flat braid.
Now you need to secure the ends and fastener. All threads need to be tied together. Put on the end caps with pins. Pour glue there and insert the ends of the pigtails. Wait until the glue dries. Using pliers, attach the fasteners.
The stylish necklace is ready. If you make the same bracelet, it will be a set. It can be worn with a summer dress. With an open T-shirt.
Pink pendant
Another equally beautiful option is a pendant made of soft pink beads. The order of work is as follows:
- preparing the necessary material - beads of the desired color, a cabochon, other decorations (if any), a piece of fabric and a piece of good leather;
- We mark the decoration, install a cabochon in the center (using glue) and trim it with beads. It is best to decorate the last row with some bright colors (for example, gold);
- take the rivoli and place them below the cabochon, then braid them with beaded beads;
- decorate the rest of the pendant with decor;
- After finishing the work, carefully cut out the workpiece (the edges can be decorated with pearls). For beauty, add a little fabric fringe.
After completing the work, you can put the pendant on yourself. Thanks to its unique appearance, it will clearly highlight female beauty.
Bracelet made of beads and seed beads
Very beautiful bracelets are made from beads in combination with large beads. The easiest way is to string beads onto several threads as in the previous case. Weave in any way. And in the process thread the beads. Do this evenly. It is advisable to choose contrasting beads. A beautiful combination of black and white.
Here you can also make various pendants in the style of Pandora bracelets. Be sure to complete the decoration with a clasp. Don't be lazy to attach it. Of course, you can use an elastic band for decorations. But it often breaks and will still stretch.
There are many original DIY jewelry ideas on the Internet. Bracelets can be woven using glass beads. Post a name or a beautiful drawing. Make a folk ornament.
The decoration can be adjusted to any celebration and the outfit will sparkle with different colors. Multi-colored bracelets go especially well with hippie style.
But business style can also be emphasized with beadwork, if it is a discreet brooch, a hair clip, or a thin thread of elegant beads.
Necessary equipment
Beadwork is not a costly creative activity; materials for it are available in every home.
Beads
You should not skimp on the quality of beads, because the appearance of the product depends entirely on it. The most common producers are Japan, China and the Czech Republic.
The Japanese use high-quality equipment and sophisticated technologies, so the price of beads is high. Products made from this material are highly valued, experienced craftsmen switch to this manufacturer. The beads are even and have the same structure, the product turns out neat and impressive.
Czech beads amaze with their color palette. In the color map you can see basic, experimental and rare colors. Its quality is slightly different from Japanese beads, but if you buy beads from one batch, it will be smooth and solid. Varieties of coatings will help bring even the most daring ideas to life.
You can purchase beads:
- pearl;
- rainbow;
- gold;
- silver;
- petrol;
- matte;
- metal;
- glossy.
Beads are also distinguished by shape. It comes in several varieties:
- round;
- cylindrical;
- with two holes;
- with beveled edges;
- glass beads are hollow tubes ranging in size from 3 millimeters to several centimeters.
Beads
Large beads with different coatings can become an accent in decoration:
- matte;
- glass;
- shiny;
- imitating natural stones;
- metallized;
- gasoline;
- rainbow;
- transparent;
- imitating pearls;
- opaque;
- Swarovski;
- metal;
- from natural stones;
- wooden.
Many modern designers and artists use beads in their works. Jewelry made from this material is not inferior in popularity to jewelry. People enjoy decorating their handbags, wallets, belts and collars.
Additional materials that may be needed:
- fishing line;
- nylon thread;
- wire;
- needles;
- scissors;
- wire cutters;
- round nose pliers;
- clasp;
- blanks for decorations.
Beaded earrings
You can make very interesting earrings from beads and glass beads in the form of tassels.
Large products with hanging elements look good. They are made using a tight weaving technique, when the thread is threaded through several adjacent beads. The result is a dense, straight fabric.
The base is made in the form of a triangle. Threads with beads are attached at the bottom. The ends can be decorated with large beads, or left as is. A hook for inserting into the ear and a special English clasp are attached to the top.
Long strings of beads resemble tassels and shimmer very playfully when moving. Detailed instructions on how to properly make jewelry can be found on the Internet.
Keep in mind that these earrings can be heavy. Take this into account when making jewelry.
Beaded brooches
A brooch is a universal thing. It can decorate almost any outfit. And beaded brooches look lively and cozy elements of clothing.
For example, to make a simple heart-shaped brooch you will need a base. Most often it is thick felt. It is taken to match the color of the beads or a little darker. Beads need to be sewn to the base. It's stronger this way. But you can glue it if the glue is not visible.
Beads need to be sewn on from the edge, gradually filling the heart shape. This can be done with one color, or experiment.
Now you need to glue the base to the pin. Special pins for brooches are sold. The unique product is ready.
This is not a complete list of methods and types of jewelry making. Be sure to try different techniques. You will definitely find your favorite decoration. And the activity will become your hobby.
Interesting video: making an accessory yourself
You will need: a metal base for the headband, scissors, satin ribbon, 4mm thick gamma wire, 12, 8 and 6mm beads, drop-shaped beads of two sizes and small transparent beads at your discretion. Cut 20 cm from a coil of wire, fold it in half and thread the first transparent bead. We pushed it to the middle of the wire and twisted it a little to secure it.
Next, we pass a drop-shaped bead to the transparent bead, immediately through two pieces of wire. Next we thread the bead at 12mm, 8mm and 6mm. The result was the first blank. In exactly the same way we make 6 more blanks. But in each subsequent workpiece, we reduce one bead in the set. At the very end you should get one bead. We will fix the resulting pattern in the center of the rim.
Interesting! If you like beaded accessories, follow this link to see other jewelry options.
We take our first piece, separate the edges of the wire and place it in the middle of the rim. We stretch it so that the beads do not dangle and wrap the rim with the remaining wire, pressing it tightly against each other. Next, take the next piece, step back a little and wind it in the same way. The outermost one comes with one bead. To prevent the wire from sliding along the rim, you can fix it with glue.
We decorate the traces of assembly of the tiara with a satin ribbon. Apply glue to the edge of the tape from the wrong side, secure it at the very beginning of the rim and begin winding. In this way we tightly wrap our entire base. All traces of the wire should be hidden under the ribbon. Wrap it to the end and secure the edge of the tape with glue. The tiara is ready.
Photos of beaded jewelry
Did you like the article?
2+
