DIY Russian stove
We meet the Russian stove in every folk tale.
But, if you look into any village where old huts are still preserved, you will find this beauty there. You can do it at home, for example, with the whole family gathered on an ordinary winter evening. To make it you will need one sheet of white paper, glue, a simple pencil, a ruler, scissors and a box of a large tube of toothpaste.
To decorate, you will also need small pieces of black or brown paper, or markers.
The box needs to be cut in half. You need to connect the two parts in such a way that you get the letter “G”. Glue them together and wait until the glue dries.
As soon as the workpiece is dry, you can start glazing it
You need to attach a pipe to the high part. It is made from pieces of cardboard and wrapped in white paper.
Now let's start creating the firebox. The flap needs to be cut out of black paper, it should be semicircular. Make a light out of brown paper.
Glue the imitation fire and damper to the stove. You can insert cotton wool into the chimney and make smoke. The stove can also be painted with different patterns.
False fireplace made of cardboard: models
A false fireplace made of cardboard, like a real one, can be wall-mounted or corner-mounted. In both options, the portal can be straight or arched. Whatever you prefer. If we talk about the practical side of the matter, straight is easier to make and easier to finish. Even a beginner can handle it.
What a fireplace made of cardboard can be like
A wall-mounted fireplace is great if you have a decent amount of free space on the wall. It looks great in the wall between the windows. If the walls are all occupied, but there are corners, you can build a corner model.
At the behest of Emelya, a fairy tale with pictures
-it-yourself brick oven
or there was an old man. He had three sons: two smart, the third - the fool Emelya. Those brothers work, but Emelya lies on the stove all day, doesn’t want to know anything.
Once the brothers went to the market, and the women, daughters-in-law, let’s send him: - Go, Emelya, for water. And he told them from the stove: - Reluctance... - Go, Emelya, otherwise the brothers will return from the market and they won’t bring you gifts. - Well, okay. Emelya got off the stove, put on his shoes, got dressed, took buckets and an ax and went to the river. He cut through the ice, scooped up buckets and set them down, and he looked into the hole. And Emelya saw a pike in the ice hole.
He contrived and grabbed the pike in his hand: “This will be a sweet fish!” Suddenly the pike says to him in a human voice: “Emelya, let me go into the water, I will be of use to you.” And Emelya laughs: “What will you be of use to me for?” No, I’ll take you home and tell my daughters-in-law to cook your fish soup. The ear will be sweet. The pike begged again: - Emelya, Emelya, let me go into the water, I will do whatever you want. - Okay, just show me first that you are not deceiving me, then I will let you go. The pike asks him: - Emelya, Emelya , tell me - what do you want now? - I want the buckets to go home on their own and the water wouldn’t spill... The pike says to him: - Remember my words: when you want something, just say: By the pike’s command, By my desire. And Emelya says :- At the behest of the pike, At my will, go home yourself, buckets...
He just said - the buckets themselves and went up the hill. Emelya let the pike into the hole, and he went to get the buckets.
The buckets are walking through the village, the people are amazed, and Emelya follows behind, chuckling... The buckets went into the hut and stood on the bench, and Emelya climbed onto the stove. How much time has passed, you never know - the daughters-in-law say to him: - Emelya, why are you lying? I should go and chop some wood. - Reluctant... - If you don’t chop wood, your brothers will come back from the market and they won’t bring you gifts. You don’t feel like getting off the stove. He remembered about the pike and slowly said: “According to the pike’s command, according to my desire, go, get an ax, chop some firewood, and for the firewood, go into the hut yourself and put it in the oven... The ax jumped out from under the bench - and into the yard, and give us the firewood.” chop, and the wood itself goes into the hut and climbs into the stove. How much or how much time has passed - the daughters-in-law again say: “Emelya, we have no more wood.” Go to the forest, chop it. And he said to them from the stove: - What are you doing? - What are we doing?.. Is it our business to go to the forest for firewood? - I don’t want to... - Well, there won’t be any gifts for you. There’s nothing to do. Emelya got down from the stove, put on his shoes, and got dressed. He took a rope and an ax, went out into the yard and sat in the sleigh: “Women, open the gates!” The daughters-in-law said to him: “Why, you fool, got into the sleigh and didn’t harness the horse?” Emelya says quietly: “At the behest of the pike, at my will, go, sleigh, into the forest...
The sleigh drove through the gates on its own, but so quickly that it was impossible to catch up with a horse. But we had to go to the forest through the city, and here it crushed and crushed a lot of people. The people shout “Hold him! Catch him! And he, you know, is driving the sleigh.
I arrived in the forest: - At the behest of the pike, At my request - an axe, chop some dry wood, and you, woodworkers, fall into the sleigh yourself, tie yourself down... The ax began to chop, chop dry trees, and the firewood themselves fell into the sleigh and tied up with a rope. Then Emelya ordered an ax to cut out a club for himself - one that could be lifted by force. He sat down on the cart: - At the behest of the pike, According to my desire, go, sleigh, home... The sleigh rushed home. Again Emelya drives through the city where he crushed and crushed a lot of people just now, and there they are already waiting for him. They grabbed Emelya and dragged him off the cart, scolding and beating him. He saw that things were bad, and little by little: “At the behest of the pike, At my will, come on, club, break off their sides... The club jumped out - and let’s hit.” The people rushed away, and Emelya came home and climbed onto the stove. Whether for a long time or for a short time, the king heard about Emelya’s tricks and sends an officer after him: to find him and bring him to the palace. The officer arrives in that village, enters the hut where Emelya is lives and asks: “Are you a fool, Emelya?” And he from the stove: “What do you need?” “Get dressed quickly, I’ll take you to the Tsar.” “But I don’t want to... The officer got angry and hit him on the cheek. And Emelya says quietly: - At the behest of the pike, At my will - a club, break off his sides...
The club jumped out - and let’s beat the officer, he forcibly carried off his legs. The Tsar was surprised that his officer could not cope with Emelya, and sends his greatest nobleman: - Bring the fool Emelya to my palace, otherwise I’ll take his head off his shoulders. I bought the largest one. a nobleman of raisins, prunes, gingerbread, came to that village, entered that hut and began asking his daughters-in-law what Emelya loved. “Our Emelya loves when they ask him kindly and promise him a red caftan, then he will do whatever you ask.” The greatest nobleman gave Emelya raisins, prunes, gingerbread and said: “Emelya, Emelya, why are you lying on the stove?” Let's go to the Tsar. - I'm warm here too... - Emelya, Emelya, the Tsar will give you good food and water - please, let's go. - But I don't want to... - Emelya, Emelya, the Tsar will give you a red caftan, a hat and boots.
Fairy tales with pictures
+170
Common mistakes when building a brick screen
4 ways to build a brick oven with your own hands for heating and cooking + video
Laying bricks close to the walls of the stove will slow down the heating of the room, causing excess heat to be released into the atmosphere through the chimney.
Laying bricks in a checkerboard pattern.
This option does not provide the proper air circulation described in the previous section. And since the screen area in this case is much smaller than with solid masonry, its cooling occurs much faster.
Thermal energy from the stove passes through such a screen as if through a sieve, so the room heats up faster, but cools down faster.
The efficiency of heat use in this case is reduced by almost half.
Ideas for decorating a fireplace made of cardboard in photo format
You can make an imitation of a fireplace from cardboard of any shape. Several ideas are collected in this section. You already know the assembly principles; you can come up with the decor yourself or use ideas from photos.
If you use good brick-like wallpaper, it will turn out very natural
If you use good brick-like wallpaper, it will turn out very natural. From one large box you will get a medium-sized fireplace.
A more complex shape and polyurethane moldings used work wonders
Imitation of masonry from different bricks
In progress... A high portal is quite easy to make. A worthy option... Even with a chimney
vote
Article rating
Bright details of the image of a fairy-tale hero
What can you make from a juice box?
What does Emelya wear, besides pants and a shirt? The suit can be complemented with an elongated vest or jacket. It is advisable that this item does not look too new and polished. The presence of fur edges is welcome. A headdress, such as a hat with fur, would also be useful. A classic earflap hat is also suitable for this outfit. Lapti are Russian folk shoes in which Emelya appears before the reader. The suit can be complemented with regular boots or felt boots. The masquerade outfit is ready. If you wish, you can draw freckles or blush on the cheeks of the fairy-tale hero. If you are making Emelya's New Year's costume, don't forget to decorate it with tinsel and sparkles.
What materials are needed
The best material is cardboard boxes. The easiest way to make a fireplace out of cardboard is if you have a box for a large monitor or TV. All you need to do is cut out the portal and glue the side walls.
Can be made from a large cardboard box or a number of small ones
It will be a little more work if you only have small boxes like shoe boxes. But from them you can assemble a more interesting model in shape.
You will also need:
- scissors;
- stationery knife;
- PVA glue;
- paper (masking) tape.
This is practically all that is needed to make a false fireplace from cardboard.
This is all the materials and tools that will be required. Of the entire list, questions may arise only regarding adhesive tape. Why paper? It is good in any finish. Including when painting. So the option is universal. If you are not going to paint the fireplace, you can use regular adhesive tape.
You will also need finishing material, but we’ll talk about this later, since a lot depends on the finishing method.
The meaning of the amulet doll Ten-handle
Ten-handed is a doll-amulet, which was made specifically as an assistant to women. Little girls had no need for it, but the talisman helped young housewives get everything done.
The Ten-Handed doll was created to help young housewives in order to have time to do all the housework.
Such an assistant was made for a special occasion - for a celebration or just like that, as needed. It is known that the Slavs gave the Ten Handles to young girls about to get married. The straw figurine helped them cope with pre-wedding troubles. Having become a bride, a girl could also receive a multi-armed figurine as a gift from relatives. It was believed that this simple amulet would help the bride settle into her new home - keep up with everything around the house, remain cheerful and full of strength.
Often the Ten Handles were offered to mature women, or they made it with their own hands. Even with experience in household and family affairs, a woman could get tired of everyday worries and then everything would be sorted out by Makoshi’s little assistant.
Generally speaking, the meaning of the Ten-Handed doll comes down to helping a woman. In the past, all Slavic women played an important role as guardians of the hearth, therefore, first of all, the lyalka favors traditionally female occupations:
- embroidery;
- sewing;
- knitting;
- cooking;
- cleaning;
- wash.
It has a positive effect on well-being - it drives away fatigue and gives energy, and thanks to this, any task that the hostess undertakes is completed.
Features, pros and cons of a homemade potbelly stove made from wheel rims
Nowadays it is not at all necessary to buy a home-made potbelly stove or make it yourself. You can buy it ready-made in the store. Moreover, some options look quite nice, and in the door area they have tempered glass, which allows you to turn such a stove into an impromptu fireplace and watch the flames. Yes, even ordinary potbelly stoves from the store, without glass, look quite good. But the question of quality remains open. You can buy the cheapest stove, but it will quickly burn out - a waste of money. And high-quality potbelly stoves will definitely not be sold for next to nothing.
Potbelly stove from the store
In addition, a good modern potbelly stove is made as safe as possible, which also increases its cost. Previously, the combustion intensity was regulated by opening the door, now - with special valves, which increased the level of safety when using the device. In addition, good store-bought stoves are much more economical in terms of fuel consumption than homemade ones. The chimney is also designed differently: now potbelly stoves have special smoke chambers or special systems, due to which the pipes rarely burn out. In smoke chambers, the smoke has time to cool slightly before being released into the environment.
We still suggest making a potbelly stove with your own hands, but one that will be reliable and durable. It won’t take long, but you will have much more confidence in such a stove than in a cheap store-bought version. So you will not only save money, but also be able to work in a warm garage for more than one season.
Potbelly stove made from wheel rims
For example, from wheel rims you can create a high-quality and durable potbelly stove. Its advantages:
- low cost - to create such a product you will not need to purchase any special materials;
- durability - car wheels are very thick and durable;
- heat resistance - the alloy that is used to create disks can easily withstand very high temperatures;
- high heating rate - such a potbelly stove quickly warms up to the required level and quickly warms up the room (efficiency reaches 85%);
- unlimited in size - to create a stove you can use 2-4 or more disks depending on your requirements.
This design, of course, also has disadvantages. To make such a potbelly stove, you need welding skills and a welding machine. In addition, the product retains the other disadvantages of any stove of this type: fire hazard, rapid cooling.
It is also important to consider some features. So, the distance between the bottom of the firebox and the grate to the first barrier to smoke (the top of the firebox) should not be less than 45-50 cm. If you have to heat the stove with raw wood, then it should be even greater - 65-80 cm
The need to maintain such a distance is due to the fact that the smoke, coming out through the chimney too quickly, takes away the lion's share of the heat. The result is a decrease in efficiency. Also, because of this, a lot of carbon deposits and soot are formed inside the furnace, which also reduce efficiency and increase the fire hazard of the furnace.
If you have to heat the stove with raw wood, then it should be even larger - 65-80 cm. The need to maintain such a distance is due to the fact that the smoke, coming out through the chimney too quickly, takes away the lion's share of the heat. The result is a decrease in efficiency. Also, because of this, a lot of carbon deposits and soot are formed inside the furnace, which also reduce the efficiency and increase the fire hazard of the furnace.
Scheme of a potbelly stove made from rims for a car
Low-quality fuel, garbage and waste are often used to fire a potbelly stove made from disks, and the optimal size of a stove for a garage is far from the largest. That is, in many cases it is simply impossible to make the combustion chamber high. In this case, it is easier to make a special grate structure assembled from thick steel or reinforcement. It is placed inside the oven, leaving a small gap of 5 mm to take into account the thermal expansion of the materials. Thanks to such a grate, you can solve the efficiency problem of a small stove.
Tin can for making a miniature stove
The simplest version of a stove with one wall is a stove made from a tin can - this is a mini-structure. When making such a device, you will need a tin can or an iron mug. The height should be approximately the same as a glass. You can find a design drawing on the Internet or make it yourself. Instructions for assembling a mini-stove:
- Make several holes in the bottom of the jar for draft. Air will flow into them, and the process of fire combustion will increase. If you make one big hole, the coals may simply fall out.
- Place small pieces of wood inside the jar. They should not look over the edges of the jar. Place logs only vertically.
- Then remove the block from the middle - this is necessary for air flow.
- Place paper and grass in the resulting gap. Light it up.
- The combustion process in such a device will last about 25 minutes. For food that requires a long cooking time, the time will not be enough, but for quick dishes it will be quite enough. At the same time, there is no smoke around.
Of course, if a large number of people go on vacation, then the mini-stove from a can should be at least a liter, and better yet, have a volume of two liters. But then the fuel consumption for such a wood-burning structure will be significantly higher. It is better to take larger firewood, then you will get a constant burning fire. This type of camping stove can produce fire for an hour. This time is enough to cook potatoes or meat. It can also be moved to a tent in case of rain. This type of stove will not serve you for a long time.
Boxes and organizers
Boxes are indispensable for making boxes. Such products are obtained almost for nothing, if you exclude the cost of materials and time costs. To create, you only need beautiful paper, wallpaper, fabric, and the nondescript box takes on a completely different look.
The following types of organizers and boxes can be made from cardboard containers:
Organizer baskets. Serve as excellent storage for a wide variety of items. A leather belt is attached to the box using a screwdriver and bolts, and the container itself is decorated with thick fabric. An attractive organizer is ready.
For chargers. Holes are drilled in the box at equal distances into which the eyelets are secured. Then they cover it with wallpaper. Chargers are inserted into the holes. Now the devices will no longer be confused with each other.
For ribbons and various braids. It is carried out according to a similar principle to the charger organizer.
For the office. Two boxes are glued together and decorated with fabric or wallpaper.
Basket for outdoor recreation. This basket is easy to make; you just need to attach a handle to it and wrap it in fabric. This thing is useful for carrying equipment and products for outdoor recreation.
Read here: Clay crafts: a step-by-step master class for beginners on how to learn modeling at home (95 photos)
Caskets. Such a thing can be created from a cardboard box using ordinary decoupage, cutting out an image from a napkin and gluing it onto the surface of the box.
Assembly options
If there is a big box
A large cardboard box will make a fireplace with a rectangular portal. Determine the size yourself, but the optimal height is about 80-90 cm, the width is about the same, and the depth is 6-15 cm. But there are models that are wider, narrower, taller, and lower. Everything is to your taste. For example, here is a drawing of a cardboard false fireplace with dimensions.
Drawing of a fireplace from a cardboard box
We begin assembling the imitation fireplace from cardboard from the central part. We form the columns first. Cutting rectangles to size is no problem. The problem is to make even folds in the right places. Take a large ruler or a straight bar and a hard object with a rounded end. For example, a ballpoint pen will do, or you can take a spoon or fork and use the pen. The idea is as follows - along the line where the fold should be, apply a ruler/bar, draw the back of a ballpoint pen or the handle of a cutlery along the bar, pushing through the cardboard. But be careful not to tear it. The sheet bends easily along the drawn line.
Cardboard fireplace parts
We glue the central part or paint it right away. Then it will be too inconvenient. You can paint it black, as in the photo. Another option is to imitate brickwork. Looks good too.
It is convenient to glue the parts together with tape (the type of tape has already been discussed). We glue each connection on both sides. We don't regret scotch. This cardboard fireplace was painted, so the columns were covered with white thick paper. You can use a primer and apply paint over it.
Almost done
We make a shelf above the fireplace from several pieces of cardboard using the same technology. If you plan to install something, it is advisable to make stiffening ribs - several partitions. If the entire structure turns out to be strong and stable, you can make a shelf from a piece of plywood, for example.
If the cardboard is thin, you can use polystyrene/foam. It is sold in construction stores. You can take the slabs that are used to finish the ceiling. They have processed edges and a pattern is applied to the front surface. In general, it might turn out interesting.
Next comes the finishing touches. In this version, “bricks” were cut from paper of suitable colors. They decorated the portal opening. This is where you will need PVA glue. Do not forget to leave seams between the “bricks”. In the presented model they are painted with a base color, but you can make them, for example, black or white.
Portal design
The rest of the surface of the false fireplace is painted, and foam (polystyrene) moldings are glued on top.
This is what happened
Moldings can be glued before painting. You need to cut them with a sharp stationery knife. Then the cut will be smooth. Glued with PVA or special glue. Wipe off any remaining residue immediately, otherwise the paint will lie unevenly.
The same structure can be covered with brick or wild stone wallpaper. Self-adhesive film is also suitable. But you have to work with it carefully - you won’t be able to peel it off.
If the boxes are small
Small cardboard boxes are no more difficult to work with. They can be the same or different sizes, thickness and width. Based on the existing set, the structure is assembled.
This is the fireplace we made from existing cardboard boxes
- Seal the opening part of the boxes with tape, then glue them together. You can use PVA glue. Press the boxes to be glued well together and leave for 8-12 hours for the glue to dry.
- Cut off the opening part and glue them together with pieces of tape.
Glue the boxes with tape from the back.
The second option takes less time, but the design is unreliable. If the dimensions are large, it may sag and sag.
To give a fireplace made of cardboard boxes a presentable look, we paint it “like brick.” To do this, cover the surface with thick grayish-brown paper. This color will be the background.
To paint, you need reddish-brown paint and a large foam sponge. It can be cut to the size of the brick - 250*65 mm. Pour the paint into a flat dish, dip a sponge into it, apply it to the paper and lightly press it, draw the bricks.
Drawing bricks
When working, you need to make sure that the “seams” between the “bricks” are the same width. This is not an easy task - you get distracted a little, and the size is not the right one. You can do it simpler - cut the masking tape into narrow strips, stick it on, and draw “bricks”. After the paint has dried, remove the tape.
Here's a fireplace made of cardboard
The top part had to be reduced because our fireplace was too wobbly. It is better to use whole boxes.
Fireplace with round portal
Its assembly is more labor-intensive: you will have to glue the vault well. This fireplace required 4 large boxes (like TV boxes).
Drawing of a cardboard fireplace with dimensions
The base was glued separately. Stiffening ribs were glued to the inside of polystyrene. The weight turned out to be solid and the base sagged without reinforcement. The strips were installed approximately 5 cm apart. They were glued with masking tape, then the base was taped on all sides.
Then we cut out the front part and decorated the back wall. It’s better to decorate it right away, before it’s glued together. We transfer the arched cutout onto a sheet of cardboard. We cut out “bricks” from cardboard and glue them so that the edges do not extend beyond the “arch.” When the glue dries, we assemble the main part of the portal. We also install several stiffening ribs in the portal - at a high height, the cardboard can “play”, and this way everything turns out strong and rigid.
The process of making a fireplace from cardboard
The next stage is making the lid. It is multi-layered - cardboard, polystyrene foam, cardboard. Everything is coated with glue, the weight is installed. When the glue had dried (after 14 hours), the lid was secured to the structure with tape. NEXT - finishing work.
To smooth out any unevenness caused by the tape, we cover all surfaces with thick white paper. You can take A4 sheets, or larger ones.
Next you will need a roll of paper towels and PVA glue. We dilute it 1:1 with water and pour it into a spray bottle. We wet the napkin and lay it down, squeezing it a little. Wet thin paper itself gives a relief; we just correct it a little, achieving a better effect. We process all surfaces in a similar way, excluding “bricks”. We wait until it dries.
This is how the surface turns out
We take red-brown and ivory paint (in this case). We paint the “bricks” brown, and the rest of the surface light. The cardboard fireplace is almost ready. The finishing touches remain.
This is how the cardboard fireplace turned out
After drying, we go over everything with a brush slightly dipped in gold paint. We dip the brush, squeeze it out, and once again remove the remaining paint on the sheet of paper. Using a semi-dry brush, we go through the “seams” between the bricks, lightly touching the “bricks” themselves. Next, using the same technique, we emphasize the texture of the surface. It is important not to apply too much paint. That's it. The cardboard fireplace is ready.
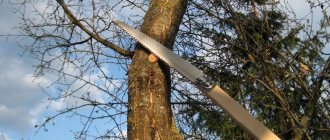
We build stone wood-burning barbecues and barbecues for the garden
To build a foundation, it is recommended to first dig a small pit, each side of which should be approximately 20 cm wider than the side of the future barbecue. Sand and crushed stone should be poured into it, watered and compacted thoroughly. After this, it is necessary to install formwork from boards, and lay a reinforcing belt inside for greater strength and fill it with concrete. For reinforcement, you can use steel mesh or wire. It is recommended to add crushed stone or pieces of old brick to the concrete mixture. After pouring, it should take 5-7 days for it to set well. Roofing felt or some other waterproofing material should be laid on top.
Then you can proceed to the construction of the base. Laying should be done on a pre-marked surface using a building level. To achieve greater strength in the corners, it is recommended to reinforce with wire. The dimensions of the base depend on the planned width of the firebox and the presence of additional compartments for firewood. The brick should be soaked so that it does not absorb moisture from the mortar. The stone can be laid dry. The width and height of the plinth may vary, but 5-6 rows of bricks are quite sufficient.
To further equip the furnace from scrap materials, it is necessary to lay the interior of the structure. For this, it is recommended to use refractory bricks. If it is not available, then you can use ordinary red brick or natural stone, first thoroughly soaked in water.
When laying with any available materials, you should use clay that has been soaked for several days. It must be mixed with sand in a ratio of 1: 3. You can use another composition by mixing cement, sand and slaked lime (1: 1: 3) and adding water to bring the solution to a thick mass.
It is necessary to leave a gap at the bottom for the blower so that the air necessary to maintain the fire can freely flow into the firebox. Place a grill rack in the roasting pan. It should be installed on built-in iron corners or brick projections so that it is removable. You can also make racks for the spit from reinforcing steel.
After this, you can begin exterior finishing. The outside of a stone stove with a barbecue can be beautifully lined with natural stone, with which forged decorative elements will be beautifully combined.
It is recommended to lay the floor around the structure with paving slabs, and the cutting surfaces are best made of porcelain stoneware or marble slabs. Additionally, if desired, you can design an exhaust pipe.
The construction of a stone oven should be completed by installing a roof, which will allow the fireplace to be used in any weather.
Below are several photos of stone ovens, where finished objects are presented:
Mini-oven made of cardboard box and concrete
Materials and tools used by the author:
List of materials:
- cement and sand; — fittings.
Homemade manufacturing process:
Step one. We make formwork
We take a plastic or other box and place a cardboard box in it. If necessary, treat the box with tape. We sprinkle sand around the box so that the formwork does not fall apart when pouring concrete.
We install a foam plastic disc at the very bottom of the box and fill it with concrete on top, then there will be a niche for the ashes.
We also install parts made of foam plastic, which, after removal, form the combustion window and the legs of the stove. Then a plastic bucket is installed on top, this will be the cavity of the combustion chamber. We pour concrete around the bucket.
Step two. Pan supports
We make supports for the dishes; the author simply bent parts from the fittings in the shape of the letter “G”. We insert the parts into the concrete and center them as needed. We also place foam plastic parts in the formwork, which will allow the formation of side holes in the walls of the oven. That's all, we finally fill the formwork with concrete and wait at least two days. As soon as the concrete sets, carefully remove the stops from the reinforcement, otherwise the bucket will not be pulled out later.
If desired, you can embed a reinforcing grid into the body of the stove; it will prevent the structure from falling apart, even if the stove cracks.
Step three. We remove the formwork and modify the oven
Cut the cardboard box and remove the plastic bucket. Now you can install our reinforcement stops in their places; they can be glued to the concrete.
We pick out the foam from the blank, creating niches and holes in the body of the oven. Finally, we coat the stove with concrete to make it smooth and remove defects.
Do-it-yourself model of a Russian hut
To do such a thing, take:
- cardboard box;
- self-adhesive film;
- PVA glue;
- bandage;
- brush;
- ceiling tiles;
- wallpaper.
Take a box and cover the bottom part with self-adhesive wood-like film to create a floor like this. Wallpaper should be glued to the walls inside.
To make a model of the Russian hut further, parents or children will draw on the back side with their own hands where the windows will be located.
But the parents will cut it out with a breadboard knife. You can make 3 windows, one on each wall. Glue ceiling tiles on top to make this part of the house beautiful. For such work, you need to take a special glue that will fix this material well.
Draw the shutters first with a pencil and then paint them.
Also make a crib out of ceiling tiles. To make its elements as strong as the house, cover it with a bandage.
Very soon we will have a model of a Russian hut. First, paint the bed brown. Then cut out the parts of the stove and glue them together. Don't forget to make a compartment for cooking and storing firewood.
Also cover the outside of the stove with a bandage and then paint it with white paint. In the corners this whitewash seemed to have fallen off a little. Show this by painting here in brown. When the paint is dry, paint around the firebox with black. Take tree branches that need to be cut into 4 parts. The grip is made from a wooden skewer, and its upper part is made from wire, which can be covered with fabric and glued here. The rug can be crocheted in the round. Make a bench on which you place a ribbon with a folk pattern. Make a cradle.
Place a figurine of the hostess inside and hang tulle curtains on the windows. Sew small pillows for the crib. Place the cat on a toy stool. You can also sew it yourself.
Glue a small icon on a paper base into the corner, make a cradle, attach it to the top and place it inside the toy baby.
You can add some of your own items to the hut layout.
Here's another model of a Russian hut you can make.
- For the base, a box has already been taken, but with lower sides than in the previous master class. Make a stove out of cardboard. To do this, you need to make 3 parts from this material and glue them together. The smallest one will be at the top. This is a pipe.
- It’s better to immediately take white cardboard so that you don’t have to cover the base with paper of that color or paint it.
- Then you will need to draw the firebox and the fire in it. Place several sawn branches nearby, as if they were firewood. Place a blanket made using the patchwork technique on the stove.
- For it you will need some leftover material that needs to be sewn together. They are then sewn to a fabric base of the same size. Make a table and a bench from cardboard, which needs to be covered with adhesive film. The bed is made in the same way. You need to sew a set of bed linen and pillows from fabric. Place a knitted rug on the floor. Place a table with kitchen utensils nearby.
- Attach a curtain to the windows. As you can see, the cradle is suspended using a wire hook. Make it from ice cream sticks, attach fabric and threads here, by which the cradle will be suspended.
Children love to look at such objects. They will definitely ask questions about what and how of these items were used in the old days. You will tell them and thereby broaden the children’s horizons.
The third master class with step-by-step photos will also demonstrate how to make a model of a hut. To make it, take:
- box or plywood for the base;
- stain;
- sharp knife;
- scissors;
- brush;
- salty dough;
- glue gun;
- gouache;
- newspapers;
- wooden skewers;
- pencil;
- wire;
- textile;
- lace;
- plasticine;
- PVA glue;
- thread with a needle.
Before making a model of the hut, prepare the base for the floor with your own hands. To do this, glue a sheet of cardboard here, painted with stain. Then it will seem like a plank floor. Using the same technology you will make a table and a bed. Use glue to connect the parts of the cardboard bed, after covering them with stain. Do the same with the table. Cover it with a cloth; you can first sew lace to the tablecloth. A bed cover is also made. Make pillows for her.
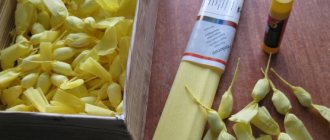
Making a pencil stove out of cardboard
I present to you a master class on a small pencil holder. The pencil stove will perfectly complement the interior of a children's room. You can decorate in any style, I decided to choose “Khokhloma”. For production we will need:
- cardboard (I used bindery cardboard, but corrugated cardboard will also work);
- PVA glue, transparent;
— acrylic primer, acrylic paints, water-based varnish;
- brushes, scissors, stationery knife;
- burlap, decorative clothespins, string.
Cut out the pattern and transfer it to cardboard. Cut out using a utility knife or scissors. We prepare a glue gun and glue the joints and assemble the structure together.
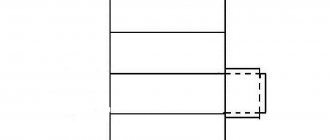
It turns out two rectangular, two curly and one more rectangular (it must be cut and bent a little). Cut the cut into approximately 5 cm and 7 cm.
We glue the long part with the cuts up to the bottom, and bend the short part in the opposite direction and glue it with the cuts down.
Now we cut small “bricks” of different sizes. And glue it along the edges using a glue gun.
We cut out doors randomly; for the bottom door I cut a hole with a stationery knife. But you can just stick it on.
You can now start painting, but I still reinforce it with tissue paper. I tear tissue paper into small pieces and glue the joints, bricks, and doors using PVA glue and a brush.
Let it dry a little and cover with acrylic primer.
And now the fun part. We select a napkin for decoupage. I have Khokhloma. We decorate the entire stove except the bricks using the “decoupage” method.
We cover all the bricks and doors with dark brown. Then cut off a small piece of sponge.
We dip it in white (without water), and go over the joints, bricks, and doors.
You can add yellow. You can paint the stripes with white, in general, let’s use our imagination!
Now we cut off pieces of burlap and glue them to the pencil holder.
Let it dry and coat with varnish.
We tie a rope and attach decorative clothespins.
Our pencil holder is ready