Do you want to give your little girl an original gift? Make a doll stroller with your own hands from planks and fabric. It may seem complicated, but it's much easier than you think. You can complete this step-by-step instruction in a few hours. Any girl will be delighted with such a stroller and will surely spend many happy days playing with it.
Consumables:
- Wooden boards 2 cm thick and 4 cm wide.
- Wooden round beams.
- Wheels – 2 swivel and 2 fixed.
- Dye.
- Textile.
- Sewing machine;
- Screws 2 cm.
- Drill and drill bits.
- Wood glue.
- Cutting hand saw or jigsaw.
- Protractor for determining the 45° angle.
Transformer
A place to lie down must be provided for the baby. Under the handle it should be possible to attach a semicircle in the legs, which will turn the seat into a cradle. For some models, you need to pull the cover on top - from the outside. A carrier is placed inside.
If you are assembling a seat, place a fabric jumper for the legs on the crossbar that secures the child
. Insert the crossbar into the holes on the sides of the frame; they should snap into place. Pull the footrest from below and adjust its position. The backrest is adjustable at the back.
If you want to change the fit and move the handle to the other side, pull the two latches on the sides towards you.
They only move up. Once the entire part of the handle has begun to move freely, transfer it to the other side. And wait for the click again.
The basket is standardly fastened with buttons, just “hook” it to the frame from below and fasten it.
When folding the stroller, pull the handle back and lower the hood.
Basic Actions
- First, the wheels are put on the chassis. Most strollers have latches in place. Therefore, carefully insert the axle into the hole in the center of the wheel and check how it rotates and whether it is loose. After this, snap the fastener into place.
- Apply the brakes to continue.
- Pull the handle. If it is not already on, insert it into the holes that are located on the pipes protruding above the base. Wait for the characteristic click.
- Pull the handle towards you so that the lower part “opens up”.
- Wait for a click or put on the fasteners (for older models).
- After the chassis is assembled, you can install the cradle or walking block. Here the actions depend on the type of stroller.
Modular “2 in 1”
Carefully inspect the top of the wheel block. Usually it indicates with arrows where to turn the mount to install the cradle or seat unit.
On most strollers you need to do the following:
- Turn the hooks on the frame on both sides clockwise.
- Insert the block bayonets into the holes.
- Turn the hooks clockwise again.
Caring for a stroller at home: washing instructions and tips
Washing a transformer is not as difficult as it seems, especially when compared with other stroller models. You can do this as follows:
- remove the shopping basket, the hood (don't forget to remove the metal arc that supports its shape) and all other fabric elements and wash them in the washing machine. They can be fastened with Velcro, buttons, locks, or bolted;
- Clean non-removable parts with soapy water and a brush.
It's good if you live in a private house. In warm weather, you can wash the stroller outside using a water hose. In an apartment, a bathroom followed by drying on a balcony or in a well-ventilated area is quite suitable. Hand wash steps:
- Place the stroller in the bath directly with or without the wheels, which need to be washed first.
To remove the wheel, pull the bracket
- Prepare a warm soapy solution. To do this, add baby powder to a bowl of water. Stir it thoroughly.
- Wetting the brush in the prepared solution, walk over all surfaces of the stroller.
- Rub especially dirty areas with laundry soap. To combat stubborn stains, use a stain remover.
- Using the shower hose, remove the soapy water from the stroller.
- Without using detergent, brush the fabric parts again.
- Rinse the stroller again and leave to dry.
Armchair and sofa
Now we can start making furniture for the living room, because our doll needs somewhere to receive guests.
So, let's start making the chair.
In order to make a similar option, we will need:
- thick cardboard or corrugated cardboard;
- plain paper;
- cardboard thread tube or old felt-tip pen;
- thin foam;
- glue;
- scissors;
- upholstery material (you can use any fabric you like);
- pencil, ruler.
Read this: DIY paper rose using several techniques
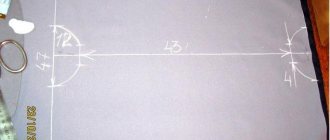
It is necessary to cut out a pattern from plain paper.
To make the seat stable, cut out several identical parts from corrugated cardboard and glue them together. We collect all the parts as shown in the photo.
We need thread tubes for the armrest; they need to be secured with PVA or Moment glue.
In order to close the holes between the seat and the armrest, it is necessary to cut out suitable size strips of cardboard and, gluing them together, place them under the armrest.
That's it, let's start upholstering our chair. To do this, we cover it with thin foam rubber and fabric.
We do the same with removable pillows.
This is the charming chair we came up with:
A few more photo ideas.
As for the sofa, the manufacturing scheme will be approximately the same. You can change the shape and size, but the essence of the assembly will be the same. We bring to your attention several options for inspiration.
Read this: Paper gun for fun children's games
In fact, cardboard is a very versatile material for this type of product, and most importantly, it is very flexible, which allows you to create different shapes. Using the same principle, you can create different furniture: chests of drawers, cabinets, tables, coffee tables, kitchen sets, all kinds of bedside tables and much more. Don't stop and create with your children, creating a unique interior for dolls.
For inspiration, we offer several ideas for various furniture with detailed diagrams.
Why is a doll stroller important for babies?
Little ones not only play with dolls, but also take care of them: bathe them, put them to bed, and carry them in strollers.
From three to five years old, children imitate adults. Babies try on the role of a mother , thereby cultivating love, care, responsibility and tenderness for others.
DIY stroller made of wood
Little “mothers” are delighted when they get a stroller for twins, or even triplets. With such a purchase, the baby will no longer be bothered by the question of which doll to take for a walk .
1.1 Requirements for strollers for dolls
sustainability
DIY strollers made of plywood
Making furniture for dolls with your own hands: what available tools will be useful?
If you want to please your little one with a new addition to the dollhouse interior, do not rush to get rid of the following:
- matchboxes (it’s easy to use them to make real drawers for dressing tables and cabinets);
- cardboard boxes for shoes, cosmetics and small household appliances;
- plastic bottles;
- bright sponges for washing dishes and viscose napkins for cleaning;
- plywood;
- scraps and scraps of fabric and leather;
- flexible wire and foil;
- plastic food containers, egg molds;
- threads for knitting and other little things that will be useful in creating doll furniture.
A whole set of furniture in the same style. Lighting from diode garlands also looks great in doll houses - children like it and, what is important, it is fireproof
“Primitive” wooden furniture for dolls, rough work, giving initial skills
Advice!
In addition, you may need polymer clay, beads, beads, rhinestones and other decor at your discretion: after all, the brighter and more elegant the interior of the doll’s home, the better.
LiveInternetLiveInternet
Quote from message Chip_i_K
Read in full In your quotation book or community! MK strollers. From the series “Into the Hands of a Doll”) https://needleworkworld.blogspot.ru/
I'll tell you how I made this beauty
The fabric was first stitched, then wrapped and basted, stretched.
Cut it from ceiling tiles (or from the same cardboard box)
the bottom of the stroller (put the side and circled it) and the mattress - the mattress needs a smaller size.
Now I cover it with fabric and tie it with thread
I sew the bottom to the side of the future stroller
I glued double-sided tape to the mattress and put it in the stroller.
Hood: I cut out the following details - 2 side parts and one central
Glued it together with tape. It seems to have worked out well...
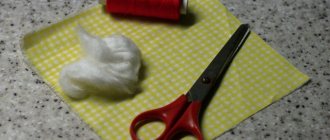
From the fabric I cut out 4(!) side and 2(!) central ones. Sew it together.
Assembly Recommendations
When assembling a stroller without instructions, follow a number of rules.
- Carefully examine all parts to see the markings.
- Don't use too much force - if something doesn't fit, you're trying to assemble it incorrectly.
- If the wheel does not fit on the axle, turn it a little - it usually has a shaped tip that is inserted into the corresponding slots in the wheel.
- Before assembling or disassembling the stroller, wipe it down, preferably lubricating the wheelbase.
- Before folding, remove the cradle from the transformer and all foreign objects from the basket and stroller box.
- Always lower the stroller hood as far as possible before folding.
- When transporting the stroller, hold it by the special handle. If there is none, for the metal parts of the frame.


