Understanding the material
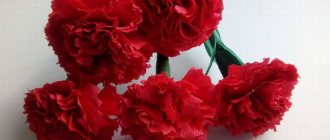
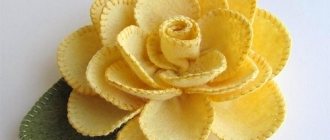
Foamiran is an artificial material with an elastic, delicate structure. It is widely used in the craft industry to make various creative crafts. Other names for the material are “rubber paper”, “artificial suede”. It is elastic, similar to suede. In fact, foamiran is foam rubber, which changes shape when heated. In some cases, the warmth of human hands is enough for this. Thanks to this feature, you can create three-dimensional figures of different sizes.
A specific material is used for decorating interior items, jewelry, and wedding accessories. The most famous manufacturers are China and Iran. A higher quality, thinner version is produced by Iranian enterprises. A variety of shades, the ability to change the tone are additional advantages in favor of choosing foamiran.
The material has a number of distinctive features:
- Harmless. Foamiran does not contain toxic substances. It is absolutely safe for children. New sheets may emit a subtle odor. It quickly disappears after airing.
- Does not retain moisture. Any product made from this material can be washed with water. It will not change shape, will not get wet, or tear.
- Plastic. To give the craft a certain shape, sheets of foamiran are heated.
- Seamless processing. You can easily form a hole in the material with a hole punch, cut it with a stationery knife, or do embossing.
The modern world of needlework is diverse. Products made from foamiran are becoming increasingly popular among creative people. Ease of use, durability of the material, bright palette of colors make the most daring ideas come true.
Ideas for Beginners
We offer a simple DIY brooch for beginners. This technique was developed taking into account handicraft skills. If you follow the recommendations from professional craftsmen, you can get a high-quality result.
In this case, we will make a beautiful brooch in the shape of a bird. To do this, you can use a fabric patch, which can be purchased in specialized stores. In addition to beads, rhinestones and large beads, you can get a unique accessory.
For work we will use a step-by-step diagram of how to make a brooch with your own hands. It consists of the following points:
- We decorate the surface of the patch with beads. To do this, we sew on bright details in a chaotic manner using thread and needle.
- Glue large rhinestones in the area of the tail and wings. They will help add bright accents to your brooch design.
- We cut out a piece from artificial leather that accurately replicates the silhouette of the bird.
- We make a through hole for fixing metal fittings. Carefully fasten the clasp.
- Now using glue we glue the two parts together. We decorate the side edges with small beads. Carefully sew the two elements together.
- Our accessory is ready! You can use this brooch to decorate your everyday and evening looks.
Useful tips
Foamiran is used in many areas. Each time, needlewomen try to expand the range of its capabilities by carrying out additional manipulations with multi-colored sheets. When working with this material, you must follow a number of simple rules - they will help you create a high-quality product:
- Application of paints. Despite the rich color palette, sometimes there is a need for an additional shade. It is best to use pastel, acrylic paints. Foamiran can be painted with gouache, watercolors, crayons, and glitter. It should be remembered that after changing the color, the craft becomes disposable . It is impossible to wash it from dust - the colors will run.
- Connecting parts. You cannot secure a foamiran product with regular PVA or an adhesive pencil. For this purpose, they purchase a “Moment”, a special pistol .
- Glue drying. The bonded parts must be given time to dry. After using the glue, you should leave the product for approximately 24 hours . Only then continue working.
- A similar option for fastening appliqués is to sew them together with a needle and thread . Neat stitches are in no way inferior in strength to glue.
Chamomile
Chamomile has long been considered a symbol of family. Despite its simplicity, it is a very sunny and bright flower. It is no coincidence that weddings are so often decorated with daisies. To easily create a charming daisy from foamiran, we suggest using a step-by-step master class and photos.
You will need:
- white, yellow and green foamiran;
- sheet of cardboard;
- protractor;
- ruler;
- pencil;
- glue.
- thin stick for the stem or wire.
- iron or candle.
Master Class
- We cut out 4 circles of different diameters from white foamiran (for example, 9 cm, 8, 7, and 6 cm). To make the circles even, use a protractor.
- Using scissors, we make the shape of the petals around the entire circumference, then cut them, leaving about 3 mm to class=”aligncenter” width=”700″ height=”920″[/img]
- We heat the ends of the petals and give them shape.
- From yellow foamiran you need to cut a long strip (about 27 cm) 2 cm wide. This will be the center blank.
- We make cuts along the entire length of the strip with scissors to create a fringe.
- Next, lubricate the strip with glue and twist it.
- We attach the core to the wire.
- Next, we string the petal blanks onto the stem, starting with the smallest circle, and do not forget to lubricate with glue.
- For the backing from green foamiran, cut out a circle and make cuts. It will be the final row in creating the chamomile.
Chamomile from foamiran is ready!
Hair band
A headband with flowers made of foamiran will become an exquisite accessory for every fashionista. To make the decoration you will need ready-made flowers, leaves, glue, and a headband. The algorithm for creating an original craft is quite simple. It is enough to glue the leaves and selected flowers to the rim. Carefully secure the composition. You can decorate with beads and sprigs of greenery.
Gorgeous rose
You will need: red and green foamiran, ruler, scissors, glue gun, iron, instant glue, foil, green and black pastels, tweezers, lighter, floral wire, tape tape, plastic mold sheet, stationery knife.
Master Class
- Cut 25 rectangles of red foamiran measuring 3x4 cm.
- Fold the rectangle in half and cut off the corners. Do this process with all the pieces.
- Heat the petal by holding it near the iron for 5 seconds, then stretch it in all directions so that the foamiran becomes thinner and twist the edge of the petal outward. Make a fold, pinch with tweezers and secure with a lighter. Repeat this process with all the blanks, forming petals.
- Prepare a rectangle of foil measuring 10x15 cm.
- Shape the foil into an oval shape and glue it to the end of the floral wire.
- Apply glue to the bottom of the petal and wrap it in foil.
- Glue the petals to form a rose.
- Wrap the wire with tape, securing it with glue at the beginning and end of the stem.
- Cut out 3 leaves from green foamiran.
- Cut out a square of green foamiran measuring 7x7 cm.
- Fold the square in half 2 times.
- Give a leaf shape at the edges where there are no folds, then unfold the sepal.
- Make small shavings with a stationery knife from black and green pastels, mix them and darken the edges of the sepals with a sponge.
- Warm up the leaves and press them onto the mold.
- Heat and mash the sepals to give them a realistic look.
- Glue the sepal to the base of the bud.
- Glue the leaves.
A gorgeous foamiran rose is ready!
Panel
Panels and paintings made from foamiran will become the highlight of the interior and will serve as an excellent gift. Before starting production, you should decide on the image and general style. These can be landscapes, flower arrangements, still lifes. Stages of craft design:
- Carrying out basic work on the painting - drawing the background, creating convex parts.
- Placement of foamiran parts. The elements are prepared in advance using an iron, scissors, and templates.
- The workpieces are carefully fixed on the canvas.
Tulips
You will need: foamiran in bright colors, green foamiran, floral wire, dry pastel, wet wipes, tape, floral buds, glue, scissors, ruler, iron, cardboard, toothpick.
Master Class
- Draw a tulip petal 6 cm high and 3.5 cm wide in the center on the cardboard, then cut out the template.
- Draw a tulip leaf 25 cm long on cardboard and 3.5 cm wide in the center, then cut out the template.
- Trace the petal template onto foamiran with a toothpick and cut out 6 petals.
- Trace the leaf template onto green foam paper with a toothpick and cut it out.
- Tint the petals and leaves of the future tulip using a damp cloth and dry pastel.
- Heat each petal by applying it to the iron, then give them a realistic shape by stretching them in width and length.
- Heat the tulip leaf and fold it in half lengthwise.
- Glue 3 petals to the flower bud, completely covering it.
- Glue the remaining 3 petals, placing them in a checkerboard pattern.
- Glue a piece of floral wire into the leaf.
- Wrap the stem with tape and attach the leaf.
- Make a whole bouquet of tulips in the same way.
Foamiran tulips are ready!
Topiary
Topiary is an original craft, an excellent gift option, desktop decoration, or home interior. Algorithm for creating a tree from foamiran in accordance with photo diagrams:
The photo shows how to make topiary from foamiran:
Making a brooch in the shape of a heart
To create such a decoration, you need to prepare several components. These include:
- Felt in a bright shade;
- Beads, decent rhinestones, bugles and Czech beads to match the fabric;
- Transparent fishing line;
- Scissors;
- Heart template;
- Faux leather;
- Thin needle for beads;
- Metal zipper;
- Accessories for jewelry.
The process of creating a decorative accessory consists of several steps. They consist of the following actions:
- Cut the zipper into 2 parts. Remove pieces of fabric using scissors. We burn the borders with a lighter.
- Now we move on to preparing the fabric base. To do this we will use a template. Carefully transfer it onto the back side of the fabric.
- Using sharp scissors, cut out the resulting blanks.
- We sew metal zipper teeth along the borders of the heart. This way they will act as a decorative border.
- Now we move on to filling the felt blank. To do this, we sew large elements in a chaotic order.
- After this, you can move on to filling the space with small beads. We decorate the part until the felt heart acquires convex borders.
- We cut out the back part from artificial leather. It is necessary to make a through hole in the middle to mask the fittings.
- The final stage will be gluing the two blanks to each other.
What else can be made from foamiran
Crafts made from foamiran are not only flowers. Foamiran is a universal material. You can make many unique works from it.
Postcards
A foamiran postcard will make your congratulations unique. The creation algorithm is shown in the photo:
Fruits
Fruits from foamiran will become part of the composition or a separate still life. Raspberry design scheme:
Jewelry, brooches
An original foamiran brooch is a work of art. It doesn’t require a lot of materials or time to make it. You need a ready-made foamiran flower, fastening, and glue. The blanks are arranged into a single composition. They are secured with a clasp.
Crown
A crown for a small or large princess is suitable as a festive attribute. Manufacturing scheme:
Owl
Every needlewoman can do the painstaking work of making an owl. To create a three-dimensional craft, you will need two foam balls. Details are cut out from foamiran - feathers, eyes, beak. Paste over the bird according to the photo:
Cabbage
Decorative cabbage made from foamiran is not inferior to flower arrangements in beauty and originality. Design algorithm:
Poppy
Poppy made from plastic suede turns out very bright and beautiful. It is not difficult to create even for beginning craftswomen. For clarity, we offer you a master class on making red poppies.
You will need:
- red and green foamiran;
- sheet of cardboard;
- toothpick;
- black threads;
- glue gun;
- scissors;
- 20 cm wire;
- bead with a diameter of 2 cm.
Master Class
- Draw patterns of poppy petals on cardboard and cut them out. You can make several templates of different shapes to make the poppy more realistic.
- From green foamiran we cut out a circle with a diameter of 6 cm.
- We insert the wire into the bead and secure it by twisting it. This will be the stem of the flower.
- Using an iron, heat the circle and wrap the bead in it. The edges are secured around the wire.
- We wrap the resulting ball with black threads, as shown in the photo.
- Next, cut out the red poppy petals using the templates.
- To give the petals a wavy texture, fold them like an accordion and twist them, squeezing them with your fingers.
- Next, glue the red petals to the stem. It is enough to make two rows to make the flower lush.
- Cut out leaves from green foamiran. To make the leaves realistic, we make cuts along the entire edge and roll them between our fingers.
- Cut the wire and glue the leaves.
Foamiran poppy is ready!
What happens
If you are thinking about where to buy foamiran, then pay attention first of all to highly specialized stores. This material is currently being produced in China, South Korea and Iran. Iranian foamiran is considered the best. But for flowers, cheaper South Korean ones will also work. Chinese plastic suede will be good for children's creativity. It is produced in large sheets of approximately 60 by 70 centimeters and in sheets of 30 by 40 centimeters.

