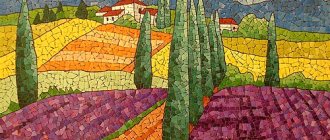
Origami pencil made from paper is usually used as a bookmark for textbooks or as a decoration for school-themed cards. But these are far from all the functions of an easy-to-manufacture and creative model. For example, a large origami pencil can easily be turned into stylish packaging. There can be anything inside: from sweets to a small gadget.
Craft “Paper Pencil”
The craft can be done in one evening if an adult helps the child. It is noteworthy that it is better to get down to business with children of preschool age, but aged 5 years and older. But even such a child will need the help of adults. Some of the features in making crafts include the following:
- You can make a simple pencil from paper - colored, special for printing, or cardboard, if the craft is required for long-term use.
- The size of the craft directly depends on the size of the sheets of paper.
- If colored paper is not available, you can use a landscape sheet that is pre-painted in the desired shade. This will be difficult to do in the future.
- If you use cardboard, you will get a high-quality and durable structure. It can be used as a pencil holder - an item for storing pencils and pens.
There are many possibilities on how to make a pencil with your own hands from paper; it is important to choose the most suitable one. Next, one of the options will be presented that requires a small number of actions, so even the smallest student can cope with the task.
Coating features
Modern pencils and colored pencils come in a huge variety of designs and colors. Since pencils are made in a factory, close attention is paid to each stage of production. Painting is one of the important stages, as it must meet a number of requirements. The extrusion method is used to finish the surface, and the end is finished by dipping. In the first case, the pencil passes through a priming machine, where at the end of the conveyor it is turned over to apply the next layer. This way you get an even coating.
What materials and tools are needed for the job?
To make a craft yourself, you can use a certain set of tools. For the planned option, you will need to prepare the following details:
- colored cardboard - used as needed;
- colored paper;
- White paper;
- scissors;
- a simple pencil;
- ruler;
- glue stick;
- felt-tip pens or colored pencils, you can use special “live” eyes.
From the assembled parts you will get the pencil shown in the photo. It can be partially changed as needed.
Children should not be left unattended with scissors, pencils and pens. With kids, you need to cut out the parts together to prevent cutting.
Hedgehog in the fog
- You will need a lot of blanks in the form of a 2 cm piece with a sharp edge. The pencil is cut with a thin wood hacksaw on a safe basis.
- And also a figure of a hedgehog made of foam plastic or papier-mâché.
- Glue the finished eyes onto the figure, assemble a polka dot string bag on a stick from scrap materials.
- Next, without missing a single mm of area, cover the figure with prickly blanks.
Tips and tricks
Making any paper craft requires following the rules and sequence of actions. In this case, there are several tips:
- with children it is recommended to use only a glue stick, which gives more accurate work than PVA glue;
- the scissors that you take for work should be chosen from the “for children” category - they are less sharp, but sufficient to cut out the workpiece for the craft;
- the use of cardboard requires the mandatory participation of adults, since a child of any age will not be able to make a clear fold;
- in making a blank for a cone, it is not necessary to use a compass to draw a circle - you can take any round object and trace it along the contour;
- gluing the individual lower parts into the “bottom” must be done carefully and in sequence - the parts are glued in order;
- A child may have problems gluing the cone, so it is better to help adults in making the craft.
The pencil craft goes well with a self-made eraser, pen, book and other stationery items. All of them can be done in subsequent evenings.
Paper pencil craft
Gifts are one of the indispensable attributes of any children's party. And if it’s a school holiday, then to lift the mood, a small souvenir should be given to each student in the class. At the same time, you always want the surprise to have a practical application, but at the same time look festive. One such surprise option could be a pencil craft made from cardboard.
The good thing about a pencil craft for a children's party is that it corresponds to the school theme, has many options for filling, and does not require much time or effort.
Pencils
What you need to prepare in advance:
- a ready-made cardboard tube (the base of disposable towels, toilet paper, culinary foil, tracing paper) or cardboard thick enough for its manufacture;
- thinner cardboard or paper for the tip;
- bright packaging (wrapping) paper;
- beautiful adhesive tape, electrical tape or colored tape;
- black felt-tip pen;
- glue;
- scissors;
- gift "stuffing".
Craft materials
- DIY snowman craft
- Autumn paper crafts
- Crafts from stones for the little ones - learning colors
As a filling for a gift, you can use: various stationery (pencils, pens, felt-tip pens, erasers, sharpeners, etc.), hair bands, beautiful handkerchiefs, sweets, small toys and keychains - anything you like.
But first you need to make a case.
To do this, cut out a segment of a circle from paper or cardboard. You can divide one circle into three parts, each of which can be used in your work.
We glue the straight edges of this segment, thereby obtaining a cone.
Cone
Gluing the cone
The cone should easily fit onto a pre-prepared cardboard cylinder. If there is no cylinder, we make one ourselves by gluing a tube of thick cardboard, choosing its diameter to match the size of the cone.
We put the cone on the cylinder and glue it.
We fix the cone
Base: cardboard tube
We paint the tip of the cone with black (or any other) color.
Black tip
We wrap the cylinder with wrapping paper and glue it.
We put the prepared “stuffing” inside.
"Filling"
Cut out a fairly large circle from thin paper. We make cuts around its circumference. We wrap it around the free edge of the cylinder. Secure with silver adhesive tape. It should look like an eraser at the end of a pencil.
We fix the “elastic band”
In general, the pencil craft made from paper and cardboard is ready. If desired, you can decorate it with ribbons, decorative elements, or come up with interesting packaging for such pencils.
The pencil is ready
Gift pencils
Since even younger children can make a pencil with their own hands, you can use this idea not only at school, but also to organize a party in kindergarten.
Materials for work:
- Colored paper, but better not very thick cardboard. A paper pencil can be of any color, but still the eraser looks better pink, the lead – black or gray, near the lead – a beige area;
- Paper towel roll. If this is not observed, such a roll can be made from any cardboard;
- Silver material. It could be paper, adhesive tape, foil, or even a candy wrapper;
- Scotch tape, if you plan to place objects inside the pencil;
- Scissors, glue stick, simple pencil.
Wood preparation stage
The production of pencils is carried out from well-selected wood, which is processed to obtain bars. Be sure to trim the bars along the length of the pencil, and allowances must be taken into account, since the material will shrink. A special multi-rip machine is used to cut the bars into planks, which are impregnated with paraffin in special autoclaves. This procedure helps improve the mechanical properties of the future product.
Depending on what the pencil is made of, it will be sharpened. It is believed that neat shavings are obtained if the products are made from pine, linden or cedar wood. In addition, it is important that the lead is properly glued - such a pencil will not break even if dropped.
How to make a pencil out of paper with your own hands?
Making an eraser
Trace your roll on pink cardboard or paper, just not too close, but a couple of millimeters more.
Around this small circle, draw a slightly larger circle. No special effort is required, it may not be very even, the edges will still bend.
Cut along the contour of a large circle, cut a strip from this pink paper, approximately 5.5-6 cm wide. The length should correspond to the circumference of your roll.
Make slits on the outer large circle, extending to the small circle, and fold them over.
Apply glue to the bent parts or to the roll and glue this part.
Glue the prepared pink strip of paper on top. The eraser is ready.
DIY paper pencil - color choice
The next stage of work is the middle part of the pencil.
But, it should be noted that if you need a complete pencil, you do not plan to put anything inside, then before pasting the entire pencil with the desired color, you first need to make the area of the lead. And then stick the paper on top of the middle part of the pencil.
If you plan to place something in a craft, measure the required dimensions and cut out the required part from colored paper.
Glue the paper using a glue stick to the roll.
Next you need to make a silver eraser holder. To do this, cut a strip from silver paper, wrapper or foil and glue it in the area where the paper meets the eraser. If you have a silver adhesive plaster, the work is greatly simplified.
Making the stylus area
Cut out a circle from beige cardboard, approximately its size can be no more than half an A4 sheet. You will also need a circle half the size of black or dark gray paper.
If you do not plan to open the pencil, the beige circle should be larger, taking into account the folds that will later need to be glued to the roll. That is, you first need to make a large cone, measure the required size for the area near the stylus, and cut the rest of the part, as in working with an eraser, and glue it.
In this case, this size of circles is enough.
Bend the circle in half, find the middle and cut along the fold to this middle.
Make a cone, carefully matching it with the size of the roll; the edges should completely match or be just a little larger, a couple of millimeters.
Make a black cone in the same way, after trying it on a beige one.
Apply glue to the tip of the beige cone and glue the lead.
Fill the middle of the pencil with candy or small office supplies (eraser, sharpener, real pencils, pens, etc.). Glue a conical piece with a stylus onto small pieces of tape on top in two places.
This is how you can make a pencil out of paper with your own hands. Children will also love making this pencil maker, because giant school supplies are fun and interesting.
It's interesting to know
The prototype of the modern pencil was used by European artists already in the 13th century. It was a rod (less often a wire) made of soft metal: silver, lead or tin. Thin, graceful strokes were applied to parchment, wooden surfaces or specially prepared coated paper. The master was required to be faithful with his eye and hand, since it was no longer possible to erase what he had drawn. Silver pencils were especially highly valued, as they lasted longer than others and made it possible to depict the smallest details. With their help, sketches for paintings by Leonardo da Vinci, Raphael, Jan van Dyck, Albrecht Durer and other Renaissance masters were created.
In the middle of the 16th century, metal rods were replaced by graphite ones. The first deposit of solid carbon was discovered by shepherds in the village of Seathwaite in Cumbria (northwest England). The graphite they discovered was distinguished by purity and hardness, which are rarely found in nature. To prevent the rods made from crumbling and dirtying your hands, they were wrapped in sheepskin or rope. For more than a hundred years, the British remained a monopoly in the production of pencils, until in 1662 Italian craftsmen managed to come up with a recipe for making rods from black clay shales, and then from animal bones burned and ground to a powdery state.
Around the 17th century, fragile leads were first enclosed in a durable wooden case. It consisted of two halves, between which a graphite rod was placed and then fastened. The idea, with slight variations, is still used today. The recipe for modern pencil leads was discovered by the Austrian entrepreneur Joseph Hardmuth, the founder of the world famous company Koh-i-Noor. He used a mixture of graphite powder and clay, which was then fired in kilns. By varying the ratio of components, it was possible to achieve different degrees of hardness of the leads. The use of powdered graphite significantly reduced the cost of pencils, making them accessible to the general consumer and finally undermined the English monopoly.
America took over the baton of Europe and brought this simple artistic instrument to perfection. In the middle of the 19th century, a native of Nuremberg, Lothar von Faber-Castell, the successor of the Faber-Castell family production, changed the shape of the wooden shell from round to hexagonal and octagonal. Now the pencils did not roll down inclined surfaces. At the same time, in 1858, Philadelphia entrepreneur Gimen L. Lipmanen patented an eraser attached to the top of the tool.
Master class “Volume pencil made of colored cardboard”
The master class is intended for preschool teachers. These pencils can be used to decorate group rooms.
Tools and materials for work:
— a sheet of colored cardboard, A4 format;
- a sheet of white coated cardboard;
- narrow double-sided tape or glue gun;
- dry pastel or gouache in beige and light brown colors (for tinting white cardboard to look like wood).
Step-by-step manufacturing instructions:
1. On a sheet of colored cardboard, draw a pencil pattern and cut it out (don’t forget about the allowances).
2. In order for the edges to bend well, you need to go over all the edges with the sharp edge of the scissors. Next, bend as shown in the picture.
3. We begin gluing the pencil from the tip (part “1” is glued to part “*”).
4. Glue the point to the pencil and use double-sided tape or a glue gun to glue the pencil.
5. Cut out two parts from white coated cardboard (don’t forget to leave allowances at the base of the pencil). To better bend the edges, we also use scissors.
6. Now you need to tint the white parts to look like wood. You can use gouache, I tinted it with dry pastels. The crushed pastel (you can mix several colors) should be applied to the cardboard with the help of a damp cloth, in the direction from the center to the edge.
7. Glue the parts together (just like a pencil point - glue part “1” onto part “*”)
8. Assemble the pencil, glue the base at the bottom and glue the “skirt” to the tip of the pencil.
9. These are such wonderful pencils!
The job application can be downloaded here.
Comments
The use of didactic and role-playing games in the environmental education of preschool children
The use of didactic and role-playing games in the environmental education of preschool children Modern culture, uniting humanity, is based on common values, one of which is.
Scenario for the holiday “Golden Autumn” in the senior group of kindergarten
Scenario for the “Golden Autumn” holiday in the senior group of kindergarten Characters Adults: Presenter, Garden Scarecrow. Children: carrots, garlic, beets, cucumber, cabbage, tomato, Postman.
"Winter meets Spring"
“Winter meets Spring” (Children enter the hall to the music.) Presenter: What kind of holiday? What kind of holiday? Haven't you heard of him? There will be a holiday here.
Direct educational activities in the 2nd junior group “Where are we...
Direct educational activities in the 2nd junior group “Where we live” Program content: Mastering the action of substitution, construction and use of a model. Development of ideas about the street and.
Summary of the integrated educational activity “Visiting the birds in the winter park”
Abstract of the integrated educational activity “Visiting the birds in the winter park” (For children of senior preschool age) Purpose: Formation of ideas about wintering birds, careful.
Summary of organized educational activities in English in the preparatory group...
Summary of organized educational activities in English in the preparatory group “Bob the Puppy!” Goal: to develop children's communicative competence through English fairy tales. Tasks: - educate.
Comments
- Tatiana
In blogs
Outdoor games for senior preschool age
P/i “Owl” Goal: learn to stand still for a while, listen carefully. How to play: The players sit freely on the court. “Owl” sits or stands to the side (“in the hollow”). The teacher says: “The day comes - everything comes to life.” All players move freely around the court, performing various tasks.
Joint activities with children, NGO “Khudozh-Aesthetic. Development (sculpting)
Topic: “Sweet Strawberry” Purpose: creating a social situation of development in the process of productive activity. Progress of the lesson: The teacher asks a riddle: Guess what we are talking about now? We plant a bush in the garden in the spring, loosen it, water it, soon the berries will turn, for the green ones will come. And then they.
GCD in the mixed age group “We play lotto”
Outline of direct educational activities with preschoolers in a mixed-age group (4-6 years old) Topic: “We play lotto” Educational area: cognitive development, speech development, social and communicative development. Objectives: Continue to develop the ability to solve riddles. Practice the ability to correlate number and quantity. Strengthen your knowledge of numbers.
Joint activity with children, NGO “Poznanie” Topic: Quiz “My favorite berry”
Goal: Creation of a social development situation in the process of cognitive, research and gaming activities. Task 1. 1. Name the birds that fly to warm regions in the fall? (Swallows, cranes, starlings) 2. What parts do mushrooms consist of? (From the stem, cap, mycelium) 3. The bear eats which berries he likes.
Origami pencil
Origami pencil made from paper is usually used as a bookmark for textbooks or as a decoration for school-themed cards. But these are far from all the functions of an easy-to-manufacture and creative model. For example, a large origami pencil can easily be turned into stylish packaging. There can be anything inside: from sweets to a small gadget.
Coating features
Modern pencils and colored pencils come in a huge variety of designs and colors. Since pencils are made in a factory, close attention is paid to each stage of production. Painting is one of the important stages, as it must meet a number of requirements. The extrusion method is used to finish the surface, and the end is finished by dipping. In the first case, the pencil passes through a priming machine, where at the end of the conveyor it is turned over to apply the next layer. This way you get an even coating.
Three models based on a square
There are several designs for origami pencils. They have differences in the assembly algorithm, but the results are similar. All schemes are available to children from 7 to 8 years old. For any of the proposed models, you will need a square of 15x15 cm. One side of the paper sheet must be white.
Step-by-step instruction:
- Place the square sheet with the white side up.
- Fold in half from right to left.
- We bend the corner to the opposite edge.
- We fold the second part with an offset. This is the tip of our pencil.
- Bend the top edge back.
- Turn the workpiece over.
- Bend the top corner.
The pencil is almost ready. You can stop at this stage, but if you want to make the model more elegant, it is better to add two more simple operations.
- Fold the right side as shown in the picture.
- We repeat the action symmetrically on the left.
- Remove the outer edges to align the pencil.
- Turn the product over to the front side.
Thanks to its compact size, this model is especially convenient for composing complex compositions:
Option No. 2
An origami pencil according to the following scheme can be made both miniature and life-size. The second option is suitable for decorations for September 1 or Knowledge Day.
Step-by-step instruction:
- Fold the square in half and open it.
- We lower the top edge and raise the bottom, thus dividing the sheet into three parts.
- Open the first layer in the direction of the arrow.
- Fold the top edge along the dotted line.
- Turn the product over.
- Bend both corners along the dotted line.
- Fold the sides towards the middle.
- Turn the workpiece over.
- The pencil is complete.
You can vary the width of the model by additionally bending the sides.
Option #3
The third model is convenient as gift packaging. Only the bottom edge will need to be tucked so that the contents of the package do not fall out.
Step-by-step instruction:
- We divide the square sheet in half by folding it in two directions. Let's expand.
- Fold the top half in half again.
- We divide in half.
- Fold the top edge to the last fold line.
- We “close” the side flaps towards the center.
- We lower the corners.
- We make folds along the dotted lines.
- Bend the upper part along the marked lines.
Decor options using colored origami pencils are amazing in their diversity. Compositions with them can be complemented with a bouquet using the origami technique or autumn leaves:
Pencil holder
Paper pencils can, among other things, serve as a stand for real ones. It will only be necessary to slightly change the assembly order of model No. 2. Among all the options for origami pencils, this one is the most popular due to its simplicity and originality.
Step-by-step instruction:
- We divide a square of thick paper 21x21 cm into three parts.
- Bend the top edge 1 cm.
- We lower the right and left corners to the central axis.
- Fold the workpiece in half into a “mountain”.
- We repeat steps 1 – 4 and assemble a second similar workpiece.
- We bend the sides along the dotted line and connect them together.
- We mark the second square with sides 21x21 cm, as shown in the figure.
- We unfold according to the arrows.
- We fold the corners towards the center. And then we lift it vertically up.
- Attach the bottom to the walls. Glue it together.
- Now the pencil holder can be used for its intended purpose.
Video tutorial on how to create a hand-made postcard with origami pencils: