Now there are many children's creativity kits that not only develop imagination, but will also help keep children occupied for a while. However, you don’t have to look for something in the store to find a suitable option for your child, because you can use the means at hand. In this article we will tell you how to make crafts from pencils with your child.
Children's ideas
Crafts made from colored pencils are a great option for children who are bored with counting or developing motor skills with simple objects.
Wooden sticks are so nice to hold in little hands, they are bright and warm to the touch. It is not for nothing that parents choose pencils as a counting material or a sorting object for learning colors.
Moreover, repeated use makes it also budget-friendly, which is also important for mothers on maternity leave.
Materials for work:
- Colored paper, but better not very thick cardboard. A paper pencil can be of any color, but still the eraser looks better pink, the lead – black or gray, near the lead – a beige area;
- Paper towel roll. If this is not observed, such a roll can be made from any cardboard;
- Silver material. It could be paper, adhesive tape, foil, or even a candy wrapper;
- Scotch tape, if you plan to place objects inside the pencil;
- Scissors, glue stick, simple pencil.
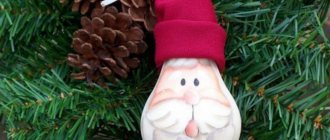
Postcard applique “Christmas tree”
We will need green colored pencils. 6 pcs. segments of 5 and 5.5 cm. Glue gun and cardboard base:
- Prepare a background, color with paints, pastels, or take a ready-made colored sheet.
- Lay out the Christmas tree, and only then attach it with glue.
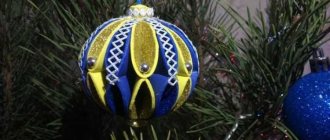
- Decorate the card with snowflakes and sparkles. Decorate Christmas trees with sequins, imitating Christmas balls.
- Once dry, sign with kind words.
Variety of school extracurricular activities
Topics for creative assignments can be very different. These are the seasons, women's holiday, New Year, various dates and events related to both the life of the country and the life of one school.
Thematic assignments may also refer to work performed using certain techniques or materials. They often refer to various trades such as sewing, knitting, weaving, pastry making, carpentry, designing and modeling.
The list can be endless, just like human imagination, which finds creative application in any field of activity.
Ideas for adults
Basically, all unique work is done on a cutting machine, pre-glued pencils into a cylinder. The works turn out to be very unusual, and not everyone can guess that they are made from such simple raw materials.
But there are also several ideas for patient and skillful hands. Don’t rush to throw away written-off or broken copies; these pencils will make cool DIY crafts.
What it is?
To perceive appliqué only as a children's form of creativity would be an obvious injustice. Some masters inspire people around the world with their works. And adults also enjoy making decorative appliqué from the simplest materials.
Although the introduction to this technique undoubtedly begins at the age of preschoolers. Children learn to cut, glue, and create one whole and beautiful canvas from different fragments. Artistic images can have different shapes, sizes, can use homogeneous materials, or combine something that differs in texture and texture.
It's hard to say what exactly is the most fashionable in appliqué right now. Most likely, there is no one leading direction, but there is a tendency towards maximum environmental friendliness and natural creativity. Paper with different textures and different densities is actively used. Volumetric, layer-by-layer applications are made that are worthy of being exhibited to the general public. Applique is becoming an increasingly elegant, sophisticated art.
Hedgehog in the fog
- You will need a lot of blanks in the form of a 2 cm piece with a sharp edge. The pencil is cut with a thin wood hacksaw on a safe basis.
- And also a figure of a hedgehog made of foam plastic or papier-mâché.
- Glue the finished eyes onto the figure, assemble a polka dot string bag on a stick from scrap materials.
- Next, without missing a single mm of area, cover the figure with prickly blanks.
Composition “Thumbelina”
This composition will look very nice on your summer cottage. It contains two types of figures, decorated with packaging materials. Thumbelina is a small doll dressed in an openwork dress made of packaging material, secured to her body with shiny tape. It can be tightly fixed in the core of a flower made from a transparent cake packaging lid or a 5-liter plastic bottle, and around it, on the branches of trees or bushes, hang figurines of elves that will circle and sway in the air.
The basis for elf figurines is a wire frame, sealed with masking or regular tape. The elf costumes and wings are also made from openwork packaging, connected with a stapler and tape.
Decor for a children's room
- Cut multi-colored pencils with a saw into figures 5 mm in height.
- Fill identical jars with blanks.
- Place it on a shelf where access to children is prohibited to preserve it.
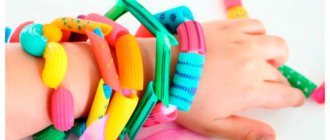
You can also make original, custom-made keychains, pendants, earrings and much more by simply combining pencils (or their remains) with accessories that can be bought at any fabric store.
Cool bright and environmentally friendly beads, made from beads in the form of squares made from pencils, will fit perfectly into an ethnic look or a child's look.
We recommend reading:
Crafts made from epoxy resin - stylish, original and beautiful products and decorations made from epoxy (110 photos)- Crafts from seeds: step-by-step instructions and tips for choosing the most beautiful ideas for crafts
Crafts from airy plasticine - ideas for creating beautiful crafts, the main steps and a description of how to make a craft correctly (100 photos)
Pencils, if they are used, always become dull and, not sparing the wood, are then sharpened, exposing the beautiful lead. The shavings are usually thrown away, but they make great work.
To begin with, you can do a simple job by simply gluing shavings onto PVA glue in the form of a butterfly or flower, or you can print the blank on a b/w printer and fill it with multi-colored shavings.
Curls with braids and ironing
This method of creating beautiful waves is extremely simple and does not require any special skills.
To begin with, you should braid classic braids. The fewer braids there are, the larger the waves will be. If you're going for a ruffled look, use lots of small braids.
It is advisable to braid to the very ends
without leaving any tails. After the braid is braided, we run a straightener along it from different sides. Next, we unravel the weaving and admire the result.
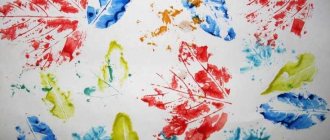
Paintings. Two unusual ideas for paintings in abstract art stele
There are not many ideas for crafts made from wax pencils, because they are not used as often as regular ones.
A non-trivial idea of using wax crayons is the effect of heat. We attach the pencils to the edge of the cardboard one by one and turn on the hairdryer. After drying, we admire the interesting picture.
Painting made from pencil lead by pouring onto glue. Those. A thick layer of glue is applied to a pre-printed outline, and then a sharp knife is used to grind off the multi-colored lead into piles, and a picture is formed, for example, a rainbow elephant or a giraffe.
Watch
Decorating watches with pencils will make outdated models more modern. Long pencils are glued both on the reverse side and on the front side, forming a drawing. Filling depends on quantity:
- if there are 6 pencils, they are attached to the main numbers;
- if there is a lot of material, the entire circle is filled with pencils located from the inside out;
- The degree of protrusion of the parts is independently regulated.
Children love to draw; there are many pencils in the house. Funny crafts are invented and assembled together with the children. Joint activities bring the family closer together, help them spend time usefully, develop logic, and introduce them to work.
Photos of crafts made from pencils
1+
1
Step-by-step creation of animals and birds
Very often, figures of various animals and birds are made from paper. Both adults and children can make crafts of varying complexity.
Bunny-palm
Any child can make such a figurine from colored cardboard or paper. All you need to do is circle your own palm on the sheet. The resulting drawing must be carefully cut out of paper using sharp scissors. The middle finger must be bent and glued to the back of the craft. The thumb and little finger bend towards each other. When the craft is ready, you can paint it with felt-tip pens or decorate it with eyes and a nose made of colored paper. The hare figurine is attached to a wooden skewer using superglue.
Elephant
This figure is already more complex. It is also made from high-quality double-sided paper. The process of creating such a craft consists of the following steps.
- First you need to draw five large rectangles of the same size on paper and cut them out.
- From this blank it is necessary to form large cylinders by gluing their edges.
- Four figures need to be connected together. To do this, you can use glue or double-sided tape. The base of the craft should be stable.
- The elephant's feet need to be decorated with light nails. To do this, you need to cut out 6 ovals from white paper and cut each of them into two parts.
- These small pieces are attached to each of the legs. There should be three semi-ovals on one cylinder.
- A thin long strip is attached to the fifth cylinder, which plays the role of a trunk. Above it are two eyes, drawn with a marker or made of colored paper.
- Large round ears are also attached to the two sides of the head.
- The head is glued to the base of the figurine using glue. If the craft is not stable enough, you can attach two wide strips to the elephant’s legs to hold them together.
Such a cute craft from simple geometric shapes can be made even by a small child.
Hedgehog
To create such a craft, your child will need paper of two colors. The brown leaf needs to be cut into long strips. The free edges of these parts must be glued together. These blanks are attached to the paper in a circle. Only the lower edges of the needles are fixed on the cardboard.
When the base is ready, you can attach a circle of lighter paper to it. The paws are also made from the same material. They are glued to the bottom of the figure. The hedgehog's face can be painted with markers.
Swan
An elegant paper bird can be made in different ways. The simplest and most understandable technology for creating a swan will suit small children.
- The base of the craft needs to be cut out of thick white cardboard. You can use a piece of a box instead.
- This figurine is attached to a blue paper base using high-quality glue.
- A sheet of white paper needs to be cut into long thin strips. Each of them must be carefully folded in half and secured with a glue stick.
- Having made the required number of blanks, you can begin to fix them on the sides of the figure. The closer these details are to each other, the more voluminous and beautiful the swan turns out to be.
- When the craft is ready, the bird’s face can be painted with a marker or decorated with details made of light paper.
The finished swan looks luxurious.
Figures for puppet theater
From thick cardboard of different colors you can make bright animals and fairy-tale characters that will be used by kids for various performances. Making such figures is as easy as any other applique. The base is cut out of paper of one color and complemented by paws and ears of a different color. Round holes for the fingers are cut out at the bottom of each figure. Using such preparations, the little director will be able to act out any fairy tale in front of the family.
Paper pencil holder
Paper is a wonderful budget material for crafts! The art of origami is wonderful for developing children's brains - it's a real puzzle. There are quite a few options for paper pencil holders - from a simple quadrangular box to complex modular (consisting of several elements) variations.
Step-by-step process for creating a modular pencil holder of a simple design:
- You will need 6 sheets of thick, shiny, bright, double-sided square-shaped colored paper (can be of different colors), scissors, glue.
- Take one square of colored paper. Fold it in half.
- Unfold the sheet and fold it in half the other way. Unfold the sheet again.
- Place the edges of the sheet to the center line, press the folds. Expand the sheet.
- Place the opposite edges to the second center line and press the folds into place. Expand the sheet. The result was a kind of marking into 16 equal squares.
- Fold all four corners, placing the corner to the nearest intersection point of the folds.
- Lay two strips with curved corners to the center line.
- Turn the rectangular shape over backwards.
- Fold the short sides up, placing them towards the center line. The result is a square with a diamond-shaped figure in the center.
- Insert the left strip into the triangular pockets of the right one until it stops to form a three-dimensional triangle.
- Press all three folds of the triangle again. The first module is ready!
- Follow the same pattern for the other five elements.
- If desired, you can insert a corresponding sized piece of colored paper of a different color into the diamond-shaped window of each volumetric triangle.
- Glue six modules together. Pencil holder with six compartments is ready!
Twist dolls
This is a traditional folk craft that has not lost popularity to this day. The process of making them resembles the technique of thread dolls, but they require pieces of fabric of different sizes and colors, and filler (cotton wool, padding polyester, etc.).
The doll is based on a square cloth, in the center of which a piece of filler is placed and tied with thread to form a head. The resulting figure is laid out so that the loose fabric forms a triangle. Handles are formed from the corners on the sides by tying them with thread (the hands and shoulders are separated).
Using the filler, the body is compacted and fixed in the same way as the head. Next, the doll is decorated with fabrics of other colors, which are tied to form skirts, aprons and scarves.
Story
Its origins go back to prehistoric times, when ancestors sewed clothes from animal skins. Over time, the need arose to decorate it, to supplement it with details that today we can call decorative. With the development of society, it began to stratify: there were priests, artisans, warriors, leaders and farmers. And the appliqué on their clothes (among other things) helped them indicate their belonging to one category or another.
Among nomadic peoples, appliqué was used to decorate horse equipment, among warriors it became part of flags and coats of arms, and it was also used in the attire of clergy. The heyday of appliqué can be considered the intersection of the 18th-19th centuries. At this time, rural residents tried to decorate their life as much as possible. The focus was on the work of professionals, which folk craftsmen were able to look at. They did not have such materials, they were not trained in art, but their inspiration and desire to repeat what they saw and adapt it to their capabilities was great.
The materials used (and are now used) are very different. From fabric and paper, as the most obvious, to eggshells and scraps of yarn, natural materials and shavings left after sharpening pencils. The brightest, most unusual applications are sold at high prices at art auctions. In a word, it is definitely impossible to consider this type of creativity unworthy of serious artistic aspirations.
Original pencil holder
You will need: a tin can, white and green fleece fabric, green felt, scissors, padding polyester, glue gun, thread, needle, centimeter, pencil, plastic eyes for toys.
Master Class
- Measure the height, bottom diameter and circumference of the jar.
- Cut out 2 pieces each from white and green fleece according to the dimensions (can height + 0.5 cm allowance and circumference + allowance).
- Sew the parts together with a back seam using a needle, or use a machine. You should get 2 blanks, as shown in the picture - one green, the other white.
- Turn the white part inside out and set the cylinders aside.
- Make 18 paired pieces (faces with ears) and sew them together, leaving a hole for stuffing. You should get 9 faces.
- Mark the location for attaching the eyes.
- Stuff the faces with padding polyester and sew up the hole.
- Glue the plastic eyes to the designated locations.
- Wrap the jar with padding polyester and sew the edges, then sew on the bottom of padding polyester.
- Place the green fleece piece on the can.
- Glue the padding polyester to the bottom of the jar.
- Apply glue to the bottom of the jar and glue the white fleece piece, and sew the edges of the white and green fleece together with a blind stitch.
- Glue on the animal faces.
- Cut out the leaves from felt and glue them too.
The original pencil holder is ready! I recommend watching this video!
Desk organization - 5 DIY pencil holders
Watch this video on YouTube
DIY pencils
Pencil holders are a necessary and useful item for a writing interior. Manufacturers offer us a huge, good range of pencil holders and that’s good. However, manual work has its advantages. You can create an even better pencil holder to suit your taste in an exclusive version with your own hands. In this article we will look at how to make original pencil holders with your own hands.
Paper pencil
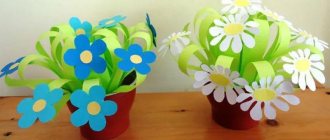
You will need: toilet paper rolls, colored corrugated paper, scissors, glue, a ruler and a simple pencil.
Master Class
- Measure the length and circumference of the sleeve.
- Prepare strips of colored paper to fit the sleeve.
- Cover the bushings with colored paper.
- Cut a cloud from a sheet of paper so that all the sleeves fit on it.
- Glue the bushings onto the stand (cloud).
- Cut out the flowers and glue them onto the pencil holder.
The paper pencil is ready! I recommend watching this video!
DIY. Budget DIY office stationery organizer. Desktop organization.
Salt dough pencil
You will need: water, flour, extra salt, a cardboard jar for the frame, PVA glue, scissors, a piece of decorative rope or corrugated paper, gouache, a brush, a button, stacks, acrylic varnish for crafts, a toothbrush.
Original pencil holder
You will need: a tin can, white and green fleece fabric, green felt, scissors, padding polyester, glue gun, thread, needle, centimeter, pencil, plastic eyes for toys.
Apple shaped pencil
You will need: an oval-shaped plastic bottle, red liquid acrylic paint, golden cord, artificial leaf, glue gun, plate, nail file.
Creative pencil holder
You will need: glass jar, yellow liquid acrylic paint, black permanent marker, nail file.
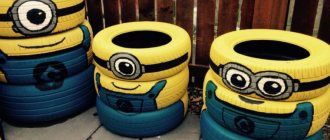
Minion pencil holder
You will need: superglue, hole punch, scissors, EVA polymer material (bathroom mats are made from it) in blue, white, black, gray, brown, wooden skewer, black and blue felt-tip pen, simple pencil, printout of the template.
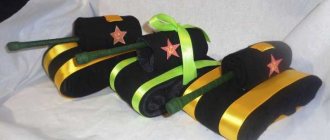
Hot pads - how to make them yourself? Step-by-step instructions with photos
Winter has come again.
It's cold and snowy outside. Naturally, in such weather you can’t do without a cup of hot tea or your favorite chocolate. In the modern rhythm of life, when there is an eternal lack of time, we can drink tea while running around the house getting ready, so we can put a hot cup anywhere. And so that furniture and tablecloths do not deteriorate from hot temperatures, we recommend making hot coasters with your own hands. In addition, if you make several such masterpieces, the problem of leftover traces and damaged furniture from hot temperatures will cease to exist for you, and not only cups can be placed on them.
Why do it yourself?
After all, today there is a wonderful variety in stores and you can buy anything! But the fact is that coasters made by yourself will be cuter. Don't believe me? Make sure of this in the photos of hot coasters presented in this article!
And so, the main advantage of such products is that they tend to get dirty. Naturally, no one will buy new ones every time if they are soiled at the slightest level. Working independently in this regard is much more profitable.
The stand can be made of anything. For example, fabric with threads, tiles, cork, an old unnecessary CD and other things. This way you will get rid of unnecessary things, and with considerable benefit.
The style, size and color scheme of handmade coasters can be anything you want. In addition, you can make a stand yourself not only for a cup, but also for a pan! And so, let’s look further at the main options and instructions on how to make hot pads.
How to make a key holder for the hallway with your own hands: ideas and tips with photos
Simple and inexpensive
A stand made of wine corks is the most common option. This material will perfectly protect the furniture surface from heat. They are easy to wash, and if any of the elements are damaged, they are easy to replace.
And such stands are very easy to make. The corks need to be fastened together to form any figure. The corks may be intact, but the stand will be high.
It’s easier if you cut them into thin and flat pieces. It will be easier to fasten them together, and the thickness of the stand itself will be quite practical.
The main disadvantage of this option is the amount of wine drunk in advance.
This option is easy to do and is very inexpensive. But they won’t last very long after all.
Strips of corrugated cardboard can be twisted to create interesting patterns. The parts are attached to each other with glue, and fabric ribbons are used to decorate the products.
Stone
What can you use pebbles brought from the sea for? This stand will look very original. The pebbles are glued to the base, tightly attached to each other. The base should first be covered with ordinary putty, onto which the stones themselves are attached. You can coat them with varnish on top to make them shine.
Tiles can be used to decorate products; they are connected by slats in a frame, and attached to a cork sheet.
Wooden hot stand
If you go to a store, that’s where you’ll most often find wooden coasters. However, you are unlikely to find beautiful ones. Although, by buying the simplest wooden stand, you will create the decor yourself! But having acrylic paints this is very easy to do. The product using the decoupage technique looks original.
Foil flowers - step-by-step instructions from designers with photo examples
Sewn, knitted, braided
Yes Yes! If you have weaving or knitting/sewing skills, this will not only be not problematic for you, but also quite exciting!
The fabric version of the stand is made incredibly quickly, because it will require felt scraps, or new fabric. And the technique is very simple, the strips need to be intertwined. As a result, a checkerboard surface is formed. If you take scraps of fabric, you can even make a stand using Patchwork. True, this option takes longer to complete.
The set of stands made of linen fabric also looks original. The main thing is that they are made in the same style.
Stylish and durable felt coasters. The felt itself can be processed in such a way that its seams do not have to be processed.
In fact, such things are not only useful in every home. The activity itself is very exciting! And your guests will be surprised when they come to you again and see something new!
Blooming liana
This composition will give you a truly spring mood even in winter. To make it you will need a stick - a base, a hemp or jute rope, plastic bottles and foam cups:
- The base stick is painted green
- The jute rope is cut into approximately equal lengths, the length of which depends on the expected size of the vine. To get a vine stem 50 cm long, you need to take a piece about a meter long.
- Leaves of various sizes of arbitrary shape are cut from plastic bottles at the rate of 15-20 pieces per 50-centimeter stem (on a base 25-30 cm long you can place 5 thread-stems), painted in green in various shades. Several leaves are also strung onto the base, located between the threads and along the edges.
- Holes are pierced in the leaves for stringing.
- Flower cups are cut from foam plastic containers at the rate of 5-7 pieces per 50-centimeter stem.
- In each cup, in the bottom, 2 holes are pierced for stringing.
- First, the leaves are strung onto the base. Then thread-stems are attached to it one by one.
- Each leaf strung on a thread is secured with a knot.
- Flowers and leaves on the threads alternate in random order.
This vine can be used to decorate a cornice or shelf. This craft is quite labor intensive. A child cannot cope with it alone. But it can become a reason for joint family creativity.