A completely useless thing at first glance - a burnt-out incandescent lamp can be turned into an exclusive work that reflects the creative position of the author.
Unrealized creative ideas can be brought to life by making original crafts from burnt out light bulbs with your own hands. By involving children in this activity, you not only instill in them work skills, but also make the family even more friendly and united.
The significance of the holiday increases significantly when children take part in its preparation. Crafts from old light bulbs made by children with their own hands contribute to the development of their creative abilities and teamwork skills.
For a child, a master class with parents on making crafts from light bulbs with their own hands is joint creativity, not hard and boring work, but a fun game and fun with their closest people.
A photo of children against the backdrop of hand-made light bulbs for a significant event will decorate a family album and allow you to preserve memories of this holiday for a long time.
How to make a hole in a glass plate?
There is a way to drill a hole
in glass using sand and solder, which is used for soldering.
Mark the place where you need to drill a hole
and pour wet sand there and make a small depression. Melt the solder in a bowl and pour it into the resulting recess. After some time, remove the sand and solder.
Interesting materials:
How to create an xbox live 360 account? How to create an active link on Instagram? How to create an album in the mail cloud? How to create an American Apple ID iOS 12? How to create an American Apple ID? How to create animation from photos? How to create animation in power point? How to create an animation in powerpoint? How to create animated telegram stickers? How to create a questionnaire in Google Forms step by step?
Preparatory work
To properly prepare the light bulb for use, you need to stock up on:
- bulb
- pliers
- screwdriver
- thick rubber gloves
- sheets of paper
Cover the work surface with paper, this will prevent further searches for small fragments. Even though the light bulbs are made of very thin glass, there is still a risk of cutting. Therefore, it would be a good idea to wear gloves. Next, remove the contact from the lamp base using pliers. Using a screwdriver, we break it and pull out the base insulator; we do this very carefully so as not to damage the light bulb and ourselves. After which you can use tweezers or small tongs to remove the entire contents of the light bulb out. The final step is to clean the inside surface of the glass with a dry cloth.
Decorative flask with plants
The most common use for incandescent lamps after the end of their service is the manufacture of decorative souvenirs for the interior.
Instructions on how to make a light bulb craft:
- Using a well-known method, the metal base and filaments are removed. You can make a small hole at the bottom of the lamp.
- A layer of decorative stones, moss, and shells is placed inside.
- You can place artificial flowers on the surface of the rocky layer, which do not require constant care.
Instead of artificial flowers, such souvenirs can also contain living plants, however, not all crops are able to grow and develop in limited spaces.
For this reason, you should approach the choice of plants for planting in detail.
Craft No2 - snow globe
You can make such a fascinating craft with your own hands as a gift to a loved one or simply to decorate the interior of a room.
For this we need:
- bulb
- water
- glycerol
- glitter
- wire or small decorative elements to decorate the inside of the ball
- a small medicine cap that fits the size of the base. This cap can also be cut from a wine bottle cork.
- stand
- decorative tape
- scissors
- hot melt adhesive
First, let's prepare an internal decorative element made of wire, this could be an abstract elongated figure, the outline of a flower or a tree branch. You can make a personalized craft by twisting the name or the first letter of the recipient’s name from wire. Then we fix the part on a plastic or cork lid. Fill the light bulb with water and glycerin in a ratio of 7:3. Add glitter there. After this, we close the light bulb with a lid with a decorative element, fill everything thoroughly with hot glue and tighten it with a base. The final step is to secure the craft on the stand with the base down and decorate the fastening area with a beautiful ribbon. The magical snow globe is ready!
Advice: It is not recommended to give this craft to small children. The glass from which it is made is very thin, which makes the product even more fragile.
Craft No3 - Christmas tree toy Snowman
On the eve of the onset of winter, and with it the New Year holidays, a great idea would be to while away the evening with your loved ones by creating Christmas tree decorations from old light bulbs. This can be done by painting patterns or drawings on the glass surface. You can glue the light bulbs using glue with sparkles, rhinestones and small beads. And you can make various figures.
A snowman will be a win-win option for a Christmas tree toy. To create such a toy you will need:
- old light bulbs
- scraps of fabric
- paints
- polymer clay
- glue
- decorative elements: ribbons, strings, strings from which you can weave braids
Paint the light bulb with white acrylic paint. While it dries, we cut out triangles from scraps of fabric, sew them together in the shape of caps, the edges of which are decorated with fringe. After this, you can decorate the caps using ribbons, beads and other available materials. For example, you can weave braids from ropes. Make small carrots from polymer clay that will serve as noses for future snowmen. We paint the noses with orange paint and make black lines for maximum naturalness. Draw a cute face for the snowman. After all the parts have dried, all that remains is to connect them with glue. Make a loop from a rope, with which the toy will be hung on the Christmas tree, and sew it to the cap.
Tip: to paint toys, use special acrylic paints for glass and ceramic products. To create complex designs, use contour paints. With their help, only the outline of the picture is created, because the thickness of such paints does not allow different colors to mix.
Craft No. 4 - Christmas tree
Another New Year's themed toy. In order to execute it, we will need:
- bulb
- green wool threads
- glue
- star - you can make it from cardboard or take a ready-made Christmas tree toy in the shape of a star of the appropriate size
- beads
- stand
Wrap the light bulb tightly with wool thread, while coating the glass surface with glue. Let it dry, after which we place a star on the top of the resulting Christmas tree, decorate it with beads, like Christmas tree decorations, and fix it on a stand. The craft is ready!
: Tools and materials
You can drill with a drill, but it is better to use a drilling machine for this purpose.
You can buy yourself this machine for $59.99. It will make your life easier.
- Cushion (placed under the bottle while drilling).
- Drilling machine (preferable to a drill, much more stable and easier to use).
- Diamond tubular drill with a diameter of 6 mm; or
- Drill bit with carbide tip for tiles and glass.
- Leather gloves to protect your hands from glass shards (just in case).
- Water.
- Glass bottle.
Give preference to a diamond tubular drill.
DIY artistic holes on jeans
By creating unusually shaped holes in jeans, you don’t need any special equipment or skills. Everything can be done quite simply at home. The most basic thing is to adhere to the principle: pull out the dark threads in the shape of the hole . The cuts should be parallel to the white threads and for the most part they are necessary only to remove unnecessary threads, leaving the necessary outline.
Initially, it would be useful to make a pattern according to the shape of the future hole. This will help avoid uneven edges. It is best to cut with a sharp utility knife or scalpel, since a regular knife and scissors will not be able to cut through denim. Directly when cutting, it is worth placing a hard board or plywood under the product.
However, it is worth remembering that when cutting a hole of this shape, you should definitely secure the edges . Otherwise, there is a risk that the work done will be in vain. You can glue the wrong side with non-woven fabric or do a zigzag stitch. It is also possible to perform manual finishing of the edge (stitching should be along the edge of the hole, and not through it).
to contents ^
Crafts from light bulbs for interior decoration
Candles
Place the wick in the lamp flask and pour in melted paraffin. When the paraffin hardens, the glass must be carefully broken and removed. As a result of these actions, you will receive an intricately shaped candle.
Lamps
If you have accumulated a large number of broken lamps, you can put them to good use by making a lamp out of them. The size and shape of the product can be any and depend only on your taste and imagination. Mentally imagine the outlines of the lamp. Place double-sided tape on the light bulbs at the points of contact and, as if using construction kit parts, assemble a lamp from individual elements, placing the socket with a working lamp in the middle. This technique can be used to make both pendant and floor lamps.
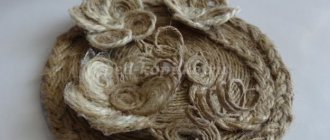
Decorative fruits
The very shape of the light bulb tells us what kind of fruit can be made from it. Of course, first of all it should be a pear. To do this, you just need to wrap a light bulb with twine and glue, decorate it with a green leaf and the craft is ready. Having made several of these fruits, you can put them in a vase, which in itself can serve as a decoration for the dining table.
In such interesting and not very fancy ways you can find a use for old unnecessary things. And of course, there can be even more of these ways if you allow yourself to dream up your imagination. And if you involve children in this kind of activity, then as a big addition to the finished product, you will get a lot of pleasure from communicating with them.
Terrarium
A great craft for insect lovers. This product can be presented as a souvenir. Yes, this craft is not for everybody, but it looks great in any room.
A light bulb terrarium can be filled with pebbles, moss, toys and other little things that you like, after first removing the internal elements. Then place an artificial or stuffed insect there.
The product can be installed on a structure made of copper wire or mounted on any stand.
Craft No. 1 - vase
In order to create a unique vase that will bring an atmosphere of spring and comfort to your interior, you don’t even have to do anything special. A light bulb filled with water can itself be used as a vase. All that remains is to resolve the issue of its instability. There are several options to consider for this:
- you can make a whole ensemble from this kind of vases. It is beneficial to play with the composition with interesting color and texture combinations and hang it on laces or beautiful ribbons attached to the base of the light bulbs. Such decoration will definitely lift the mood of those around you, while speaking about the subtle taste of its creator
- You can make a stand for the vase. To do this, you can use any nice board, textured stone, beautiful lid, or make it yourself from wire.
- just use an old hanging candle holder if you have one
- The most difficult, but at the same time interesting way will be to give the bottom of the light bulb a flat look using a gas burner. Under the influence of high temperature, the glass will become soft and can be shaped into the desired shape. However, the difficulty lies partly in correctly calculating the exposure time.
Burners
Pour alcohol, oil or kerosene into the flask and lower a wick soaked in the same liquid into it. You will get an original alcohol lamp or kerosene stove, which can be used to create romantic lighting or in case of a power outage.
Candlestick-burner
Kerosene lamp burner
Illuminated mirrors can add an unusual accent to any room and attract attention. These products are truly universal and can fit into any interior and any space with the right choice of design dimensions and type of lighting. Read about how to make a backlit mirror with your own hands on our website.
Benefits from inoperative LED lamps
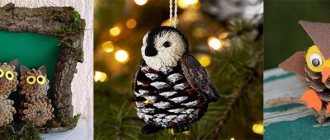
DIY crafts from LED light bulbs:
- The LED lamp is wrapped in threads, possibly multi-colored, symbolizing eco-style;
- Non-working lamps painted in different colors can serve as decor together with working lamps;
- Floating decorations made from painted lamps in the nursery.
Manufacturing stages
You need to fold 5 light bulbs so that they form a pentagon or other shape.
Mark the contact points with a felt-tip pen, and then apply glue to the marked places and glue the lamps together. Glue can be replaced with adhesive tape. Place a working lamp inside the resulting figure.The easiest way to make a lamp
Around the burning lamp, hang several burnt ones on a thin chain, cord, fishing line or wire.