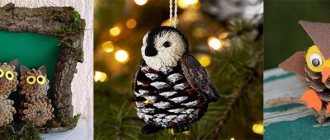
Polystyrene foam is a very convenient material from which you can make a huge number of useful things. When buying equipment, don’t throw it away, but use everything wisely: you’ll get something you need and that’s original, and you’ll enjoy your work, and you won’t have to go to the trash containers again.
To please yourself and your loved ones with something useful and original, you can buy it in construction or specialized stores. You can use crafts to decorate your garden plots, your home, set up a photo zone, a child’s birthday party, or make useful things for your home.
Properties of foam plastic
Before making exclusive masterpieces, you need to learn about the properties of the material. Polystyrene foam is a plastic mass filled with air. It is also called expanded polystyrene. It is incredibly light, quick to cut, and flexible to process. That's why it's comfortable to work with him.
Foam can be joined using glue, putty, screws, and liquid nails. Therefore, there is no particular difficulty in making any products from it.
At the same time, it is necessary to monitor the materials for working with polystyrene foam. Do not use products that can destroy it (dichloroethane, benzene, acetone, etc.) for processing it.
Mineral and organic acids and ammonia should be used with caution. Before starting to manufacture the product, you should check the material for contact with these agents.
Polystyrene foam does not react with cement, gypsum, alabaster, or asphalt. If it is necessary to strengthen the craft, it can be treated with these means.
To give the finished product a beautiful appearance, it must be painted. For this, any dyes that do not contain elements that destroy foam plastic are used.
We recommend reading:
Crafts from plasticine: the best master class for children at school or kindergarten. 90 photos of the best ideas for creating plasticine figures- Felt crafts - the best patterns and templates. Step-by-step instructions and master class for beginners (130 photo ideas)
DIY crafts from egg trays - the best step-by-step master class, with description. TOP 100 photos of original ideas for crafts
"Friends and Foes" material
The positive properties of polystyrene foam determine its active use for the design of various crafts. But it must be remembered that materials such as acetone, various acids, benzene, ammonia react with the foam and cause its deformation.
But gypsum, alabaster, and cement can be used without fear to strengthen the surface of the product.
Flat crafts
Making flat products is more common for beginners of this interesting activity. For products of this kind, ceiling tiles and thin pieces of foam packaging from household appliances are more suitable.
To work, you just need to decide what exactly the master wants to depict. It could be a photo frame, a house, a bird, some kind of plant, fish.
After selecting the desired picture and material for its manufacture, draw a sketch, transfer it to a piece of foam plastic and cut it out with a sharp knife.
The final maneuver - painting the craft and covering it with varnish - is not difficult.
We recommend reading:
- DIY crafts from Kinder surprise eggs - 125 photos of exclusive options with step-by-step instructions, master class and video
Crafts made from twine - an overview of original design solutions. More than 100 photos of new products + step-by-step instructions for creating crafts with your own hands
- DIY crafts from candy wrappers: 150 photos of the best ideas from craftswomen. Simple instructions, master class, diagrams and video tutorials on creating crafts from candy wrappers
Material advantages
- The weight of the material is easy to carry, without the use of brute force;
- moisture resistance, can be used outdoors;
- any damaged place in the craft can be corrected;
- easy to use stand for stability;
- No expensive processing materials are needed.
The disadvantage of polystyrene foam is its poor tolerance to fire and solvent; the craft can easily be destroyed.
Volumetric crafts
Having gained experience in making flat products, the master can try to create a three-dimensional masterpiece. To do this, he will need thicker pieces of foam, the desire to work, patience, and perseverance. This type of work does not like hasty actions.
It is necessary to accurately calculate the proportions of the product, then make several sketches, taking into account the appearance of the finished sample from all sides. It is necessary to cut carefully, slowly. After all, when making voluminous crafts, you need to be able to cut out each line correctly; make a smooth transition from the depression to the hump.
Therefore, it is better to start with simpler figures - a house, a mushroom, a Christmas tree, and other simple crafts.
Sometimes, in the absence of large pieces of polystyrene foam, craftsmen use thinner pieces in their work. In this case, it is necessary to make a wire frame and paste it with prepared pieces.
It is best to take ceiling tiles for such work, as they tend to bend a little. At the same time, you need to make sure that it does not break.
We recommend reading:
Crafts flowers - 125 photos of the best ideas from craftswomen. Instructions on how to make it yourself from A to Z. Simple and complex options for crafts + video tutorial- DIY crafts: TOP-200 photos of the best ideas. Schemes, master classes, modern design, new products, instructions with descriptions
- Crafts from plaster - 120 photos of the best ideas for creating original crafts with your own hands. Master class for beginners with examples and video lessons
You can cut out small blanks in the form of rectangular, square, oval pieces, paste them over the blank, and then wipe the seams with sandpaper.
One step higher
The next step involves puttingty. To do this, you need to purchase a small spatula, preferably a rubber one, and a little putty from a hardware store.
Pour it into an old bowl, mix with water and stir until smooth. Then apply a thin layer to the entire surface of the figure. Wait until the product dries, if necessary, use sandpaper on uneven surfaces.
Products made from foam balls
Often in their work, craftsmen use a technique such as gluing individual balls. Now there are many similar foam pellets on sale in various colors. But if you wish, you can not buy them, but roll them out yourself, using a piece of foam plastic as a basis.
The finished “peas” can be painted in any color and dried, and then using glue to create new masterpieces or decorate finished crafts. Below you will find a description of how to make a ball from such pellets.
Topiary
Topiaries are made from foam balls - artificial trees with a round crown. A stick-trunk is attached to the ball, and artificial flowers, fabric or coffee beans are glued on top with hot glue. The finished craft is complemented with decor and secured in a miniature pot.
Tools for work
Before you get started, you need to take care of the tools. You will need:
- Pieces of foam plastic (expanded polystyrene). You need to choose them by density, thickness, depending on what exactly you want to create;
- A sharp cutter (a sharpened garden or stationery knife, scissors);
- Fine sandpaper, a set of needle files for cleaning the product;
- Adhesive compounds (any glue used for gluing foam plastic, putty for exterior or interior use, liquid nails);
- Screws;
- Material for the frame (thick wire, reinforcement, etc.), if you intend to make a three-dimensional figure;
- An electric soldering iron with a set of various attachments is used only by highly qualified craftsmen who know the principle of working with such a tool.
Attention! When working with a soldering iron, be especially careful and careful! During processing, harmful substances may be released. Therefore, it is necessary to take care of a respirator.
Additionally, to create a beautiful decoration of the finished product, you need to prepare the necessary materials:
- Felt pens, markers, dyes of various colors;
- Multi-colored laces, ribbons, beads, sparkles;
- Acrylic, water-based paints for interior and exterior work;
- Clear varnish;
- Large and small brushes;
- Special napkins with a suitable pattern.
The list of these materials may not be complete. Depending on what kind of work of art you intend to create, select the necessary decorations at your discretion.
Necessary materials for creating decorations
For foam crafts you should prepare several materials:
- Styrofoam;
- stationery knife;
- sandpaper and file;
- putty;
- glue and paint.
Flat foam parts and shapes are much easier to make, but with volumetric crafts the situation is much more complicated. For successful final work, you need to get used to and learn how to work with such material. It’s better to start with ordinary flat crafts, so your hand will become familiar and you will get used to working with soft materials.
Making figures from foam plastic
Various foam products attract children with their ease of manufacture from a young age. Already at 5-6 years old, a child can begin to cut something out of plastic pieces. These can be simple fish, flowers, mushrooms - easy-to-make flat figures.
To do this, it is enough to help the child make a stencil, transfer it to a foam sheet, and show how to cut it out correctly.
It’s not scary if the edges turn out uneven, because the material has the property of crumbling. In such cases, you can either rub off the unevenness with sandpaper, or glue 1-2 balls of the appropriate size to the damaged area.
Decorate the finished product with paints or a felt-tip pen and let it dry. Then cover with varnish and dry. At the end, decorate with ribbons, beads, rain or other suitable material as decoration.
If you decide to create a masterpiece to decorate your garden, you need to select denser, thicker pieces of foam. First, cut out the stencil, transfer it to the prepared material, and carefully cut it out with a knife.
If necessary, when creating a three-dimensional sculpture, first make a frame, and then glue pieces of foam plastic onto it. Cover the finished figure with putty in two layers.
In this case, the second layer is applied only after the first has dried. Next, you should thoroughly clean the product with emery cloth or a file, paint it and install it in the chosen place.
Sometimes the finished figurine needs to be strengthened. In such cases, it must be treated with cement or gypsum mortar, or a stand made of asphalt or cement, then fixed in the chosen location.
painting
How to paint foam plastic intended for small crafts or heavy figures? For crafts, regular children's paints or gouache will suffice. For heavier models, you can use acrylic or facade paint.
- Liquid wallpaper. What do they need?
- Hybrid minivans C-MAX Hybrid and C-MAX Energy. What do you need to know first?
- Bathroom tiles. What is it like?
At the end you MUST open it with a good varnish. The varnish will give protection and now your creation will not be afraid of cold raindrops.
What can be made from foam plastic
There is no clear answer to the question. You can do whatever your heart desires. Starting from a small bird or mushroom and ending with various beautiful products in the form of a sleigh with deer, crocodiles on the shore of a pond, and other figures.
In the photo of crafts made from foam plastic you will see options for various products for decorating rooms and a summer cottage. They can be given to parents for a holiday or to a friend for a birthday.
These are figurines made by children's hands and adult craftsmen. Such masterpieces do not just make a person happy; they make him a little happier, kinder, nobler.
Volumetric figures from ceiling tiles
You can make 3D crafts from thin foam plastic, but it will take more time and patience.
Herringbone
Progress:
- trace and cut out 2 Christmas tree figures;
- cut one of them in half lengthwise (along the trunk);
- process the workpieces with sandpaper;
- glue half of the “tree” perpendicularly;
- color the figure.
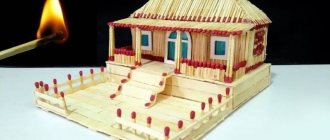
House
Many people have dreamed of making a house with their own hands; using polystyrene foam it turns out simply fabulous. But it is made quite simply. The main thing is to maintain proportions.
- Cut out 4 parts - walls, 2 parts - roof, 2 triangles - gables.
- Connect the parts using a glue gun.
- You can decorate as your imagination allows. Place cotton pads or cotton wool (snow) on the roof. Cut out the windows and glue the curtains; the trim can be made from pieces of thin molding. In the yard, surrounded by a tiled picket fence, place a Christmas tree and figurines of children and animals. Such a composition will cause everyone's admiration.
Figures for the garden
People set up summer cottages not only for planting cucumbers and potatoes, but also for relaxation of the soul.
Therefore, everyone wants their summer cottage to look well-groomed, beautiful, pleasing to the eye and joyful to the heart. To do this, there is no need to buy expensive sculptures to decorate your leisure time.
All you need is patience and the necessary materials. And your imagination will tell you how to make colorful foam crafts.
It could be a crocodile resting on the shore...
Or maybe the cranes will fly in to eat red berries or admire bright flowers.
You never know how many visitors might come to visit you.
Lock
You can make a castle craft for children from polystyrene foam with your own hands. To do this, you will need large sheets of polystyrene foam from a hardware store.
On the tops of the walls, cut square battlements, like a real castle. Gates can be cut out on two walls; if desired, they can be folding. To do this, the cut out rectangle can be attached to the castle wall with two laces.
The size of the castle can be suitable for toy soldiers and princesses, or it can be full-size, almost as tall as your child. If the castle does not have a roof, it will be safe to play in it.
For children
Guys are a separate category that requires special attention and care. Therefore, if possible, make several foam toys with them.
It could be a bright fish that has come to visit...
A cat purring tenderly in the sun...
A boat happily plowing the waters of the pond...
A little imagination and your child will be happy and cheerful.
What kind of miracle?
Polystyrene foam is a (mostly) white building material whose structure consists of foamed plastic masses. Polystyrene foam is 98 percent air and only 2 percent polystyrene. The thickness of the material ranges from 20 to 1000 millimeters.
The foam has the following dimensions:
- 1000 x 500;
- 1000 x 1000;
- 2000 x 1000.
The building material has a number of interesting properties:
- thermal conductivity;
- protection from natural elements;
- sound absorption;
- poor water absorption;
- good strength;
- long service life.
New Year's surprises
New Year's holidays create a special, joyful mood for both children and adults. Therefore, crafts made from polystyrene foam for the New Year arouse increased interest in parents’ work.
Selecting toys and making various decorations add fun and organization.
Garden decorations
For many craftsmen, summer cottages are a real testing ground for creativity. Here you can show your designer's talent and give full rein to your imagination.
In any case, self-made jewelry compares favorably with a factory product. This is always a one-piece product, the second of which cannot be found. There are no restrictions on the work - everything depends on the flight of the master’s imagination.
What does it cost us to build a house?
Just choose the right material and a little imagination. To make a house from polystyrene foam, first of all you need to select the material of the required thickness.
If it is a flat house, then you can take a ceiling tile, apply a design to it, carefully cut it out, and clean the edges if necessary. Paint the finished house in the desired colors, varnish it, and decorate it with glitter. The house is ready.
Making a voluminous house is a little more difficult. To do this, you need to cut out the walls, roof, smoker, and other attributes from pieces of foam plastic. At the same time, calculate the dimensions so that they fit together when gluing.
We glue the blanks together. To do this we use PVA glue and liquid nails. You can use tape for gluing. The finished product is also decorated and decorated with various jewelry.
Peacock
A bright and beautiful bird will become a real decoration of a country garden. The peculiarity of creating a figurine is that you should use a voluminous piece of foam for the body, and a flat piece of material for the tail.
First, the body and legs of the bird are cut out, then the luxurious tail. It is necessary to firmly attach the main decoration of the peacock to the body.
For this purpose, you will need to apply several layers of putty, carefully smooth out the unevenness with sandpaper, paint it in all the colors of the rainbow, and cover the entire figure with varnish.
Beautiful Christmas tree
The Christmas tree can be made from both pieces of foam plastic and foam balls. A flat herringbone is not particularly difficult. Simply draw a design onto the tile and cut it out with scissors or a knife. You finish drawing the toys and decorate them with rain.
A beautiful Christmas tree is made from foam pellets. Having previously painted the balls green with water-based paint, fold them into a small cone and the New Year's beauty is ready.
A Christmas tree craft made from polystyrene foam with hanging or painted decorations looks original. To do this, you need to cut out 2 squares of the same size. Make all subsequent squares 1-2 cm smaller.
Glue or assemble them onto a rod diagonally from each other. Such a Christmas tree can be painted and covered with pieces of cotton wool on top. Decorate it with serpentine, rain, toys.
Foam alphabet
As many outstanding teachers believed, a game can only be partly a game, and the most valuable games are those that develop children. Why not use foam crafts for kids to teach the alphabet? What could be simpler than putting a letter of the alphabet on a piece of packaging material and cutting it out? Let the child paint the figures in different colors. In this way, you can keep your child busy with his favorite activity - coloring, and at the same time he will learn several letters, and maybe the entire alphabet!
Beautiful ball
Creating a craft foam ball is also quite simple. To do this, take plastic pellets and paint them the color you want.
Let the paint dry. Then apply a little glue to each “pea,” put it in a plastic bag and start rolling, slightly pressing the balls together.
When you have a ball of the desired size, carefully remove it, let the glue dry, treat the top with varnish or cover it with glitter, bugles, and other jewelry. The beautiful ball is ready.
Step-by-step instruction
Step No. 1. Balls of different sizes and shapes are cut out of foam plastic. Future Christmas tree decorations can be either round, oval or polygonal.
Step No. 2. Paint is applied to all the balls that will subsequently be decorated.
Step No. 3. While the blanks are saturated with paint and dry, the drawings are prepared (cut out).
Step No. 4. Glue and water are diluted in a one-to-one ratio.
Step No. 5. The prepared pattern is moistened in the adhesive solution and attached to the ball.
Important! Start gluing the design from the center, carefully moving towards its edges.
Step No. 6. Mix a handful of semolina with white paint and apply to the workpiece. You will get the effect of a “snowy” toy.
Step No. 7. If desired, you can glue tinsel or sparkles onto the balls.
Step No. 8. Dried crafts are varnished.
Step No. 9. A loop is made, with the help of which the toy will take its place on the Christmas tree.
All that remains is to have time to hang all the made balls in their places before the chimes strike.
Old Snowman
The blank for making a polystyrene snowman is ready. These are your white balls. Now you need to assemble it correctly. We cut off a little bit of foam from two opposite ends to make the snowman more stable.
Glue the balls together: the bottom one is the largest, then the smaller one, etc. Cut out and glue the arms and legs. We make 2 cones: one larger for the headdress, the second smaller for the nose. Eyes and mouth can be drawn with a felt-tip pen.
Features of the material (recommendations from craftswomen)
What exactly can be made from this material, the plasticity of which is easy to judge even by its name?
In this case, we must proceed from the most valuable properties for modeling, namely:
- It is simply cut;
- Easily holds the outline given to it;
- Excellent coloring and does not fade for a long time.
These features make the creative process an exciting and rewarding experience. With minimal effort and mental effort, anyone can make whatever they want from polystyrene foam, from textbook hares for decorating a Christmas tree to spacious houses for dolls.
You just need to think a little about which foam plastic to choose for crafts in each specific case, so that grains that are too large or small do not interfere with the implementation of a specific plan.
Useful and exciting
Working with polystyrene foam and polystyrene foam is not particularly difficult, and masterpieces made by yourself will delight you for many years to come. In addition, such crafts will teach children perseverance and patience.
Just don’t rush them, don’t force them to invent something. Wait until your baby becomes interested in this work. Then he will be pleased with his invention.
DIY Christmas balls for the Christmas tree 2022
I wanted to collect worthwhile ideas and beautiful original crafts that look beautiful and are not very difficult to make. These wonderful crafts are made from glitter foamiran.
It is denser than usual, and a layer of dense glitter is applied to its surface; they look wonderful in crafts and play great in artificial light. For one toy you need to take several colors, it’s more beautiful and the contrast is obtained.
Source: youtu.be/W01PHm45x_k
What you will need:
- Glitter foamiran
- Glue gun (or moment)
- Scissors
- Toothpick
- Ruler
- Ribbon or golden rope
If you want to make such crafts, you need to purchase foamiran in different colors. A strip 3 cm wide and 15 cm long must be drawn on the back side using a toothpick and a ruler about 5 cm long.
Cut it out and we should have 6 blue stripes and 6 silver stripes.
Cut a piece of 6 by 6 cm. Draw it with a marker on the front side, 0.5 cm long, mark it, but do not cut it. Then roll it into a tube and glue it with hot glue. Literally apply glue to half a centimeter.
Glue the strips on top alternating blue and silver. We glue only on top and they need to be attached all in turn.
Then we take the very first strip and glue it on the second side, where the seam begins, glue it in place of the 0.5 cm mark that we made.
Thus we glue the next strip, and the next. The second one is next to it, but not behind it, but in front of it, the third one, and so on until we’ve done everything. You can use instant, hot glue in a gun, or super.
The material is quite dense, hold it for at least 5-7 seconds to hold it together. The stripes should be diagonal. Due to the shine in the light of the lights, it looks festive, and the combination of two colors makes the craft more elegant.
We make a loop from a ribbon or thread, and cut off a piece of foamiran 2 by 8 cm. Glue it from the inside, folding it in half on the longest side.
We apply a rope and begin to glue and twist it. This way the thread is well fixed. And we attach this blank with glue inside the hole.
You can decorate with beads and other materials. This way you get a ball with a loop that you can use to hang it on the Christmas tree.
Photos of crafts made from foam plastic
Did you like the article?
2+
Master class on how to make balls of thread for a Christmas tree
This is a very simple thread idea that will decorate the interior and will serve as an excellent decoration for the New Year's tree. They can be made in different sizes from small to larger.
That is, trees are different, sometimes you need to decorate a school or street “beauty”, but for the street, I would not recommend them, they are light and airy and can easily fly away in a gust of wind.
Source: youtu.be/4zD7YtEuZt8
What you will need:
- Scissors
- Balloons (round)
- White iris threads
- PVA glue
- A glass of sour cream or yogurt
Pour the glue into a glass, it's a plastic yogurt glass. We thread the thread into a needle, it is better to take a “gypsy” one, pierce the bottom of the glass on one and the other side, passing the needle, remove the needle, the thread remains.
We pour about 1 cm of glue into the jar. Therefore, using this chalk as a guide, we pierce the glass at the bottom and thread it through.
Inflate the balloon to the desired size. I tie it with a knot, not a thread, so that the thread doesn’t get in the way later. Then we wind the thread around the ball; you don’t need much, because it won’t be light and airy.
The thread passes through the glue, is completely saturated with it, and sticks to the ball.
Next, we cut off the thread with a reserve, I make a loop from this reserve, and use it to hang the product to dry.
The glue should dry well and harden, only after that we release it from the balloon. We separate it with scissors, piercing it in different places, make sure that the ball is separated from the thread on all sides, and only then can it be pierced and it will burst.
We take out the ball by the tail, they are strong, beautiful and do not deform. It’s better to make small ones, they are then denser and more beautiful. If you want multi-colored ones, then take colored threads.
Original lace balls for the New Year tree
This is indeed an unusual and original idea for decorating balloons; you can paste lace around it in a circle, or place certain elements. Moreover, it is sold in a variety of shapes and sizes.
The ball itself is made of paper, one might say from old newspapers, it’s cool, everything you need is at home, and you can make as many of these balls as you like, you just need to stock up on twine or beautiful multi-colored threads, just take it thicker, it will look gorgeous.
Master: Svetlana Dedovich Photo: Alexander Korob
What do you need:
- Glue
- Newspapers
- Threads
- Twine or jute thread
- Lace
- Decor
- Scissors
We make a ball from newspaper, giving it a rounded shape with our hands.
We wrap the ball with threads, further giving it the shape of a circle. We make a loop out of twine, use an awl to make a hole in the ball and glue the loop. We gradually coat the workpiece with glue and glue it with twine.
Press tightly, wrap the entire ball, wait until it dries, then wrap it in a circle in rows. It is best to use a hot glue gun, it will dry and set instantly.
And then we wait until everything dries and glue the ribbons and decor. Decorate with lace and other elements to your liking.
Also, you can cover ready-made balls with lace in a circle, buy pebbles, brooches, and other decorative details, and decorate them beautifully. If you use glass balls, work very carefully so they don't break. It is much more convenient and better to work with plastic ones.
Here is another option for decorating plastic transparent balls with lace.
Also, you can place a foam ball on a square-shaped lace fabric, gather the ends, and tie with thread. This can be done using tulle or satin or silk fabric.
Then you can glue a brooch, or ribbons, whatever your imagination allows.
Unusual New Year's balls made of ribbons using the Artichoke technique
A very interesting technique, it’s difficult for me to explain it and show a photo. It seems to me that it is better to see once than to hear a hundred times. The technique is complex, both for beginners and novice craftswomen, but in the end it turns out very beautiful and unusual.
I suggest watching the video if you like working with ribbons, I think you will like the idea, the video starts by pressing the button in the center.
You can decorate it with ribbons of different colors, if you want red and green, please, maybe you like blue and white, or in general, make it the same color, it will also be beautiful.
I really want to fit a lot of ideas into one article, but unfortunately, this is not always possible. I hope you liked them and you choose the most interesting ones for yourself. All the best to you, happy holidays!
Knitted Christmas tree hangings and crochet patterns
Perhaps there are needlewomen who love to crochet. Then I suggest they make an amigurimi-style Christmas tree toy.
Here are the knitting patterns.
The pattern is repeated.
More options.
A few ideas.
Lace beauty.
To keep the craft in shape, you can stretch it onto a ball, starch it, or coat it with glue.
Ball made of half beads for the New Year 2022 of the Water Tiger
Recently I went to a craft store, there’s everything there, you can create whatever you want. If you make a ball with beads, you need to stick them with needles into the foam, or glue them. If you take the half ones, in my opinion, they are prettier, look more original, and they can be glued with hot glue or instant.
Decorate with a ribbon bow and a beautiful brooch, it will look gorgeous. You can give such a gift, and it will delight you for a long time. And you will be remembered and thanked.
Source: youtu.be/lVMcdfpGwUg
What is necessary:
- Styrofoam ball
- Glue gun
- Half beads
- Ribbon (for loop)
- Ribbons (for bow)
We make a hole in the foam ball and attach a ribbon. We cut off the required amount, tie two together, make a loop at the bottom and secure with glue. Then we cover the entire ball.
The ball can be additionally coated several times with white acrylic paint, so it will look white, and those gaps that remain will be white.
We drip a drop of glue and apply a half bead, glue in rows or as you want, perhaps your imagination will lead you beyond some other boundaries.
Beads can be taken in different sizes, colors and shapes. It looks very gentle and beautiful on the Christmas tree, plays and shimmers.
Christmas balls for the New Year 2022 in vintage style
This interesting style has always been valued for its sophistication and beauty; I make them “antique”, in keeping with the style of past years.
What do you need:
- Lace
- Ball
- Glue
- White paint
- Brush and scissors
First, you need to cover the workpiece with white acrylic paint and wait until it dries completely. Then cut out small fragments from the lace and glue them to the part.
Glue the lace, cover it with paint, and let it dry well. It is very important. Then we highlight the lace with dark paint, dipping a sponge into the paint, and making strokes and accents, it could well be gold paint or metallic.
Glue a loop, a bow, and cover with a layer of varnish. It is better to take a wooden or plastic workpiece; each layer must also dry very well, I repeat many times so that you do not miss this moment.
With citrus and clove aromas
Every holiday is accompanied by some kind of aroma. New Year is the smell of citruses, pine needles and mulled wine with cloves and cinnamon. To maintain the atmosphere, you should definitely hang fragrant balls of dried oranges or lemons on the Christmas tree.
Fragrant toys for the Christmas tree
True, such decorations will last no more than one season, and next year you will have to make new scented balls.
To work you will need:
- orange (lemon);
- toothpick;
- clove buds and cinnamon sticks;
- ribbon;
- wide elastic band.
Operating procedure
We put a rubber band on the citrus so that it tightly clasps the fruit. Now use a toothpick to make holes where we will attach the clove buds. Now loosely insert a clove bud into each hole made.
Insert a clove into the hole made
In this state, leave the decoration for 2 weeks in a well-ventilated area. To speed up the drying process, you can place the orange in the oven and dry it for an hour.
We get a beautiful toy
At the end we decorate with a ribbon by which it will be hung.
To make from cinnamon sticks, you need to take a foam blank. Break the cinnamon sticks into two halves and simply insert the cinnamon into the soft base frequently. We attach the ribbon and you can hang it on the Christmas tree.
For cinnamon lovers
Basic moments
Absolutely any materials are suitable for needlework:
- paper;
- sequins;
- beads;
- newspaper;
- ribbons;
- lace;
- threads;
- buttons.
You can use a foam sphere or a simple plastic Christmas ball without decorations as a basis. We bring to your attention several master classes on making New Year's balls. They can not only decorate the Christmas tree, but also create a festive interior in the house.