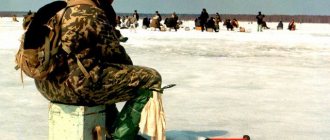
Winter fishing is a hobby that brings a lot of pleasure and positivity, but only if the fisherman is warm and comfortable. To prevent frost, snow and wind from spoiling your vacation, you need to take care of reliable shelter. You can make a tent for fishing in winter yourself, using ready-made instructions with a detailed description of each action. The presence of a house will extend the total fishing time. Let's talk about what a homemade product should be like and how to build a high-quality winter tent with your own hands.
What types of tents can there be?
Depending on the choice of one type or another, it will be decided not only how to make a winter fishing tent with your own hands, but also further ease of use.
Here are some popular winter fishing tents:
Umbrella design. The easiest tent option to use and make. As is clear from the name, the model opens like an umbrella.
In order to make a dome of this type, duralumin rods are used. And the fabric layer itself is synthetic, covered with a tarpaulin to protect it from wet precipitation.
Automatic option. This is a very popular tent design among anglers. All this thanks to incredible ease of use.
The frame opens on its own, like a spring. The fabric is stretched over it and the tent is assembled. The most inconvenient thing is that the frame is very brittle and, due to the lightness of the tent, it blows away with the slightest breeze.
Check it out here too!
Frame. This is the most rarely used type of tent. Assembling and disassembling the frame takes a lot of time, it is difficult to call it stable, and it is not particularly durable.
The nuances of preparing the base for a tent in the country
- The tent should look organically on the site and be positioned in such a way that there are flower beds nearby or a picturesque view opens up. You can also place it on the green lawn next to the house.
- The site for installing the tent must first be perfectly leveled and cleared of weeds, large roots and stones. For a stationary tent, you must first pour a strip foundation, and on top of it make a flooring made of wood, natural stone, rolled lawn or paving slabs.
- For a collapsible structure, you must first mark the site, clear it of debris and roots, and remove up to 15 centimeters of soil. Then pour a 10 cm layer of sand, thoroughly pour it with water and compact it, and cover it with a 5 cm layer of granulation on top.
Rules for making a tent
The biggest and most important requirement for a homemade winter tent is its comfort. In winter, it is especially important to have a warm place that will allow you to warm up at any time.
It is the provision of insulation of a tent for winter fishing with your own hands that is considered the basic rule of manufacture.
But there are some other requirements that need to be taken into account if you decide to make a tent yourself:
- It should be light in weight and easy to transport or carry. This requires its assembly to be as compact as possible.
- The dome fabric is chosen to be dense and protected from moisture. Depending on the density of the fabric, the tent will be warmer or cooler.
- Disassembly and assembly should not be complicated or very long. Sometimes you need to warm up urgently and the long process of assembling a tent prevents this.
- The materials of the tent should retain heat well inside for a long period. In addition, with the high lightness of the tent, it is necessary to take care of its additional fastening to protect it from the wind.
Useful tips
Building a hut at home is not difficult if you adhere to the following recommendations:
- The easiest way is to build a hut from just pillows. However, such a design will not be durable. It will last for a few minutes of play. If you plan to spend more time in the hut, you should take care of other components - blankets, furniture and means that will hold it all together into a single whole. This design will be durable.
- If the size of the room itself is large, you can increase the hut itself that is being built in it. In this case, it will be possible to divide it into compartments - several small rooms. To divide the hut into compartments, you can use chairs, pillows, and boxes.
- To illuminate a house that will be dark without windows, you can use a battery-powered flashlight. So that you don’t have to constantly hold it in your hands, you can choose a place for it on the ceiling or floor, prepare elements with which it will be secured in the chosen place.
- The constructed hut will have many cracks. Pillowcases and towels will help eliminate them. It is enough to fill unwanted holes with them;
- Since the hut is made mainly of soft objects that do not conduct heat well, it can become very hot inside. It is recommended to take care of installing a portable fan here in advance. It is important to be careful: under no circumstances should you cover it with blankets, otherwise a fire may occur.
- It is not necessary to leave the inlet open. Here you can install an element that will act as a door. This could be, for example, a pillow or a large sheet of cardboard.
- Those who want the construction to last not a few minutes, but several hours, are recommended to use lighter items. This is especially true for the blanket, which will act as a roof.
- To build a hut, you need to try to take items that none of the household members will need in the near future.
- Do not use fragile items that could break or cause harm to health.
- Plastic sheets should not be used as they emit an unpleasant and toxic odor.
- There is no need to use light bulbs that get very hot, as they create a fire hazard.
- If the fortress is large, you can put a mattress in it so that you can sleep fully in it.
- You need to place the hut so that it does not block the doors. Otherwise, if something happens, it will be impossible to leave the room.
A small hut, built from a blanket and pillows at home, is great and simple entertainment for children, family or a group of friends. It’s a pleasant place to spend time in this cozy place: play, communicate, fantasize.
What may be useful
In order for a do-it-yourself winter fishing tent to be reliable, it is not at all necessary to purchase expensive material. Moreover, everything that a master might need can be found in almost any home.
Check it out here too!
For example, the tent most often created by fishermen is made on the basis of a special box, which can be easily purchased at a fishing store.
In addition to such a box, you will need a few more materials, which are also not difficult to obtain. Two pairs of skis, some for children, others for schoolchildren, along with poles.
Source
Hiking equipment
If it is not possible to take a tent with you, and the stops do not require a long stay in one place, the best solution may be an awning, from which you can quickly organize an excellent and reliable shelter.
When choosing it for a hike, the best solution would be to purchase it with eyelets, thanks to which it will not be difficult to tighten it. Another important factor is what the tent is made of. The fabric should be as saturated as possible, without seams, and if there are stitches, they should be reliably protected.
In addition to the canvas itself, you may need metal stops and guy wires; they are usually included with the awning, but can also be purchased separately. Metal tubes are necessary to set up a tent, and guy ropes will help tension the canvas so that water drains from it and does not penetrate inside. You will also need a rope; it must be strong, reliable and long enough for the fastening device.
The main equipment for a hike will be a tent or awning shelter
What should a tent be like?
Making such a shelter yourself does not require effort, although it protects from adverse weather conditions no worse, and sometimes better than a purchased one, while saving money.
In the manufacture of such structures, the craftsman’s own requirements for the size and weight of the product, the speed of its assembly, the ability to protect from cold, the possibility of insulation and the installation of additional equipment are taken into account.
Taking these conditions into account, a homemade tent for winter fishing should:
To retain heat, therefore, to cover it, use a material that has good strength, thermal insulation, moisture resistance, but at the same time has breathable properties.
Be lightweight, mobile, compactly folded, and quickly installed. Frames made of aluminum or composite materials meet these requirements.
Rent of land for a trade pavilion
How to rent land for a pavilion? This is a rather difficult and painstaking task; you will need to be patient. Often the land on which the pavilion is planned to open is owned by the state or municipality. So it can only be rented. To do this, you will need to make a request to the city department of consumer services and trade or to the district committee of public domains.
Renting land for a trade pavilion is only possible if the businessman is registered as an individual entrepreneur or acts on behalf of an LLC. Therefore, first you will need to purchase one of these statuses. After which the procedure will be as follows:
- The land for the pavilion is selected. You can choose a site based on personal preferences. But if many shops have already been built on it, the administration has the right to refuse.
- Then you will need to collect documents and submit them to the administration. The documents you will need are: an application for renting a plot, a certificate of no tax arrears, drawings of future construction, certified copies of OKVED codes. The period for studying the application from the moment of its submission is 30 days.
- Also, renting land for a pavilion requires permission from the following organizations: sanitary and epidemiological station, fire departments, environmental enterprises, traffic police, water utility.
- If a positive decision has been made on the request and all permits have been obtained, you can proceed to the construction of the building. In this case, it will be necessary to carry out cadastral work on this site.
Interesting Facts! The process of leasing a plot of land for a retail pavilion can be significantly simplified. To do this, you will need to purchase a plot of land on any market, then all the documentation will be collected by its owners, and the businessman will act as an ordinary buyer. You can also rent a plot from a private entrepreneur, and not from the state, this will significantly simplify and speed up the opening of a trade pavilion.
Refusal to rent
If the rental request received a negative response, you will need to clarify what is the reason for the refusal. Most often, the reasons for this are the following:
- There is too much density of objects for trade in the selected area.
- The land is used by the state for urban needs.
- The site is no longer part of the circulation.
If such a situation arises, you can go to court or change your plans for choosing a land plot. The second solution will allow you to arrange the trade pavilion as quickly as possible.
Types of shelters
Depending on the methods of ice fishing, structures are divided into:
For mobile devices. They are extremely light and quick to install, they are useful when changing holes frequently and protect more from wind than from frost. These include:
A cape tent in the form of an isosceles triangle, which is easily made from transparent polyethylene film, which gives a good overview.
An appropriately elongated ice screw can be used as a support in such a structure, and pins or screws can be used for fastening. Among the disadvantages of such a shelter, the fragility of the material and cramped living conditions are noted.
A dome tent with a central support in the form of a metal pole driven directly into the ice. For ease of transportation, the pole can be collapsible. The same plastic film or a denser synthetic material is attached to it, which adheres to the ice using pins.
Stationary (frame). They are used for fishing at a fixed location. They can serve as a permanent place of residence or as a temporary shelter.
The functional characteristics of such a building can be improved by installing a warm floor and a heating system.
This category may include the following types of structures:
Umbrella - a frame made of strong rods and duralumin tubes is covered with a tarpaulin or synthetic awning according to the principle of an umbrella.
Automatic - The protective material of the shelter is immediately attached to the frame, which, when unfolded, takes the desired shape. The advantage of such a product is the speed and ease of assembly, the disadvantage is its fragility and instability in strong winds.
Frame. A base is constructed from several duralumin tubes, bent in an arc, fastened together and covered with an awning. The shape and size of the base determines the dimensions of the tent.
The history of the creation of the first models
Long-brimmed outerwear became the progenitor of the epancha of the early 18th century
Specialized clothing, vaguely reminiscent of modern raincoats, appeared in the Russian army during the time of Peter I. These were epanches, used to protect soldiers from rain and wind. In 1761 they received collars in the form of hoods. Starting from the second half of the 19th century, such things, combining the advantages of several items, became part of military equipment in many European countries. The Russian Empire included raincoats in the equipment of its officers only in 1894; these models were waterproof.
In Soviet times, European and tsarist experience was adopted only in 1936, securing tents as standard equipment for the rank and file and command staff of the Workers 'and Peasants' Red Army. The standard set of protective raincoats included:
- Panel size 180x180 cm;
- The stand is collapsible, consisting of two 65 cm rods;
- Lacing rope;
- Two jokes.
During the Great Patriotic War, soldiers immediately appreciated the best aspects of compact tents, using them for all sorts of needs:
- Weather protection;
- Use as camouflage ammunition;
- Carrying wounded soldiers.
On guard duty, such equipment was used as ordinary capes, and in open areas, soldiers often built large shelters, connecting several panels together. Entrances to dugouts were also often masked with raincoats. Beginning in 1942, the defense industry of the Soviet Union began to produce camouflage models with improved camouflage properties.
DIY winter fishing tent
Winter fishing is a lot of positive emotions, which can be diluted by some of the negative emotions associated with weather conditions. It is not difficult to imagine the discomfort an angler feels in the presence of frost, and even wind, which increases the feeling of cold. The wind may not be strong, but it can bring a lot of problems. If you have a winter tent for fishing, then some of the problems can be reduced to zero.
The presence of a tent allows you to increase the total time a fisherman spends on a pond in winter. Moreover, you can easily raise the temperature in the tent to above zero, which will allow the fisherman to feel very comfortable.
Sewing process steps
A two-person canvas tent must be waterproof. Only in this case will it be comfortable to be in it in any weather conditions. The material can be bought ready-made or made with your own hands. To do this, one of the following manipulations is carried out with the tarpaulin:
- Soap dissolves in water to a concentration of 50%. This is a ready-made impregnation option in which you need to place the fabric. After drying, the surface is treated with vitriol. Just a few minutes are enough for the composition to thoroughly saturate the structure. After completing the manipulations, the fabric is dried.
- Heat 4 liters of water. In the resulting liquid, dilute half a kilogram of soap, 0.45 kg of rosin and 25 grams of soda. All ingredients are thoroughly mixed, and then the fabric is added to the vessel. You will need to allocate at least 2 hours for impregnation.
- Water and alum are mixed in a ratio of 10:4. Additionally, you will need to add 2 parts fish glue and 1 part soap. The canvas needs to be soaked. After completing the procedure, it is squeezed out and rinsed in lead acetate. In this case, its concentration should be no more than 4%.
Thanks to these simple methods, a 3-person canvas tent will be able to repel moisture. Manipulations may only be performed with protective gloves. However, the easiest way is to cover the structure with film. For additional fixation, ordinary clothespins will be quite sufficient.
Types of tents for ice fishing
Depending on the design features, winter tents are divided into specific models.
These are the simplest designs that are easy to assemble and install. To make the frame of such a tent, you should use durable but lightweight materials. Synthetic fabrics or their combinations with tarpaulin are more suitable as an awning for covering.
Machine
The design is designed in such a way that the frame acts as a spring, which takes the desired shape when it is released from the packaging. They are quite popular due to their simplicity of design and lightness. Despite this, these tents have a number of disadvantages. Firstly, they are not resistant to strong winds, and secondly, they are not so easy to fold. Therefore, when going fishing, you will have to practice beforehand. It unfolds itself, but without the skills, it will be very difficult to fold it and if you overdo it, you can break it.
Frame
This tent consists of several folding poles and an awning that covers this frame. We can safely say that this is the same simple option, but it takes a long time to assemble and disassemble. In addition, it is not particularly durable. Therefore, fishermen rarely purchase such a design.
Options for mounting a tent in the ground and on asphalt
When installing a prefabricated tent on the ground, you need to use additional safety guy lines.
This will increase the rigidity of the structure and extend its service life. The guy ropes are installed using special pegs 15–20 cm long, which are driven into the ground around the perimeter of the tent.
If the tent will be mounted on asphalt, additional metal rods are used. To strengthen them, special holes are drilled, rods are inserted into them, which are then filled with concrete mortar. After the concrete has hardened, guy wires are attached to the rods.
Requirements for a homemade tent for winter fishing
A tent for winter fishing should protect the fisherman from wind, frost and precipitation. Moreover, the tent should have enough space to relax so that you can cook lunch or just drink tea to keep warm.
You can purchase any tent at specialized retail outlets, especially since the assortment is very large. Be that as it may, some fishermen make them themselves, taking into account all the requirements. Besides, who else but the fishermen knows what kind of tent is needed. Moreover, not all factory-made models meet the requirements of winter fishing enthusiasts.
A homemade tent should be:
- quite light and compact;
- mobile so that you can move easily;
- covered with dense but breathable fabric;
- easy to install and dismantle;
- durable and strong, and also retain heat for a long time.
To work you will have to stock up on these tools
Most tents made by anglers themselves fit into a fishing box. By the way, you can also make a box yourself, which is what many fishermen do, although you can buy it. In addition to the box, you will need the following accessories:
- two pairs of skis, one for children, one for school;
- tubes. In this case, it could be ski poles;
- unnecessary folding bed;
- dense fabric, such as tarpaulin.
At first glance, how can you build a tent from such a set of elements? But, nevertheless, such a design proved that it has the right to life. The final product fits into a fishing box, which is very easy to transport on ice. The structure is quickly and easily assembled and just as easily moved on ice in working condition.
The only negative is that there is little space in it. But if you approach the problem constructively, then it is possible to solve it and increase the size of the tent. Paradoxically, it protects from the cold, and this is the main thing.
Choosing a site for a pavilion
Many novice businessmen do not know how to set up a pavilion in the city.
To organize a trade pavilion, you will first need to choose a suitable location. This step is extremely important as a kiosk located in a good location will bring more profit. It is better to give preference to places near residential buildings and major roads. It is also advisable that there are no supermarkets nearby; most buyers will go there. But if the store being built will sell fresh fruits or vegetables, there is no need to fear competition from large buildings.
For a small kiosk selling food, an excellent solution would be a site in the courtyard of a residential building away from shops. The people living there will be grateful and all the costs of building the kiosk will be recouped in the shortest possible time.
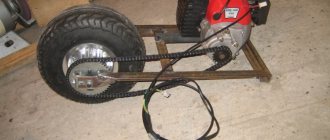
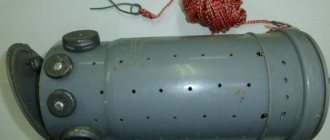
Drawings of a homemade winter tent
Judging by the drawings, the tent is mounted on skis, which simplifies its installation on ice. Regular tents require special fasteners. In addition, skis allow you to move the entire structure around the pond countless times. As a rule, winter fishing is not limited to one punched hole - there can be ten, or even more, and each hole has to be fished.
The only thing is that it is problematic to use it in the presence of strong wind, since it is mounted on skis, the wind will be able to move it across the pond on its own. In this case, you can get used to it and use the power of the wind to move it. The main thing is to drill the holes correctly.
Functions and structure of the tent
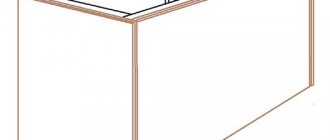
A tent is a small building with walls or a frame located under a canopy. As a rule, it is installed for a short period and, if necessary, can be moved from one place to another. Most often, the tent is installed in the recreation area - where the grill is located, or on the side of the house from where a beautiful view opens. Sometimes it is mounted next to the pool so that you can hide in the shade after swimming.
Thanks to the removable side walls, it can be fully or partially open and closed from the desired side to prevent a draft.
The design of the tent should harmoniously fit into the overall appearance of the site.
Step-by-step production
Despite the fact that this design was born a long time ago, many anglers have tested it in harsh winter conditions.
How to make a tent with your own hands
- Ski poles act as a frame and are installed vertically. Horizontal tubes should be thinner. At the corners, the frame is connected using tees, the diameter of which must match the diameter of both vertical and horizontal tubes.
- The next step is to attach the vertical tubes to the skis. A metal plate is attached to the ski, into which a tongue is inserted in the letter T, attached to the lower end of the tube. To secure the stick, just rotate it at an angle of 90 degrees.
- Two sticks are prepared from an old cot that will connect the frame to the box. Take a bent tube, at the end of which there is a docking unit. At the other end of the tube there is a latch, which serves as a fastening element for the docking unit.
- A spring is made from a copper strip that connects the box to the tubes.
- Finally, all that remains is to pull up the awning. Metal strips with holes are attached to the lower part of the awning. The brackets attached to the ends of the skis are pulled into these holes. The awning is connected to the brackets using ropes. For stable behavior of the tent on ice, it is equipped with two anchors.
Step-by-step construction of a tent
To build a collapsible or stationary tent for relaxation with your own hands using a frame made of plastic pipes, you will need the necessary tools and materials. A homemade frame for a tent is made not only from PVC pipes, it can be made from wooden blanks, timber, or profile metal. The tent itself also has a variety of shapes:
- dome;
- spherical;
- star tent;
- rectangular or polygonal geometry;
- with solid walls made of fabric or mesh;
- with and without windows;
- with a swinging entrance panel or with a zipper, wooden elongated buttons and so on.
Despite the apparent complexity of making a stationary tent, in fact, all the steps can be completed independently, without resorting to hiring professionals, which can significantly save money.
Ordinary
It has already been said above what type of frame can be used to build a tent, as well as the types of fabrics listed. It also wouldn’t hurt to draw up an estimate in advance, taking into account the consumption and cost of required materials, as well as draw a detailed drawing. Such measures make it much easier to complete work, since even with excellent memory, something can be overlooked. Afterwards you will have to redo it or go to the store again for the missing material.
The assembly of the tent begins after the site is prepared and the awning is sewn. If the supports are not previously concreted into the foundation, then proceed to installing them and assembling the frame. This will require traditional tools:
- ruler, tape measure, pencil;
- level, hammer, hacksaw, motor drill and screwdriver.
To build factory products, you will need different configurations of screwdrivers and wrenches; for wooden structures, you need various kinds of hardware.
Before installing the racks, you will have to drill holes in the ground, and for steel products a depth of 50 cm is sufficient, and for wood - from 70 to 100 cm. In this case, the wood should be treated with antiseptic impregnation to protect it from rotting.
The number of supports depends entirely on the shape of the tent - for a classic rectangle you will need 4 posts and 1 central one, for a fancy octagon, 9 posts, respectively. If the tent has a rounded shape, then the amount depends on the area - the larger it is, the more supports are required.
Do not forget about the slopes on the roof so that rainwater does not collect on the canvas.
If the canopy has the shape of a tent, then the central support is made higher than the side ones by at least 30 cm. If the shape is square, then the pillars of one side are made higher than the other, resulting in a pitched roof. All parts are joined using adapters and other devices. After completing all stages of assembling the frame and organizing the roof, the structure can be considered ready - all that remains is to throw on and secure the canvas, and arrange the floor.
Step-by-step instructions for building a tent with a mosquito net
- We mark the boundaries for installing the tent and prepare the site for installation. We first mark the place to install the tent by driving pegs in the corners, and use a stretched cord to mark its sides. We prepare the site by removing the soil and making a cushion of sand and granulate.
- Let's start installing the support posts. In the places where the supports for the tent will be located, using a brace or a garden drill, we make holes about 70 cm deep. We install support posts in the prepared holes strictly vertically using a building level. Their lower part, which will be in the ground, must first be wrapped in roofing felt or painted with oil paint to prevent rotting.
- The earth around the pillars can be compacted, but for reliability it is better to fill it with concrete mortar. If the tent has a pitched roof, then the rear posts should be 30 cm shorter than the front ones so that water can flow freely from it. If a cone-shaped roof is planned, then another pillar can be concreted in the center, which will be at least 50 cm higher than the side ones.
- We mount the top trim. The cross bars are fastened only after the side supports have completely dried. For this, metal plates or special corners are used.
- After forming the top trim, we begin to form the roof. To do this, we attach additional strips, placing them crosswise or in another way provided for in the drawing.
- We additionally attach rafters to the top of the supports for strength. The upper awning will be mounted on them.
- We stretch the top awning and attach the side walls to the finished frame. To do this, we use special ties or Velcro fasteners. During the daytime, you can only use the awning - it is quite enough to hide from the sun.
- If necessary, side walls made of fabric can be attached to the top of the frame. They are attached to the transverse bars of the frame on three sides. You can hang a mosquito net from the entrance to the tent. It is very convenient if it consists of two parts and is equipped with special magnets or a zipper.
How to sew a tent with your own hands
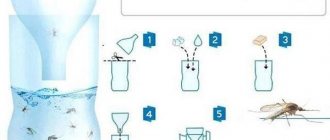
Alternatively, you can make a tent in the form of a house. To make it you need to take:
- Water-repellent fabric with an area of 14 square meters. meters.
- Metal washers, 1.5 mm in diameter, 20 pcs.
- Braided rope, up to 15 m long.
- Narrow ribbon, about 9 m long.
- Fabric for bedding, rubberized within 6 m.
Such a tent can accommodate one or even two people. First of all, you need to prepare two pieces of fabric measuring 1.8 x 0.9 m. Marks are made on the 1.8 m side every 65 centimeters. The same is done with the other (0.9 m) side. The fabric should be cut at the joining points to create the entrance and back wall of the tent.
The diagram shows the implementation of further work step by step. Most importantly, all parts must be sewn securely. Use tape to reinforce the seams. There are times when a tent is made from ordinary fabric. In case of bad weather, polyethylene film is used, which can protect against wind and precipitation. Metal rings are sewn into the fabric for fastening. As a rule, they are located at the bottom of the awning, as well as in the places where the fabric is attached to the frame.
Advantages of an awning gazebo
The gazebo tent has a number of advantages that make such a product an indispensable assistant when relaxing outdoors or in the countryside. If necessary, it can be quickly expanded and rolled up, spending a minimum of effort and time. Thanks to its compactness, there are no problems when transporting the tent - when folded, it takes up little space in the trunk or inside the car. It can be stored on the balcony, warehouse and utility room.
Tent gazebos, made from high-quality materials, are excellent protection from bad weather - ultraviolet rays, rain, wind and insects.
Manufacturers make tent gazebos of different sizes, from small to large. Small tents are designed for 1-2 people, and spacious ones can accommodate up to 8 people. A separate category includes tourist gazebos, which are characterized by a reliable fastening system and the strength of the material, coated with protective solutions against moisture and elevated temperatures.