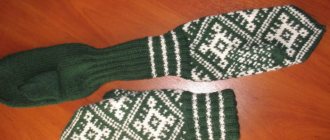
As you know, things made with your own hands are valued much more than those bought in stores. In order to weave baubles you do not need to have any special skills or talents.
Weaving from ribbons, diagrams of which can be found on numerous Internet sites, requires preliminary preparation of all the materials necessary for the manufacture of these products, namely: multi-colored ribbons, the length of which should be about a meter, and fasteners, which can be easily purchased in the store.
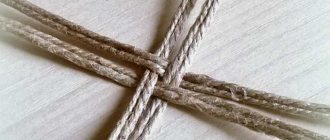
When starting to weave ribbons, the patterns first of all indicate the formation of a loop, which is subsequently threaded into another, while the first one is tightened. Then a loop is made again and threaded into the next one.
This pattern should be repeated until your bauble reaches the required length. There are also options for making bracelets from ribbons and beads, after which such bracelets will sparkle with completely different colors.
What can be woven from ribbons: bracelets, belts, keychains, baubles. Weaving baubles is a fun hobby that can be learned quickly.
What else can you weave accessories from: rope, cord, braid, floss, leather, and so on.
If you don’t have ribbons, but have a sewing machine, cut strips of fabric, fold them, and sew them on the machine. You will get cords or ribbons for weaving. Instead of a lock, you can use buttons, hooks, and Velcro. A little imagination - create from available materials.
In the video - a necklace and bracelet made of beads and ribbon:
A simple bauble made of satin ribbons
You will need: 2 satin ribbons 75 cm long.
Master Class
- Fold one and the second bauble in half, leaving 10 cm ends for ties.
- Weave one ribbon over the other, as shown in the picture.
- Weave a bauble of the required length from 13 to 18 cm.
- Secure the bauble by connecting all 3 pieces into a knot.
A simple bauble made of satin ribbons is ready!
Interpretation of colors
When planning to give someone a handmade bracelet, you should not neglect traditions. We invite you to find out what these or those colors in the baubles mean:
- White is the color of innocence, wisdom, and new beginnings.
- Red is a symbol of passion and love, helped in protection from negativity and the evil eye.
- Yellow and orange were woven into the bauble to improve mood and attract fortune to one’s side.
- Pink is the shade of a romantic personality.
- Black and gray tones are a symbol of independence and modesty.
- Shades of blue were intended to achieve inner harmony, indicate a connection with nature, symbolize friendship, kindness and wisdom.
- Brown is a symbol of stability, prosperity, support from loved ones.
- Purple was woven in to emphasize a person’s abilities in the arts, magic, and to denote an extraordinary personality.
The closest friends were given the so-called rainbow - a bracelet symbolizing soul kinship, joy, and the desire to live life to the fullest.
You can use symbolism and combine colors, giving them a certain meaning, the main thing is that the resulting product pleases its owner.
Classic bauble made of two ribbons
You will need: satin ribbons of two colors of the same width, 1 meter long.
Master Class
- Connect 2 ribbons, step back 10 cm from the edge and tie a knot.
- Fold the edge of one ribbon and wrap it with the other ribbon.
- Tighten the knot.
- Fold the loose ribbon into a loop, then thread it through the completed first loop.
- Pull up the first loop (the second loop should become larger).
- Fold the first ribbon and thread it into the second.
- Tighten the loop.
- Repeat the weaving process until the desired length of the bauble.
- Tie a knot.
The classic bauble of two ribbons is ready! I recommend watching the video master class!
#13. Bauble of two ribbons [★☆☆☆☆]
Simple difficulties
Ribbons make beautiful and naturalistic flowers. They are easy to make, but you need more materials. The plant, the stages of its appearance will be shown, is made using the kanzashi technique. It's interesting and fast. Most often they are worn in hair or decorated with dresses, skirts, etc.
Progress:
- use petals;
- glue;
- stamens (sold in specialized handicraft stores);
- pliers.
- We make 5 or 6 petals using the kanzashi technique. We put the petals on the needle, pulling the thread through them.
- Do not tighten the knot to insert the stamens!
- Lubricate the stamens with glue and insert them into the flower.
- Don't forget to tighten the thread from the petals, tying them into a knot. This flower is ready. You can collect a whole bouquet!
Some tips. In order for the product to turn out the way the needlewoman sees it, you need to remember a few rules. They will make the work easier. These are the achievements of professionals who have been working with ribbons for many years, weaving various accessories.
- Choose the color for the product very carefully. It all comes from history, when each color had a specific meaning.
- Don't pull the loops too tight because it will be difficult to unravel and the appearance will become sloppy and less defined.
- The pin is needed as a help. It holds the tapes while working.
Square bauble made of four ribbons
You will need: 4 tapes 5-7 mm wide, 2 meters long.
Master Class
- Fold 4 ribbons together, space 15 cm and tie a knot.
- Straighten the ribbons on different sides - up, down, right, left. When weaving, you do not need to look for the front side, since in this bauble all sides will be viewed equally.
- Lower the first ribbon from top to bottom to make a loop.
- Move the second ribbon from right to left so that it overlaps the first.
- Bend the third ribbon from bottom to top so that it overlaps the previous one.
- Move the fourth ribbon from left to right, then pass it into the loop of the first ribbon.
- Tighten the weave slightly, then straighten the ribbons - you should get an even square.
- Repeat steps 3-7 until the desired length of the bauble.
- Secure the weave with a knot.
The square bauble of four ribbons is ready! It is worth noting that the bauble can be worn not just straight - square, but also twisted in a spiral. However, you need to handle it carefully, because if it stretches, it will lose its voluminous beauty. This can be avoided if you insert a fishing line or a strong thread at the beginning of weaving.
I recommend watching the video master class!
DIY keychains – Unusual keychains made from satin ribbons
Advice from the experts
The skill of creating such interesting accessories is simply a treasure trove for a handmade master. Instead of an expensive purchase, make a unique gift for your friends and family.
Also, do not forget the professional recommendations of experienced craftswomen to achieve success in your work:
For beginners, it is optimal to practice on materials of equal length. Do not over-tighten the knots, pay attention to symmetry.
Your faithful assistant is a pin, and also a pad on which you can secure the material. At the end of the weaving, everything is tied in a knot. This will prevent the loops from shifting and unraveling.
Without fastening, doing all the manipulations by weight is very difficult and ineffective, although a master with great skill will gradually succeed.
The role of color and color combination is important. Learn to combine shades correctly, notice interesting and unusual combinations on the canvases of painters, at fairs and clothing designers.
Don't forget that in some subcultures certain colors carry meaning. It is important to remember this so as not to get into an ambiguous situation. You can view the meanings of color codes on the Internet.When you first start using a technique, it's rare that something perfect comes out, so don't despair. It’s better to try the actions strictly according to the instructions as many times as possible; you will master the working principles very quickly.
Round bauble made of satin ribbons
You will need: 2 satin ribbons of the same width, 2.5 meters long, a tailor's pin.
Master Class
- Fold the ribbons crosswise and secure with a pin.
- Fold the top (second) tape into an arch over the horizontal (first) tape.
- Unfold the left end of the first strip and lay it parallel to the right (on top of the second strip).
- Lift the right end of the first strip up, then lay it over the ends of the second.
- Take the end of the second ribbon that is on top, bend it to the left, then pass it over and under the first ribbon.
- Pull the knot and straighten the elements of the square.
- Re-tighten the knot.
- Repeat the weaving process (tying knots) until the bauble is the desired length.
The round bauble made of satin ribbons is ready! I recommend watching the video master class!
Round bauble made of 4 satin ribbons
The bauble can be used not only as a stylish accessory for your hand, but also as a pendant on a backpack. If you get creative, you can weave it - a headband, a keychain, handles for a bag... Also, the bauble will be a nice gift for a loved one. Select and combine your favorite colors, creating original masterpieces with your own hands!
What is the secret of the attractiveness of braids and how to wear them?
Of particular interest is the weaving of satin ribbon. Such samples look especially elegant and of high quality. The production itself is simple and takes less time than the same thin threads or small beads, rhinestones, sequins, which require painstaking care, good eyesight and perseverance.
A huge selection of ideas for creating crafts can be found on the website: https://tytpodelki.ru
Adults, teenagers and teens alike will love doing this creative activity. The main thing is to become familiar with the basic principles.
Wearing a bright detail - a bracelet made of ribbons - is worth not only on the wrist, but as a keychain, belt, or used as a decorative “highlight” of the interior.
This is a fairly ancient tradition. For centuries, symbolic cords and braids served as amulets and memorial knots; they were tied by mothers to their children, and by lovers to warriors as a sign of protection.
It’s easy to add beads, stones or symbols to the braid, but this is already a complicated stage in the work. Ideally worn with suits for sports and relaxed clothing for leisure, this is not a business accessory.
Although jewelers now offer models in the form of silver and gold woven bracelets, this is not a homemade type; it is preferred by people with means.
Our master class talks in detail about different ways to design hand baubles from satin and silk. Learn these simple methods and soon you will delight your friends with amazing gifts.
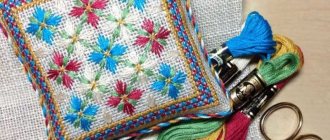
Bookmark for books with cross stitch: patterns, diagram
In order to start creating a bookmark using cross stitch, you need to stock up on the following things:
- Canvas for embroidery. White color is preferred, but other colors are available
- Floss threads
- Hoop, needle
- Scheme
- Marker
IMPORTANT: It is advisable to use a special disappearing marker.
- Sufficiently thick cardboard
- Glue
- Scissors
Operating procedure:
- The diagram printed first
- It is advisable the canvas with a warm iron to give it evenness.
- Next, markings
- Now you can start embroidering. You can start from any angle
IMPORTANT: For accuracy, it is desirable that the stitches are embroidered in the same direction.
- At the end of the work, you can make a neat edging using the “back needle” pattern.
- Next, it is recommended to iron the work - this step will help level the surface
- It is advisable to cut out pieces from thick cardboard corresponding to the size of the embroidered fabric
- Now all that remains is to fasten the canvas and cardboard with glue. You can also wrap the work in polyethylene, fastening it with a hot iron - this way the bookmark will last longer.
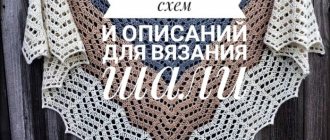
Scheme-1 for cross-stitched bookmarks
Scheme-2 for cross-stitched bookmarks
Pattern-3 for cross-stitched bookmarks
A few more patterns for cross stitching bookmarks
Patterns for cute feather bookmarks
Bookmark scheme with nature
You can decorate the resulting bookmark, for example, with a tassel
DIY money bracelet
If you need to solve certain financial difficulties, then a money amulet bracelet can help with this. It is created with your own hands, for which you do not need any specific skills or abilities. In addition, this ritual does not even use certain spell words: it is much more important what thoughts and promptings you can put into the craft
For this reason, it is important that the ritual of creating a talisman is carried out by you exclusively in a good mood and well-being, otherwise, it is better to postpone making it until another day
The process of creating a bracelet amulet is best carried out during the waxing moon phase, then this planet will be able to endow the talisman with special powers. But you should prepare in advance: purchase three new skeins of natural wool yarn in the store in the following colors: red, blue and green. You should not save on your purchase; the threads should be of high quality and made only from natural materials.
In addition, you will need one wax candle purchased from the church.
Popular articles Surprise your loved ones: make beautiful bookmarks for books with your own hands
On the specified day, you should remain alone in the room and sit at a table on which you place a lit candle and prepared threads. While looking at the flame, clear your thoughts of extraneous feelings and focus on how much you should improve your financial situation. It is best if you already know exactly what amount and in what currency you will need. Think of this money as if it is already in your hands and all your problems are solved.
When you feel ready, take one thread from each skein and weave the bracelet to the length you need. You can weave in any way: a regular braid or intricate patterns.
When the bracelet is ready, tear off the free edges and tie them so that the amulet can be put on your hand.
Now your talisman is ready, and you must wear it constantly on your left hand until your wish comes true and you receive the required amount of money. As soon as what you want comes true, you can safely burn your talisman: it has already fulfilled its purpose.
Wooden bracelets
The instructions describe step by step how to make an interesting decoration from any available wood materials.
Even popsicle sticks are suitable for a cool children's bracelet. The idea is this:
- Holes are drilled at the ends of 2 ice cream sticks.
- Then the material is left in water for 2 days so that it becomes soft.
- The elastic bands are threaded through the holes, and the resulting structure is pulled onto a bottle whose diameter is approximately equal to the circumference of the wrist. In this position, the workpiece is left for a day until it dries and takes the desired shape.
Paint the accessory with oil or acrylic paints.
We offer you to master other techniques by attending the following courses: