Hello, dear friends! Today for you is another one of my works - a small wicker basket made of jute twine. In this article you will learn how to make such a basket yourself and my master class will help you with this.
On the Internet, a great variety of beautiful Easter compositions are pleasing to the eye, and I couldn’t resist: I decided to weave my own Easter basket. I have long wanted to make my own composition for this holiday. And now my dream is coming true!
A wicker basket will be a wonderful holiday decoration. You can put not only Easter eggs in it, but also other pleasant little things.
Previously, I had to weave baskets from paper tubes. My experience helped me a lot in this matter and weaving went quite easily.
Materials for work
So let's get started.
We weave the bottom
We begin to weave the basket from the bottom. To do this, cut the twine into pieces of 30 - 35 cm and make ribbons of 2 or 3 threads from them.
I used 2-strand ribbons, they are easier to start working with.
We intertwine 4 ribbons in the middle with each other.
Then we weave two more ribbons.
The bottom will consist of 8 tapes, which means that there will be 16 racks.
Then we glue the end of the thread between the ribbons and begin to braid them in a circle in several rows.
Since the number of racks is even, the pattern has to be shifted to create an interlacing of the thread.
This can be corrected by adding another rack.
We simply paste it into a convenient place between the threads and continue to weave the pattern in a circle with ribbons of 3 threads.
When the tape ends, we extend it with the next one, gluing the ends together.
Weaving the wall of the basket
Well, our bottom turned out to be the required diameter. Now we glue another ribbon behind the stand and braid one circle with two ribbons.
This is done very simply: each tape is tucked in turn behind the next nearby rack.
After this, we bend the racks at an angle of 45 degrees and “dress” our workpiece on the mold.
To prevent the posts from sticking out in different directions, they can be tied with a string at the base of the bucket.
Then we begin to weave a ribbon of 3 or 4 threads in a circle.
We continue to work like this until the desired height of the basket is reached.
Next, we braid one circular row of two working tapes, just like on the fold of the posts at the base of the bottom.
- When you finish weaving, cut off the excess length of the posts, while hiding the ends between the ribbons of the last row.
- It should look like this.
- Using this pattern, you can weave a basket of any shape, for example, oval or square.
Making a handle
The next stage is making the handle. To do this, we make a ribbon of three threads and bend it in an arc, thus giving the shape of a handle.
We insert the ends of the tape between the last row of the basket on opposite sides. How to attach it is shown in the photo.
- For greater reliability, wrap the handle attachment point with twine.
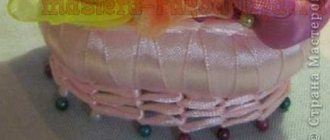
- Finally, we glue a regular classic braid made of jute over the handle and decorate the ends with bows.
Wicker basket
- Well, our wicker basket is ready!
- This is what the bottom of the basket looks like.
- I also decorated it with a flower, by the way, also made from twine.
Well, this is my Easter composition. Wicker basket with holiday eggs. I'll go visit with her.
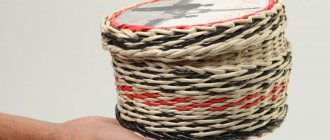
And here is another basket with jute twine lace. I wove it according to the same principle.
Looks completely different. And the flowers are absolutely great! A beautiful idea for gifts. Do you agree?
- It was a very nice idea to use it to serve bread on the table.
- I also have wicker baskets with bows, which you can see in this article.
I invite everyone who wants to receive a ready-made basket to stop by the store. There you can buy a basket according to your taste.
Well, that's all, dear friends! This concludes my master class.
It is very interesting to hear your opinion about my works.
I look forward to your feedback and comments.
Thank you for your attention and participation! I wish you all the best and a festive mood!
Source: https://tvorchestvovpodarok.ru/pletenaya-korzinka-master-klass/
The principle of knitting a jute basket
We tie the rope in a circle with single crochets using jute thread. When the bottom of the required diameter is connected, we go up without making any more additions.
The bottom can be of any shape. Flat crochet is based on adding stitches evenly on each row. As soon as you stop making these increases, the canvas will automatically “grow” upward.
If you want to knit a square basket, then take a granny square as the base (bottom).
Jute Christmas tree basket
Such a large basket, 50 cm in diameter, is suitable for decorating a New Year tree. After the holidays, it can be used as a place to store toys, yarn, etc.
Jute is a fairly heavy thread, so the basket will turn out to be massive and weigh up to several kilograms.
Using jute thread (thin), tie 3 air loops, close them into a ring using a connecting post.
In the same ring, knit 10 single crochets (dc). At the end there is a connecting loop.
1 row. We tie a rope. We knit very tightly! Knit 2 tbsp into each loop, grabbing the rope. The connecting loop at the end of the row can be omitted; further knitting will be done in a spiral. But hang the marker on the first loop and move it from row to row.
Tying a rope with jute thread, video
Crochet jute basket bottom
2nd row. 1 tbsp, in the next column of the previous row - 2 tbsp. That is, we alternate 1 tbsp and 2 tbsp until the end of the row. Now we always knit with a rope.
3rd row. Vice versa. 2 tbsp, 1 tbsp to the end of the row.
To ensure that the rope lies evenly and tightly, pull it around the knitting circle using a crab clip or a paper clip.
4 row. 3 tbsp/n + 1 tbsp/n to the end of the row.
And so we knit the bottom to the desired diameter. In my case = 50 centimeters.
Raising the walls of the basket
Now you will need to lift all the knitting up so that the bottom remains flat and the walls are voluminous.
If we knitted without a rope, we would simply stop adding loops and the fabric itself would begin to knit upward, not wide. But with a rope everything is a little more complicated.
It is necessary to attach the rope in the first row of the lift as far above the bottom as possible. At the same time, knit in the first row, capturing only the top loop of the column of the previous row. As shown in the video:
- This series will force you to make an effort and be more attentive, but overall it is not difficult.
- And now we knit up to the desired height.
- If you want the basket to tuck, then knit more rows by 5 - 10 cm.
Basket tying
After the desired height is knitted, all that remains is to tie the basket with jute thread to give it completeness: with connecting air loops as shown in the video:
It is not necessary to tie the rope with jute thread; you can use any thread. But it is precisely this combination that allows you to create a complete basket. At first glance, it is difficult to guess that the basket is knitted from two threads: rope and jute.
Some use white plain yarn, as well as any colored yarn. Now they sell different ropes.
But this “wooden” shade is universal. And it is suitable for different tasks. The basket can be used here and there. And later, even send it to the dacha for other types of storage.
Tapered jute and rope basket
This option is also suitable for a Christmas tree; this basket model can be used as a vase for artificial flowers, etc.
The diameter is knitted exactly as described above. But in this basket I have it 35 centimeters . I measured the legs of the artificial Christmas tree, their length is about 30 cm.
- This basket is just for the Christmas tree, so there is no point in making the bottom anymore.
- In the same way, we lift the basket up, moving the rope accordingly and knitting only one part of the column of the previous row.
- 10 rows - according to the drawing without increases or decreases.
Twine weaving for beginners step by step - ideas for the interior with photos
Today, everything unusual, natural and handmade is in fashion. Not everyone can afford designer items, which do not always bring joy. A DIY craft will help you relax when making it and will be pleasing to the eye in the future. Twine weaving for beginners will not cause any difficulties if you carefully read our article.
Before mastering twine weaving, it makes sense to understand the concept of twine. Each of us has string in our household, which is also called twine. Twine is a thin, strong rope that looks aesthetically pleasing and neat.
There are such types of twine: textile, polypropylene, jute, flax-hemp, polished flax. All these types of twine are intended for various types of products. For example, textile twine is used for stitching and packaging products. It is made from yarn fibers, thin strips of paper, and films.
Products made from this material are unusual, practical, original and last quite a long time. All crafts will bring you a lot of positive emotions. Once you try making things, accessories and many other nice little things from twine with your own hands, you will understand how exciting it is! Here's an inspiring photo:
Polypropylene twine is a thread that can withstand very high temperatures: up to 50 degrees Celsius. This material is very reliable; neither acid, nor alkali, nor moisture will spoil it. This material is usually called cord.
Let's get started
To work you will need:
- 20-25 meters of 5 mm twine;
- scissors;
- the shape to weave in.
Step-by-step master class on making a basket:
- First you need to make 12 pieces of rope, 65 cm each.
- We make the frame of the basket. To do this, you need to arrange 11 ropes in the form of a cross. We place 5 ropes horizontally, and 6 vertically. The last rope - the twelfth - needs to be secured in the middle. The frame is ready.
- We fix the main thread in the middle and begin to weave. We weave in a circle, between the ropes of the frame. To make it easier and more convenient to form a basket, you can use any bowl and weave over it.
- We continue weaving until the basket reaches the desired height, and then fasten the main thread. We also fasten the frame threads. To do this, we wrap each thread around the last two rows.
Sheep mask
Very often, children in kindergarten need animal masks to participate in the matinee. One of the popular characters is the sheep. Making her mask is easy. You will need:
- Cotton wool;
- Paper plate;
- Glue;
- Cardboard;
- Scissors.
Here are the instructions “how to make a craft from cotton wool”:
- Cut out the middle of the paper plate.
- Roll cotton wool into balls and paste them over the plate.
- Cut out ears from cardboard and glue them to the appropriate places.
- Try on a mask.
DIY twine basket ·
Today I want to share with you a master class on making a cute basket from twine or string. This material can be called differently. Such baskets can be used as an organizer for office supplies, cosmetics or various small items.
To make a basket we will need:
Any cardboard box. Choose the size and shape yourself based on your preferences and needs. I had a small parcel box from which I removed all the stickers.
- Leg-split
- Double-sided tape or glue gun
- Scissors
- Lace
- We will also need a ruler and pencil.
Progress
- The box needs to be cut and glued so that we have a bottom with walls on 4 sides.
- Next, using scissors or a stationery knife, the walls must be cut into strips.
- I draw your attention to two mandatory conditions:
- The number of stripes must be odd. Then we can weave the basket correctly. I ended up with 23 strips.
- Small gaps must be left between the strips. This is done so that the thread does not get “chewed” during weaving. I left gaps of about 4-5 mm.
When the basket blank is ready, we can proceed directly to weaving. The end of the thread must be secured so that it does not dangle. I did this using a stapler.
- And then we weave, weave, weave...
When we have woven to the top edge of the basket, the end of the twine also needs to be secured. You can use glue, a gun or, like me, a stapler.
To decorate the top of the twine basket, I used beige lace. I glued it with a glue gun - first from the outside, and then from the inside.
I cut out the bottom for the basket from the lid of the box. I pasted the appropriate material. I put the bottom in the basket.
I decided to decorate the lower outer edge of the basket with a ribbon made of air loops knitted from twine. I also glued it on with a glue gun.
All. Our twine basket is ready.
You can also decorate it in different ways.
Source: https://domovenokk.ru/master-klassy/korzinka-iz-shpagata-svoimi-rukami
Current ideas
The photo of crafts made from cotton wool shows that this amazing material allows you to realize a variety of ideas.
DIY Easter basket made of twine
A basket made of cardboard and twine is a simple craft, but quite labor-intensive. You may get a little tired from such monotonous work, but the result is worth it.
In order to make an Easter basket from cardboard and jute twine with your own hands you will need:
- thick cardboard,
- jute twine,
- hot glue gun,
- pencil,
- scissors (for thick cardboard it is more convenient to use a stationery knife),
- a compass or two plates of different radii,
- for the handle - a little wire.
First you need to prepare a cardboard base. Let's use plates...
An important condition: the number of “legs”—the walls of the basket—must be odd.
We leave small distances between adjacent segments, approximately 5 mm. We cut off the excess from the trapezoids to make rectangles, as in the photo.
For convenience, first close the bottom of the basket with twine. Let's use hot glue. To avoid making a mistake with the center, it is better to wrap from the outer circle.
- You can also use PVA glue, depending on your convenience, but in this case you will have to put the workpiece under the press for a while.
- We bend the legs and begin to form the basket itself.
We fix the tail of the twine on one of the legs inside the basket with hot glue and begin to wrap the basket, alternating the legs: we bring the “thread” to the next leg from the front side, then we wrap it around the next one, and so on.
Like this…
- Press the threads tightly and pull.
- We get such beautiful twine weaves.
Not reaching the edge 5 mm, we make holes in the cardboard, as in the photo. We unwind the twine with enough reserve so that we have enough to complete our basket and cut it off.
- We form a handle for our basket from the wire and wrap it with twine.
- We return to the edges of the basket and continue wrapping it in the same way.
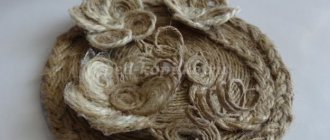
- I made a flat braid like this out of twine and decorate the edge of the basket with it.
We also close the cardboard on the bottom side of the basket with twine. We wrap the outer circle using hot glue.
- Ready…
- A twine basket is a labor-intensive craft, but if you have the time and desire, it can be made in just one evening.
- Have fun creating!
- I was glad to help!
Source: https://samayamk.ru/podelki-k-pashe/pasxalnaya-korzinka-iz-shpagata-svoimi-rukami.html
Hare
This is one of the simplest cotton wool crafts for children. Even a novice master can make it. Materials needed:
- Colored paper and cardboard;
- Colored pencils/markers;
- Scissors and glue;
- Cotton wool.
Order of steps:
- Place a piece of cardboard in front of you. Decorate its lower part with cotton wool. It will be snow.
- Cut out the hare's paws from white cardboard and glue them to the workpiece.
- Make ears for the bunny in the same way.
- Twist the cotton wool into two balls: one, larger, for the body, the other, smaller, for the head. Attach them to the base with glue.
- Cut out carrots from colored paper and hand them to the hare.
- Use felt-tip pens or pencils to draw eyes, nose and mouth.
All that remains is to hang the craft on the wall.
It's all just a simple split! 10 original ideas for creativity
Twine is an affordable material for creativity. Using it, you can weave, knit, make adhesive-based decor, and make designer practical things. Products made from it always look original and noble. Vases, candy bowls, various boxes and baskets are stylish and functional decorative elements that are easy to make yourself if you wish.
Twine baskets made using different techniques
Whatever the chosen technique, the result is always excellent.
Using a container as a base for a basket
With a supply of twine, scissors and a deep bowl, it’s easy to weave a basket yourself.
We prepare 12 pieces of twine, each 65 cm long, and place them crosswise. We tie one of the ropes in the middle. As a result, we get the basis for the frame.
Having reached the desired height, we fasten the main thread and the carcass threads. We begin to do this 2 rows before the end of weaving. It is important to tuck the threads inside the basket.
- Our basket is ready to be filled!
Weaving a basket using a template
A less labor-intensive method involves using a stencil. Transferring the template of the required size onto cardboard or plastic is a matter of technique.
- Then all that remains is to braid it with twine.
- At the end of the work, we add jumpers to the basket to hide the joints, a handle and secure the thread.
- Our basket is ready!
Glue was also used here. With its help, an ordinary jar was transformed into a stylish, functional little thing.
Source: https://cpykami.ru/idei-izdelij-iz-shpagata/
Creation technology
- In order for the cotton wool to hold its given shape, a fixative is needed.
- You can use PVA glue as it.
- Since there are so many varieties available today, this can be confusing.
- Experts recommend sticking to a composition without any additives. This glue is considered the safest.
- An example is PVA Beam. It is designed for gluing different materials, in particular cotton wool.
- After this glue dries, it becomes transparent and flexible. And it is also environmentally friendly.
The fixer can also be made with your own hands.
- To do this, soak 10 g of gelatin in water for 24 hours.
- Then the solution needs to be boiled in a water bath, add, without forgetting to stir, 100 g of flour and keep on fire for 60 minutes.
- Then you should pour 25 g of alcohol, 10 g of glycerin into it and add dye.
- After thorough mixing, leave for 30 minutes and cool the composition.
To create cotton figures, you need to moisten the cotton with glue or, soaking it, make layers, forming a volume. Drying each layer will help improve the quality of adhesion.
- If time is limited, you can dry the craft in the oven.
- It is recommended to apply a layer of paper napkin soaked in adhesive to the outermost layer.
- As soon as the product has dried, it needs to be coated with a primer - this will make painting easier and strengthen the figurine.
- If you are planning a large craft, the frame should be made of wire.
- It is better to choose a wire that is smooth and even, without rust or other defects.
- You also need to take care of pliers. They can be purchased at any hardware store.