A bright plasticine birthday card will not smudge if you use a light mass for sculpting flowers, which hardens in air in a few hours.
Of course, you can choose any inscription and make a gift with your own hands for March 8 or another holiday. The sculpting technique is simple; even children who want to please their mothers and grandmothers can handle it. But adults will definitely like the idea, because homemade cards are in trend today; there is no shame in giving them to bosses, teachers, doctors and “people who have everything.”
- Materials for a bright postcard
- How to make a three-dimensional card with flowers
Website for children and parents
This lesson presents an interesting version of a birthday card.
This is a voluminous composition with flowers and an inscription, which is replete with bright shades. But all the details are not drawn, not cut out of paper, but molded from plasticine. Even from this soft material you can create greeting masterpieces with various ornaments. To get a beautiful postcard, of course, you will need cardboard; it is easiest to stick all the details on it. And you can make any flowers, arrange them on paper in your own way, use your imagination and come up with something of your own. In the process of such work, you will immediately see what shades the child has, what flowers he likes, how he tries to make something unique, put it together and achieve a beautiful result. What you will need for the creative process of creating a postcard:
- the brightest paper from the set, preferably thick cardboard; - green, blue and white plasticine for flowers and floral designs; - yellow plasticine to create an inscription; - a thin stick.
Let's get inspired
I suggest making a picture for the little ones:
I showed our result on Instagram:
Wonderful lessons on sculpting pictures of landscapes from plasticine can be found on the Video Modeling channel. There are few video tutorials, but one or two are enough to understand the basic principle and even create masterpieces.
And our result for this lesson:
Please do not treat such creativity as purely childish. There are paintings that are worthy of admiration and can take pride of place on the wall of an apartment. For example, we have a painting that we sculpted based on Pushkin’s fairy tale “Ruslan and Lyudmila. Remember the beginning: “Near the Lukomorye there is a green oak tree, a golden chain on that oak tree...”
Our second favorite picture
Just look at the masterpieces you can create. Sometimes even oil painting does not look as impressive and voluminous as plasticine.
How to make a postcard from plasticine.
A handmade postcard is a very popular gift. Such a product can be made not only from colored paper, but also from plasticine. This will create an interesting volumetric effect. You can time such a craft to coincide with any holiday or significant date, for example, March 8th. Naturally, there are no strict recommendations for creating such a gift. It is clear that children will make it for their beloved mothers, aunts and grandmothers, and maybe kindergarten teachers, so any experiments are welcome.
We invite you to make a plasticine postcard with a picture of a mimosa, because this is the most popular plant; everyone associates it with the awakening of nature and International Women's Day.
1. If there is a mimosa sprig in the picture, then yellow and green colors are required, the rest can be chosen as desired.
2. Using the same principle, select the base of the postcard. This could be a rectangle of bright cardboard, regular packaging cardboard, or an old photo frame.
3. From bright soft plasticine, start rolling thin flagella of short length. Make several of these pieces so that you have enough to create a vase.
4. Start attaching bright plasticine strips close to each other, starting from the bottom of the future postcard.
5. Work your way up to form a round or rectangular container.
6. Insert green branches into the hole of the vase. Make them the same way as the blanks for the vase, only from green plasticine.
7. Knead the yellow plasticine in your hands and form many small balls.
8. Stick the yellow mimosa blossoms onto the green branches, trying to distribute them evenly.
9. Another little touch is the congratulatory inscription on the card. Letters can also be made from plasticine. It could be “Happy March 8!” or “Congratulations!” etc.
10. Attach the inscription to the central part.
The final look of the craft.
This is the kind of surprise every child can prepare for their mother or grandmother using ordinary plasticine.
Plasticineography methods
The most commonly used of them are:
- Strokes. A small amount of plasticine is placed on the pad of the index finger or a special plastic spatula, after which it is applied to the work surface in the right place with sharp, randomly directed movements.
- Plasticine balls. Typically used when placing accents on a flat image (for example, the middle of a flower) or as basic shapes to fill the inner surface of an object schematically depicted on the working plane.
- Flattening the rolled balls. It is not recommended to use a lot of force when flattening the balls. Otherwise, the resulting figure will be deformed, thus losing its clear rounded shape.
- Smearing on the surface. This technique is used to create a background or fill the inside of a figure with colored material.
- Scratching patterns on plasticine. Patterns are created on a flattened piece of plasticine using a special plastic knife or tools with already formed threads.
- Rolling plasticine sausages. You can roll sausages both for placing them on the final image, and for the purpose of using them as a blank.
- Squeezing plasticine out of a syringe. For extrusion, it is recommended to use a special syringe, which allows you not only to easily extrude thin strips of plasticine, but also to remove the remaining working material from the main body of the tool.
Possibilities of using appliqué techniques for children
The formation of personality in children begins with the fact that each child forms his own passions and shows creative abilities. According to psychologists, the development of fine motor skills helps to quickly master writing and reading techniques, which is why plasticine is so popular:
- modeling and repetition of familiar forms, which helps develop memory and consolidate new images gradually learned by the child;
- manifestation of creative abilities and the opportunity to develop one’s individuality, creating original masterpieces;
- using the fingertips and receiving new tactile sensations, which stimulates the child’s speech development.
When creating applications, you can use handicrafts as an interesting and exciting process for the child’s learning and speech development. Using plasticine, you can reproduce beautiful postcards and memorable photos, select and implement original and exciting ideas for children.
Plasticine applications: basic techniques and ideas
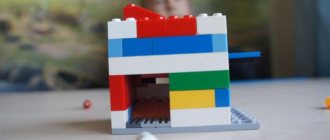
Developing a child's imagination and fantasy in the early years of preschool life develops rapidly, but even they need a certain stimulus. Beautiful and unusual crafts, plasticine applications on a cardboard base can be used to decorate your home or at children's exhibitions.
Simple and easy modeling will not take much time and will help diversify preparation for school and the learning process. To implement any idea, you can use different techniques that are accessible to children and adults; they are not difficult to implement and do not require special skills.
Talking parrot
A nice and bright bird is a nice birthday surprise for a friend or girlfriend. To make it we will need the following tools and materials:
- Bamboo skewer (can be replaced with a straight twig peeled from the bark or half a chopstick).
- Modeling stacks
First, you need to sculpt the details of the future figure: body, wings, beak, eyes, legs and scallop. Experiment with different colors, choose exactly the combination that you like.
When all the parts are ready, make a flower and attach it to a skewer. Wrap the skewer in the parrot's wing for him to hold.
Continuous coating
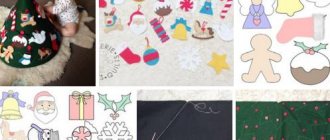
An interesting craft using the smearing technique, suitable for very young children who are just learning how to sculpt from plasticine. A pre-printed drawing is used as a basis (you can take any picture from a children’s coloring book) and soft and pliable plasticine is used for filling.
It is best to choose a high-quality product from well-known manufacturers that does not leave greasy or colored marks on the hands of children. The drawing is filled with plasticine along the contour; under the influence of the warmth of the hands and light pressure, it should be gently distributed over the entire area without going beyond the outlined contours.
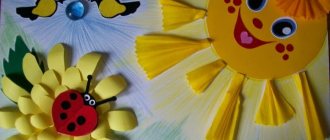
Making a rose for mom
- plasticine of two colors;
- white cardboard.
In order to make a gift, you will need plasticine of two colors: white and green. Before use, you need to knead it well. It must be remembered that plasticine is very sensitive to excessive heat, so you can rub your palm against your palm. You will immediately feel how they have warmed up and the lump has become pliable. We begin to roll the ball, this ball gradually turns into a sausage, very long and huge. Then use your thumb and forefinger to make a flat ribbon. You can take any color. After all, look how many roses there are now. Sometimes they are even purple. Or you can mix two colors. For example, mix red with yellow. The result will be a yellow-red rose. When the ribbon has become completely flat, we begin to wrap our rose from the very end: first the dense middle of the bud, then we lift each layer higher and higher. We make petals that either go back or rise to the top again. In this way, we wrap until our tape runs out. You can bend some of the petals a little with your fingers and the rose is ready.
Let's start sculpting the petals and stem. First, we’ll make a cup for our bud with pointed corners. Then we make a long stick, this will be the stem, and we attach the leaves to the stem. Now our gift is ready, let's put it on white cardboard and secure it a little. Mom will be delighted.
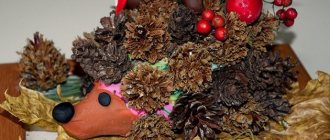
You can make a wonderful hedgehog for your mother from plasticine, and make needles for it using sunflower seeds. The caterpillar will be made from six chestnut fruits. They just need to be secured together with colored plasticine. Make horns, eyes, a nose and a mouth, and then sit her on a cut out green piece of thick paper.
Quilling or flagella
A realistic picture with a certain plot will be obtained if you use flagella rather than a thin layer of plasticine to fill the picture. They are prepared in advance; for this, plasticine of different colors is rolled into balls, which are gradually stretched into thin stripes.
Filling any space with flagella is very simple; for this, direct and reverse laying techniques are used. For figures with smooth lines (berries and fruits, animal figures), it is better to use the circular laying technique, the end of the flagellum is placed in the center and twisted in a spiral.
Plasticine mosaic
This type of creativity is very popular in kindergartens and it will also require a template with a pattern that is interesting to the child. Individual elements of the template are filled with small pieces of plasticine, which helps to completely cover the area and create the effect of a multi-colored mosaic.
If you have a ready-made template, it is fashionable to combine different colors and shades of plasticine; applications can be created on cardboard or glass. This technique makes beautiful cards for any holiday, and for the New Year you can decorate the windows in your house with mosaics, creating uninteresting and thematic installations.
Collage "Cosmonaut"
Every man in childhood traditionally dreamed of becoming an astronaut. Therefore, a space-themed collage would be an excellent gift for dad or grandfather on February 23rd. The list of necessary materials is simply obscenely simple:
- Jar lid
- Paper
- Glue
Take a blue or black color and roll it evenly over the lid, previously glued with paper. This is the background of our craft, onto which we will attach the remaining parts.
Then form a rocket using the color purple. Complete the composition with a red rocket exhaust and white stars.
Similarly, you can depict cosmic landscapes - for example, the spectacular rings of Saturn. After finishing the work, coat it with varnish.
Simple tips for working with plasticine applique technique
Original plasticine decor will become a real decoration or an unusual craft if you use a few simple tips:
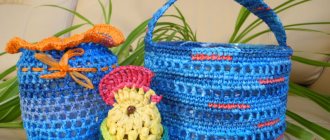
- instead of a cardboard base, you can use improvised materials for beautiful interior decorations, such as plates or trays, photo frames and even computer disks;
- the technique of flagella application can be facilitated by automating the process of making the flagella themselves; for this, the plasticine is heated on a radiator and placed in a syringe without a needle;
- classic plasticine can be replaced with an inexpensive and more plastic air mass; after drying, it does not leave greasy marks, and the crafts themselves become light and almost weightless.
When choosing any model for a future craft, it is important to ask what will captivate the child himself and what heroes or characters he likes. In this case, the creative process will bring a lot of pleasure to the little master, will help develop his abilities and will never bore the child.
To implement the plasticine appliqué technique, you do not need a special master class or special skills. Having tried to make the first craft with their child, parents will only need a little preparation and purchasing materials, after which they can not limit their imagination.