HomePapers3D paper crafts for children
Paper has incredible potential for creativity. Such familiar material, given an idea and imagination, can turn into a city or a person, an animal and a forest - yes, in fact, into anything. Some people use voluminous paper crafts for entertainment in their free time or as a hobby, and some create real masterpieces that we can see when we visit the exhibition.
Man has always, even in ancient times, had a craving for beauty. At the very beginning, rocks and stones served as canvas for images, and with the advent of paper, it was discovered that it could be used not only for writing.
Now, it’s probably difficult to say who was the first to come up with the idea of creating figures from paper, but this person laid the foundation for a huge layer of a wide variety of creativity and self-expression. It's hard to believe how many uses and uses for paper there are.
Nowadays, it is difficult to do without this important element of our life, and even more so as a tool for creating beauty!
Appliques, three-dimensional figures, snowflakes cut out in childhood for the New Year - probably not a single child was left without good memories of this from childhood. Making paper crafts with your own hands is a great way to make an original album or book of your achievements.
The list of ways to work with paper can go on for a long time - origami, accessible even to kids, will help you assemble a whole zoo. Modular origami is assembled from many identical parts into three-dimensional shapes. The unknown kusudama technique turns paper squares into voluminous and very beautiful spheres.
A technique called quilling is working with multi-colored strips of paper that twist and turn into droplets, leaves and flowers, and then fold into magical shapes on the canvas.
Paper is used to create three-dimensional and adhesive applications, drawings, and create 3D figures and models from templates.
A sheet of paper can be given any shape, and we begin to instill a desire to create beauty from childhood - already in kindergarten.
For example, applications from napkins are quite popular there - kids make small lumps, which then turn into beautiful flowers, animals and houses.
Using newspapers, magazines, photos and drawings you can create collages, large and small - some of them are simply amazing! Quite recently, a new direction for using paper has emerged - three-dimensional images that are created by layer-by-layer building.
Looking at these sculptures, it is impossible to believe that the material for the work was the most ordinary paper.
Another excellent example of creating volume using paper - details and stripes are cut out on a printed template using a scalpel, and as a result of the work you can get a whole playground - houses, furniture, people.
Cutting strips according to a template can turn into an airy and beautiful futuristic 3D module - although in fact, it is very easy to do and looks simply amazing!
In our section you will definitely find a new and fresh idea for creating paper masterpieces. A variety of techniques are collected here - complex and not so complex, for adults and children. Everyone will find a suitable and inspiring idea for themselves.
do-by-hands.ru
Making crafts with your own hands develops perseverance in children, reveals creative talents and develops fine motor skills of their fingers. The result of your children’s efforts can be saved as a keepsake or decorated in the nursery’s room.
If you are thinking about what to do with your child for the evening, DIY paper crafts are the best choice. This technique is very simple to perform, and the result will in any case please the whole family. So let's get started.
List of necessary materials for creating crafts
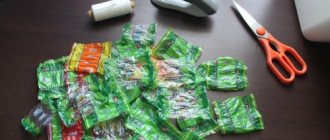
To create an original craft from a sponge, you need to purchase a package of multi-colored foam rubber products. This will be one of the main, but not the only material for creative work.
Other materials will be required:
- Scissors, a blade or a scalpel - with their help it is convenient to give the desired contours to the toy, and a scalpel or blade is used to separate the hard base of the washcloth from the foam rubber.
- Felt pens, gouache, markers, paints.
The listed items will be needed for drawing the elements and coloring them. When using paint for coloring, do not forget to dry the sponge thoroughly and only then proceed to the next step.
Recommendation: “When working, it is better to avoid using watercolors, the distinctive feature of which is blurriness and a long drying time. They don’t give a rich color on foam rubber.”
It wouldn't hurt to purchase:
- Gun glue and PVA - with a hot glue gun you can join individual parts of one work, as well as make decorative droplets on the surface of the foam rubber product. Once frozen, they will look impressive on the toy.
- Glitters and sprinkles are used to decorate finished works. They are mixed with PVA glue so that the glitter adheres firmly to the craft, and the product is left to dry completely.
The necessary materials depend on the child’s ideas and imagination. When working you may also need:
- scotch;
- plasticine;
- colored paper.
Comments for STREAM-teacher
Our craft is part of the “Scientific Toy in Great Literature” series. First, read the short, inexpressibly beautiful story of Mamin-Sibiryak, The Story of a Sawyer. How to introduce it to children depends on the context, but I prefer a family master class: the child makes the craft, the parent prompts, and together they listen to the story.
“In my childhood there were very few toys, especially store-bought ones, and that’s probably why I remember them with particular clarity. But the best toy was the wooden sawyer, which our coachman arranged from time to time. The sawyer was cut rather roughly from a piece of wood; he held a wooden saw in his hands and, placed on the edge of a large table in the kitchen, began to swing rhythmically. This man's toy made the strongest impression because it moved, and movement is synonymous with life. "
I turned this very old toy Sawyer into a fisherman. Over the past 100 years, the wood in it was gradually replaced by cork and matches, but even in this form modern kids cannot make it. And a sponge or penoplex is quite accessible to children. The main trick of our figure is in the tube, because the load must be located exactly under the fulcrum (under the legs). In wooden toys this was achieved in different ways, in more modern ones - with the help of wire. And we built a curved C-shaped structure from toothpick handles, an L-shaped tube (it does not bend thanks to a strip of tape) and clothespin fish - a nice solution, the author-maker is pleased with himself