- October 23, 2018
- Decor
- Sofia Ermakova
The opportunity to update tired but comfortable stiletto heels or pumps, sneakers or slips is shoe decor. You can remake your favorite pair with your own hands in just a few minutes. It all depends on the idea. Sometimes it’s enough to draw cute faces of cats or other animals on light-colored sneakers. More complex options include decor using the decoupage technique, painting in bright colors with special paints or markers, and so on.
How to make flip flops yourself
Flip-flops give you a feeling of lightness and weightlessness, although they are considered harmful to the health of your feet. There is no need to buy several pairs of such shoes, because from time to time you can simply update ordinary flip-flops with your own hands. One of the easiest ways to decorate flip-flops is to take two identical colorful scarves (or cut one in half), and then wrap the scraps on shoe straps. The rest of the material can be effectively tied at the ankles.
Other options for simple DIY shoe decoration: decorate the straps of flip-flops with multi-colored buttons, sparkles, small bows made of satin ribbons, artificial flowers (one large one or a scattering of small ones), bright threads, decorative artificial stones, beads, beads, rivets, metal rings. To implement most ideas, it is enough to have glue, thread and needle, scissors, as well as the necessary decorative element. In some cases, a glue gun is especially useful.
How to renew suede at home?
If the suede feels unkempt when worn and you don’t want to spend the money on refinishing it at the dry cleaners, then you can use at-home methods for updating suede. What will you need? The following countermeasures are required:
- cheap laundry soap;
- baking soda;
- full fat milk;
- semolina;
- ethanol (you can use kerosene);
- ammonia solution;
- wire brush;
- suede care products;
- dry rag;
- talc or baby powder;
- sponge;
- magnesia;
- turpentine.
Step 1. Make your shoes clean again
Remove dust and dirt from suede with a dry sponge or a special brush for suede (you can also use a branded eraser or a regular school eraser for suede).
If your shoes are in poor condition, clean them with soap and water. To do this, wipe the sponge with laundry soap, slightly moisten it and lather thoroughly. In this case, the cleaning agent is foam. Apply it to the suede and scrub with a brush. Avoid getting the material excessively wet!
Or you can use laundry detergent or other detergent instead of soap.
Step 2: Remove stains
Semolina can help remove stubborn debris. To do this, sprinkle the stain with semolina, and then gently scrub with a wire brush.
Tip: the easiest way is to “steam” suede over a boiling kettle (near the spout). A saucepan cannot be used because the total water surface of the steam is too large. You might get burned!
Step 3. Fat stains
To remove greasy streaks, sprinkle the stained area with talcum powder and leave for a quarter of an hour. Shake the remaining talcum powder. Dampen a dry cloth with alcohol or kerosene, and then wipe the dirty area (above the talcum powder). The procedure should end with standard shoe cleaning with a suede brush.
Tip: Greasy streaks can be easily removed with dish soap. Apply to the stain, leave for a quarter of an hour and rinse with a damp cloth.
Step 4. Bald patches
Method 1: Suede can get rid of corns! To do this, mix soda and milk (1 teaspoon and 3 tablespoons, respectively). The resulting solution should be absorbed with a soft, dry cloth and the chest should be treated. After 5 minutes, repeat the procedure, then leave the shoes for 30 minutes.
After the time has passed, the shoes must be combed with a rubber brush.
Method 2. Ammonia and warm water will help restore the structure of suede at home. The components should be mixed in a ratio of 1: 4, and then treat the surface of the shoe. This method works well for removing old stains from suede.
Step 5. Drying
After the procedures, shoes should be thoroughly dried. To do this, fill them with unnecessary paper and let them dry naturally.
Tip: Do not use newsprint as filler as the ink may leave marks.
Step 6. Restore color
The ideal way to restore the color of suede is to use a special paint. If you don't have it in your house, you can try: coffee grounds (helps bring back the dark color); a mixture of magnesia, talc, turpentine and full-fat milk in equal proportions.
These measures should be applied to the entire surface of the shoe and left for some time. For coffee grounds it is 12 hours or a day. The milk mixture should be stored for no more than an hour. Then brush the suede with a brush and dry thoroughly.
Step 7: Post Processing
Dried shoes should be brushed again and protected with hydrophobic impregnation.
All you need is a pair of suede shoes... Three pairs.
Updating an old pair of shoes with glitter
Adding glitter is an effective technique when decorating shoes with your own hands (photos of altering shoes can be found in the article). Sneakers, slips or sneakers can be completely covered with glue (be sure to first remove the laces and cover the sole with film) and sprinkle with small glitter, limiting it to just the toe or heel. The same goes for classic shoes. Just be sure to pay attention to the sole: if it is a contrasting color to the sparkles, then you need to additionally use shoe paint, because such a product does not look very beautiful when finished.
How to update your shoes?
Many lovers of suede shoes have to give them up, because ladies often do not know the simple rules of care. The main requirement is that you should not wear shoes made of delicate material in bad weather, as it is necessary to limit contact with water as much as possible.
The remaining rules are divided into three subgroups: drying, storage and care products. It is important to correctly follow each rule, then you will not have problems with your favorite shoes or sneakers. It is recommended to arrange your shoes regularly to avoid problems later. If the matter has already started, then the cleaning will take place in several stages.
Bright pumps from the mass market
How to decorate shoes with your own hands? Old beige shoes, of which the average woman accumulates enough in her wardrobe, can be turned into bright shoes. You can also use boats for painting that have generally lost their attractive appearance. First, the pair must be prepared for painting, that is, thoroughly clean and degrease the surface, remove dust and dirt, and any remaining cream or wax for shoe care. You can find paint that comes with special cleaners, but you can also make do with improvised means. A soap solution is enough, and to remove old dirt, you can add a small amount of ammonia.
How can you paint shoes? Depending on the material from which the pair is made, you need to purchase specialized paint. By the way, leatherette products are the easiest to undergo this procedure. It is most convenient to use a spray. In some cases, you can use acrylic paint for shoes. It is often difficult to find brightly colored spray paint on sale; “standard” black, brown, beige, and so on are becoming more and more common. The solution is bright acrylic paints. It is better to apply in two layers.
Ankle boots
Ankle boots are stylish shoes that never go out of style. They look great on your feet in the off-season, and insulated models can be worn even in cold weather. If you have ankle boots in your wardrobe that have lost their presentation, take them out and we will update them. This is what you should end up with:
To work you will need:
- Brushes.
- Acrylic paint is dark gray, or black.
- Gold and red-brown acrylic paints.
- Dish sponge.
- Green acrylic paint with glass effect.
- Glue Moment.
Take a brush and dark gray acrylic paint and paint the heel and heel of the ankle boots.
We wait 3.5 hours for the shoes to dry. If you don't have time to wait, you can dry it with a hairdryer. Next, take gold acrylic paint and a dish sponge. Apply paint to a sponge and lightly paint the heel and heel.
Apply a small amount of paint with a sponge. Using a fan brush, rub the drops. Next, take red-brown acrylic paint and a sponge.
We process the heel and heel on top. After this, we paint over the stripes near the iron eyelets for the laces with red-brown paint.
We make a print. We take a beautiful drawing with flowers and transfer it to paper, or draw it by hand. We select the colors with which we will paint the flowers.
The flowers are taken from the designs of Pavlov Posad shawls. Let's start making decor.
Let's describe further. We use contours with a glass effect to create convex surfaces.
We paint the inside with green paint with glitter (glass effect).
Place aside for 7-8 hours to allow everything to dry. Cut strips of corduroy or velor. The length of the stripes is slightly wider than the knitted top of the ankle boot. Sew the edges and sew onto the knitted top.
We select the size of faux pearl beads.
Sew pearls along the bottom of the velvet ribbon. Glue to the bottom of the shoe.
We make laces from the same material: we cut long strips and sew them together. Sew a pearl bead onto the end.
You can sew artificial stones between the iron loops for laces,
Stylish sneakers: colored markers for shoes
DIY shoe decor is not just about gluing sparkles, beads and rhinestones. Those with artistic inclinations may enjoy painting their own shoes. Such a business can even be profitable: you can buy cheap white sneakers or slips to order and brightly paint them to suit the customer’s taste. Bright shoes with patterns for young people are rarely found on sale, but there is a demand.
You can color light-colored sneakers with special colored markers. These can be sold in sets of several colors or individually. When purchasing, be sure to pay attention to the purpose of the product (there are markers for fabric, leatherette, genuine leather, and so on), the shape of the tip and the thickness of the line. You should not use ordinary artistic ones for coloring shoes, because they are not resistant to repeated washing and the effects of ultraviolet items.
7 easy ways to restore suede at home
“And they are still fighting for the honorary title of the House of High Culture and Life!” - Anton Semenovich Shpak said to the police dog in the immortal comedy “Ivan Vasilyevich Changes His Profession.”
This article won't tell you what to do if your suede jacket is stolen. However, you can learn how to make your suede shoes look fresh again! Let's find out how!
Suede is a very thin and delicate velvety leather that absolutely cannot withstand walking through dirt, dust or rain. At the same time, the dazzling summer sun doesn’t suit him either! So how do you take care of such painstaking material?
5 steps to care for suede:
- after each exit, clean your shoes with a special brush;
- if the brush does not help, use a special eraser;
- Remove stubborn dirt using special foam for suede;
- use special gels and sprays to protect against contamination;
- The color will be restored by suede paint.
How to make stylish comic shoes
The real boom in recent years has been comic book shoes, which are almost impossible to find on sale. Such pumps or stilettos are suitable for stylish and daring girls for every day. You can make a fashionable pair with your own hands. To decorate shoes, prepare suitable shoes, bright magazine clippings, and glue. You can use universal contact glue “Nairit” (suitable for natural and synthetic leather, rubber, fabric, good for those places that will be exposed to moisture), combined glue “Eva” or polyurethane “Desmokol”. The decorating process is simple: glue comic strip pieces to your shoes in random order. This is very similar to decoupage, but pictures cannot be transferred from glossy paper. For durability, it is worth covering the shoes over the comics with a fixing shoe polish. This will make the pair less susceptible to moisture and dirt.
Restoring shoes using superglue
Even a really deep hole in your leather boots can become invisible if you use superglue. View this post on Instagram
LEDERZENTRUM hilft: Könnt ihr uns helfen, Solche Schäden in Fettledern zu reparieren? Die COLOURLOCK Produkte und die richtige Technik konnten diesem Möbelhersteller helfen! LEDERZENTRUM helps: Can you help us to repair such damage in oiled leather? The COLOURLOCK products and the right technology could help this furniture manufacturer! LEDERZENTRUM aide: Pouvez-vous nous aider à réparer de tels dommages dans le cuir gras? Les produits COLOURLOCK et la technologie appropriée pourraient aider ce fabricant de meubles! #colourlock #lederzentrum #lederreparaturen #leatherrepair
Posted by LEDERZENTRUM (@lederzentrum) Nov 17, 2022 at 3:52 PST
- To restore the product, put a little superglue on the tip of a toothpick. Holding the shoes, apply the substance to the inside of the product.
- Next, take a smooth cloth and press firmly on the skin to keep the superglue firmly on it.
- Make sure the glue doesn't leak out.
- Keep the fabric on the item for 1-2 minutes.
- Next, find a leather dye that is the same color as your shoes and apply 2-3 coats on top. Let it dry.
Different ways to decorate shoe heels
The decor of shoes (for example, you can update boots with your own hands in literally thirty minutes), or rather, the heels or soles, usually involves covering them with beads, sparkles, and rivets. This is a not too radical way to attract attention and remake your favorite pair. This is especially true for shoes in which the heel has been damaged during use. During the work you will need special glue, a container of suitable size, tweezers or tweezers. Dip each pebble (bead, rivet) into glue, place it in the desired place on the shoe and hold for a while. If we are talking about glitter, it is better to cover the main part of the shoe with film or newspaper, and then simply sprinkle the decor on the heel, previously coated with glue.
Suede boots
We have a pair of suede boots, we will dress them in “sweaters” and make high boots out of them. To do this, we do not need to spend a lot of money, and the result will please you. Before decorating, shoes must be cleaned of dirt and dried. If you have spray paint, it's best to touch it up. For decoration we will need an old sweater, not necessarily in good condition. Even if it is torn, cutting out strong places will not be difficult.
To work you will need:
- Old sweater.
- Faux fur 0.5 meters.
- Long scissors.
- A utility knife or razor blade.
- 6 large buttons (they are usually used for outerwear.
- Three black hair ties.
- Pins.
- Centimeter or ruler.
- Sewing machine (can be done by hand).
- Needle and thread.
Using a centimeter we measure the volume of the calf and the desired height of the pad. Transfer the length and width to paper or newspaper. Draw a pattern and cut it out. We apply the pattern to the sweater knit and faux fur. Add another 1 cm on each side. We cut it out, we get 2 pieces of faux fur and 2 knitted parts. Cutting fur with scissors is inconvenient; it is better to do it with a blade or a stationery knife. We cut from the wrong side. Before doing this, put more newspapers on the table so as not to spoil the furniture. Be careful not to cut off any strands of fur.
Cut all 3 rubber bands in half.
We place pieces of fur on pieces of sweater one by one, front to back. Carefully align the edges. Pin around the perimeter. At the bottom of each part we leave a space without pins, about 10-15 cm. This is the place for turning the product inside out.
Fold each elastic band in half, making a loop. We insert the loop inside, the tip out, between the knitwear and the fur on the side.
Using a ruler or centimeter, measure the distance between each loop. The distance should be the same. In total, you get three loops for each of the two parts. We made buttonholes.
We sew the parts around the perimeter, leaving room for turning. If you don’t have a machine, we sew on your hands with a “back needle” seam.
Carefully trim all corners without reaching the seam. This is necessary so that the corners do not puff up after turning.
Turn the parts right side out. For convenience, we use a pencil.
Turning the unstitched edges inside, sew them with a blind stitch. We bend each part and mark places for buttons.
Sew buttons according to the marks. Wrap the pads around the boots and fasten them with buttons. Beautiful high boots are ready.
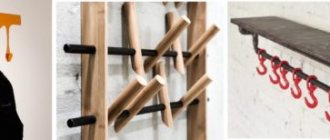
What useful things can be made from boxes?
A large number of fashionable shoes always means a huge number of cardboard boxes. All of them can easily and quickly turn into useful and pleasing to the eye gizmos. What you can make from shoe boxes with your own hands:
- Home decor. Thick cardboard can be used to create a wide variety of crafts.
- Picnic basket. It is enough to attach handles and decorate the box with fabric. This carrier will be convenient for transporting utensils and treats for a summer picnic.
- Box for cosmetics. Several boxes can be connected together to create a small chest of drawers.
- Jewelry holder. To make the box a convenient device for neatly storing earrings, just cover it with wrapping paper and make holes for pendants or studs.
- Puzzle with a ball. Stick several popsicle sticks on the lid of the box (on the inside), mark “Start” and “Finish”, and try to go through such a maze with the ball.
- Dollhouse. From several boxes you can make a house for playing with dolls, consisting of several floors and rooms.
- Storage folder. Shoe boxes are great for storing magazines. To make such an organizer look more interesting in your interior, decorate the box with multi-colored adhesive tape.
Top detail of slippers
The boots turned into two leather blanks for the top of the slippers. To make the flip flops look neat not only on top, but also on the inside, make a backing under the main part. The backing can be made from any contrasting fabric. In this case, the same fabric was used as on the inner surface of the sole. The backing is cut out 2 cm more from the main part along the metatarsus of the foot.
Glue the lining on the inner surface side. Fold the seam allowances and glue them onto the face. If the slippers are made of leather, then do not glue the entire lining, but only along the edging, in order to avoid excess thickness. If the top is fabric, then glue the entire surface.
The width of the top of the slap should be increased by the width of the seam. Expansion and side processing are performed simultaneously. For density, I place the cut out side seam from the jeans under the facing inside. The seam width of the jeans is 1 cm, just what you need. Just keep in mind that the sealing strip should be a continuation of the part, and not a stump. To avoid mistakes, first attach and then cut, as in the picture below.
If you are gluing your sneakers onto the factory sole, do not seal the sides!
The width of the edges is processed in the same way as the edges of the sole. All that remains is to sew the top and sole together.
Charger organizer
Tired of wires lying around the outlet or electrical extension cord? First, cover the outside of the package with colored tape or brightly colored wrapping paper. This decor for a shoe box (it’s quite easy to make an organizer with your own hands) is already half the battle. All that remains is to make a few holes and route the wires. A stylish organizer for chargers will instantly deal with clutter.
How to Remove Scratches Using Olive Oil
Olive oil can be used when the leather becomes dry after prolonged wear. It can give your skin a gorgeous shine and make it look like new again.
View this post on Instagram Glöm inte att ta hand om eran skor innan snö och slask kommer.
Posted by Skoservice (@skoservice) Nov 20, 2022 at 10:18 am PST
Cleaning leather shoes with nail polish
When it comes to patent leather, the process of removing scratches is quite simple. Mainly because the glossy finish applied to the leather provides extra protection.
View this post on Instagram. 地址: 中環威靈頓街17-19號香港工商大廈(鏞記對面,翠華旁 304室:LEATHER HEALER 802室:Leather Healer X Berwick1707 Opening hours: 1pm-8pm Mon to Sat (Sunday off)
Posted by Leather Healer (@leatherhealer) Nov 5, 2022 at 9:20 am PST
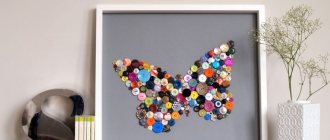
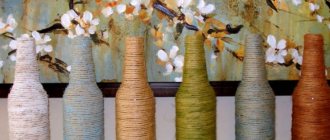
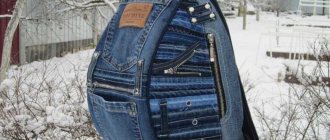
Decor and crafts from old things - photos
In conclusion, we invite you to carefully look at our photo gallery. Here you will find many simple and beautiful ideas for crafts from old things with your own hands. Get inspired!
Photo: zen.yandex.ru
Photo: okwedding.ru Photo: tr.pinterest.com Photo: makaan.com Photo: remontbp.com Photo: zen.yandex.ru Photo: projetos.habitissimo.com.br Photo: pinterest.ru Photo: xnn.ro
Photo: zen.yandex.ru Photo: lifestyle.sapo.pt Photo: o.yandex.ru Photo: berkem.ru Photo: pinterest.ru Photo: nikastroy.ru
Photo: mysemfamily.ru
Photo: sovkusom.ru
Photo: twnews.se
Photo: provse.today Photo: repairstyling.com
Photo: pinterest.at
Photo: vk.com Photo: idoska-yaroslavl.ru Photo: id.decor-modern.com Photo: happymodern.ru
Crafts from old clothes and shoes
Many of us often find a home in our closets with things that we don’t wear – something has gone out of fashion, and something is simply tired or has lost its aesthetic appeal. Let's see what useful crafts can be made from old clothes?
Shirt bag
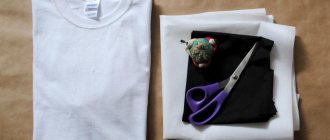
In any man’s wardrobe there is probably an old shirt that has long been “written off”, but it would be a pity to throw it away. But you can make a variety of useful things from a shirt - for example, sew a bag.
To sew it, you will need: a shirt, lining fabric that will ensure the strength of the product, you can also use a boring tie for decoration. To begin, draw a template on cardboard of what the future handbag will look like, cut it out, and transfer the sketches to the main and lining fabrics.
Next, we cut out, sew together the front fabric, and sew separately prepared handles and a fragment of a tie to it. When all the elements are attached, you can sheathe the workpiece with lining material. So our spacious handbag is ready!
Photo: cyberpedia.su
Photo: makeit-loveit.com
Photo: salonkallisto.ru Photo: makeit-loveit.com
Photo: makeit-loveit.com Photo: makeit-loveit.com
Decorative sweater pillows
Soft, comfortable sofa cushions can be sewn from sweaters. Draw on paper the desired shape of the product - let it be a flower, a star or a fluffy cloud.
Cut out the template and pin it to the sweater, inside out. Using the template, we cut out two halves of the future pillow and sew it together, leaving a small gap through which we fill the product with padding polyester or any other soft fibrous material. Sew the pillow until the end. You can further decorate the craft, for example, by sewing on parts of an animal’s face cut from the wind.
Photo: proffstroygroup.ru
Photo: delaemrukami.org
Photo: salonkallisto.ru Photo: mychildroom.ru
Photo: podelunchik.ru Photo: eco.glossy.ru
Cat house made from old T-shirts
To make a cute house for your mustachioed pet, you will need two old T-shirts (one of them can be replaced with a pillowcase), thick cardboard, two pieces of metal wire and tape.
We cut out the bottom of the house from cardboard (plywood), wrap it with one T-shirt (pillowcase), and turn the sleeves inward. To make the cat comfortable, you can put insulation in the form of foam rubber or a flat pad. We give the pieces of wire a curved shape and fasten them together crosswise at the top point, fixing them with tape. Next, the ends of the wire must be connected to the corner areas of the bottom.
Now we take the second T-shirt and simply put it on the structure, pull all the hanging elements under the bottom of the house and secure it with a pin. The neck will serve as the entrance to the cat's home, for which she will certainly be grateful to you.
Photo: cpykami.ru
Photo: cpykami.ru
Photo: catracalivre.com.br Photo: zen.yandex.ru Photo: krass42.com
Beautiful flowerpots made from old shoes
Original flowerpots made from old shoes can wonderfully decorate not only a country house, a plot of land, but also a city apartment. This can be done in two ways - use shoes as a stand for a small flower pot, turning it into a flowerpot, or plant plants directly in old shoes or boots. In the second case, not just any shoes will do, but leather or rubber ones, which will last much longer.
Take care of the drainage system - to do this, you need to make holes in the sole and place the flowerpot on a tray where the water will drain. Shoes can be left in their original form or decorated - painted in bright colors, painted, or varnished.
Photo: news.myseldon.com Photo: totalhub.ru
Photo: orbita.site Photo: livemaster.ru
Crafts from old books
Recesses in thick books have long been used as secret storage for money, securities or letters. To do this, simply cut out a recess of the required size. But you can go further and turn the product into a magnificent decorative interior detail.
To begin with, the internal content of the pages needs to be turned into a monolith, so we carefully coat all the pages inside and outside with PVA glue. Place a blank sheet of paper between the top cover and the first page of the book. The coated book must be left under pressure overnight to dry.
We make cuts on a clean sheet of paper and fold the flaps inward. The base of the box is ready! Now let's start decorating. There are many options here - the cover and “inside” can be painted, decorated using decoupage technique, covered with fabric or vinyl wallpaper. You can also make real pieces of furniture from old books with your own hands, for example, original wall shelves, banquettes or even entire sofas.
Photo: pinterest.ru
Photo: liveinternet.ru Photo: otrada-o.ru Photo: liveinternet.ru
Photo: liveinternet.ru
Photo: pinterest.pt Photo: skolkogramm.ru
DIY bull craft: New Year ideas for children
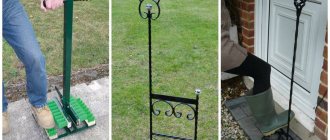
Crafts from old pallets
Many useful things and crafts can be assembled from ordinary pallets. And you don’t even have to work too hard - this material itself is an almost ready-made element for assembling furniture. For example, try making a coffee table that is ideal for both a rustic interior and a stylish loft.
The procedure is quite simple: cut one pallet into two equal parts, treat them with wood-preserving impregnations, and open them with varnish. When the parts are thoroughly dry, assemble the table by placing one part on top of the other. Be sure to secure the structure. For convenience, the table can be equipped with wheels, and the tabletop can be made of ordinary glass with polished edges.
Working with old pallets like a construction set, you can assemble wonderful garden benches, stands for outdoor flowerpots, wonderful children's swings and much more.
Photo: miceup.net
Photo: lanshaft.com
Photo: noithatinfo.com
DIY Christmas tree star: 8 step-by-step ideas (photos)
Floor mat made from old towels
Housewives often “re-qualify” towels that are unsuitable for use after bathing procedures as rags, take them to their dachas, or simply throw them away. We propose to give them a chance to prove themselves as a necessary element within the same bathroom, only as a soft rug.
Large towels should be cut into long strips. It is advisable that they be of different colors, then the rug will turn out to be more colorful. So, we take three strips each and weave them into braids, securing them with pins or hairpins for convenience. When everything is ready, we begin to roll the blanks into a circle, stitching them with threads for reliability. We remove the pins from the finished rug and place it in the bathroom.
Photo: jvlife.ru Photo: soveti-sekreti.ru Photo: zapivo.net Photo: severdv.ru
10 cool ideas on how to decorate your apartment for the New Year