Do-it-yourself square
A couple of months ago, at the intersection of Sovetskaya and Kuratova streets, I came across curb stones in the acacia bushes. It was easy to notice that the stones repeated the silhouettes of the paths that had once been laid. It looked like this:
Having gathered volunteers, still having little understanding of what exactly needed to be done and how, we began to dig a public garden.
It was very difficult, each piece of earth was dug out with effort. The collapsed curb stones did not add joy either.
While digging the park, we hammered a couple of metal posts into the ground to prevent random parking:
A week later, the post disappeared, cars continued to park between the trees. We decided to bury something more solid. I came across a piece of concrete pillar:
This was the third time they went to work, it was raining, the volunteers did not leave and continued to dig. We got thoroughly wet, but the result was worth it. The path began to take shape:
Working with shovels in the rain taught us a lot, the next time we came with a lawn mower:
For thick roots they brought axes, and shovels, where would we go without them:
In the photo above you can see that the soil became uneven over the years of neglect; the entire square was flat. The ground hung over the curb stones. Team for that day:
The paths are no longer clear:
The curbs spoiled the view:
That day it seemed to me that nothing sensible would come of it. But the volunteers did not pay attention to the difficulties and decided to straighten the entire landscape, deciding to dig up and reposition all the curbs.
And if we left, we left the square like this:
Then next time it will be like this:
During this time, we dug up all the soil with a motorized cultivator, bought garden shears for acacias (the only expense at that time was scissors for 400 rubles, which immediately broke. The Tool store refused to accept them (to celebrate, we split the receipt somewhere), but they agreed to give us the largest garden shears to complete the job, which we later returned). This is how the square got an entrance from the street:
Further progress is not visible, but we have dug up a huge amount of land, leveling the square. They filled in meter-long holes and dug in three more protective concrete pillars. They re-arranged all (.) curbs: They brought pallets to make benches, alas, someone stole them:
At that moment, good-natured townspeople contacted us and gave us daisies, we planted them. We bought grass seeds (another 250 rubles). The center was seeded.
However, a few flowers have taken root. We're done with the earth, hurray:
Then they put together a bench prototype by eye, making it without a ruler:
Then 5 more benches were added:
And, passing by, they began to notice the first guests:
During the excursion, Mikhail Borisovich Rogachev brought people to us:
At this point, the artist Andrei Stanislavsky actively joined us, who saw the park as more than a park. We held several meetings where the prospects for the resulting space were discussed. I would also like to note that at this point the work of the City Projects on the park can be considered completed. And despite the fact that the volunteers remained, this is a completely different story. Stanislavsky explained the importance of informing residents about the park. The more information they have about him, the greater ownership and responsibility they will feel for him.
The improvement continued, trash cans appeared (the guys regularly change the bags themselves), the benches were treated with stain:
A lot of people began to walk around, a lot of cigarette butts, candy wrappers, bottles, cups, and boxes appeared. This is of course very sad. But the fact remains that the square turned out to be in demand.
Volunteers say that they are not going to stop there and they have grandiose plans. This is just the beginning.
This is not an example of demonstrative landscaping; we tried to do something with our own hands and we succeeded. And there are plenty of such spaces waiting for improvement; I can name at least 2 more squares on the same street. Soviet, requiring attention. And this is in the historical center, where, it would seem, everything has already been built up and everything is known to us.
Source
Amusement Park | Creative ideas for crafts
Added: 08/13/2016 07:50:00
An amusement park, an amusement park, a circus tent... We all have cheerful memories of a carefree time spent somewhere far, far away in childhood, although it was just recently! GELA.ru designer Alexandra Korrol created a three-dimensional scrap object in the form of amusement rides. The most interesting detail of this project is the spinning Ferris wheel with suspended booths! We can imagine what delight it will cause not only among children, but also among all household members. You can attach small retro photographs to the booths, for example, of yourself and your childhood friends with whom you grew up, quarreled and made peace, ate cotton candy while walking around the amusement park... So, spin the wheel, dive into memories and watch a step-by-step master class!
Step 1. Prepare the basis for the future amusement park. Thick cardboard (ideally 2 mm) measuring 30x25 cm. Cover the sides with acrylic paint (mix white and dark gray colors). Don't worry if the paint runs over the edges and stains one side of the sheet. We cover one side (front) with paper from the “Geometric Neon” series, and cover the second side with gray cardboard.
Step 2. From thick cardboard with a thickness of 1.2-2 mm, cut out 3 silhouettes of circus domes (tents) - 1 large and 2 small. We use templates.
Step 3. Cover the sides of the cut out circus domes with silver acrylic paint. We cover the front sides with colored cardboard (we use the colors found in the base).
Step 4. On the back side, glue pieces of gray cardboard to the circus domes and leave small allowances for gluing to the base (no more than 1.5 cm). We bend the resulting allowances. For convenience, we use a bending tool.
Step 5. From the Geometric Neon paper set, cut out the inside for the large dome. Glue it.
Step 6. Cut out the upper part of the dome from colored cardboard. We tint the sides with a stamp pad.
Step 7. Glue the dome to the workpiece. We tint the entire silhouette on the sides with a stamp pad.
Step 8. Cut out parts for the top of the dome and the entrance from microglitter paper (use templates). We tint the parts using stamp pads and glue them to the workpiece.
Step 9
Step 10. Using the same principle, we glue 2 small domes.
Step 11. Cut out flags of the desired shape from paper, tint them and glue them onto thin cardboard sticks. We glue the sticks to the back of the domes.
Step 12. Using a circular knife, cut out 2 circles with a diameter of 25.5 cm from thick cardboard (no more than 1.2 mm thick).
Step 13. Using a simple pencil and a compass, mark 1 circle as shown in the photo. First, stepping back 1.5 cm from the edge, draw a large circle. Next, draw a small circle with a diameter of 3 cm. And 2 medium circles (placed between the large and small ones), so that the width of the hoop ends up being no more than 6 mm. Next, using a ruler, draw the circle into 8 equal parts. The thickness of the strips should be 1 cm.
Step 14. Using a scrapbooking knife and a glass mat, cut out unnecessary parts from the circle.
Step 15. Paint the sides of both circles with white acrylic paint. We cover the circles on both sides with colored paper and cardboard.
Step 16. On thick cardboard (at least 1.7 mm thick) make markings with a simple pencil, as shown in the photo. Cut out 3 identical shapes that will serve as legs for the ferris wheel, glue 2 of them together. We cover the sides of the legs with white acrylic paint. We glue the legs on both sides with colored cardboard, leaving allowances for gluing to the base of at least 1.5 cm on each side.
Step 17
Step 18. From thick cardboard (1.2 mm thick is suitable) we cut out 8 blanks for the booths (use a template). The booths should not exceed 6 cm in height so as not to interfere with the rotation of the circle.
Step 19. Cover the sides of the booth with white acrylic paint. First we cover the front side with colored paper and cut out the windows. Next, we cover the back of the booths with colored cardboard. Using an Xcut awl, we punch holes in the workpieces as shown in the photo (3 mm).
Step 20. Having placed the circles on top of each other (we fix them with needles in the places of future punctures), using an Xcut awl we punch 8 holes as shown in the photo (3 mm) and a 4 mm hole in the center.
Step 21. On the back side of the first circle we glue small blocks of white thick cardboard (the height of the blocks is 8 mm).
Step 22
Step 23. Glue the first wheel to the second (apply glue only to the blocks). We take 8 small screws no more than 1.6 cm in length and 2-3 mm in diameter. We distribute the booths inside the circle, alternating shiny with matte ones and secure them with screws and nuts. The distance between 2 circles must be at least 1 cm. This will allow the booths to easily turn over when the wheel rotates.
Step 24
Step 25. Using a hole punch with a circle shape (2.5 cm) from thick cardboard, we cut out the blanks. We glue them together so that they are 1 cm thick. We will need 2 cylinders. Before gluing, you need to make a 4 mm hole in each circle using an awl.
Step 26. We begin assembling the Ferris wheel. We take the first leg (thin), attach a small washer to the front side and insert a screw approximately 5-5.5 cm in length and no more than 4 mm in diameter into the hole.
Step 27. We cover the resulting cardboard cylinders with a strip of yellow paper to match the legs. Place 1 cylinder on the screw, then a large washer.
Step 28. Put the wheel on the screw. On the reverse side of the structure we put on the 2nd large washer, then the 2nd cardboard cylinder and the 2nd leg (glued together from two parts) and secure everything with a nut.
Step 29
Step 30.
Step 31. Glue the wheel legs to the base. The distance between the legs should be at least 4 cm. The circle should rotate freely (if rotation is difficult, loosen the nut on the main supporting screw). Use strips of yellow cardboard to cover the allowances from the inside and outside (if desired, strips of cardboard can be pre-glued onto thick cardboard). We glue the legs using Extra Forte glue.
Step 32
Step 33
Step 34. Cut out 2 castle turrets from thick cardboard (1.2-1.7 mm thick) (the shapes and sizes of the towers are arbitrary, in this case 15.5 and 20.5 cm in height and 9.5 and 8 cm in width We glue the turrets on the front and back sides with colored paper and cardboard, making sure to leave an allowance for gluing to the base on both sides of at least 1.5 cm.
Step 35. Decorate the turrets with stickers from the set and add flags to the tops.
Step 36. Print out a file with silhouettes of circus performers. We cut out the silhouettes and glue them onto the colored cardboard used to create the domes and wheels. We trim the shapes, leaving a small colored border and an allowance for gluing to the base of no more than (1 cm).
Step 37. Glue the large dome, spaced at least 5 cm from the edge. Next, glue the small yellow dome, spaced approximately 3 cm from the large red one. Next, glue the small turquoise dome, spaced 2 cm from the yellow one. Glue the turrets between the domes and the wheel on any distance from each other. We make sure to make additional cardboard supports and glue them on the back side to the domes and towers (as shown in the past MK “Paper City” in photo No. 31 https://www.gela.ru/pro-tovary/tvorcheskie-idei/bumazhnyy-gorod /).
Step 38
Step 39. Glue the figures of the artists to the blank. We supplement the ferris wheel and base with adhesive decor. elements from the set.
Circus performers
Sample
Necessary materials:
— Thick cardboard 1.7-2 mm. — Thick cardboard 0.9-1.2 mm.
leave a comment
www.gela.ru
How to turn a former wasteland into a beautiful park
Any Russian city is full of vacant lots. I recently talked about Moscow, but the picture is similar throughout the country. There are many reasons for the appearance of vacant lots in the city. Somewhere they were formed due to improper planning, somewhere the owner of the territory did not have enough money for construction, and the site is empty. Regardless of the reason, vacant lots have an extremely negative impact on urban space. All sorts of bad citizens gather there, they store garbage there, they just look unsightly. What to do? Vacant areas need to be integrated into urban space.
All over the world, city authorities are trying to solve the problem of vacant lots so that microcommunities arise in these places. For example, in New York, the mayor's office supports volunteers who work in city gardens - it allocates sites for them and even advertises for them.
Why don't we arrange such a place in Moscow? Well, we know how to cultivate vegetable gardens. City Projects even found a suitable vacant lot. Here, on the site of a half-destroyed house on Pyatnitskaya Street, a former estate from the mid-19th century, there is an excellent wasteland for such an experiment. Only one façade wall of the building remains now. Inside there is a courtyard of a three-story residential building.
Design projects of public gardens
Modern park culture has made a huge step towards transforming parks and squares from a banal place for walking among green spaces into a place of mass and cultural recreation, where various returning categories of people can spend time without conflicts. Everything is organized in such a way that no one disturbs each other and everyone can find something to their liking, enjoy the excellent landscape design and sophisticated aesthetics of the architectural complex, engage in sports, hobbies, favorite activities, art, or take time for solitude with nature. And to get such a result, you first need high-quality design projects for public gardens . How are they created? What styles are there? What is important to pay attention to? And what are the requirements for modern parks from visitors? We propose to deal with all these issues within the framework of this article.
It's a question of time
If it was decided to create a park design project that meets modern requirements and so that the park remains in demand for many years, then a logical question will arise: how to make it so that after many years it remains interesting to children, youth, adults, as well as the elderly? It also wouldn’t hurt to find an answer to the following question: how to place many different infrastructure facilities in a limited area in a specific urban environment? At the same time, it is important to arrange everything so that the landscape design does not turn into an awkward forest in 10 years.
Agree, the issues are quite complex and without competent specialists it is impossible to understand them, since it is necessary, within a limited area, to please the interests of people of different ages, different preferences and different tastes regarding the landscape. Here, if you look at it this way, you need a whole team of specialists who will professionally develop a competent design project for the future park or public garden, taking into account all the nuances and modern trends.
Main tasks
A high-quality design project must solve certain problems. The main goal of landscape design is to recreate the composition of the park area, unique in its aesthetics and comfort, while preserving as much as possible the natural landscapes and existing cultural and memorial complexes with the obligatory improvement of them. It is also necessary to organically fit all cultural and natural objects into the overall architectural concept of the future park or square.
The main task for any park or public garden is to promote relaxation, physical and psychological relaxation of its visitors. In this regard, a special role in the design of the park area is played by water bodies, which have a special calming effect and attract the attention of people, regardless of their age, social status and life preferences.
But to begin forming a project, you first need to choose which style of gardening art in landscape design will need to be recreated. Experienced designers will always help you make a choice and give practical advice regarding a specific site with an existing landscape, its vegetation and architectural objects. Assistance will also be provided in determining the functional load of a park or public garden, since it can perform many functions to meet the needs of the local population or harmoniously complement the local infrastructure with those social facilities that it lacks.
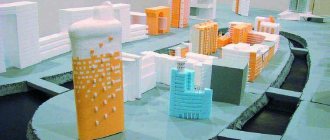
Square layout | Country of Masters
They invited me to participate in the competition “Project for improvement of the territory adjacent to the Alley of Miners’ Glory” in our city. It was assumed that these would be sketches, drawings, well, in general, planar images. But since it’s easier for me to work with other materials with my hands, and I’m not very good at drawing, I decided to make a model.) The organizers weren’t against it. The model will be presented to city residents today (City Day), but you will see it earlier. This is the result of my three-day mental, physical and creative work.)) A piece of land that they want to improve in the future has the shape of an isosceles triangle. This dictated the shape of my layout. Next to the park there is already a children's playground equipped with swings and various slides. On the other side of the square there is a stage area for concerts. A system of existing facilities and a planned park for family recreation would provide residents of the city with a complete and varied recreation and would become one of the architectural decorations of our city. I took a picture with the numbers when I was photographing the object to describe it by sector. I think the numbers won’t hurt you when watching.)) Sector No. 1 – “Lovers’ Corner”. Sector No. 2, 3, 4, 5 – “Flower beds”. Sector No. 6 – “Workout area”. Sector No. 10 – “A platform for rollerbladers and skaters. Sector No. 7, 8 – “Recreation area” Sector No. 9 – “Table tennis area”. Sector No. 13 – “Recreation area” Sector No. 11, 12 – “Glade of fairy tales”. Object No. 14 – Fountain and mini-river. Then everything will be closer. Enjoy watching!))) (lots of photos)
This structure should be iron and strong, like true love.)) And this is where lovers (well, I would like) should hang their locks. Mine is already hanging there!)))
stranamasterov.ru
Basic stylistics
Today, a number of landscape design styles are relevant in world practice, which need to be discussed in more detail, since each of them is characterized by its own characteristics.
Regular style
A park or square in this style necessarily contains strict laws of symmetry, but it will also be given out by certain characteristic features:
- correct plan of alleys and paths;
- clear contours of ponds and open areas, made in the form of geometric shapes;
- large areas of lawns;
- tall hedges;
- topiary forms of plants;
- luxurious fountains;
- the presence of monuments, statues, gazebos and rotundas, made in the style of classicism.
If we take the most famous parks in the world, made in a regular style, then they will be:
- Luxembourg Park;
- the Tuileries Garden near the Louvre;
- Palace and park ensemble of Versailles.
English style
The fundamental concept of this style is naturalness and maximum untouchedness of nature, complete preservation of the terrain and the unique features of its vegetation. In fact, the English style, by its nature, is the direct opposite of the regular style.
Such a park will be characterized by:
- winding neat lines of paths and paths made of stone or wood;
- picturesque ponds of free, indefinite shapes;
- lack of clear symmetry in the arrangement of trees and flower beds.
You can enjoy the natural beauty of the landscapes of the English park in Tsaritsynsky Park in Moscow, in the Catherine and Pavlovsky Parks near St. Petersburg or in the English Park in Munich.
Modern style
This is an increasingly popular style of parks around the world, which has achieved success due to the harmonious combination of elements of the regular and English style. Additionally, the modern style introduces fashion trends in architecture and sculpture into the design, and also uses non-standard various materials and surfaces, which sets it apart from competing styles.
Such parks fit harmoniously into the urban environment of modern cities, since they are characterized by the absence of any strict rules regarding the combination of different vegetation, so, for example, cereal crops may well be located next to coniferous plants. A striking representative of this style is Andre Citroen Park, which was created on the site of a former landfill. Today it is a shining example of modern style and a favorite holiday destination for Parisians.
Provence
Parks of this style are distinguished by an amazing harmony of simplicity and grace. Provence traditionally embodies the style of the French province, in which there should be no luxury or excess. It is typical for him:
- variety of flowering plants;
- an abundance of blue, blue and violet colors;
- the presence of elegant forged elements of small architectural forms;
- desire for natural materials.
Made from plasticine
The easiest way to make a mountain craft with your own hands is from plasticine. Schoolchildren often end up with used plasticine after school, which is no longer useful in other work. But for creating a layout - just right. If you mix all the colors, you get a brown shade that is suitable for simulating rocks.
You can use a thick cardboard cone as a base. You can first make a sketch of the future craft.
First you need to install the cone on the stand and fix it with plasticine. Paint the base of the mountain brown. The peak can be turned into a snow-capped peak by using white. Use a green tint to depict herbaceous vegetation along the base. Red and yellow colors will imitate flowers.
All that remains is to draw the gorges, washed out by water flows, and crevices with a stack so that the mountain takes on a natural appearance.
Project creation process
When the customer decides on the style of the park and indicates all his wishes, as well as design preferences, the labor-intensive work of a team of professional designers begins to create a unique design project.
In the process of creating a design project, the following issues are resolved:
- competent zoning of the territory;
- harmonious proximity of active recreation areas;
- public events, children's recreation, cultural and sports facilities;
- quiet recreation areas, walks, beaches and so on.
In addition, a certain type of landscape design of open and closed type is created, where the following is organized:
- layout and width of alleys;
- grouping of plants taking into account possible anthropogenic load on them;
- natural sound insulation;
- additional water surfaces;
- restricted use zones with unique and rare vegetation that requires careful treatment by visitors.
At the same time, it is important to preserve the aesthetics of the park at night and in the evening by installing a complex of landscape lighting so that the recreation area can attract the attention of visitors at any time. It is also important to organize everything in such a way that visitors, being in the territory of the square or park, feel themselves there. comfort and safety.
The next important point is the creation of ponds to create a relaxing and peaceful atmosphere. These can be streams, fountains and artificial ponds that will fill the park and attract attention with lively and dynamic colors, thereby creating comfortable areas that positively affect the mood of park guests.
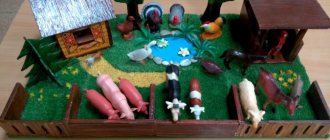
City park layout | Country of Masters
Content
We made this model of a city park of culture and recreation for a school competition. Nowadays, project activities of schoolchildren (according to new educational standards) are becoming very relevant. So we were offered to take part in the creation of a project on an environmental theme.
One of the main conditions for participation in the creation of a project is a creative approach to work. Therefore, we decided to make a model of a dream park, which we hope will appear in our new microdistrict in the near future.
Layout dimensions 70cm by 70cm.
The trees were made from colored paper (4 pieces were glued together, the trunks were painted with gouache).
The alleys are made of corrugated cardboard. Benches, lanterns, gazebo, sandbox, swings - made of ordinary cardboard.
The lawn is made of finely chopped corrugated paper.
The base of the flowerbed is a tube made of corrugated paper, flowers and leaves are made of colored tinted paper.
The fountain is made of foil cardboard in three tiers.
I will be glad if someone finds our idea useful!
stranamasterov.ru